5-minute Vegan Gluten Free Naan Bread

The free bread basket you get in restaurants to quench your hunger – I know, sometimes it isn’t even free – is usually just that – a hunger quencher. In my gluten-eating days, I have rarely come across a restaurant that serves a bread basket with bread that actually deserves its name. Since going gluten free, I naturally have to pass on the bread basket – but unlike saying good-bye to thin-crust pizza on Saturday nights and freshly baked croissants in bed on Sunday morning, I happily live without these buckets of stale bread thrown at you that spoil your appetite for the “real” meal.

The only exception is delicious naan bread in Indian restaurants, fresh from the clay oven, only waiting to soak up tangy relishes and condiments. While Indian food has never grown on me as much as, say, Mediterranean or middle eastern cuisine, I’d happily walk miles for a good naan bread – gluten free of course.

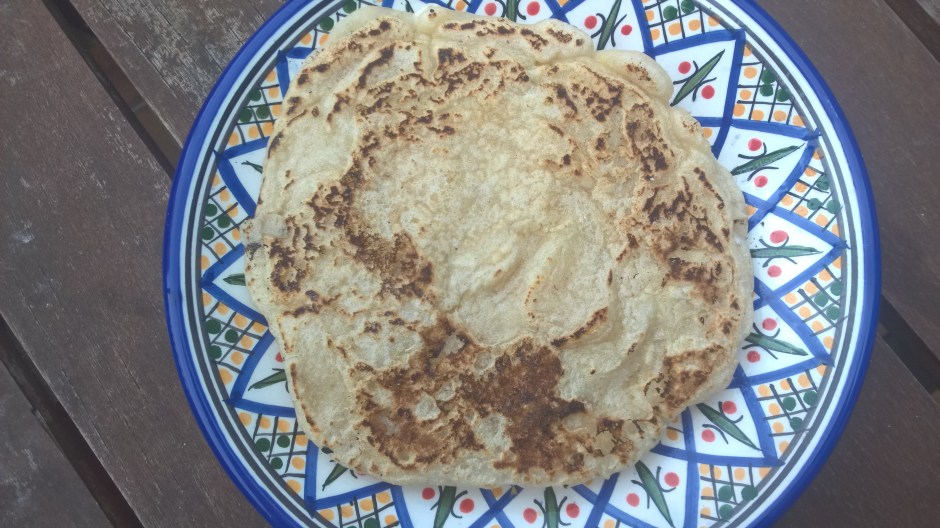
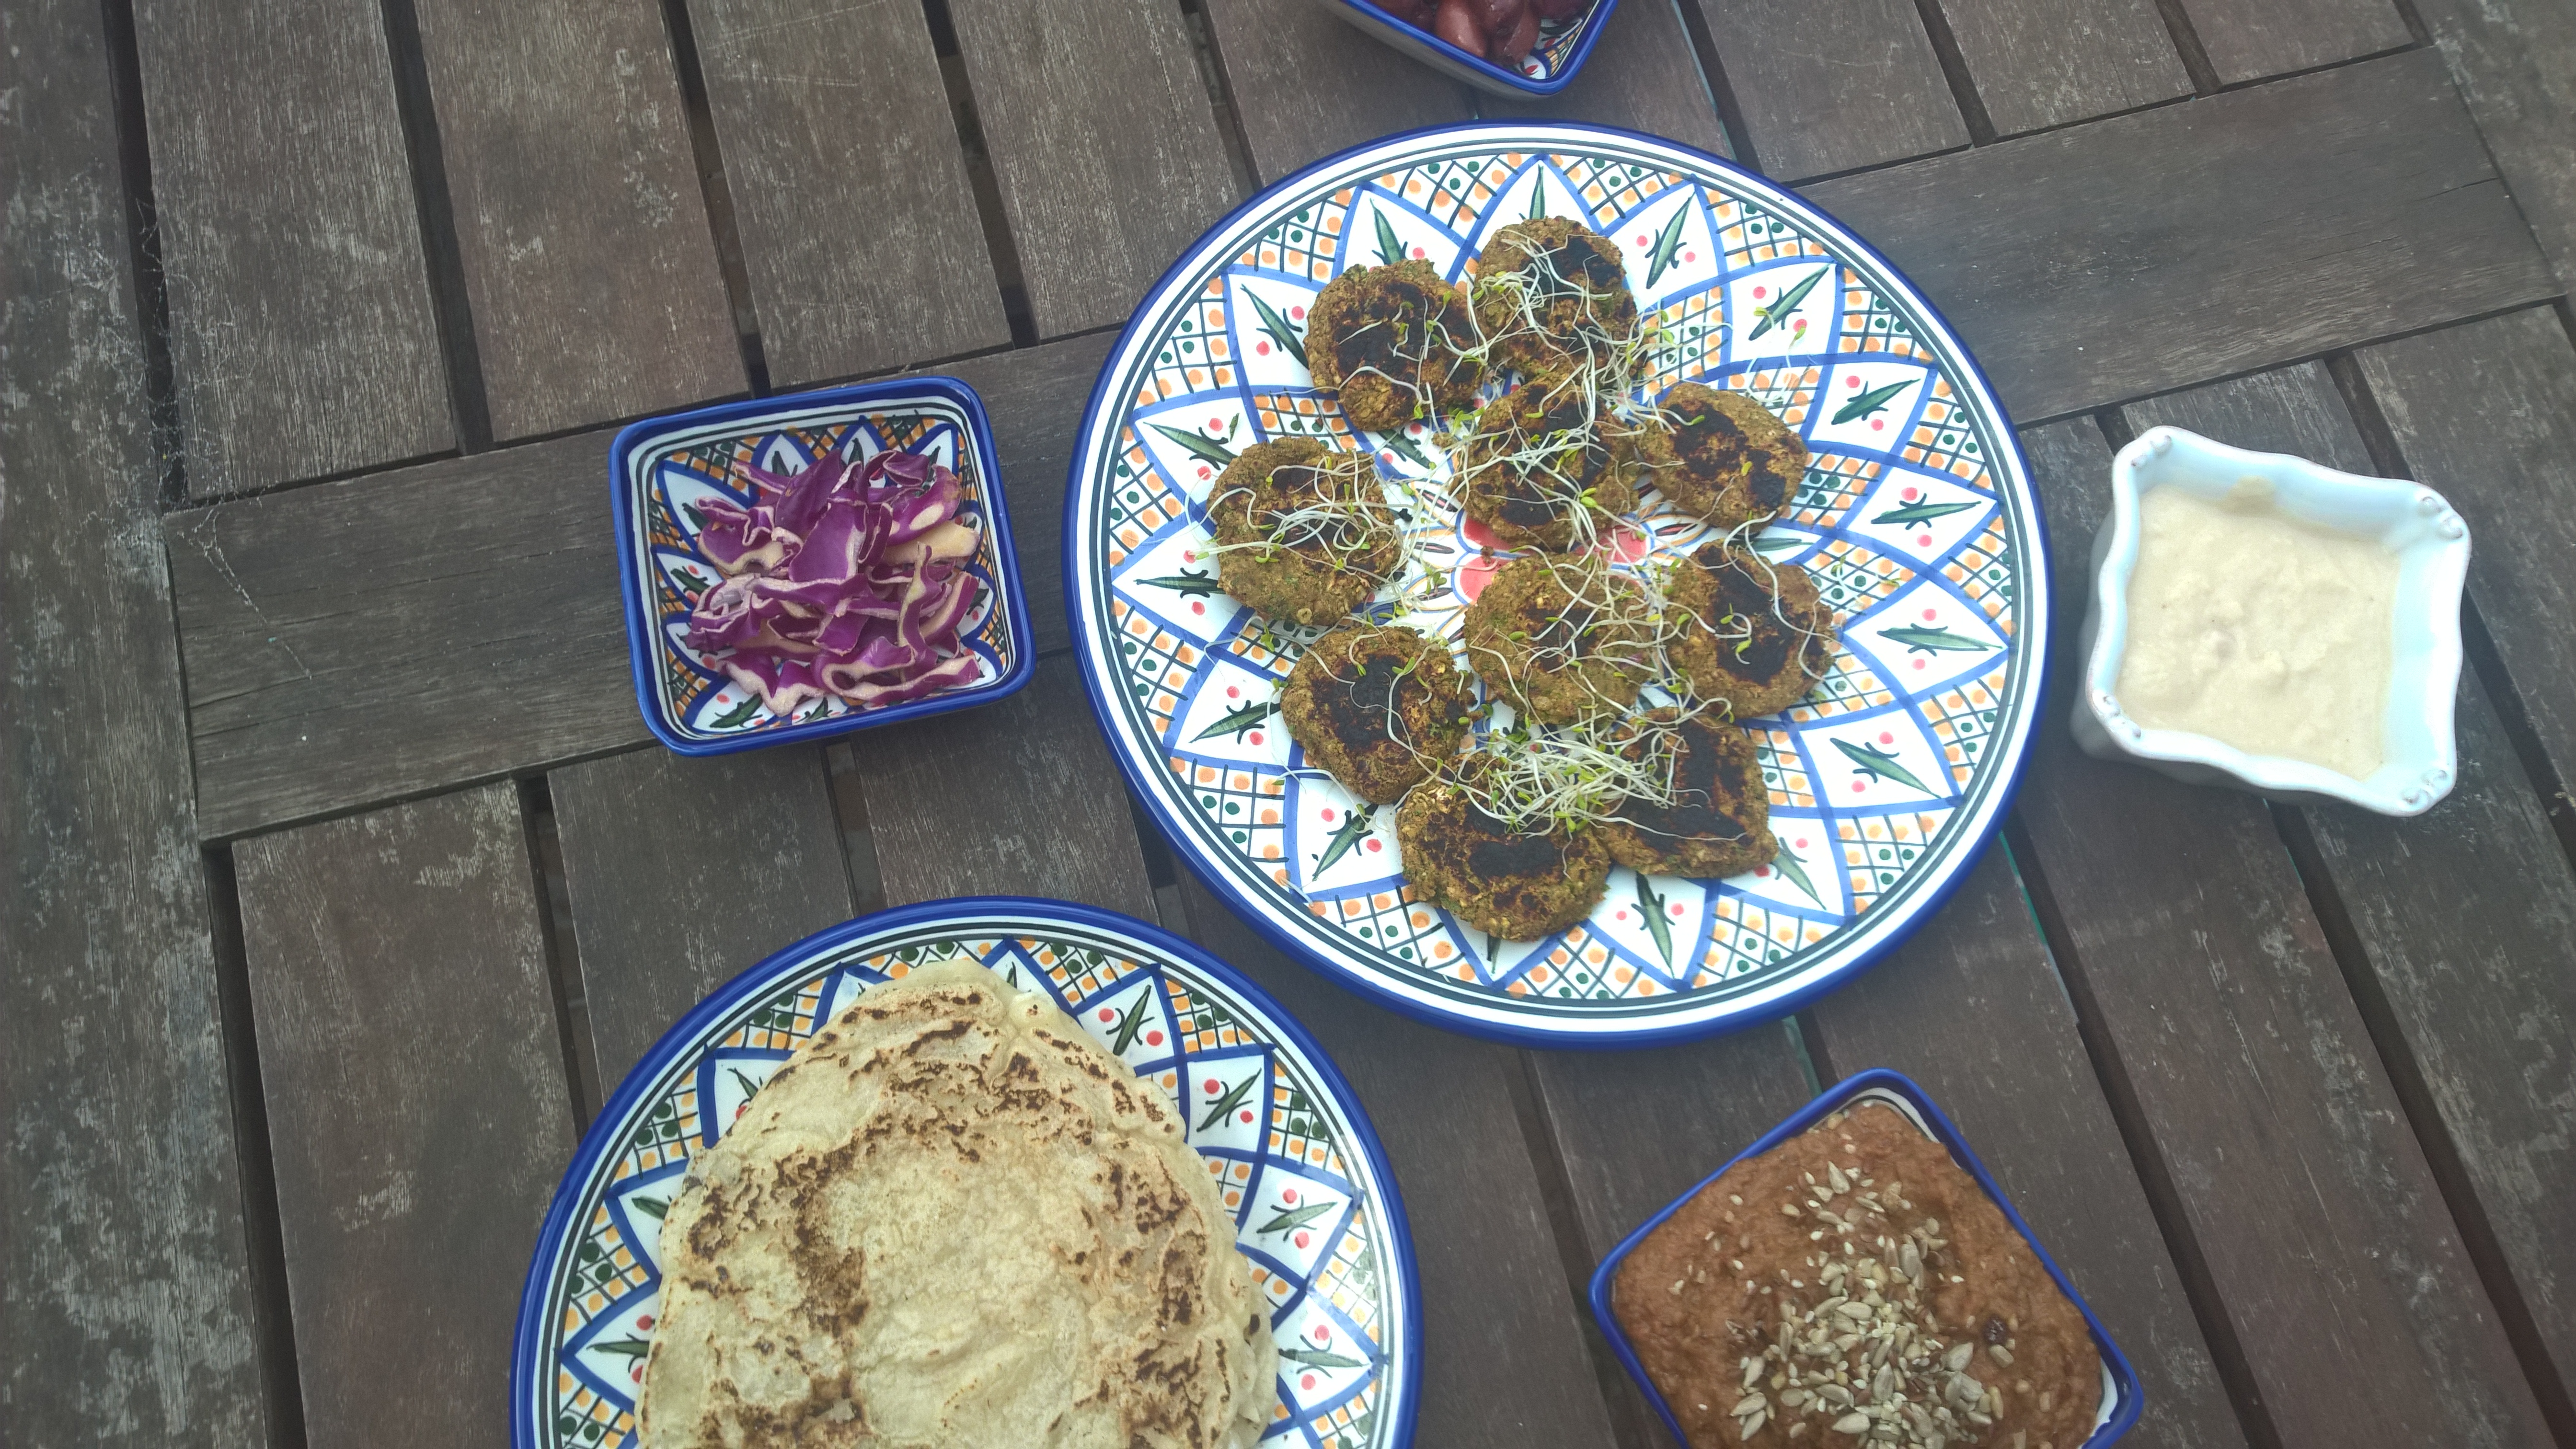
The best things in life happen by chance, and my latest creation in the realm of gluten free carby things was born while experimenting with different pancake recipes. (After all, it was Pancake Day on Tuesday.) While I’m still trying to rival the crêpe stand in Melbourne CBD, I might not have come up with a pancake recipe I would be happy to post, but – yup – a recipe for naan bread! How good is that? I mean, you try to create something that roughly looks, tastes and smells like a pancake, a crêpe, a poffertje,a flapjack, or a blintz (any reference to a certain Austin Powers movie is mere coincidence), and what you get is naan! I won’t complain. I guess it’s just life. Do you have that too where when you are looking for something you always find something else? Or is it just me?

I won’t go as far as calling these babies “healthy” because – shame on me- I used plain old commercial gluten free flour which is about as carby as you get. I’ve been a bit slack these days. So the fact that these beauties take less than five minutes to make (and contain just four ingredients (five if you count the fat for frying)) got me sold. Yes, this means you could devour a stack of delicious gluten free naan bread in under five minutes from now.

So while I work heavily at creating a more healthy version of this revelation (I think sorghum and buckwheat are likely candidates), why don’t you go forth and bake. The time starts now.

5-minute Vegan Gluten Free Naan Bread

Makes 4 naan breads

250ml filtered water
150g gluten free self-raising flour
1 tbsp psyllium husk
pinch of sea salt
a little bit of refined coconut oil for frying

Mix flour, psyllium and salt, then gradually add water while constantly whisking until you have a smooth dough. Lightly grease a large non-stick frying pan. The pan should be really hot. Make sure you use a good non-stick brand. Ladle a quarter of the batter inside the pan, fry until bubbling on top, then flip. Let cool before serving (the texture will become more naan-y as it cools down).

Enjoy!

Buckwheat and Chia Bread (vegan, paleo)

gluten free vegan paleo chia bread

The net is swarming with recipes for “paleo bread” these days, which is great. After all, it’s good to know you can get on with your life even if – for medical or lifestyle reasons – you don’t eat “regular” bread. And let’s admit it, we all like bread, at least now and again, even the paleo police!

The thing about “paleo bread” is that it usually contains a bucke load of eggs – hey, don’t get me wrong! I loooove eggs – poached with smoked salmon and avocado smash. Not as an ingredient in bread. I’ve seen paleo bread recipes calling for as much as six eggs. Six! That’s cake. It’s not bread. I wanted bread! (Using six eggs in a recipe is darn expensive too, but that’s another story.)

The solution – chia seeds! The “chia gel” made of chia seeds with the triple amount of water is a perfect (and cost-effective) way to replace whole eggs. It also means you can meet your vegan friends and enjoy some nice bread together.

While in theory, you can always replace egg with chia gel, it works especially well in this recipe. The nutty flavours of besan flour and buckwheat flour complement the chia seeds well. This bread is perfect as an accompaniment for light savoury dishes such as soups and salads, and it is also amazingly good on its own or dipped in olive oil.

The best thing about this bread is that it is easy as, and in just a little more than an hour (the majority of which spent on waiting) you can enjoy delicious bread!

Makes one loaf

1 pint (473ml) filted water
2 tbsp extra virgin olive oil
2 tbsp organic apple cider vinegar
Chia gel, made of 3 heaped tbsp chia seeds, dissolved in nine tbsp filtered water
125g besan flour
125g arrowroot
125g potato starch
100g brown rice flour
50g buckwheat flour
3 tsp sea salt
1 tbsp raw sugar
1 tbsp dried yeast

Preheat oven to 180 °C. Mix together the wet ingredients in one bowl, and the dry ingredients in another. Mix the wet to the dry ingredients and mix for 2 minutes on low.

Pour the dough in a prepared loaf tin. Cover with a clean cloth and let stand in a warm place for half an hour, and then bake for another half hour: Place on the medium rack and place an empty baking dish with icecubes on the lower rack (this step is not necessary but helps to achieve a crust). Quickly close the oven door and bake for 30-45 minutes or until the bread sounds hollow when knocking on it (this will depend on your oven, the time of year, temperature, humidity, and even the altitude of your home!).

Enjoy!

Super Moist and Fudgy Chocolate Cake {vg, gf}

An almost paleo chocolate cake - you really can have it all!

An almost paleo chocolate cake – you really can have it all!If you like chocolate, you are in for a treat. Let me introduce to you a luscious chocolate cake which is not only whipped up in a jiffy, but makes for a perfect breakfast on the go, dessert or afternoon snack – and, most of all, it is absolutely moreish and -almost- paleo. Yes, this is not a misprint! You can absolutely have your cake and eat it all on a paleo diet, provided you find a high quality, sugar-free or low-sugar dark chocolate (I’d settle for nothing less but Lindt Excellence 90% – it is technically not sugar free, but with 6.7 g of sugar per 100g, is unrivalled among dark chocolates. Plus it just is the best tasting dark chocolate I have ever tasted. You can read up more on dark chocolate here).

This cake has a lovely tang to it, is never too sweet, and keeps your blood sugar nice and stable. Just the right thing to round off a great meal. It lasts a long time in the fridge and is very portable. Yes, I think you’ll really love this one. And if you are like me, you should have all the ingredients ready to go in your pantry – I really hope you always have a few bars of Lindt Excellence 90% in your cupboard! It definitely belongs on the list for essential pantry items…

Besides lovely lovely choccie, this gem packs a few other fit foods, such as raw cocoa, organic butter, cinnamon, eggs, almonds, and honey, so you can indulge a bit knowing you’ll do your body and mind something good.

Makes one loaf

150g organic coconut oil
150g very dark chocolate (at least 85% cocoa), roughly chopped
150g organic rice malt or maple syrup
juice of 2 large or 3 small oranges
2 flax eggs (1 flax egg = 1 tbsp milled flaxseed dissolved in 4 tbsp filtered water)
100g almond meal
45g tapioca starch, sifted
45g potato starch, sifted
30g raw organic cocoa powder
1 tsp cinnamon
1/5 tsp baking soda

  1. Preheat oven to 160 °C. Melt butter, chocolate, honey, and orange juice in a small saucepan over medium heat until well combined. Turn off the heat and let stand for about 20 minutes.

  2. Fold in the beaten eggs, almond meal, sifted starches, cocoa powder, cinnamon and baking soda and stir batter until smooth.

  3. Grease a loaf pan or line it with baking paper and pour in the batter. Bake for 45 minutes or until a toothpick comes out clean.

This beauty stores best in foil in the fridge for up to two weeks. Although it stays nice and fresh at room temperature, storing it in the fridge will not only result in a nice fudgy texture, but will make the cake also less messy and therefore more lunchbox-friendly.

Enjoy!

2-Minute Paleo Crumpets

Delicious Crumpets - Homemade and Guilt-Free
Delicious Crumpets – Homemade and Guilt-Free

If you thought fast food was unhealthy, think again! Sure, gulping down trans-fat laden chicken wings while you are running for the train is wrong on many levels, but healthy eating doesn’t mean having to skip the hairdresser’s appointment for lack of time. In fact, there are lots of recipes for microwave breads out there. Yes, you read that quite right. There is breads that you can prepare in the microwave in less than two minutes! If this sounds too good to be true in your ears, have a go at my 2-minute Paleo crumpets! This recipe is adapted from Louise Hendon’s Microwave Paleo Bread, and I don’t only enjoy that I can bake delicious gluten free, grain free “bread” and still have time to go for my pamper package at the local day spa, but I also love its nutty taste and subtle flavour as well as that it’s so versatile!

Next to the fact that you can satisfy any cravings for carbs and bread you might have in less two minutes and with virtually no net carbs, these crumpets come jam-packed with fibre, vitamin E, and healthy fats! And let me repeat that once more: They are absolutely and truly paleo, meaning they are grain free, sugar free, dairy free, soy free, and, in general, worry free. Whether you follow a gluten free or low carb diets, these little babies will fit your lifestyle! Lacking the pernicious sweetness of traditional crumpets, these tasty round slices don’t only pair up nicely with ricotta and homemade jam, but I actually love them with butter and gluten free AussieMite or dunked into a hearty soup! There is really no reason not to try this great recipe. Whether as a filling breakfast option, lunch or dinner component or hearty afternoon snack, just whip up a handful ingredients and get your microwave going!

Makes 2 crumpets 

30 g almond meal
10 g flax meal
pinch of sea salt
pinch of baking soda
20 g butter (or oil of choice)
1 egg

Mix all ingredients in a large mug until thoroughly combined. Pat down into mug and smooth surface. Microwave on high for one and a half minutes. The crumpet should easily come out of the mug. Cut into desired thickness and enjoy with favourite topping whilst still warm.

Enjoy!

Gluten Free Vegan Hot Cross Buns {refined sugar free}

Gluten Free, Dairy Free, Sugar Free Hot Cross Buns

Happy Easter everyone! What are family gatherings without traditions? When you have food intolerances – especially gluten intolerance – it can be hard to enjoy all the family traditions. Birthday cake, christmas pudding, and pumpkin pie are all off-limits, and so are the ultimate Good Friday traditions of fish and chips and hot cross buns – or aren’t they?

You will need to get your hands dirty, folks, but it’s definitely worth it! I created some yummy gluten free hot cross buns for you that you can safely serve your gluten-eating family and friends. Gluten free, dairy free, egg free, nasty free, but with lots of flavour and texture and full of juicy sultanas. I did not use lemon peel in this recipe, as no-one in my family is a huge fan of them, but you are of course welcome to add it. Looks like Easter is saved this time. And I have eight more months to serve you the yummiest gluten free ginger bread you’ve ever had!

These buns are fairly easy to make, but you have to calculate a bit of time – 15 minutes of kneading, 45 minutes of resting, and another 25 minutes of baking.

Makes 9 buns

90 g sorghum flour
75 g rice flour
35 g arrowroot
1 tbsp dry yeast
1 tsp cinnamon
1/2 tsp cardamom
1/2 tsp nutmeg
generous pinch of salt
3/4 cup plant milk
2 flax eggs (1 flax egg = 1 tbsp flaxseed dissolved in 4 tbsp filtered water)
2 tbsp coconut oil, melted
3 tbsp organic maple syrup
dash of lemon juice
75 g sultanas
30 g (sugar-free) citrus peel (optional)
75 g erythritol
2 tsp lemon juice

Mix the flours, arrowroot, yeast, spices, and salt in a large mixing bowl until one colour. Beat the flax, oil, maple syrup, and lemon juice in a separate, smaller bowl. Pour the wet ingredients into the dry ingredients and beat on high until well combined. Fold in sultanas and citrus peel, if using. Thoroughly wet your hands to prevent sticking, shape nine equally big buns and spread on a prepared baking sheet. As they will rise a bit, remember to leave enough space between the individual buns. Cover with cling wrap and let rest in a warm place for 45 minutes.

Meanwhile, preheat the oven to 200 °C. When the buns have risen, remove the cling wrap, shape a cross on every bun, and bake on the middle rack for approximately 25 minutes or until golden brown at the edges. Turn off the oven and take out the buns to cool on a wire rack. Meanwhile, prepare the icing – mix erythritol and lemon juice until of pasty consistency. Fill in a sandwich bag and cut a tiny hole in it to spread the icing in the lines of the crosses.

Serve the buns while still hot and fresh. They will get a bit solid the next day, but you can easily chuck them into microwave or oven to bring them back to life.

Enjoy!

Sugar Free Plum Jam

Delicious Homemade Plum Jam in just 5 Minutes

It’s autumn! (For all the ones who think “WTF? It’s April!”, we are talking southern hemisphere here!) Although we still get sunny days in the low 20s, the evenings have that certain something about them that reminds me of the dusky, hazy, and utterly magical October evenings I remember from Europe. Autumn is my favourite season, featuring colourful trees, the smell of leaves and fresh chestnuts, a mellow light, cool-but-not-too-cool days, and a long dusk – and not least some of my favourite foods to eat, which all start with p – potatoes, pumpkin, pears, and -yup- plums!

Even though we started harvesting our lovely plums already a couple of months ago, these yummy purple and yellow fruits are still ubiquitous. As I am still in the phase of perfecting my gluten free bread making skills but want to go a bit more easy on nut butters (think anti-metabolic PUFAs…), I needed to come up with a good jam. Unlike my home country, the selection of jams here in Australia leaves a lot to be desired. It’s hard to find a jam with a fruit content of more than 30% (when in Germany, you can only get 50% +!), and even the ones with a supposed fruit content of 50% taste like sugary mush. Any wonder when sugar and glucose syrup are the main ingredients! I usually prefer going without any sweetener at all as fruit has a natural sweetness to it that doesn’t need tampering with. However, plums are a bit of a different animal, as they are quite sour, so I opted to use a bit of Xylitol. Xylitol (just like erythritol) is a safe natural sweetener that has actually been shown to be beneficial for teeth and even to reverse cavities! I have no issues with Xylitol in terms of digestive distress, but if you are extra sensitive, you might want to opt for eryhtritol instead, which is also an excellent sweetener. Of course, you can use “real” sugar or stevia although I don’t think that stevia gives jam the nicest taste.

I know what you think, that (white) sugar is needed to preserve the jam – and you are absolutely right. However, I am not a preserve-maker (yet), and I like my jam being ready instantly, and I like it fresh! This jam should last a couple weeks in the fridge – it’s so delicious though that you will get through it quicker! The great thing about plums is that they have enough natural pectin, meaning that unlike with other jams, you don’t need to add pectin during the jam-making process and will still get that “jamminess”. Yes, you really can make this jam spontaneously as it takes less than 5 minutes to make! It is really as easy as! Tip: By adding some wintery spices (cinnamon, ginger, cardamom etc.) you will get that perfect autumn feeling!

500 g plums, washed, cored, and roughly chopped (leave skin on)
1 tbsp apple juice
1 tbsp lemon juice
1 tbsp xylitol (or alternative sweetener)
2 tsp arrowroot starch
cinnamon, cloves, cardamom, ginger, nutmeg (optional)

Combine plums, apple juice, and lemon juice in a saucepan over moderate heat and bring to the boil, stirring constantly. Whisk the arroworoot starch with 2 tsp water until a pasty consistency is achieved. Add the arrowroot paste, stirring vigorously. The plums should instantly start to thicken up. Now add the sweetener and the spices and stir until the desired consistency is reached. Let cool completely and transfer to mason jar. Lasts a couple of weeks in the fridge. This jam is great on gluten free bread, in yoghurt and quark, or straight from the spoon.

Enjoy!

Gluten Free Crusty Rosemary and Walnut Bread (vegan, wholegrain)

Healthy Wholegrain Vegan Gluten Free Bread

I think we all agree that the ultimate achievement for any gluten free baker is gluten free bread. GOOD gluten free bread. Unlike gluten free biscuits, which – albeit unhealthy- are widely available and reasonably tasty, a delicious gluten free bread is something you will not find in any supermarket, well-stocked as it may be. Finding a HEALTHY gluten free bread is even more of a challenge.

After my attempts at gluten free and yeast free bread (here, here, and here), I decided it was time to have a go at “proper” bread, which also contains yeast. As stated before, I am not a fan of yeast and it might cause issues in some gluten-free folks, but a bread with yeast in is definitely a different animal than yeast-free bread, and I figured that the few times per year I have bread, a bit of yeast won’t kill me.

This bread, according to my hubby my “best one so far”, is roughly based on a recipe for crusty boule I found in Jeff Hertzberg and Zoe Francois‘ fabulous book, but I tweaked it quite a bit based on my own research about gluten free flours. I replaced the egg with flax to make a vegan version. I added fresh rosemary from the garden for a nice Mediterranean flavour that would go well with olive oil and sea salt, and walnuts for a nice crunch. The result is an insanely delicious bread.

I could write a novel about this bread, but this would lead too far, I think. Let me just tell you that for now, I am very proud of my achievement to bake a really delicious bread with a crust like I haven’t had anywhere outside Germany – something you won’t get from supermarket bread. A bread that a non-gluten free person would happily eat. A bread that consists of roughly 50 % wholegrains – another thing you won’t find in supermarkets!

Note that you need to follow my instructions closely and use the exact amounts (weigh them) as making gluten free bread is quite a bit more finicky than gluten free cakes or biscuits. Please also note that your dough might behave differently depending on your home’s altitude, humidity etc. You might need to play around a bit.

Makes two 1-pound loaves

450 g gluten free flour (I used 200 g arrowroot starch, 150 g brown rice flour, 100 g sorghum flour)
1 flax egg (i.e. 1 level tbsp ground flax seed, mixed with 1 tbsp water)
1 tbsp honey, melted, or other sugar (DO NOT OMIT OR CHANGE THIS AMOUNT, or otherwise the yeast won’t do its job)
2 tbsp extra virgin olive oil
2 tsp dry yeast
250-300 ml water, lukewarm (use less in humid climate, more in arid climate)
2 tsp sea salt
any add-ons (rosemary and walnuts in this case; feel free to add any others)

First, mix the dough. All ingredients have to be at least room temperature. You need to do the mixing in an electric stand mixer, not in a hand mixer! A hand mixer is not powerful enough to whip in enough air to get fluffy bread, and you end up with dense and gummy bread, and we don’t want that. So use a stand mixer or large food processor. Mix the flours, yeast and salt first. Whip oil, honey, water and flax with a blender in a separate bowl and set aside. It is important that you use an electric hand mixer for the wet ingredients to whip air in them! Do not use a common whisk. Use less water first and only up the amount slightly if the bread seems too dry. You can always add more but not take away what’s already in! Too much moisture will cause your bread to become heavy and dense. While processing the dry ingredients, add one third of the wet ingredients through the feeder of the processor, then another third, and then another, blending after each addition. To avoid over-processing, add any add-ons such as herbs and nuts together with the last third of the oil-water-mixture. Stir just until smooth.

Now, give the bread a nice shape. Unlike gluten-full bread, we don’t rise the dough, then shape it, then rise it again, but only let it rise once, and shape it before that. Remember to go very easy on the dough as to not destroy the air bubbles! Do not knead the dough! I know you always walk past the pizzeria and see the guy torturing his dough, but we are talking gluten free here – and gluten free dough is a little bit different! After giving the bread a nice shape, let it rest on a warm counter covered with plastic wrap or a clean tea towel for 3,5 hours. You can now use your dough or store it in the fridge or up to a week! If taking out chilled, let it warm up before baking for 90 minutes.

30 minutes before baking, preheat your oven to 240 °C and slide a Dutch oven in it to heat up. After 30 minutes, serrate the loaf with a big knife, cautiously take out the Dutch oven and cautiously (!) place the loaf inside. Put the lid on the Dutch oven and place in the oven.

Bake for 20 minutes. Then turn the heat down to 230 ° C, lift the lid off the Dutch oven, take a tray and fill it with icecubes, and place beneath the Dutch oven. Quickly shut the oven door and bake for another 15 minutes. The steam caused by the ice will make the nice crust!

After 15 minutes, take out the Dutch oven and with a dairy or candy thermometer, check the temperature inside the bread, which should be between 93 and 98 ° C. If this is not the case, bake for a few minutes more, even if the top looks well done. In this case, cover the bread with foil to protect the crust from getting too burnt. As soon as the bread has reached this temperature, turn off the oven and let the bread cool completely. This is very important, as you will end up with a gummy centre if you attempt to cut the bread beforehand.

There you have it. Gluten Free Bread. The Holy Grail.

Enjoy!

Sugar Free Homemade Jam aka World’s Healthiest, Easiest, Yummiest Jam

Sugar Free Homemade Jam

Now that the gluten free bread dilemma is solved, it’s time to think about what to build on that foundation. There is obviously EVOO and coarse sea salt, there is goat’s cheese, nut butters – and then there is jam. The only problem is that in the course of the whole low-carb and paleo movement there is a certain scepticism towards jam. But is there anything nicer than homemade jam? For me, Sunday breakies with my fam evokes memories of warm bread rolls, real butter and loads of fruit jam. And before you send me a blood sugar check device, you might have a look at my low-carb breakfast bread – and my low-carb, completely sugar-free homemade jam!

Unfortunately, as an urbanista, I do not own my own fruit garden, so I use frozen raspberries. You are of course welcome to use any fruit you like, fresh, store-bought, home-grown or frozen. I have only tried this super easy recipe with frozen berries, so cannot vouch for the result of doing it with fresh berries, but I think it would work just as well.

This is the easiest jam you will ever make and it is super duper quick, too! Admittedly, this is not your typical preserve, so you cannot store it in the pantry, but in the fridge, and you should consume it ASAP. But you will never have had soooo much fruit goodness on your bread!

450 g frozen raspberries or berries of choice, thawed and puréed
2 tbsp stevia
1 tbsp arrowroot, dissolved in 1 tbsp water
1 tbsp lemon juice

Mix all ingredients in a saucepan and bring to the boil. Turn the heat down and let simmer while constantly stirring until jam begins to thicken – it shouldn’t take too long. Turn off the heat and transfer jam to a small mason jar and refrigerate – jam will continue to thicken in the fridge. Use within two weeks.

Enjoy!

Gluten Free, Vegan, Low Carb Breakfast Bread

Gluten Free Grain Free Bread full of Goodness

Due to my newly awakened love for homemade jams and nut butters, another gluten free bread was beckoning. I adapted this one from Elana Amsterdam‘s Bread 2.0, but I replaced the eggs with flax to make it truly vegan. I like eggs scrambled or poached on my breakfast plate, but I don’t want them in my bread! This bread is thus very high in fibre and therefore very satisfying – together with the high protein content from the almond and flax, it is ideal to keep you satisfied for a long time. That’s why I call it a breakfast bread – although it’s delicious any time of the day, it just gives you the power you need to perform until lunchtime!

The bread is soft and fluffy in a good way – not the “Aussie sliced sandwich bread style” type of soft. Its nutty aroma and texture which is faintly reminiscent of banana bread (only that there is no banana in it…duh) also makes it a healthy and satisfying afternoon snack, which is sure to keep the 3-4 PM slump at bay. It is very low carb which should be enough to convince even the die-hardest bread haters. This bread is only very lightly sweet; however, I prefer it with sweet spreads or nut butters rather than savoury spreads. Your choice!

Makes 1 small loaf

150 g almond meal
75 g arrowroot starch
25 g ground flaxseed plus 40 g ground flaxseed dissolved in 4 tbsp filtered water (“flax egg”)
1 teaspoon honey
1 teaspoon apple cider vinegar
½ teaspoon baking soda
generous pinch of sea salt

As usual, mix the dry ingredients (almond meal, arrowroot, 25 g ground flaxseed, soda, salt) in a large bowl and the wet ingredients (flax egg, honey, ACV) in another bowl. Add the wet ingredients to the dry ingredients and mix well (use a hand mixer or your food processor). Scoop into greased or non-stick 10×20 cm loaf pan and bake at 150 °C for 30 minutes. Let cool completely before serving. Store in a ziplock bag in the refrigerator for up to a week.

Enjoy!

Gluten Free Yeast Free Wholegrain Pizza Base (Vegan)

The good thing about experimenting is – even though it doesn’t always work, or, in fact, more often works NOT, you may stumble upon fantastic things you hadn’t imagined before. Take pita bread, for instance. I love falafel, just like anything else that belongs to Middle Eastern cuisine, and what is falafel without pita? So I tried to make pita – still working on it. My first tries were delicious enough, but they were not exactly pita, not enough pita to post a recipe on the web, anyway. However – my thought was “this would actually make quite a nice pizza”. Pita, pizza – the names are close enough, so I thought why not turn my pita experiment that didn’t work into a pizza experiment that works?

I must admit, pizza is one of the few things I genuinely miss being gluten free (having an Italian husband doesn’t help the cause!). Sometimes I would just like being lazy and grab one of these gluten-free pizza bases from the shop – a look at the ingredients (and nutrition facts) has so far been enough to deter me from wasting seven bucks on a processed gluten-free pizza base. Good on me!

It’s not that there is a lack of recipes for gluten free pizza out there, and I don’t doubt that they taste alright. But I just couldn’t find one that ticked all the boxes. Either they involved almond and/or coconut flour – and, as much as I like these two, almond and coconut just doesn’t belong on pizza! Or the recipes involved yeast and/or gums (a big no-no), or they seemed to be too complicated and involving too much time when you are hungry and impatient! I wanted a pizza recipe that doesn’t need proofing. I am not the biggest fan of a yeasty taste either, and I find it quite hard on the stomach which is not healthy.

This pizza is also WHOLEGRAIN – so it is really good for you. There is no complicated ingredients (you should have these when you have been baking gluten free), and if you get started right now, you could have a lovely healthy gluten free pizza that is delicious in less than 30 minutes. WTF? Exactly. My wholegrain pizza base ticks all the boxes. You can make this for your gluten-eating friends, and they won’t say “this is good for gluten free”, they will say “this is good”. In fact, I trust they will say “this is great”. Healthy? Tick. Easy? Tick. Yummy? You bet. And quicker than waiting for takeaway.

Gluten Free Vegan Pizza Base

Makes one baking sheet of pizza (probably makes sense to double or triple using several sheets and freeze leftovers)

50 g buckwheat flour
50 g brown rice flour
30 g millet or oat flour
30 g ground flax seeds
1,5 tsp sea salt
1 tsp baking soda
3 tsp vinegar
1 tbsp olive oil
a pinch of sugar (or honey)
225 ml warm water
garlic powder (optional)
tomato paste (optional)
oregano
olive oil to top (optional)
toppings to taste

Preheat oven to 220 ° C. As usual, mix the dry ingredients (flours, soda, salt, flax, sugar, garlic powder if using) until one colour. Add water, oil and vinegar and mix until you have a supple, uniform dough – a bit like a muffin batter, rather than the pizza doughs you might have made with gluten flour. Let the dough rest for 10 to 15 minutes before spreading it on a very well-greased or silicon baking sheet – the thinner you spread it the better. After all, we want a nice Italian-style thin crust pizza, not one of these American grease bombs which are as thick as a quilt! With a wet spatula or spoon (or using your wet/oiled hands), flatten the dough so that it becomes nice and even. We don’t want a pizza that is thin in one corner and thick and doughy in the other!

Bake the dough without toppings for roughly 15 minutes until dry and pizza-like. Now comes the fun part – the toppings. You will probably want to spread some tomato paste and oregano on the pizza as a classic, although this is not even necessary. For the pizza in the picture, I used a mix of different vegetables (kale, peas, fresh tomatoes, mushrooms, capers) and some tempeh as vegan “ham”. Olives, sundried tomatoes and vegan cheese would also be a great additionI Just try whatever you fancy! I recommend sprinkling the top with a dash of olive oil, which works wonders for the flavour!

Now bake the pizza base with the toppings until they have reached the consistency you desire – probably another 10, 15 minutes. Devour.

Enjoy!