Healthy Coffee and Chocolate Chip Muffins (gluten free, vegan, low GI, 70% wholegrain)

Healthy doesn't mean boring - scrumptious vegan coffee and chocolate chip muffins
Healthy doesn’t mean boring – scrumptious vegan coffee and chocolate chip muffins

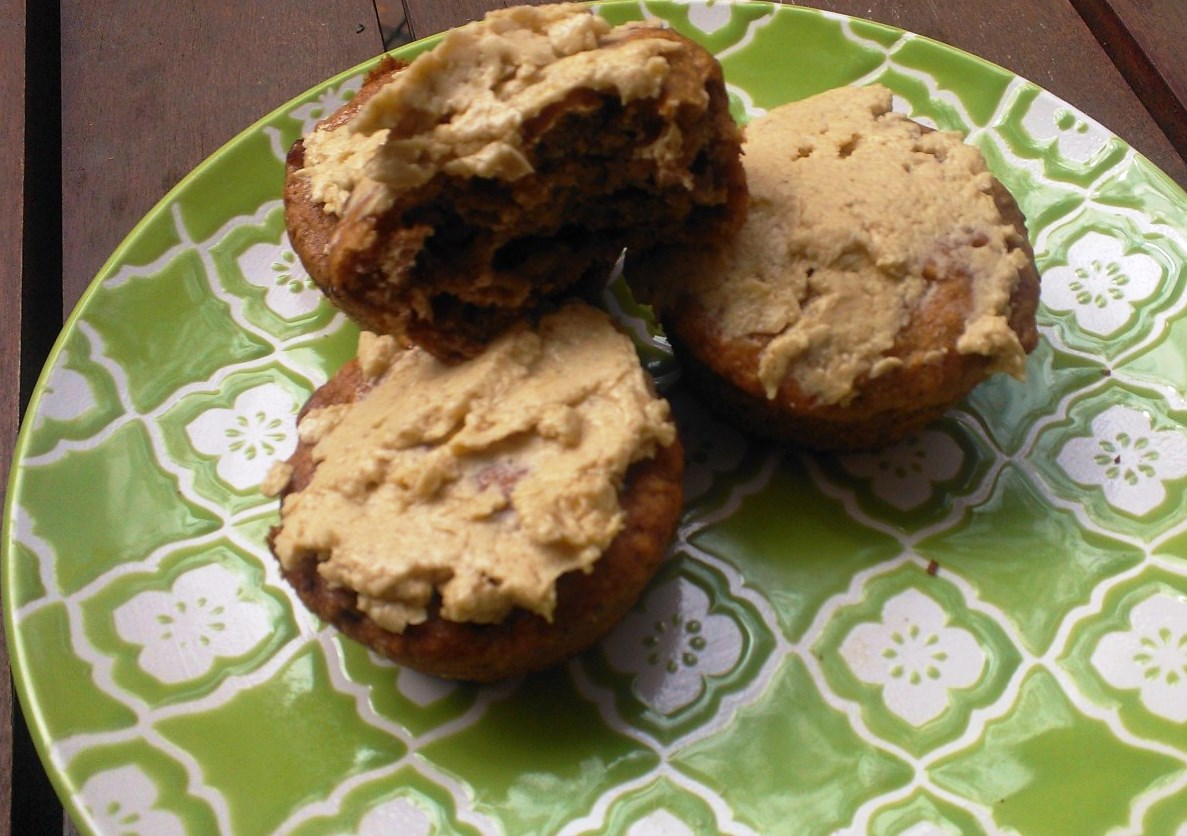
Even if you are a carnivore like me, you will sooner or later stumble upon vegan desserts if you need/want/try to avoid dairy. The label “vegan” on any restaurant or supermarket item per definitionem means free of animal products and therefore free of dairy – a safe bet for those with a casein allergy, lactose intolerance, or who simply want to avoid dairy for other health and/or lifestyle reasons. I do love my goat’s and sheep’s milk, the occasional cheese platter and, of course, my eggies, but I wanted to create something nice and scrumptious for all you vegan and/or dairy intolerant out there – and what would be better than a luscious, naughty little muffin?

In baking, you have heaps of options to replace animal products with plant products – there are flax or chia seeds you can use instead of eggs, almond milk, rice milk, oat milk instead of cow’s milk…the list goes on! And if you can’t have butter, there is always coconut oil! If you thought “vegan” is synonymous with boring and chaste, think again – these wouldn’t be my muffins if they weren’t a bit naughty! And do you really think my hubs would survive a day at work with boring snacks? These muffins are made in a jiffy, fill the house with a lovely smell, and taste so-not-gluten free! In fact, they are moist and luscious and have the soft, fluffy crumb we all love and miss about glutenated muffins! And -unlike baking with gluten flours- there is no danger of overmixing the batter, as there is no gluten that can get activated! Yay!

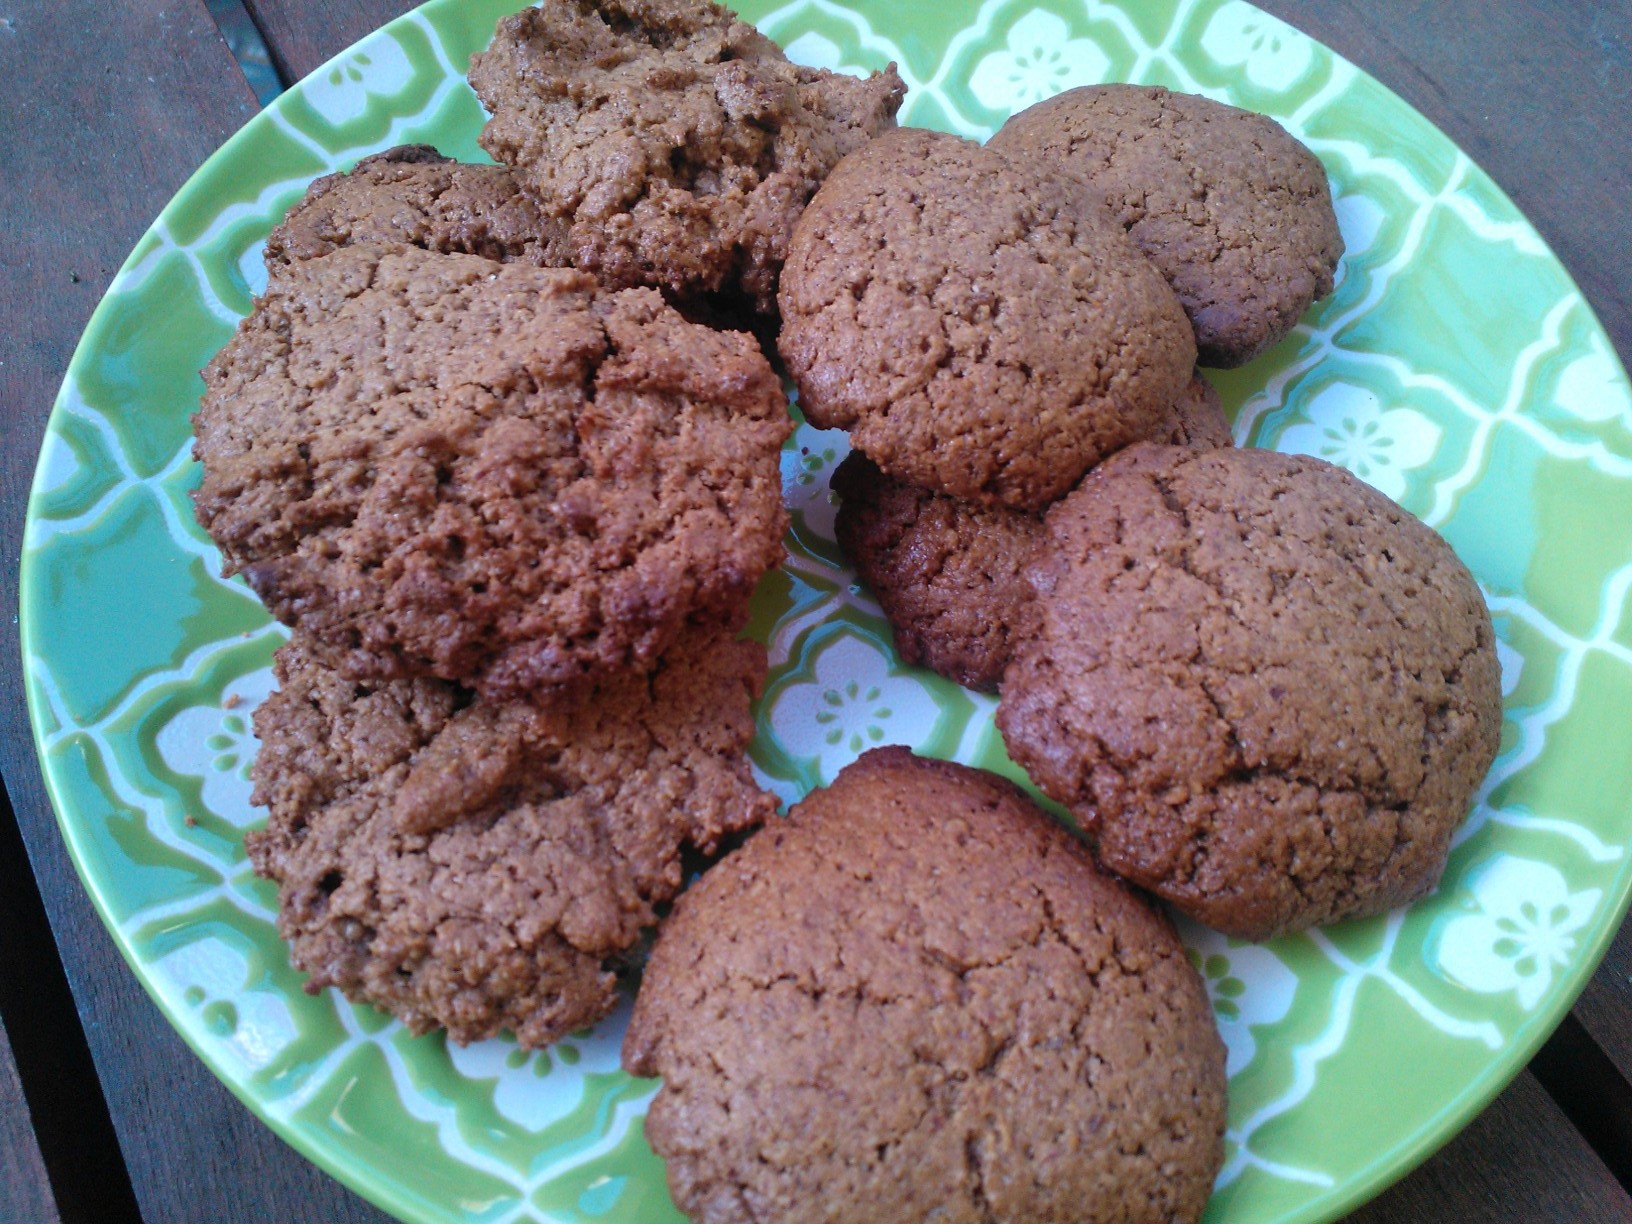
Don’t let the labels “healthy”, “vegan” and “gluten free” deter you – these muffins boast LOTS of coffee and LOTS of chocolate! What better way to make it through a working day on your desk? Not only do they look good, smell even better and taste divine, they are the perfect nutritious breakfast and/or afternoon snack: Fibre and omega 3 from chia seeds; iron, zinc, calcium, potassium, polyphenols and antioxidants from coconut sugar (which is so much better for your blood sugar than regular sugar and won’t send you into a carb-induced stupor); anti-viral lauric acid from coconut oil; vitamin E from almond milk; antioxidants and minerals from dark chocolate; magnesium and copper from sorghum – maybe they are not that naughty after all?

Makes 18 small muffins

100 g organic coconut oil, very soft
70 g organic coconut sugar
2 “chia eggs” (i.e. 2 level tablespoons of black chia seeds dissolved in equal amounts of filtered water)
1 teaspoon organic vanilla extract
125 g sorghum flour
75 g millet flour
80 g of any starch (i.e. any mix of tapioca, potato starch, rice starch, maize starch)
1/2 teaspoon freshly ground sea salt
1 level teaspoon aluminium-free baking soda
1 cup almond milk
1 cup freshly brewed filter coffee, very strong
200 g vegan dark chocolate chips (from the health food store; alternatively, try very high-quality dark chocolate such as Lindt Excellence 90%)

Preheat oven to 170 °C and line or grease your muffin pan/s. Beat the coconut oil with the coconut sugar until creamy and fluffy. Add vanilla and chia eggs, mix in. In a separate bowl with a spout, mix together the coffee and almond milk. In another, bigger, bowl with spout mix the flours, starches, salt, and baking soda. Alternatingly, add almond coffee mix and flour mix to the coconut mix while beating until you get a homogenous, pancake-like, rather liquid batter. Stir in the chocolate chips. Fill muffin pan and bake for 18 minutes.

Enjoy!

Almond, Chocolate, and Chia Granola Bars

Healthy, Easy and Yummy Granola Bars with Chocolate, Chia, and Almonds!

My man loves muesli bars. He used to get 24-packs of those hideous store-bought, highly processed, toxic, and also expensive “muesli bars”, and no, they didn’t even taste good in my opinion! Having finally used up our stock of processed junk “muesli bars”, it was high time to swing the kitchen knife again and come up with my own healthy granola bar recipe!

Given that I still had rolled oats and sultanas in my pantry which I wanted to use up (I am not a huge fan of sultanas tbh, but I cannot stand throwing things out), the opportunity seemed perfect. I was on the prowl for a good granola bar recipe online and I got my inspiration mainly from The Minimalist Baker, but I tweaked it a bit to make it “husband friendly”, i.e. I added dark chocolate chips for a bit of naughtiness, cornflakes for some added “crunch”, chia for extra goodness, and I changed the ratios a bit. I used ABC butter instead of peanut butter for its more favourable health benefits and its subtler taste. Oh, and yes, I used sultanas instead of dates, as this is what I had and I didn’t want to go shopping again. It worked just as well. Pretty cool if you can just start a recipe and everything ready, ay?  The result is an almost perfect muesli bar that my hubby would choose over store-bought concoctions anytime. They are not 5-ingredient ones, but they are still surprisingly easy to make. Are they messy? Yes, but that’s part of the fun!

For one 20×20 cm baking pan

140 g rolled oats
60 g cornflakes
20 g chia seeds
150 g almonds
200 g sultanas
100 g dark chocolate chips
130 g nut butter (I used almond, brazil and cashew nut butter)
50 g honey or maple syrup
pinch of salt

Line the baking pan with parchment paper to easily remove the granola later and preheat oven to 180 °C. Line a baking sheet also with parchment paper and spread the oats, chia seeds, and almonds. Toast in the oven for 12-15 minutes, occasionally stirring, or until slightly browned. This step is actually not necessary, but it improves the taste a lot, and the chocolate chips will melt and incorporate nicely later.

While the oat mixture is toasting away, knead the sultanas with a tiny little bit of hot water so as to get a sticky, dough-like consistency. The sultanas should come together as a ball. Then, heat the nut butter, honey, and salt on very small heat while constantly stirring – don’t let it catch! – until honey is incorporated.

Take oat mixture out of the oven, add cornflakes, chocolate chips, sultanas, and warm honey-nut-mix, and incorporate. Beware, you will get your hands sticky, veeeery sticky, but you have my official permission to lick your fingers! (Just leave a little bit for the actual granola bars!) Make sure that the granola mass actually IS really sticky or else it will become messy and crumbly later!

Pour the mix into the prepared baking pan and pat it down REALLY HARD! Yes, you can use violence here; in fact, I’d advise to do so! I used another sheet of parchment and another baking pan which I pressed onto the granola mass. You could also use a book and stand on it – I have heard of people doing that! Now it’s time for 30 minutes in the freezer – do not attempt to cut the bars before you have frozen them! After 30 minutes, remove from freezer and very cautiously start to cut into how many bars you like. Store in refrigerator. Note: Collect any crumbs, toast them and enjoy with almond milk as a nutritious start to the day!

Enjoy!


Decadent Flourless Chocolate Mud Cake (Gluten Free, Dairy Free and Almost Paleo!)

Flourless Chocolate Mud Cake

THIS. IS. THE. CHOCOLATE. CAKE.

I promised you some time ago to publish a more nutritious, starch free chocolate cake recipe. I tend to keep my promises. I wanted to create the most perfect chocolate cake recipe in the world, and here it is. Don’t even look at anything else! It happens to be not only gluten free, but entirely grain free. It is actually virtually Paleo. But that doesn’t matter. What matters is that this cake could be served in the best chocolateries and pâtisseries in Paris and would pass. This will be the richest, most luscious, most delightful, most exquisite, ambrosial, and, yup, most decadent chocolate cake you EVER devour.

Since I like to make decadence healthy you can actually afford indulging in this treasure. I promise you that this is the most guilt-free yet most guilty-tasting chocolate cake you’ll ever sink your teeth in. It is actually only a handful of ingredients, but it is of utter importance that all of these ingredients are of pristine quality. I used real Lindt 70% chocolate, so use the best dark chocolate you can lay your hands on.

Thanks to this indulgence being flourless, it is and stays gooey, melt-in-the-mouth and moist and does not dry out. The egg whites make the cake fluffy and moist without the nasty sponginess of flour-full cakes. This cake doesn’t puff up much, but I think towering cakes should be left to weddings anyway!

Serve this cake on the best plates you have, get your nicest tablecloth out, light a candle, and play some Handel – anything else wouldn’t do this lavish delicacy justice. Don’t say I didn’t warn you.

Makes one medium-size round cake

150 g organic coconut oil or butter or a mixture of the two
150 g high-quality dark chocolate (70%; I used Lindt Excellence)
50 g cocoa powder
6 eggs, separated
100 g honey (or coconut sugar)
1 tsp vanilla
1/2 tsp cinnamon
(optional)
pinch of sea salt

For the frosting

150 g high-quality dark chocolate (70%; I used Lindt Excellence)
3 tbsp coconut cream
pinch of sea salt
optional: ca. 30 g milk or white chocolate and 1 tsp coconut oil for the pattern

Preheat the oven to 130 °C. This is important. Although this seems like s low temperature, too much heat will cause the cake to burn outside and the gases to expand too rapidly, leaving a deflated cake with a pancake-y texture. Melt the fat, vanilla, (cinnamon) and chocolate in a double boiler while stirring, turn off the heat once half the chocolate is melted and keep stirring. Take the chocolate off the boiler. Meanwhile, cream the yolks with honey or sugar in a large mixing bowl. Beat the egg whites with the sea salt in a very clean, separate bowl on high until stiff peaks form. Pour the melted chocolate-fat-mix into the yolk mix, stirring. Finally, fold in the whites VERY CAREFULLY. Bake for 40 minutes. There should still be a bit of chocolate on the toothpick!

Let the cake cool and prepare the frosting by melting all the frosting ingredients together and icing the cake. You might want to put a ring around the cake to help the frosting build up on top of the cake and not running down on the sides. Refrigerate. If you like you can melt a bit of white or milk chocolate with coconut oil to “paint” a pattern on top of the cake. Serve with icecream (link) or apricot coulis. The cake will last in the fridge for almost two weeks.

Enjoy!

Gluten Free Vegan Hot Cross Buns {refined sugar free}

Gluten Free, Dairy Free, Sugar Free Hot Cross Buns

Happy Easter everyone! What are family gatherings without traditions? When you have food intolerances – especially gluten intolerance – it can be hard to enjoy all the family traditions. Birthday cake, christmas pudding, and pumpkin pie are all off-limits, and so are the ultimate Good Friday traditions of fish and chips and hot cross buns – or aren’t they?

You will need to get your hands dirty, folks, but it’s definitely worth it! I created some yummy gluten free hot cross buns for you that you can safely serve your gluten-eating family and friends. Gluten free, dairy free, egg free, nasty free, but with lots of flavour and texture and full of juicy sultanas. I did not use lemon peel in this recipe, as no-one in my family is a huge fan of them, but you are of course welcome to add it. Looks like Easter is saved this time. And I have eight more months to serve you the yummiest gluten free ginger bread you’ve ever had!

These buns are fairly easy to make, but you have to calculate a bit of time – 15 minutes of kneading, 45 minutes of resting, and another 25 minutes of baking.

Makes 9 buns

90 g sorghum flour
75 g rice flour
35 g arrowroot
1 tbsp dry yeast
1 tsp cinnamon
1/2 tsp cardamom
1/2 tsp nutmeg
generous pinch of salt
3/4 cup plant milk
2 flax eggs (1 flax egg = 1 tbsp flaxseed dissolved in 4 tbsp filtered water)
2 tbsp coconut oil, melted
3 tbsp organic maple syrup
dash of lemon juice
75 g sultanas
30 g (sugar-free) citrus peel (optional)
75 g erythritol
2 tsp lemon juice

Mix the flours, arrowroot, yeast, spices, and salt in a large mixing bowl until one colour. Beat the flax, oil, maple syrup, and lemon juice in a separate, smaller bowl. Pour the wet ingredients into the dry ingredients and beat on high until well combined. Fold in sultanas and citrus peel, if using. Thoroughly wet your hands to prevent sticking, shape nine equally big buns and spread on a prepared baking sheet. As they will rise a bit, remember to leave enough space between the individual buns. Cover with cling wrap and let rest in a warm place for 45 minutes.

Meanwhile, preheat the oven to 200 °C. When the buns have risen, remove the cling wrap, shape a cross on every bun, and bake on the middle rack for approximately 25 minutes or until golden brown at the edges. Turn off the oven and take out the buns to cool on a wire rack. Meanwhile, prepare the icing – mix erythritol and lemon juice until of pasty consistency. Fill in a sandwich bag and cut a tiny hole in it to spread the icing in the lines of the crosses.

Serve the buns while still hot and fresh. They will get a bit solid the next day, but you can easily chuck them into microwave or oven to bring them back to life.

Enjoy!

Gluten Free Sugar Free Scottish Shortbread

The best shortbread out of Scotland - and gluten and sugar free, too!
The best shortbread out of Scotland – and gluten and sugar free, too!

I love shortbread. In fact, I’d go miles for a true Scotch shortbread. And I don’t even like biscuits and cookies normally. Scottish shortbread was one of the first things I missed on the gluten free diet. And pizza. And crusty bread. And carrot cake. Not because you cannot get gluten free shortbread in the supermarket. You can. It tastes alright. I wanted a shortbread that doesn’t taste alright. I wanted a shortbread that tasted freaking awesome, fantastic, to-die-for, melt-in-the-mouth – and I got it.

I wanted to create a healthy-ish gluten free version of classic Scottish shortbread, not any old shortbread, but that rich, buttery, sandy, melt-in-the-mouth type of shortbread like made by Walkers brand which I absolutely adored in my pre-gluten-free days. With just three ingredients – organic salted butter, stevia, and a healthier gluten free flour blend with protein-rich and low-carb sorghum flour, my Scottish shortbread is totally free from any sugars, trans fats, flavourings, and preservatives, while featuring the taste, flavour, and the oh-so-good texture of the original. it took several attempts to create the perfect gluten free AND sugar free shortbread, but here is one that you should definitely not postpone to make!

Although I know that any Scotsman would be shocked by the concept of sugar free shortbread, my aim is to re-create old favourite recipes in a healthy and allergy-friendly way. In fact, shortbread is the only type of cookie where refined sugar can be totally replaced, as it is meant to be pale anyway and doesn’t need browning like other cookies do.

You will find that this shortbread is nothing short of divine, and – without wanting to flatter myself too much – probably the best you’ll get served outside of the highlands. It is very easy to make, too. The most important thing: Don’t EVER skimp on the butter! The butter is the star ingredient here, and that’s also why there cannot be a vegan Scottish shortbread. You can of course replace the butter with vegan spread if you must, and the result would no doubt be yummy, but it wouldn’t be Scottish shortbread. At all. Use BUTTER! Use organic butter, not homebrand or anything like that. Use salted butter. I know all those shortbread recipes out there calling for unsalted butter. Don’t listen to them. Use salted butter. If you can’t/don’t want to use salted butter for whatever reason, remember to add a generous pinch of sea salt to the dough. Remember there is THREE ingredients (counting the flours as one). There is no baking powder, no egg, no xanthan, and no vanilla! I didn’t even add flax, which I normally do with everything. This is a purist food! A note on the sweetener: If you use stevia, you can taste it in the final product. I like stevia and think it is the best calorie-free sweetener around, but if you loathe the taste of stevia, use erythritol, xylitol, or another granulated sweetener.

Makes 18 thick Scottish shortbread fingers (20×20 cm baking pan)
Adapted from Gluten Free Baking Bear

170 g organic, salted butter, 10 minutes out of the fridge (if using unsalted, you MUST add salt to the dough)
1/4 cup stevia, erythritol or other granulated sweetener (use slightly more if you like it sweet)
100 g sorghum flour
140 g arrowroot
60 g white rice flour

Preheat the oven to 150 °C. Make sure that your butter is cold! Do not use butter that is room temperature or warmer, or you will seriously ruin your dough! Mix the stevia and flours in a bowl until one colour. Now add the butter in chunks and rub in the dry mass WITH YOUR HANDS. The idea is that every bit of flour gets covered by butter. This is the fun part, especially if you get to lick your fingers in between! The dough will first resemble crumbles, and as the butter gets soft while you knead, the dough will soon come together as a ball, and the mixing bowl ends up clean and dry. No need to refrigerate the dough ball – just keep having fun!

Now press the dough into the baking pan. Tip: To lift out the shortbread more easily later, you can line the pan with some baking paper. Unfortunately, the shortbread will always crumble a little bit, which cannot be completely avoided. It doesn’t matter. Once, you have pressed the dough in evenly and pressed it flat with your hands, divide the dough with a rubber spatula into 18 bars (6×3). Next, poke holes into the bars with a fork, making sure the fork hits the bottom of the pan. Every bar should have three to four rows of “fork holes”. Place in oven and bake for approx. 40 minutes or until the edges turn VERY LIGHTLY GOLDEN. Some recipes say up to 60 minutes, but you must make sure not to over-bake the shortbread, as Scottish shortbread tends to be rather a little but underdone and crumbly instead of crispy and burnt.

Turn off the oven, take out the pan and let it cool down a bit before re-cutting the lines with the spatula and transferring the shortbread into the fridge. The shortbread will assume its unique and divine texture in the fridge. Lift out of the pan and devour.

Enjoy!

Gluten Free, Ultra Low Fat Gooey Chocolate Cake (egg-free, dairy-free option)

Almost Fat Free Chocolate Cake with Chia Seeds!

Do you feel guilty after a big slab of chocolate cake? Does one bite of chocolate cake make you want to devour the whole thing? Have you tried “low-fat” chocolate cakes from the shop, finding them dry, tough and unpalatable and/or featuring a plethora of ingredients you really shouldn’t put into your body?

Yes?

Well, then I have the solution!

The solution? My ultra low fat, ultra fluffy, ultra gooey, ultra chocolatey chocolate cake! With only 2 or 3 g of healthy fat, mainly omega 3, (depending what yogurt you use and how big your slabs are ;-)), and still reasonable 17 g of carbs per slice, this moist and fluffy yummyness beats any store-bought cake by a mile – in terms of nutritional facts AND taste! And that without any processed ingredients!  The secret to this wizardry? Chia seeds and (vegan) yogurt, which replace both the oil/butter and the eggs in this cake.

So don’t think that I sacrifice nutritious whole foods for the sake of going low fat – chia seeds are one of nature’s most nutrient dense food sources and, in fact, the highest plant based source of omega 3, fibre, and protein. With as much protein per 100 g as a steak, almost 20 g of omega 3, and a whopping 37,5 g of fibre (this is 150 % your RDA), chia seeds are one of those superfoods that shouldn’t be left behind in no worries cooking and baking! As they are hydrophilic, they can be ground and mixed with water before baking to replace eggs and even oil – a bit like flax seeds, albeit kinder to your tummy!

I used conventional gluten free all-purpose flour for this cake and am currently devising a “whole grain” version with healthier flours to lower the carb content. Meanwhile, bake this cake and grab a slice, as it is seriously good and seriously healthy, even with the conventional flour!

Makes one round 24 cm spring pan or twelce slices

160 g gluten free all purpose flour
50 g unsweetened natural cocoa powder
1 1/2 tsp baking soda
1 tsp salt
1/4 cup sugar
1/4 cup stevia
4 tbsp chia seeds, ground and mixed with 12 tbsp water to a paste
1 tbsp vanilla
500 g yogurt of choice (fat-free is okay!)

Preheat the oven to 180 ° C. In a medium bowl, sift the flour, cocoa, soda, and salt. In another medium bowl, beat the sugar, stevia, “chia eggs”, and vanilla. Fold in yogurt until well combined. Now stir the wet ingredients into the dry ingredients and mix on low just until combined. Do not overbeat. Scoop into greased or silicone sringpan and bake for 20-25 minutes or until it passes the toothpick test. Make sure not to overbake the cake, or else the centre will not be nice and gooey!

Enjoy!

Healthy Peanut Butter Biscuits (Vegan, Gluten Free, Starch Free, Grain Free, Low Carb)

Healthy Grain Free Biscuits

My husband loves biscuits. I mean, he LOVES LOVES LOVES biscuits. There used to be times when not a day went by without him buying a colourful packet full of concentrated bombs made of wheat, sugar, processed and hydrogenated oils, emulsifiers, thickeners, and preservatives. And for him, those bombs served as a perfect substitute for breakfast, not to mention that no cup of tea was complete without them. Luckily for me, my gluten intolerance has prevented me from following suit for some time, but even I admit that I DO long for a nice, crunchy bickie along the way – and I don’t even have a sweet tooth!

As probably everyone is aware, the plethora of “gluten free” biscuits lining the supermarket shelves at exorbitant prices might be gluten free – and some of them might even be quite tasty – but they are a far cry from healthy. What I wanted was tasty biscuits that even though they cannot quite replace broccoli are healthy-ish, without creepy ingredients, don’t break the bank, are quick and easy to make, and that even my junk addicted husband would eat. And that happen to be gluten free.

What I came up with was not only gluten free, but also dairy free, soy free, egg free, vegan, and almost sugar free. With just the right amount of almond flour left to produce two dozen of yummy cuties, some ideas, and a healthy dose of curiosity, I set out to create one of my most successful experiments, the result of which hubbs happily gobbles down – and asks for more. Him snooping around the biscuit tin and devouring a handful of these biscuits at work is probably the most convincing argument that these biscuits are good. Very good.

My husband never bought biscuits from the shop again.

They actually don’t taste overly peanut-buttery, so if you really fancy peanut butter, you might want to replace all the vegan spread with the peanut butter and even add some peanuts to the dough. This is a great base for an all-time favourite biscuit recipe, as it is so versatile. You can use other nut butters, giving it a different flavour each time, or you can add cocoa powder and chocolate chips for chocolate biscuits, or dried fruit and oats for muesli biscuits. The choice is yours. They are whipped up in a jiffy and take only 12 minutes to bake. So whether you fancy a morning or afternoon snack right now or need something sweet to conclude a nice meal, head to the kitchen now! These babies are so healthy you can even have them for breakfast!

As the title reveals, my biscuits are not only gluten free, but completely grain free and starch free, thanks to lovely almond flour and my favourite ingredient flax, both of which come with a healthy dose of satisfying protein and fiber, as well as healthy fats, including omega 3! I would recommend using some sort of “real” sugar for a nice texture and colour, but you can probably use stevia throughout if you follow a strictly non-sugar diet. I used half brown sugar and half stevia for the biscuits displayed in the picture, and with 7 g of carbs per large biscuits, they are still fairly low-carb even if you use some regular sugar. I used vegan spread and flax as egg replacer to make a truly vegan biscuit, but feel free to use real butter or beat an egg in the dough – both of which improve the flavour even further. Note that I used reduced-fat spread, as the almond flour already contains a lot of fat. Feel free to use full-fat margarine if fat is not your worry, or butter as mentioned above.

Chilling the dough for 30 minutes before baking improves flavour and texture slightly, but is not a must. If you don’t chill the dough, the biscuits’ appearance is a bit “rougher”, but they are yummy nonetheless!

Makes 24 biscuits
Inspired by Erin

250 g almond meal (blanched for lighter biscuits or natural as in the pictures)
7 tbsp brown sugar or other sugar
7 tbsp stevia or other sweetener
20 g ground flax seed
1/2 tsp baking soda
1/2 tsp sea salt
80 g peanut butter, smooth or crunchy
40 g reduced fat vegan spread
2 tsp vanilla

Preheat oven to 180 ° C and prepare two baking sheet. Cream peanut butter, spread, sugar, vanilla and stevia until light and fluffy. Mix the almond flour with the soda and salt and carefully fold into the wet ingredients. The dough should be sticky and wet. If it appears to dry, add 2 tbsp of water. Once blended well, you can chill the dough for 30 minutes to achieve smoother looking biscuits (see picture below the cookies on the right hand side). If you are in a hurry or very hungry, just skip this step and put up with coarser looking biscuits.

right: cookies with dough being chilled before baking, left: cookies with the dough not being chilled

Take 1 tbsp, form into a round shape and place onto baking sheet. Repeat with the rest of the dough until you have 24 biscuits. You will probably need two sheets as there needs to be space between the biscuits (they will spread out during the baking process).

Bake for 12 minutes – they might still appear slightly raw, but you must switch off the oven now, otherwise you risk them getting too hard as they will continue too harden. Let them rest in the hot oven for a few minutes, then take out and let cool (if you have the patience).

Store in an airtight (preferably metal) container where they will keep for up to five days.

Enjoy!

Gluten Free Vegan Banana Muffins with Maple Frosting

Gluten Free Egg Free Banana Maple Muffins

Next time you see a bundle of overripe bananas in the supermarket marked down to next to nothing, don’t walk on by! There is sooo much you can do with ripe bananas! I just cut them up and chuck them in the freezer where they keep nicely until I want to create a recipe with them – or I just have them as they are! There is truly nothing more divine than frozen bananas, and they are great in smoothies and milkshakes, too!

My hubs asked me for some cakes he could take to work, so I made some banana muffins – some without frosting for on the road, and some with frosting for a little indulgence at home! These are wonderfully moist, packed with fiber from flax, and they are delicious in many ways. Due to the mashed banana inside, there is no need to add heaps of fat, so they are are a healthy cheat treat for those wathing their waste lines! The vegan maple frosting works beautifully with the banana flavour, too. Oh, and they are pretty foolproof, so you better start making them now – your kids will love you for these! (My hubby is a bit like a child in that he loves unhealthy things – he gobbled these up though, so I am secretly snickering behind his back that these are healthier than he thinks. I didn’t tell him about the flax!)

Makes 12 muffins

3 over-ripe bananas, mashed
100 g arrowroot starch
50 g white rice flour
50 g brown rice flour
100 g sugar or other sweetener (you should use at least some “real” sugar to achieve a nice texture and colour)
90 g low-fat vegan spread
50 g honey
30 g flax
3 tbsp almond milk
1 tbsp molasses
2 tsp baking soda
2 tsp vanilla

Frosting
75 g powdered sugar
60 g low-fat vegan spread
5 tbsp maple syrup
2 tbsp almond milk
1 tsp vanilla

For the muffins, preheat oven to 180 ° C. Melt spread, sugar, honey, molasses and vanilla over low heat until spread is melted. Turn off the heat and whisk in the mashed bananas and almond milk (I know it’s tempting, but don’t eat this mix – at least not all of it!). Mix flours, flax, and soda in a different bowl, and slowly add banana-butter-mixture to the flour mixture. Mix until well combined, then scoop into muffin pan and bake for approx. 20 minutes or until muffins pass the skewer test. Turn off heat, let muffins rest in the pan for 10 minutes, then turn to wire rack and let cool completely.

Only scoop the frosting on top of the muffins once they have cooled down completely, as otherwise it will melt. Whip all ingredients for the frosting until light and fluffy, then store in the fridge until stiffened up and decorate the muffins.

Tip: Mix some walnuts or other nuts or chocolate chips mixed in the muffin batter.

Enjoy!

Vegan Paleo Carrot Cake 2.0 {low carb, low fat}

Paleo Carrot Cake
Paleo Carrot Cake

THIS. IS. THE. CARROT CAKE.

I know I should not be so obsessed with something I thought up and made myself. But this carrot cake is – honestly – a stroke of genius.

I know.

In case you don’t, let me tell you – you can find literally TONS of recipes for “paleo carrot cake” on the net. After all, which cake should be more suitable to adapt to a grain free, sugar free diet than this carroty, nutty yummyness and goodness?

However, what is a carrot cake without frosting? It’s nothing! And what do most “paleo” carrot cake recipes offer you as a frosting? Cream cheese frosting! Dairy cream cheese frosting!!! Hello???!!!! How on earth is it paleo with a cream cheese frosting??? What’s the point making a great, healthy, grain free, paleo carrot cake when you ruin your efforts with a dairy frosting? NOT GOOD!

It’s been a while since my first carrot cake recipe, and as I am continuously trying to improve my recipes, I wanted to come up with a true paleo, grain-free version of my favourite cake – not only gluten free, which is still relatively easy, but totally grain free, gum free, starch free and, of course, refined sugar free. And it is vegan, too! And with a dairy free frosting. Yes. A carrot cake with no worries, basically.

Since I couldn’t find a recipe online which appealed to me, I experimented with my two new favourite ingredients – almond flour and coconut flour. By the way, I ended up making muffins again as they are easier to handle and to give away than a slab of cake – but the amounts stated in this recipe should be enough for a round, 9 inch layer cake. The frosting is as easy and foolproof as the whole recipe – just coconut cream with a bit of maply syrup for sweetness and vegan margarine for firmness. Easy peasy!

These beauties are so yummy you won’t even care how many calories are in them, but just in case you are interested – one of these carrot cake muffins contains 100 kcal. 100! That’s less than two apples! Only that these keep you fuller for much longer than apples do. These muffins have all you need to face the day – brimming with protein, vitamins, minerals, fibers, and with few complex carbs, few healthy fats. You can/should have one carrot cake muffin for breakfast. Have two. Have three, and even after three muffins you will still have ingested fewer calories than with your standard bowl of sugary cereals and milk. Three muffins equal the carb intake of 1 banana.

They stay fresh for a long time (you should store them in a fridge though).

The best thing is – my hubs, who is so not into healthy eating, loved them, and that’s the whole point of healthy baking – that nobody thinks it’s healthy!

P.S.: I take back my statement about frosting. These carrot cakes you can have without frosting, they are that good. But frosting doesn’t hurt anyone. 😉

Makes 18 muffins

50 g rice protein powder
75 g coconut flour
25 g almond flour
generous pinch of salt
1,5 tsp. soda
1,5 tsp. cinnamon
1 tsp nutmeg
1 tbsp molasses
40 g coconut syrup or date syrup or other liquid sweetener
1 banana, mashed
2 t vanilla
4 flax eggs (1 flax egg = 1 tbsp flaxseed, dissolved in 4 tbsp filtered water)
300 ml almond milk
5 large carrots, grated
60 g chopped walnuts
100 g chopped dates

For the frosting
Solidified part of 1 tin full-fat coconut cream, stored in the fridge overnight
1 tsp vanilla
1 tsp maple syrup
1 tbsp nuttelex or vegan margarine or coconut oil
stevia to taste

Preheat oven to 180 °C and line a muffin mould with paper. Mix the dry ingredients for the batter (protein powder, flours, salt, soda, spices, flax) until one colour. In a separate bowl, combine wet ingredients (molasses, honey, banana, vanilla, eggs, almond mik) until well combined. Stir wet ingredients into dry ingredients and blend well with hand blender. Stir in carrots, nuts, and dates. Scoop batter into 18 muffin moulds and bake in preheated oven for 20 minutes or until a toothpick comes out clean. Transfer to a cooling rack and allow to cool completely before frosting – if at all frosting.

Carrot Cake with Maple Frosting

For the frosting, beat coconut cream (only the solidified part at the top of the tin!) with stevia, vanilla and maple syrup until it becomes the texture of whipped cream. Add margarine and whip until it gets to a frosting-y texture. Add more fat if it is not solid enough for your liking. Only use on completely chilled (overnight) muffins and always store in fridge!

Enjoy!

Gluten free, low carb, vegan carrot cake muffins

WP_000398
Carrot Cake with whipped cream filling
WP_000396
Carrot Cake with vegan frosting

Those who think that gluten free cooking is complicated and tasteless hasn’t tried these fantastic carrot cake muffins – they are ready in a jiffy, packed with fibre (they really are satisfying!) and beta-carotene, low carb and low GI, and of course completely gluten free, dairy free, soy free, and sugar free! Have I mentioned that they are extremely yummy, too?

For all frosting addicts out there who cannot or don’t want to have milk, yes, I created a dairy free frosting that tastes like a cream cheese frosting! And no, it does NOT contain Tofutti or any other GMO-laden soy crap. It is made with coconut milk – however, you won’t taste the coconut much in the final product so don’t fret if you are not the biggest coconut fan in the world – you will still like it, I promise. You can find the recipe here and below. Update: I created a new vegan and sugar-free frosting without any nuts. Recipe here.

Alternatively, these muffins are even better filled with my vegan whipped cream! Highly recommended! (see left-hand picture above)

Watch out, these delicious little cakes will be gobbled up before you know it – so better make a bigger batch if you need them for a party! You can easily double or triple this recipe. They last well in the fridge (in fact, they taste even better the next day) and you can freeze them without any worries.

Makes 12 muffins

For the muffin batter
2 eggs or egg replacer to make it vegan
100 g of honey (can be substituted with organic maple syrup or agave nectar)
40 ml olive oil
100 g plain gluten free flour
30 g flax seed
1 teaspoon gluten free baking soda
50 g nuts (almonds and/or walnuts are best, but you can use any nuts) – more nuts improve the flavour even further
1 1/2 cups of freshly grated carrots – the more carrots, the more moist and delicious your muffins will be
1/2 teaspoon xanthan (if your gf flour mix doesn’t contain it already)
1 teaspoon cinnamon
1/2 teaspoon kosher salt (or Celtic sea salt)
1 teaspoon vanilla
10 dates (optional, but adds taste and texture – could be replaced with raisins and/or sultanas)

For the frosting
1/2 can of coconut cream (full fat or light – both work fine)
1 teaspoon of honey
pinch of salt
80 g coconut oil
80 g vegan margarine (Nuttelex) or butter
1/8 teaspoon xanthan to thicken

Muffins:
-Preheat oven to 180° C
-Beat honey, eggs, oil, vanilla in a large mixing bowl until smooth
-In a separate bowl, combine the dry ingredients: flour, flax, soda, xanthan, salt and cinnamon
-Add to wet ingredients and beat until smooth
-Mix in carrots, nuts and dates and transfer batter to muffin pan
-Bake for 30 min or until a toothpick comes out clean

Frosting:
-Heat coconut milk, honey and salt, bring to the boil and let simmer for 10 minutes
-add xanthan, stirring continuously, bring to the boil and remove from heat – the mix should have a shiny surface
-stir in coconut oil, whisking or using a blender
-set to cool for 15 minutes and transfer to fridge for another 2 hours (the longer, the better), until mix has firmed up
-when it is thoroughly chilled, transfer coconut mix to a mixing bowl (you might need to blend it again with a stick blender to make it really smooth), add the margarine or butter and mix with hand blender for 2 minutes until thick and fluffy
-decorate muffins with the frosting using a cake decorator or silicon spatula

Enjoy!

Tips
– use sugar free orange marmalade instead of honey, to get a more tangy and zesty taste
– add some ginger to the dough for some exotic spiciness
– mix some gingerbread or pumpkin pie spice in the frosting for a delish Halloween or Xmas treat
– replace the carrots with cooked pumpkin or sweet potato for an extra luscious treat
– you can of course make this a cake instead of muffins. This recipe is enough for one round 20 cm baking pan. Double this recipe for a bigger cake.