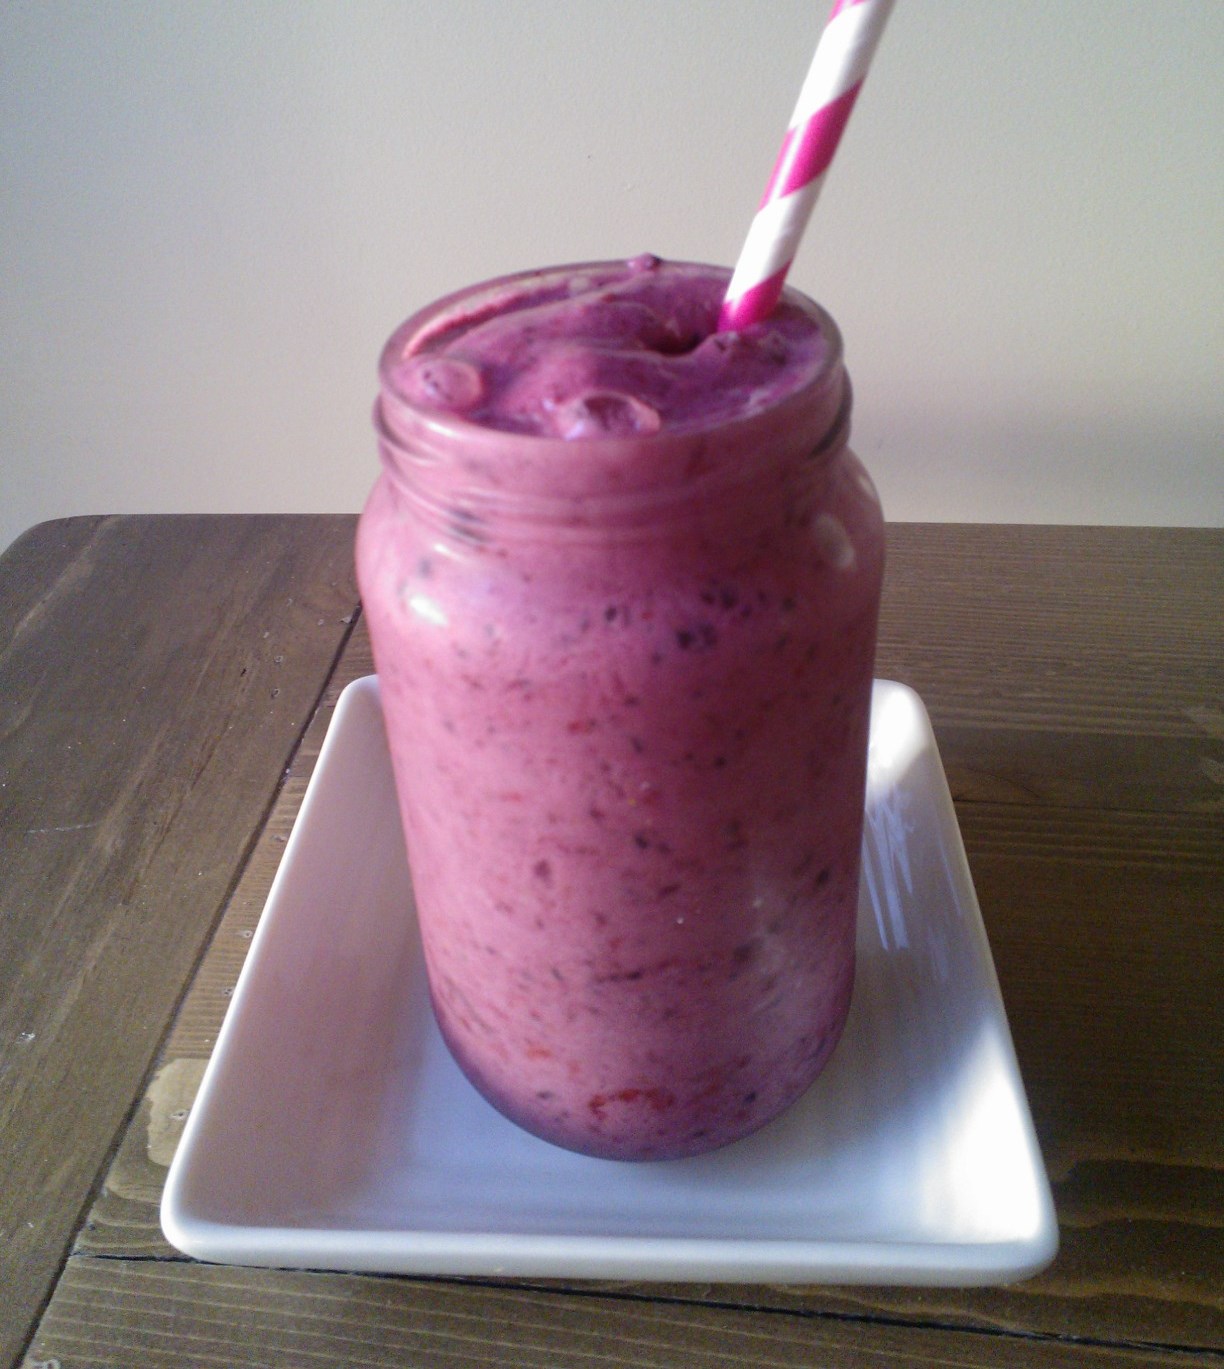
Berry and Rosewater Smoothie – no fat, but a lot of protein!
If you like Turkish Delight and berry smoothies, you are gonna love this. If you don’t like Turkish Delight, but like berry smoothies, you can leave out the rosewater and have a berry smoothie. Not just any old berry smoothie, but one that is very low carb, very low fat and jam packed with protein! One that doesn’t only taste great, but which keeps you going for hours. And you are gonna love it.
200 g non-dairy yogurt or non-dairy milk or a combination of the two 100 g berries of choice (I used mixed) 1 cup of icecubes 1 scoop rice protein powder stevia to taste (I used approx. 1 tbsp) a few drops of rosewater essence (can use other essence such as peppermint or vanilla or omit)
Blitz all ingredients in a blender or mini food processor and serve.
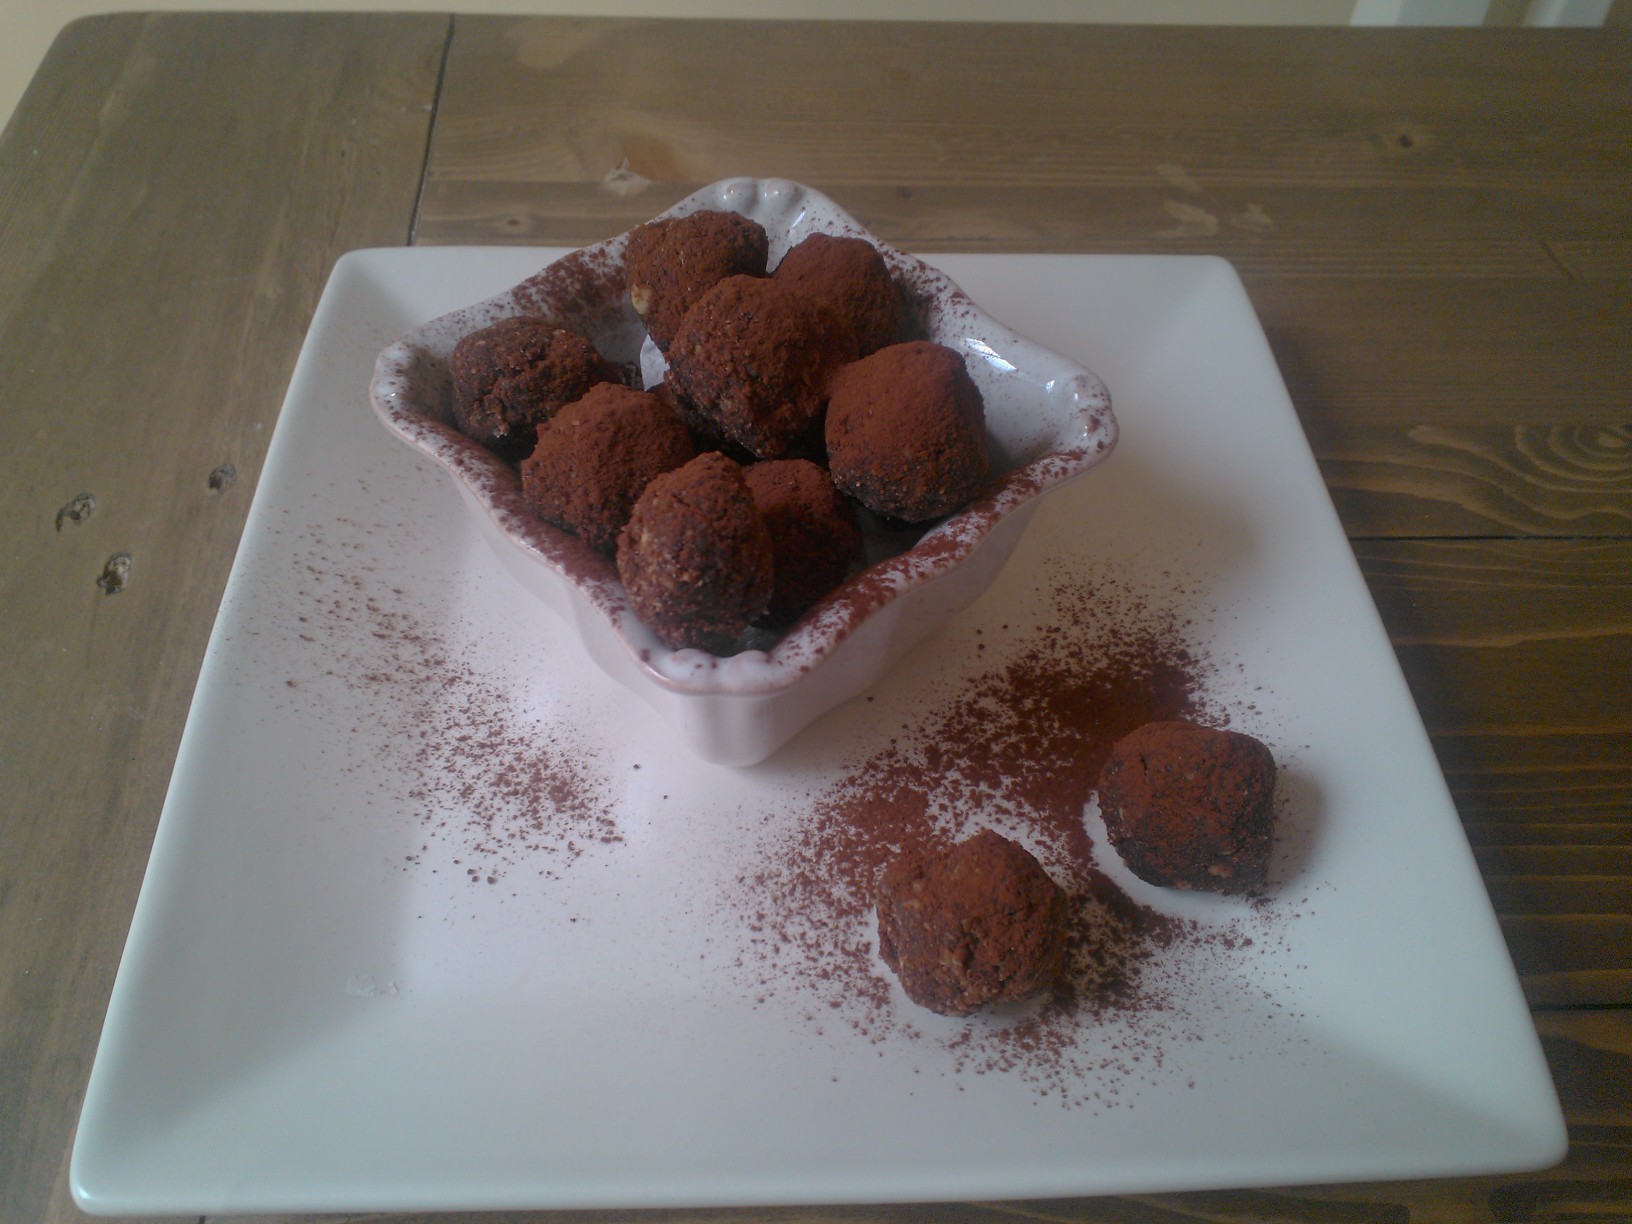
Doesn’t the title make your heart jump? And look at the picture – if this doesn’t make your mouth water, I honestly don’t know what would. Everyone wants chocolate truffles! (Even those who profess they don’t want them.) Well, now, whether you are a die-hard paleoist, a convinced vegan, on a diet, or a chocolate truffle connoisseur – you can now have your truffles and eat them too!
With just four ingredients – yes, FOUR (okay, I didn’t count the vanilla and the salt)! – and not a trace of refined sugar or dairy in sight, there is simply no reason not to enjoy decadent dark chocolate truffles anymore! Save the flight to Belgium (and your feeling of guilt) for another day. These chocolate truffles are so healthy you can have them for breakfast (I do, anyway). With 3 g of net carbs and 3 g of healthy fats per truffle, you can have two truffles. Or three. Or four. You will probably be satisfied after one or two though, as they are filling and surely curb your cravings for a long time! You can probably even go on a chocolate truffle diet by replacing your usual afternoon snack with one of these beauties – you will definitely save calories, be more satisfied, and put a lot of goodness in your body on top of it all.
Still not convinced? My I quote my sweet husband saying: “They taste like proper chocolate truffles!” If you don’t know my husband, let me just tell you he is a junk food addict. He loves sugar, wheat and processed nibblies. For him, fruit is an apple pie and veggies are potato chips. I have a hard time getting healthy stuff into him. So there, if he says they “taste like proper chocolate truffles”, it is the best proof that THEY TASTE LIKE PROPER CHOCOLATE TRUFFLES.
No go forth and make chocolate truffles.
Makes 15 truffles
60 g coconut flour 60 g nut butter, peanut butter or tahini, soft 60 g agave syrup, honey (if not strictly vegan) or any other liquid sweetener, melted 30 g unsweetened cocoa powder 1 tsp vanilla pinch of salt
Mix all ingredients, preferably by hand until well combined. You will get your hands very sticky, but that’s the fun part of it. You get to lick your fingers. Mhm…chocolate fingers! With slightly moist hands, shape 15 truffles and cover with sifter cocoa.
Tip: Add some peppermint oil for a delightful chocolate peppermint truffle!
Yes, the title is correct – this is a vinaigrette with watermelon in it! And it works just beautifully! If you don’t believe that a watermelon vinaigrette works, you better see for yourself, as this is whipped up in a matter of minutes, with just a handful of ingredients! I have tried it on Greek Salad, Salade Nicoise, as well as chicken salad, and it is absolutely fabulous no matter what you put it on! Delightfully sweet and refreshing without a hint of any industrial sugars, this low-fat dressing is sure to jazz up your summer salads!
Serves 2
3 cups fresh watermelon, roughly chopped 1 tbsp apple cider vinegar 1 tbsp lemon juice 1 tbsp extra virgin olive oil salt and pepper fresh mint, basil, and parsley
Blitz all ingredients in a food processor until the desired consistency is reached and serve with freshly prepared salad. Lovely! Keeps in the fridge in an airtight container for up to five days.
My husband loves biscuits. I mean, he LOVES LOVES LOVES biscuits. There used to be times when not a day went by without him buying a colourful packet full of concentrated bombs made of wheat, sugar, processed and hydrogenated oils, emulsifiers, thickeners, and preservatives. And for him, those bombs served as a perfect substitute for breakfast, not to mention that no cup of tea was complete without them. Luckily for me, my gluten intolerance has prevented me from following suit for some time, but even I admit that I DO long for a nice, crunchy bickie along the way – and I don’t even have a sweet tooth!
As probably everyone is aware, the plethora of “gluten free” biscuits lining the supermarket shelves at exorbitant prices might be gluten free – and some of them might even be quite tasty – but they are a far cry from healthy. What I wanted was tasty biscuits that even though they cannot quite replace broccoli are healthy-ish, without creepy ingredients, don’t break the bank, are quick and easy to make, and that even my junk addicted husband would eat. And that happen to be gluten free.
What I came up with was not only gluten free, but also dairy free, soy free, egg free, vegan, and almost sugar free. With just the right amount of almond flour left to produce two dozen of yummy cuties, some ideas, and a healthy dose of curiosity, I set out to create one of my most successful experiments, the result of which hubbs happily gobbles down – and asks for more. Him snooping around the biscuit tin and devouring a handful of these biscuits at work is probably the most convincing argument that these biscuits are good. Very good.
My husband never bought biscuits from the shop again.
They actually don’t taste overly peanut-buttery, so if you really fancy peanut butter, you might want to replace all the vegan spread with the peanut butter and even add some peanuts to the dough. This is a great base for an all-time favourite biscuit recipe, as it is so versatile. You can use other nut butters, giving it a different flavour each time, or you can add cocoa powder and chocolate chips for chocolate biscuits, or dried fruit and oats for muesli biscuits. The choice is yours. They are whipped up in a jiffy and take only 12 minutes to bake. So whether you fancy a morning or afternoon snack right now or need something sweet to conclude a nice meal, head to the kitchen now! These babies are so healthy you can even have them for breakfast!
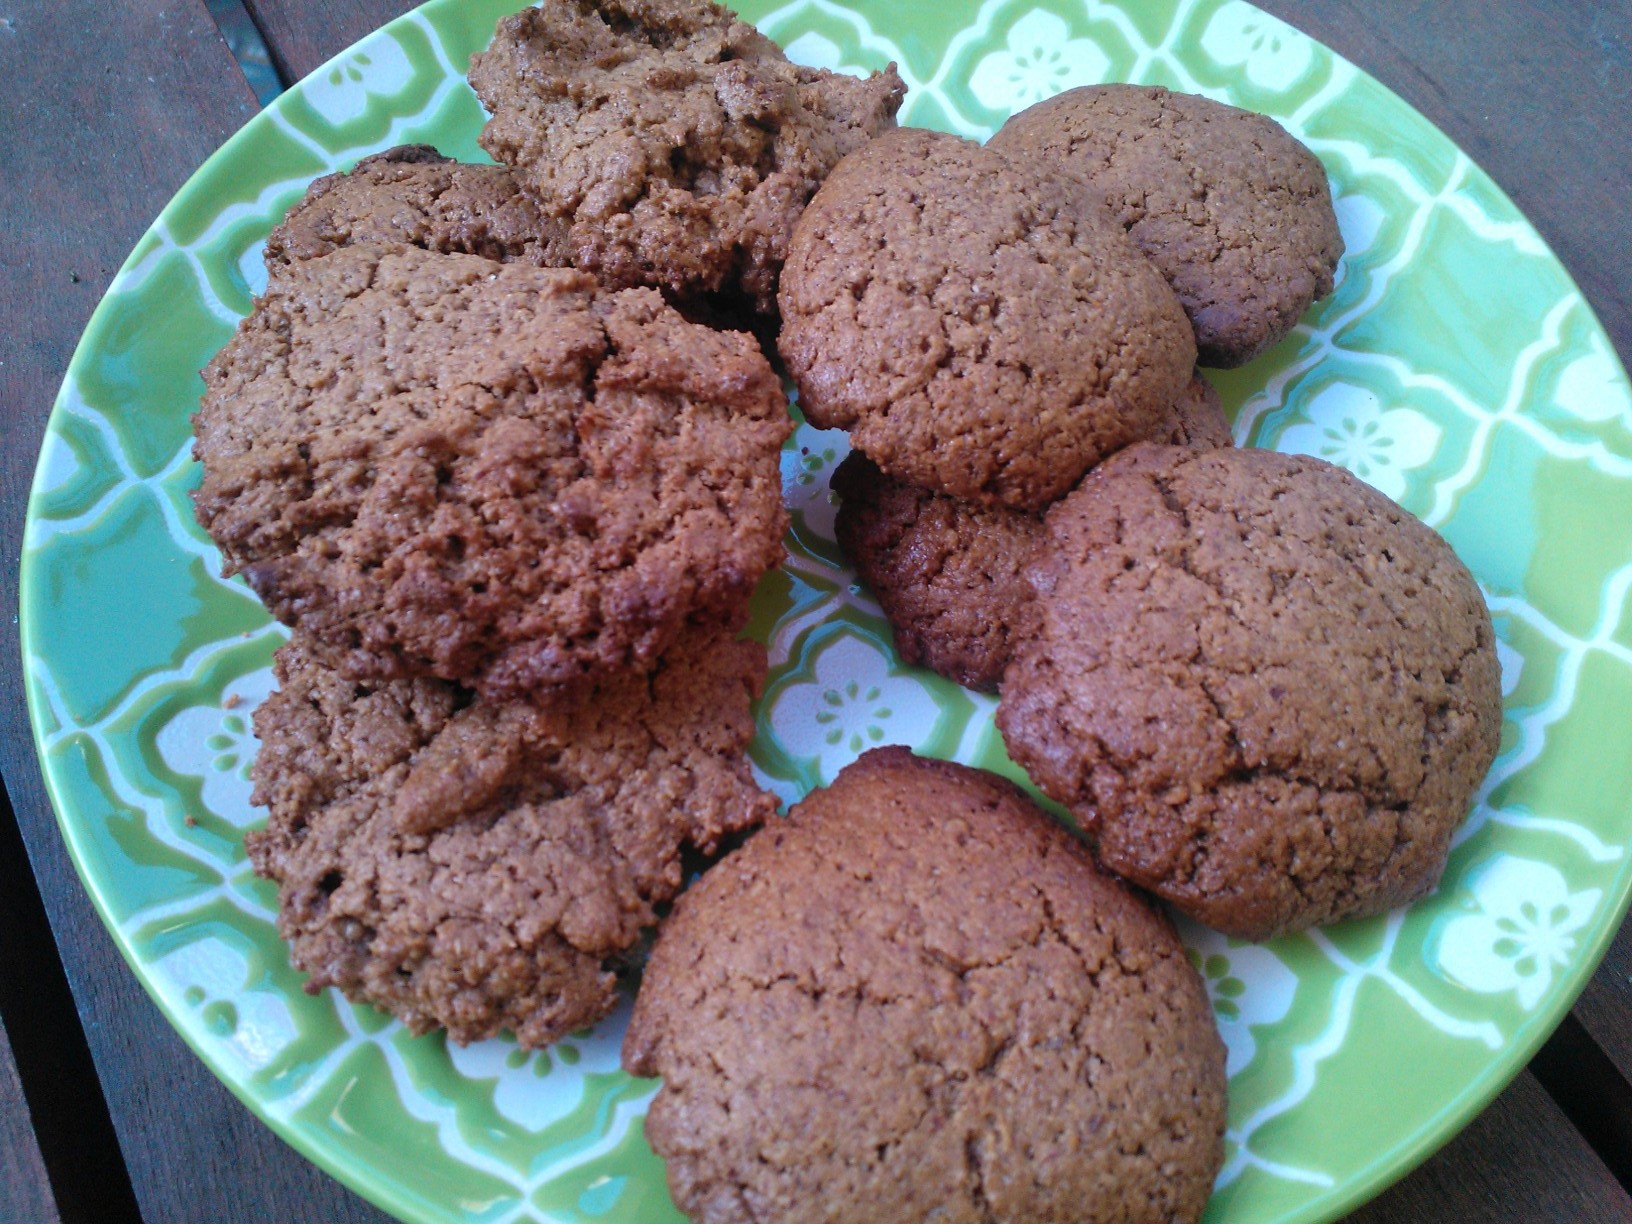
As the title reveals, my biscuits are not only gluten free, but completely grain free and starch free, thanks to lovely almond flour and my favourite ingredient flax, both of which come with a healthy dose of satisfying protein and fiber, as well as healthy fats, including omega 3! I would recommend using some sort of “real” sugar for a nice texture and colour, but you can probably use stevia throughout if you follow a strictly non-sugar diet. I used half brown sugar and half stevia for the biscuits displayed in the picture, and with 7 g of carbs per large biscuits, they are still fairly low-carb even if you use some regular sugar. I used vegan spread and flax as egg replacer to make a truly vegan biscuit, but feel free to use real butter or beat an egg in the dough – both of which improve the flavour even further. Note that I used reduced-fat spread, as the almond flour already contains a lot of fat. Feel free to use full-fat margarine if fat is not your worry, or butter as mentioned above.
Chilling the dough for 30 minutes before baking improves flavour and texture slightly, but is not a must. If you don’t chill the dough, the biscuits’ appearance is a bit “rougher”, but they are yummy nonetheless!
250 g almond meal (blanched for lighter biscuits or natural as in the pictures) 7 tbsp brown sugar or other sugar 7 tbsp stevia or other sweetener 20 g ground flax seed 1/2 tsp baking soda 1/2 tsp sea salt 80 g peanut butter, smooth or crunchy 40 g reduced fat vegan spread 2 tsp vanilla
Preheat oven to 180 ° C and prepare two baking sheet. Cream peanut butter, spread, sugar, vanilla and stevia until light and fluffy. Mix the almond flour with the soda and salt and carefully fold into the wet ingredients. The dough should be sticky and wet. If it appears to dry, add 2 tbsp of water. Once blended well, you can chill the dough for 30 minutes to achieve smoother looking biscuits (see picture below the cookies on the right hand side). If you are in a hurry or very hungry, just skip this step and put up with coarser looking biscuits.
right: cookies with dough being chilled before baking, left: cookies with the dough not being chilled
Take 1 tbsp, form into a round shape and place onto baking sheet. Repeat with the rest of the dough until you have 24 biscuits. You will probably need two sheets as there needs to be space between the biscuits (they will spread out during the baking process).
Bake for 12 minutes – they might still appear slightly raw, but you must switch off the oven now, otherwise you risk them getting too hard as they will continue too harden. Let them rest in the hot oven for a few minutes, then take out and let cool (if you have the patience).
Store in an airtight (preferably metal) container where they will keep for up to five days.
Before Sushi took rank 1 as my favourite food in my late twenties, it was undeniably falafel – and still is, actually. Especially since it is a bit easier to replicate at home than sushi! I love, love, loooooove falafel! Have I mentioned that I am in love with falafel? It is just one of those dishes that makes you think “who the eff needs meat”? Don’t get me wrong, I love meat! But falafel makes lving without a lot easier since it is just so delicious! To me, it is the perfect summer dish with fresh salad, a crispy gluten free pita, homemade hummus, and a glass of dry and ice-cold white wine. Falafel is also very good for you! Chickpeas provide protein, fibre, manganese, iron, and complex carbs, making you feel full for a long time! Chickpeas are also naturally low in fat, so one more reason to dig into those falafels – provided you don’t eat the conventional deep-fried version, which nullifies all the health benefits of the falafels.
Since I adore falafel but don’t believe in deep-frying (especially not deep-fried in recycled trans-fats, yikes!), I wanted to come up with a way to have them oven-baked, not fried. I am happy to announce that it worked! Falafel is naturally meant to be a rather dry dish, so in my view, it doesn’t really matter that the baked falafels might be a little bit drier than the store-bought ones. I think they are just as yummy, and if them being low-fat means that I can have more, I don’t complain either! I prefer not to use any oils besides olive oil and coconut oil; however, olive oil is not suitable for deep-frying, and neither is coconut oil, plus its flavour simply doesn’t work in middle eastern cuisine. So that’s why my falafels are baked!
Another issue is that falafel in a snackbar are most of the time glutenated as they contain wheat flour – a big, big no-no! So that’s why my falafel has chickpea flour, which makes a whole lot more sense as it improves the flavour a lot and naturally enhances the chickpea aroma. One more thing, please do not waste your money on those ready falafel mixes – there is nothing wrong with them per se, but they are basically just chickpea flour with a bit of salt and spices in them. They are chickpea pancakes and have absolutely nothing to do with falafel, no matter what the package says, and they are far too overpriced for what you get. If you want quick and instant falafel-style patties, just mix some chickpea (besan, garbanzo) flour with hot water, lemon juice, salt, and parsley and fry it, which makes for a filling and quick dish, but is simply not falafel! Again, you can make “falafel” patties by buying your own chickpea flour instead of expensive “falafel” mixes!
Which takes me to the second point – even though falafel is relatively easy to make, you have to start one day before you eat them – that’s because you need to soak dried chickpeas over night. Yes, you read right, unlike hummus for which we use canned chickpeas, falafel requires the dried chickpeas, which are half the size of the canned ones. Believe me – don’t try this recipe with canned chickpeas. I don’t say that it’s not delicious, but it’s just not the same! You really need to use the dried chickpeas!
This recipe is adapted from the Shiksa in the Kitchen, but I obviously don’t deep-fry the falafels, since this is a recipe for baked falafel – duh! There is another superb recipe in Yotam Ottolenghi and Sami Tamimi’s book Jerusalem, which recommends using a meat grinder.
Makes 30 falafels
375 g dried chickpeas, soaked overnight in a big bowl, covered in water twice their volume (or so that 5 cm water are above the chickpeas in the bowl) 1 onion, chopped (omit if low FODMAP) 1 garlic clove (omit if low FODMAP) 3 tbsp coriander, chopped 2 tbsp parsley, fresh, chopped 2 tbsp chickpea flour 1 tsp cumin 1,5 tsp salt 1 tsp ground coriander generous grind of black pepper generous pinch of cayenne pepper pinch of ground cardamom 1/2 tsp baking soda (optional)
Drain and rinse chickpeas well. Process with all ingredients bar the baking soda to a coarse paste. Do not overprocess it! Scrape the sides down while you are processing it. It should more look like couscous than a paste, but it must still hold together! Place in a big bowl and fluff with a fork to smash any chickpeas that are not processed. Chill mix for 1 hour before using. If you are using baking soda, use it right before baking. You can omit it, but the falafels do get fluffier with the soda.
Preheat the oven to 210 °C and line a baking tray with baking paper (or use a silicon sheet). With wet hands, shape balls or patties out of 2 heaped tablespoons of the falafel mix. Bake for 30 minutes in total, turning around half way through until lightly golden. Serve with gluten free pita, salad, hummus, and tzatziki.
Tip: It’s great to toss the falafels in a bit of sesame before baking!
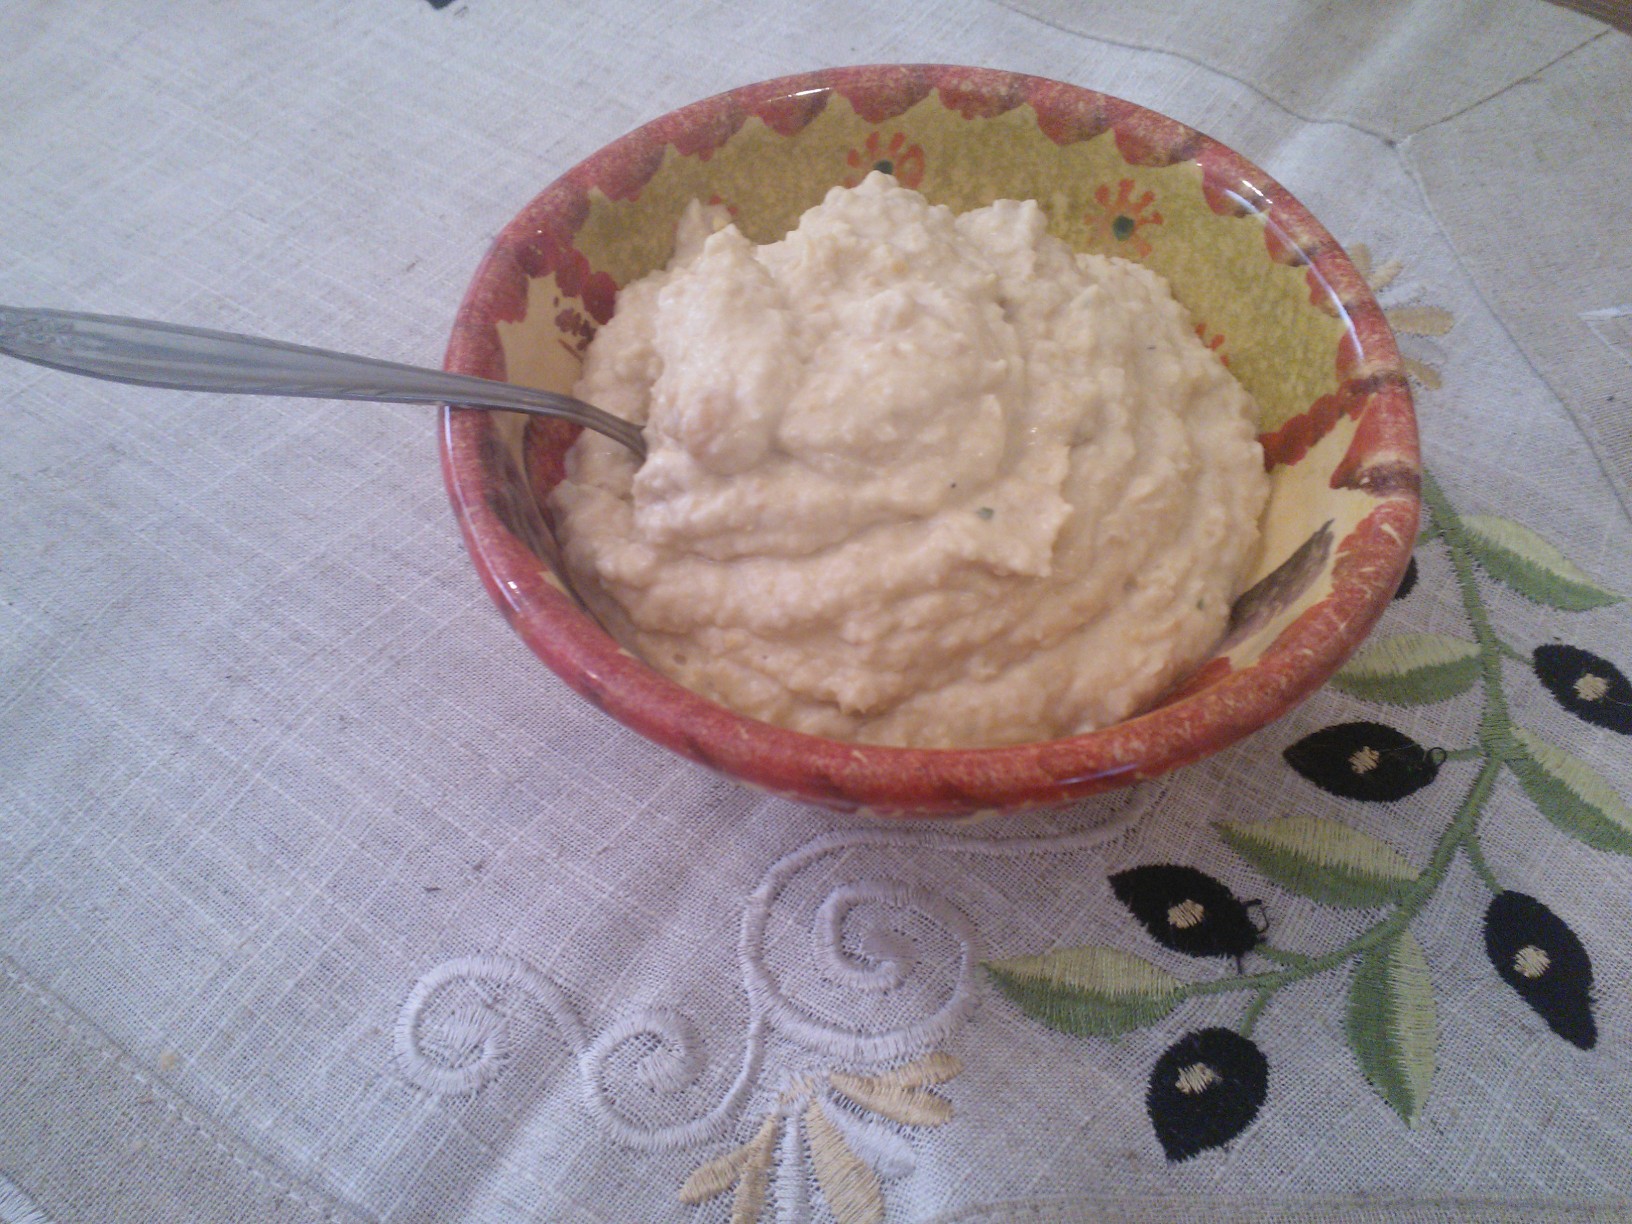
As you will know, store-bought hummus is brimming with things like canola oil and other creepies; what could be one of the healthiest foodstuffs around comes jam-packed with unhealthy fats, artificial flavours…and when you look at the so-called “skinny versions” – they are even worse! Not to mention, quite pricey too for a tiny tub! Actually, it is so easy and so quick to make hummus yourself there is absolutely no excuse not to make it yourself! Plus, you can control exactly what’s in it! And save some money on the side. I just use a dash of very good EVOO for a batch so my hummus is really quite low fat, but feel free to omit or use more olive oil than that! I wouldn’t recommend skipping the olive oil altogether, as it is essential for the flavour of this Middle Eastern dish.
1 can of chickpeas, drained and rinsed 5 tbsp lemon juice 1 tbsp extra virgin olive oil 1 tbsp tahini, hulled or unhulled depending on whether you like a more robust or more subtle flavour 1 tsp kosher sea salt spices to taste (a true hummus needs garlic, but you can omit if you are low FODMAP; I always do! Chilli is great if you like it hot!
Combine all ingredients bar the oil in a food processor while adding 40-50 ml of water. Process until smooth. Serve the hummus in a bowl, make a well in it and put 1 tbsp of oil in the well. Serve with toasted gluten free bread or crudités. Hummus keeps in the fridge for 3-5 days. I currently have a batch in the freezer, so will let you know if it turns out alright!
Do you have new year’s resolutions? Well, my hubby’s is to learn German (which is a very good resolution), I want to become a better baker in 2014, and chances are, you plan to eat healthier or make more home-cooked stuff instead of takeaways – in which case you have come to the right place!
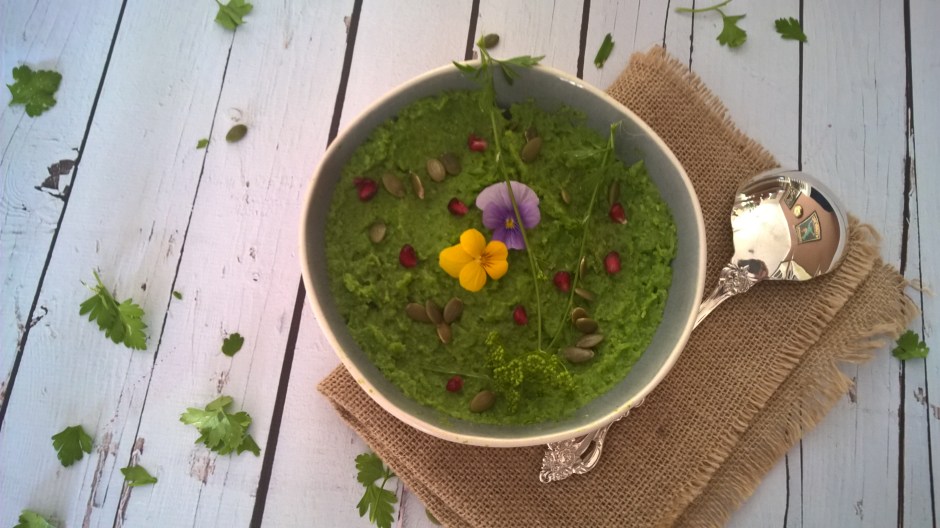
Actually, the title is a little bit confusing – the soup we’re dealing with here is far from a tasteless broth fasting. In fact, it is a warming, hearty, thick, stew-like soup, which is very comforting on cold winter days (as they are now in the Northern Hemisphere), and at the same time, it is the perfect light soup to give your digestive system a break, reset your taste buds and gain back the energy you lost in a holiday-carbohydrate-induced stupor (and maybe lose a couple of pounds, too!).
The good thing is, my magical soup doesn’t taste like anything that resembles the words “diet” or “detox”, but it is pure goodness in a bowl, consisting of nothing but fresh vegetables, water, a dash of olive oil, lemon juice, and a few spices. There is no stock powder, no MSG, no unhealthy fats, no sugar whatsoever, and only minimal amounts of coarse sea salt.
It really is the easiest thing to do – just shovel all ingredients in a stock pot and simmer for 45 minutes. It is the ideal way to make use of any leftover veggies that are withering in your fridge. No excuse to throw away any food anymore! (I hate wasting food.) It is a very inexpensive pleasure, too (if you buy your veggies from the market). And you can adjust the flavour to your liking – use any veggies you like (or which need to go), use herbs and spices (I love spicy food, so I use liberal amounts of chili powder – very good for your metabolism -, paprika, black and red pepper, ginger, cardamom, coriander, nutmeg, you name it). You can use curry powder and a dash of coconut milk for an exotic flavour. Or you can just keep it basic with s+p, garlic, chives, and parsley. Or make it Mediterranean style with crushed tomatoes, basil, and oregano (and a bit of shredded Parmesan). The options are endless.
In taste and texture, this soup resembles a classic pea and ham soup – only far, far healthier! So, chances are, your family will love it too! I sometimes add a bit of protein such as marinated tofu or tempeh. It’s all yours to make this your personal detox soup.
The Ultimate Detox Soup
Serves 6
1 kg fresh vegetables (e.g. leeks, carrots, cauliflower, broccoli, lettuce, parsnips, turnips, peas, green beans, tomatoes, zucchini, mushrooms, celeriac, pumpkin, capsicum, squash…) water to cover herbs and spices (salt, pepper, paprika, chili, ginger, cardamom, coriander, nutmeg, oregano, parsley, basil, chives…) extra virgin olive oil to taste lemon juice to taste
any add-ons to serve (e.g. tofu, tempeh…)
Rinse, drain, and chop the veggies into 1-inch pieces. Place on the bottom of a heavy stock pot and cover with enough water. Bring to the boil, add herbs, spices, EVOO, and lemon juice, and simmer uncovered for 45-55 minutes. Take off the heat and purée with a stick blender. Serve by itself or with a protein add-on and fresh parsley.
Next time you see a bundle of overripe bananas in the supermarket marked down to next to nothing, don’t walk on by! There is sooo much you can do with ripe bananas! I just cut them up and chuck them in the freezer where they keep nicely until I want to create a recipe with them – or I just have them as they are! There is truly nothing more divine than frozen bananas, and they are great in smoothies and milkshakes, too!
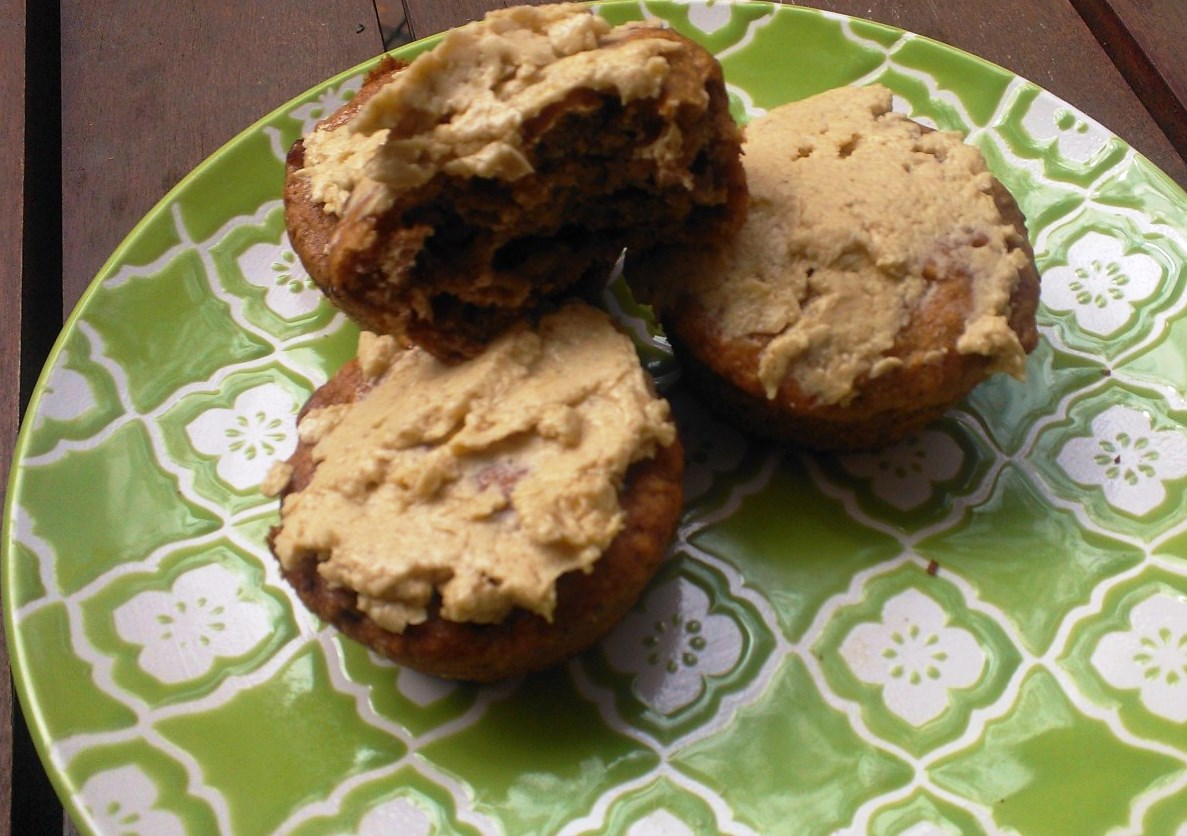
My hubs asked me for some cakes he could take to work, so I made some banana muffins – some without frosting for on the road, and some with frosting for a little indulgence at home! These are wonderfully moist, packed with fiber from flax, and they are delicious in many ways. Due to the mashed banana inside, there is no need to add heaps of fat, so they are are a healthy cheat treat for those wathing their waste lines! The vegan maple frosting works beautifully with the banana flavour, too. Oh, and they are pretty foolproof, so you better start making them now – your kids will love you for these! (My hubby is a bit like a child in that he loves unhealthy things – he gobbled these up though, so I am secretly snickering behind his back that these are healthier than he thinks. I didn’t tell him about the flax!)
Makes 12 muffins
3 over-ripe bananas, mashed 100 g arrowroot starch 50 g white rice flour 50 g brown rice flour 100 g sugar or other sweetener (you should use at least some “real” sugar to achieve a nice texture and colour) 90 g low-fat vegan spread 50 g honey 30 g flax 3 tbsp almond milk 1 tbsp molasses 2 tsp baking soda 2 tsp vanilla
Frosting 75 g powdered sugar 60 g low-fat vegan spread 5 tbsp maple syrup 2 tbsp almond milk 1 tsp vanilla
For the muffins, preheat oven to 180 ° C. Melt spread, sugar, honey, molasses and vanilla over low heat until spread is melted. Turn off the heat and whisk in the mashed bananas and almond milk (I know it’s tempting, but don’t eat this mix – at least not all of it!). Mix flours, flax, and soda in a different bowl, and slowly add banana-butter-mixture to the flour mixture. Mix until well combined, then scoop into muffin pan and bake for approx. 20 minutes or until muffins pass the skewer test. Turn off heat, let muffins rest in the pan for 10 minutes, then turn to wire rack and let cool completely.
Only scoop the frosting on top of the muffins once they have cooled down completely, as otherwise it will melt. Whip all ingredients for the frosting until light and fluffy, then store in the fridge until stiffened up and decorate the muffins.
Tip: Mix some walnuts or other nuts or chocolate chips mixed in the muffin batter.
As I have made icecream in pre-dairy free days, I knew that you needed to add some sort of sugar to achieve a consistency anyone would actually like to delve into – I was wrong.
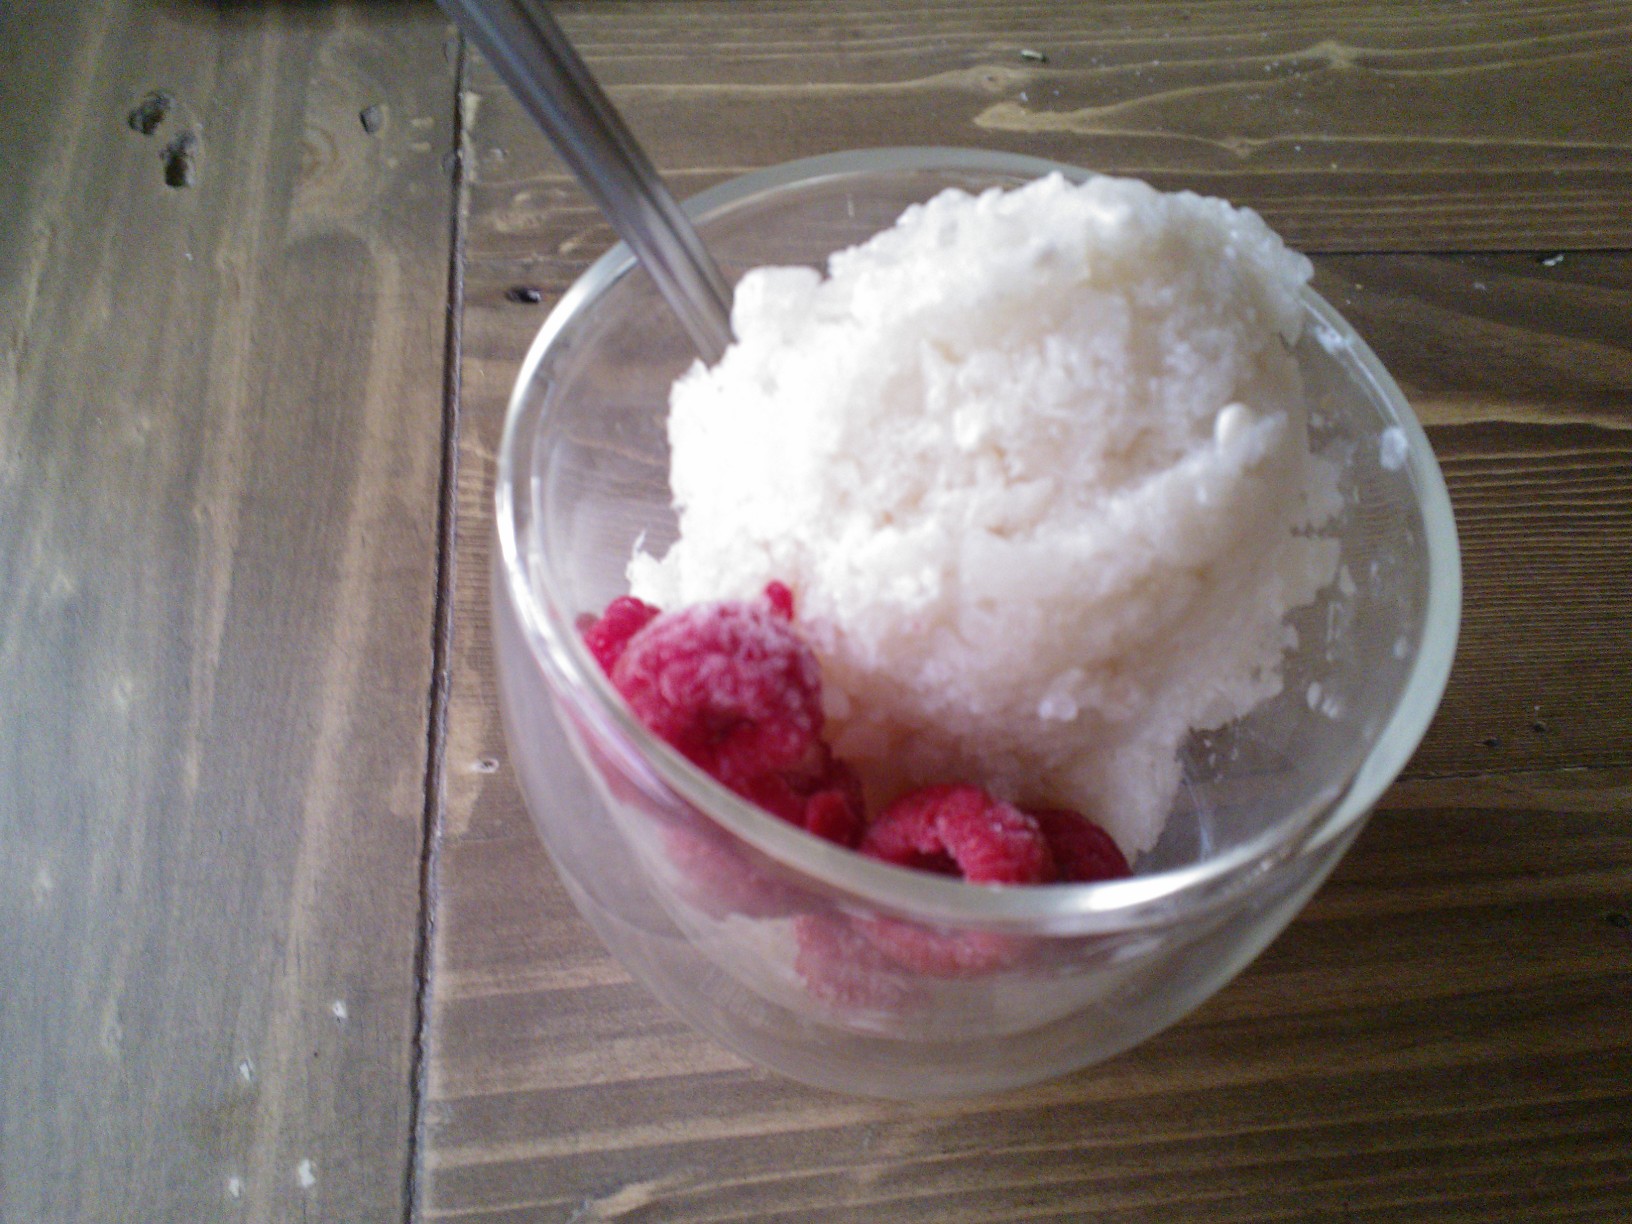
In fact, you can make sugar-free icecream. This is obviously not your usual Sara Lee dessert – but the lack of sugar, fat and calories is worth the slightly more solid texture of this creation. You shouldn’t compare this to the industrialised icecream which has bucket loads of creepies, but as a dessert in its own right, which is easy, quick, inexpensive and very refreshing – perfect for those Aussie summer days when the mercury climbs over 35 ° C. Just to think that you can have ICECREAM without sending your blood sugar through the roof and making your pancreas work overtime?
It is possible, after all.
500 ml almond milk 2 tbsp stevia or erythritol 1 tsp vanilla pinch of salt
Mix all ingredients in a tupperware dish, then freeze until hard, break up and whip in your food processor until smooth.
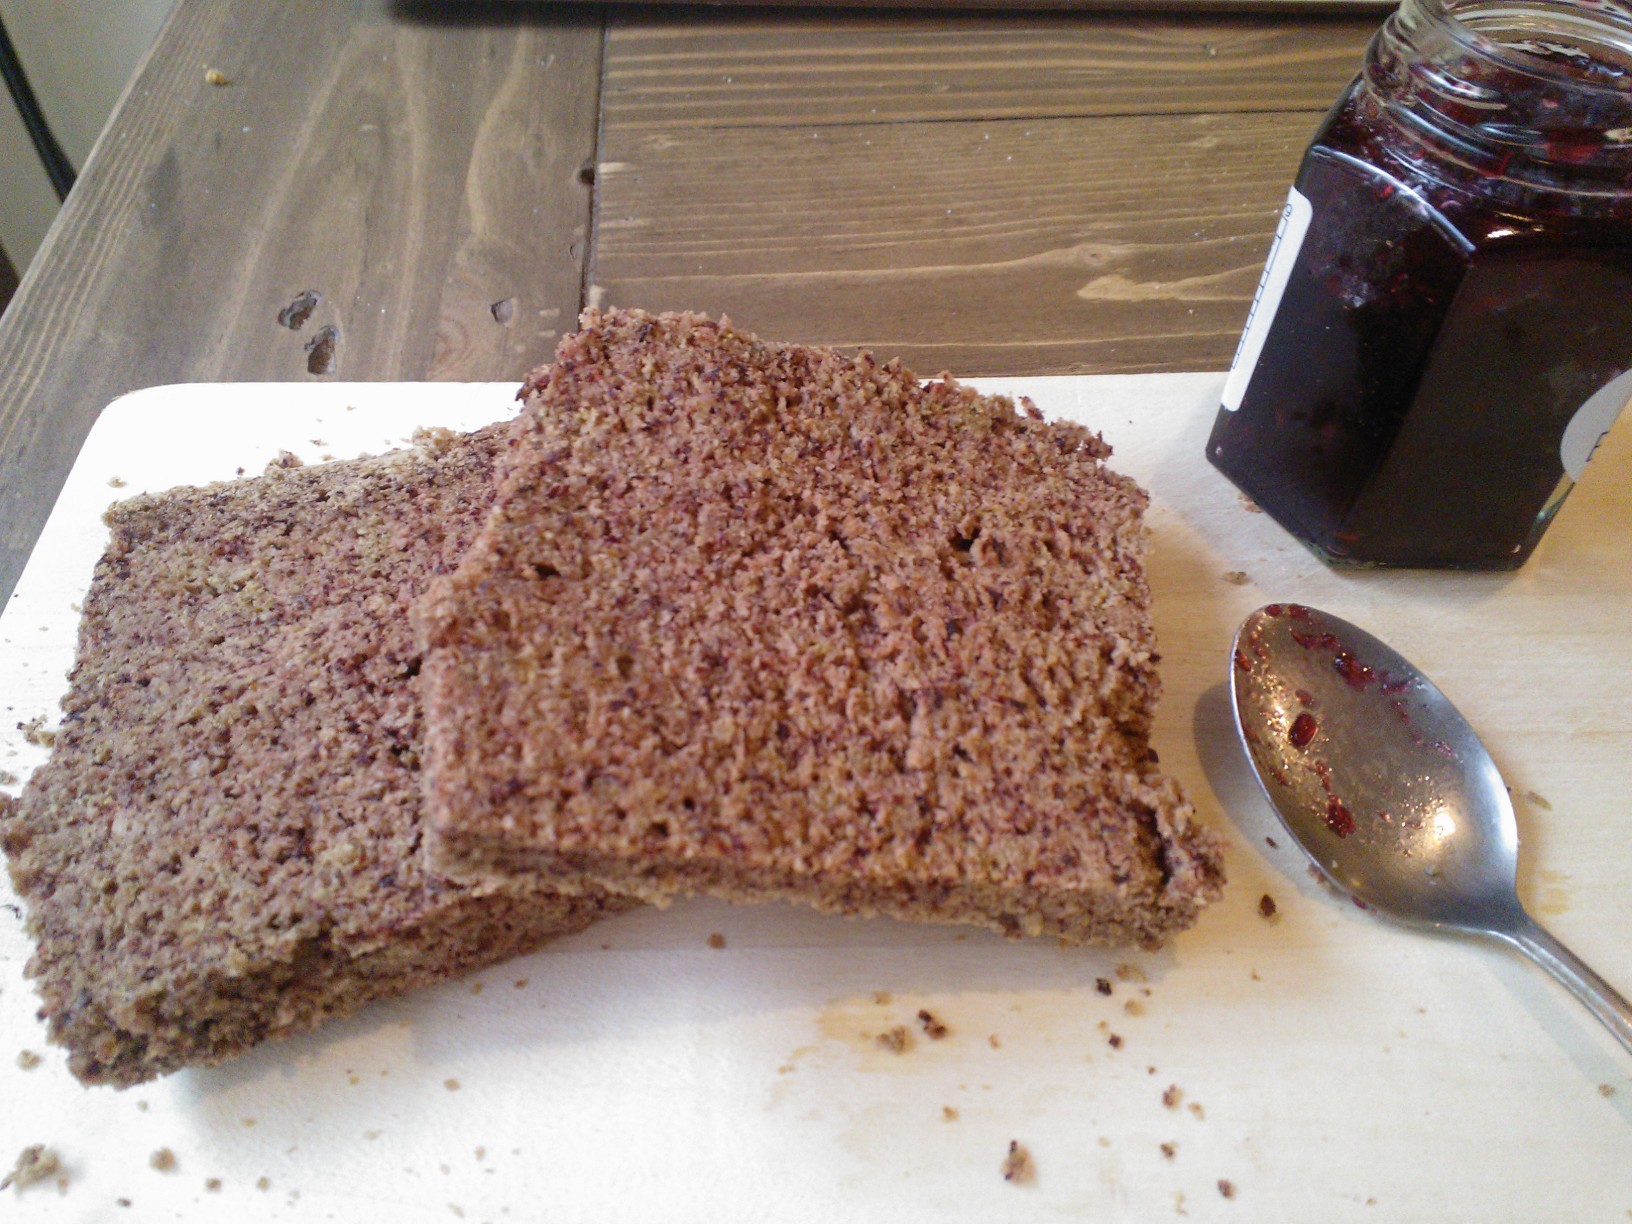
Due to my newly awakened love for homemade jams and nut butters, another gluten free bread was beckoning. I adapted this one from Elana Amsterdam‘s Bread 2.0, but I replaced the eggs with flax to make it truly vegan. I like eggs scrambled or poached on my breakfast plate, but I don’t want them in my bread! This bread is thus very high in fibre and therefore very satisfying – together with the high protein content from the almond and flax, it is ideal to keep you satisfied for a long time. That’s why I call it a breakfast bread – although it’s delicious any time of the day, it just gives you the power you need to perform until lunchtime!
The bread is soft and fluffy in a good way – not the “Aussie sliced sandwich bread style” type of soft. Its nutty aroma and texture which is faintly reminiscent of banana bread (only that there is no banana in it…duh) also makes it a healthy and satisfying afternoon snack, which is sure to keep the 3-4 PM slump at bay. It is very low carb which should be enough to convince even the die-hardest bread haters. This bread is only very lightly sweet; however, I prefer it with sweet spreads or nut butters rather than savoury spreads. Your choice!
Makes 1 small loaf
150 g almond meal 75 g arrowroot starch 25 g ground flaxseed plus 40 g ground flaxseed dissolved in 4 tbsp filtered water (“flax egg”) 1 teaspoon honey 1 teaspoon apple cider vinegar ½ teaspoon baking soda generous pinch of sea salt
As usual, mix the dry ingredients (almond meal, arrowroot, 25 g ground flaxseed, soda, salt) in a large bowl and the wet ingredients (flax egg, honey, ACV) in another bowl. Add the wet ingredients to the dry ingredients and mix well (use a hand mixer or your food processor). Scoop into greased or non-stick 10×20 cm loaf pan and bake at 150 °C for 30 minutes. Let cool completely before serving. Store in a ziplock bag in the refrigerator for up to a week.