Vegan, Sugar Free, Paleo After Eight (Mint Chocolate Chip) Icecream

Vegan Icecream Delight

It’s summer in Australia! And which foodstuff screams “summer” like no other? Icecreeeeeeeaaaaaam!!!! (Although I have it all year round…don’t judge). Well, I have mentioned before that I am a total icecream junkie – an obsession which was slightly compromised by the diagnosis of dairy intolerance. nevertheless, I have showed in the past that it is possible – and, in fact, delicious – to make healthy homemade dairy free (i.e. vegan) icecream.

I have become a little bit tired of coconut-based dairy-free icecreams, however. I have heard of avocado-based icecreams, but forgot about it, since I thought avocado in an icecream was pretty close to spinach in an icecream – it just doesn’t work. The other day, though, when I – after a long, avocado-less time – devoured a creamy, luscious, decadent Hass avocado, I just thought “there must be something to avocado icecream” – it is just soooo creamy and full-bodied, and it doesn’t have a strong flavour on its own, which makes it PERFECT for icecream. Most vegan icecreams are based on coconut and/or banana, but neither of these ingredients has a very neutral flavour. Avocado has. The only problem is – unlike banana and coconut, avocado has a VERY gaudy colour, so unfortunately, you ar epretty much confined to doing “green” icecream with it. This is not a problem though, as I have always been a huge fan of “after eight” or mint chocolate icecreams. I wanted to give it a try.

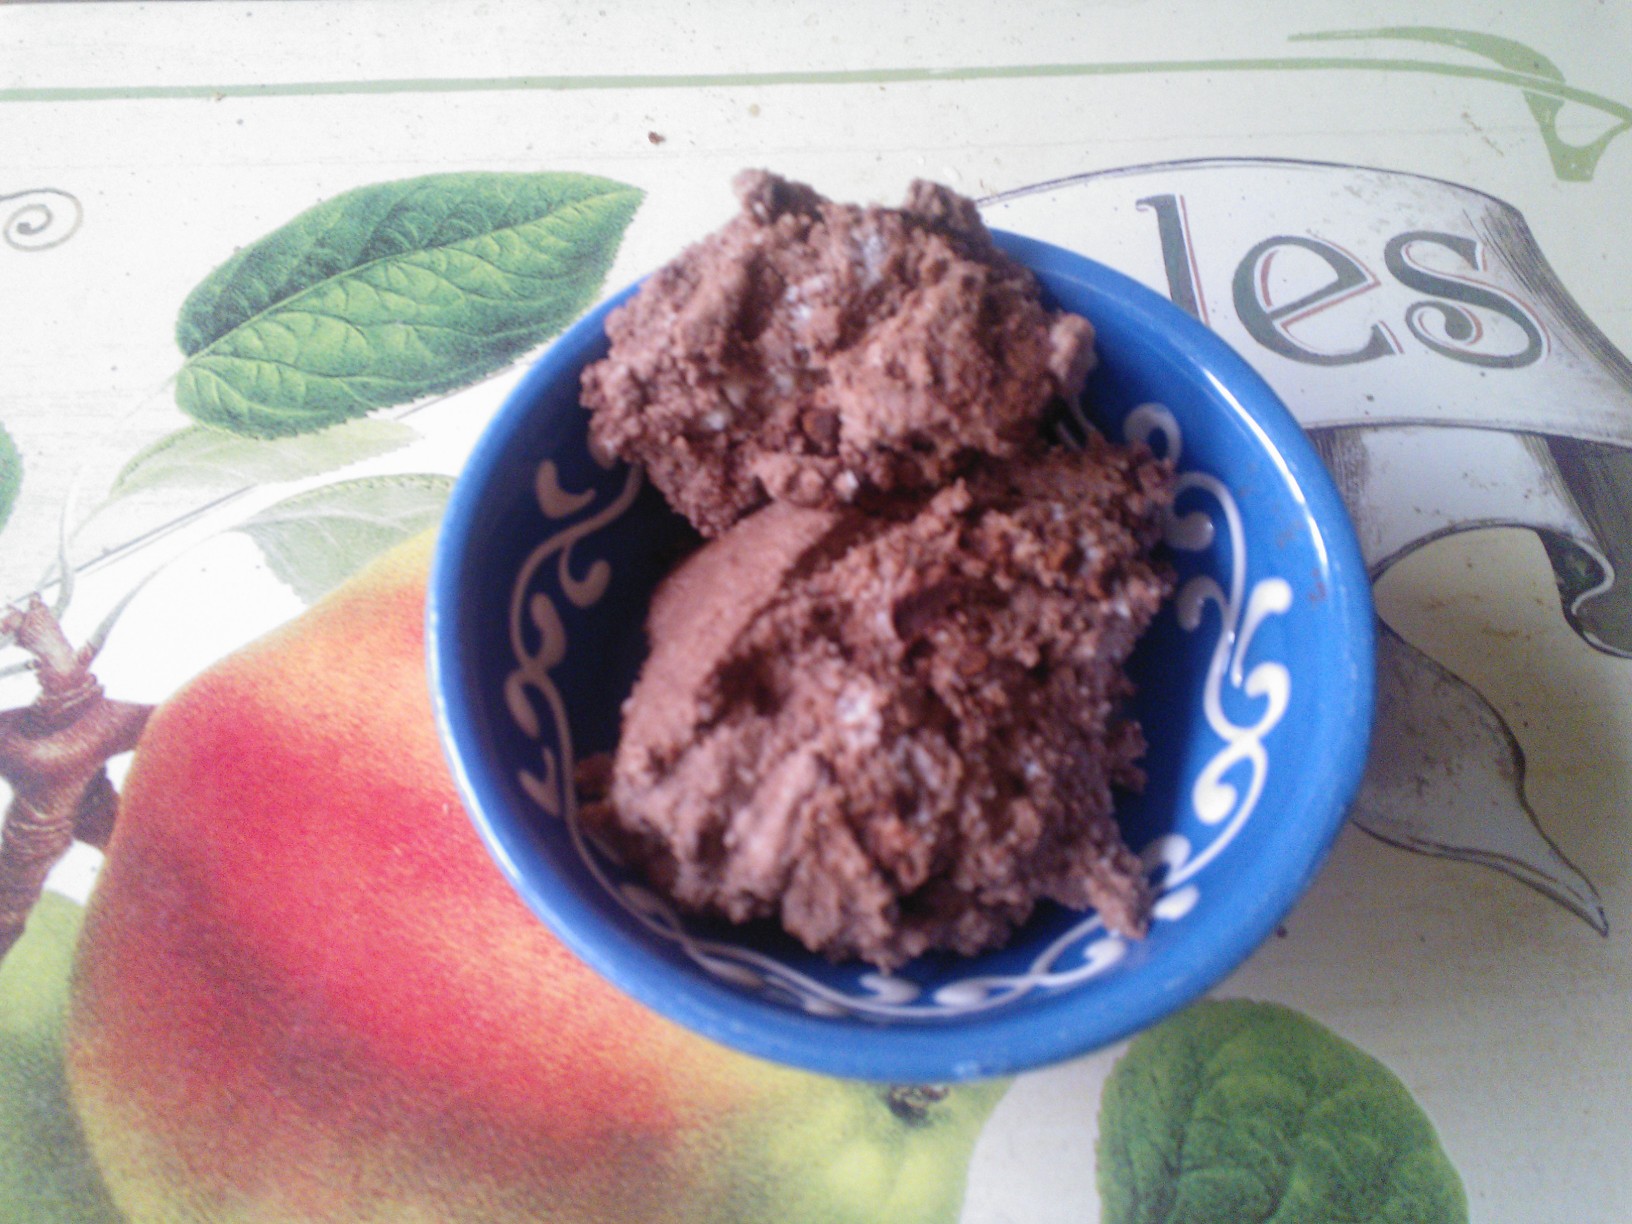
This is by far the best and creamiest icecream I have ever made, and the best thing is, this one really IS sugar free (just a bit of lovely honey). As the avocado is rather fatty, you don’t need any refined sugars to create this oh-so-good creamy icecream taste. It just tastes like your regular icecream from the shop! It also needs only five minutes of churning (you probably don’t even need an icecream maker), and you can serve it instantly or freeze it – it won’t affect the texture.

I was sceptical at first whether I should try creating an avocado-based icecream, as I didn’t want to waste my lovely avocados on a recipe which potentially wouldn’t work. Am I happy I did give it a shot! You cannot go wrong with this. Trust me.

I used regular chocolate chips for this (shhhh—-don’t tell anyone!), but you can buy paleo approved ones or make your own – so you can deffo make this a paleo icecream! Oh, and I call it an “After Eight” icecream, as that’s what “dinner mints” are called in Europe – you ought to have this cutie at any time of the day though! Hm…yum yum! Better get started right away!

Makes 1 small tub (500 ml) (for 2 gluttons like my hubbs and me or 4 normal people)

2 ripe Hass avocados (~200 g)
130 ml almond milk
3 tbsp raw honey
peppermint aroma/edible peppermint oil (to taste)
chocolate chips to taste (approx. 60-70 g)
optional: a few fresh peppermint leaves

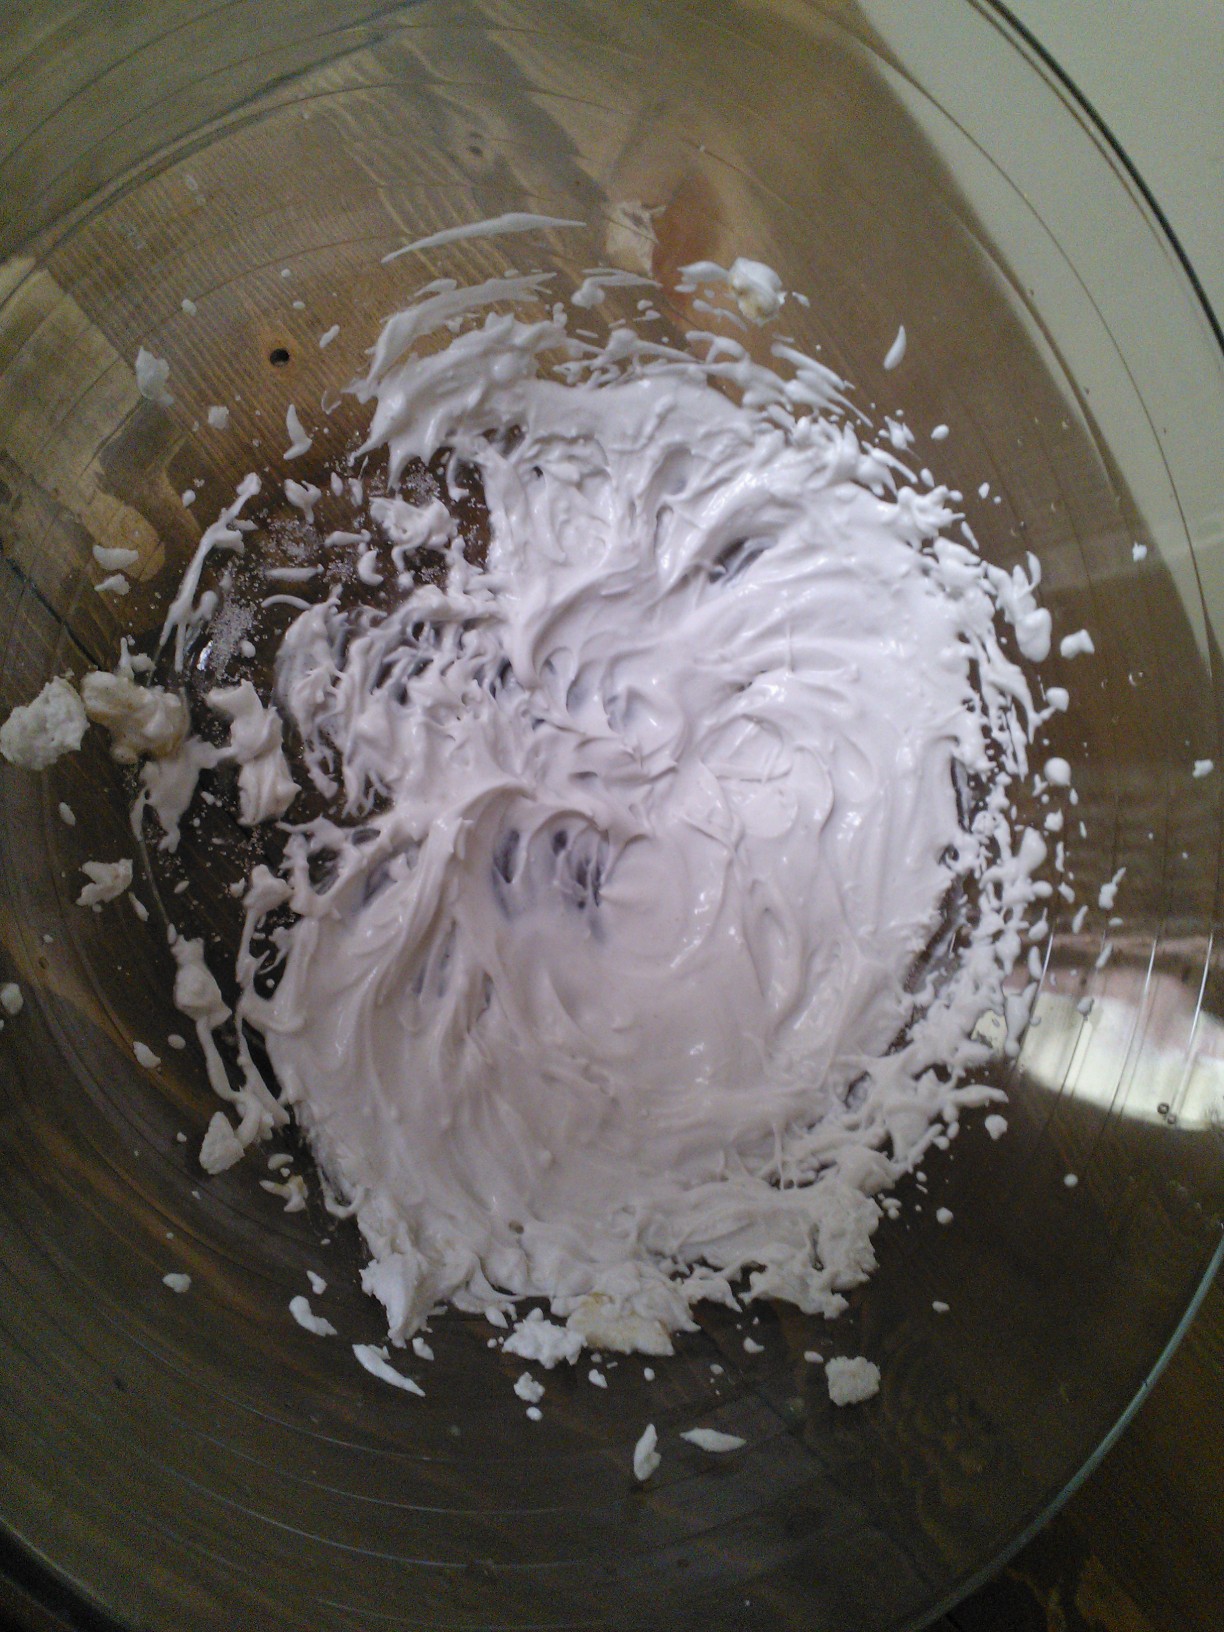
Blend everything until well mixed. Refrigerate for at least six hours or overnight. Churn in icecream maker for approx. 5 minutes (not the usual 20 minutes). Enjoy chocolate peppermint bliss.

Enjoy!

No-Bake Homemade Gluten Free Granola aka World’s Yummiest Muesli

Easy No-Bake Granola with a Twist

Is your breakfast so delicious that you wish breakfast time would never end? No? Then it might be time for my homemade granola! This divine creation combines the right amount of crunchy with the right amount of chewy and a little bit of sin mixed in! The unique, unusual and super delicious taste stems from a dash of tahini (sesame paste) which also balances any excess sweetness. Hands down, you won’t want to stop sinking into this yummy goodness – if only it wasn’t so filling! This chocolate, sunflower, sesame and date granola doesn’t only taste awesome, it’s also awesome for you! Yummy goodness from healthy wholegrain rolled oats, magnesium and fibres from dates, and healthy fats from tahini and sunbutter – and it is easy, too! You don’t even need to rev up your oven!

200 g (certified gluten free) rolled oats (instant ones would probably work, too) (you can toast the oats before to get a crunchier granola, but it isn’t necessary)
100 g sunflower seed butter (sunbutter)
50 g tahini (sesame paste)
50 g dates, pitted, chopped
optional: chocolate chips, dried fruit, sunflower/pumpkin seeds, sesame seeds
100 g melted honey
pinch of salt

Mix all dry ingredients in a big bowl. Mix the wet ingredients in a different bowl until well combined. Stir wet ingredients into dry ingredients and mix (with your hands) until very well combined and a sticky, crumbly mass – this will be veeery sticky, but that’s the fun part – you are officially allowed to lick your fingers!

Delicious Homemade Date and Sesame Granola

Press the granola mass into a 20×20 cm baking dish and freeze for a couple of hours. Tale the “granola cake” out of the dish and break into lumps. Enjoy with cold milk, yogurt or just as a snack.

Enjoy!

Gluten Free Yeast Free Wholegrain Pizza Base (Vegan)

The good thing about experimenting is – even though it doesn’t always work, or, in fact, more often works NOT, you may stumble upon fantastic things you hadn’t imagined before. Take pita bread, for instance. I love falafel, just like anything else that belongs to Middle Eastern cuisine, and what is falafel without pita? So I tried to make pita – still working on it. My first tries were delicious enough, but they were not exactly pita, not enough pita to post a recipe on the web, anyway. However – my thought was “this would actually make quite a nice pizza”. Pita, pizza – the names are close enough, so I thought why not turn my pita experiment that didn’t work into a pizza experiment that works?

I must admit, pizza is one of the few things I genuinely miss being gluten free (having an Italian husband doesn’t help the cause!). Sometimes I would just like being lazy and grab one of these gluten-free pizza bases from the shop – a look at the ingredients (and nutrition facts) has so far been enough to deter me from wasting seven bucks on a processed gluten-free pizza base. Good on me!

It’s not that there is a lack of recipes for gluten free pizza out there, and I don’t doubt that they taste alright. But I just couldn’t find one that ticked all the boxes. Either they involved almond and/or coconut flour – and, as much as I like these two, almond and coconut just doesn’t belong on pizza! Or the recipes involved yeast and/or gums (a big no-no), or they seemed to be too complicated and involving too much time when you are hungry and impatient! I wanted a pizza recipe that doesn’t need proofing. I am not the biggest fan of a yeasty taste either, and I find it quite hard on the stomach which is not healthy.

This pizza is also WHOLEGRAIN – so it is really good for you. There is no complicated ingredients (you should have these when you have been baking gluten free), and if you get started right now, you could have a lovely healthy gluten free pizza that is delicious in less than 30 minutes. WTF? Exactly. My wholegrain pizza base ticks all the boxes. You can make this for your gluten-eating friends, and they won’t say “this is good for gluten free”, they will say “this is good”. In fact, I trust they will say “this is great”. Healthy? Tick. Easy? Tick. Yummy? You bet. And quicker than waiting for takeaway.

Gluten Free Vegan Pizza Base

Makes one baking sheet of pizza (probably makes sense to double or triple using several sheets and freeze leftovers)

50 g buckwheat flour
50 g brown rice flour
30 g millet or oat flour
30 g ground flax seeds
1,5 tsp sea salt
1 tsp baking soda
3 tsp vinegar
1 tbsp olive oil
a pinch of sugar (or honey)
225 ml warm water
garlic powder (optional)
tomato paste (optional)
oregano
olive oil to top (optional)
toppings to taste

Preheat oven to 220 ° C. As usual, mix the dry ingredients (flours, soda, salt, flax, sugar, garlic powder if using) until one colour. Add water, oil and vinegar and mix until you have a supple, uniform dough – a bit like a muffin batter, rather than the pizza doughs you might have made with gluten flour. Let the dough rest for 10 to 15 minutes before spreading it on a very well-greased or silicon baking sheet – the thinner you spread it the better. After all, we want a nice Italian-style thin crust pizza, not one of these American grease bombs which are as thick as a quilt! With a wet spatula or spoon (or using your wet/oiled hands), flatten the dough so that it becomes nice and even. We don’t want a pizza that is thin in one corner and thick and doughy in the other!

Bake the dough without toppings for roughly 15 minutes until dry and pizza-like. Now comes the fun part – the toppings. You will probably want to spread some tomato paste and oregano on the pizza as a classic, although this is not even necessary. For the pizza in the picture, I used a mix of different vegetables (kale, peas, fresh tomatoes, mushrooms, capers) and some tempeh as vegan “ham”. Olives, sundried tomatoes and vegan cheese would also be a great additionI Just try whatever you fancy! I recommend sprinkling the top with a dash of olive oil, which works wonders for the flavour!

Now bake the pizza base with the toppings until they have reached the consistency you desire – probably another 10, 15 minutes. Devour.

Enjoy!

Homemade Apple Cinnamon Granola (Sugar Free, Nut Free, Wheat Free)

Healthy Homemade Granola

Dear friends, Christmas is coming around veeeery fast – too fast if you ask me – but here in the Southern Hemisphere, the days are getting hotter, so the time for a big, steaming bowl of hot porridge are over – for now. It’s time t move on to a lighter breakfast snack, so I tried to make some homemade apple cinnamon granola – a light alternative to oatmeal without lacking a xmas-y touch.

Making granola is not as difficult as it sounds, and in fact, this granola is as HEY – healthy, easy, and yummy – as all my other recipes. You can make a big batch and store it in an open-mouth jar, where it will keep fresh for a while. My granola contains no sugar – only natural fruit sugars – and only a tiny pinch of healthy coconut oil, no other oils, especially not palm oil or other scary things! Besides, this one is nut-free (for a nutty granola see here), so even the nut allergy sufferers among you can enjoy their granola!

I love this as a healthy snack by itself, a nourishing breakfast with almond milk or natural yogurt, or to add some pizzazz to fruit salads and compôtes.

Makes 4 servings

200 g rolled oats
50 g dried apple (unsweetened), very finely chopped
2 tbsp raw honey , agave or maple syrup
15 g coconut oil, melted
generous pinch of cinnamon
generous pinch of sea salt
drop of vanilla

Preheat oven to 150 °C. Combine oats, fruit, cinnamon, and salt in a big bowl. Whisk honey, oil and vanilla in a separate bowl until well combined. Now pour the “wet” ingredients into the “dry” ingredients and mix well with your clean hands as if you prepare a shortbread dough. Be warned though, this is veeery sticky – but the good thing about making homemade things is, you get to lick your fingers legitimately! (And you will with this one, you will!)

Now spread (what’s left of) the mix (after finger-licking) onto a prepared baking sheet (i.e. silicon sheet or a lined baking sheet) and bake for 10-15 minutes until very lightly toasted. Let cool and refrigerate.

Enjoy!

Quick and Easy Vegan Sugar Free Caramel Butterscotch Sauce

Caramel Latte with Sugar Free Dairy Free Butterscotch Sauce

Okay, I apologise for that humungous title – but I am so excited to have come up with a caramel sauce that is thick and creamy and tastes just like butterscotch caramel, but is completely dairy and sugar free! Howzat? And if this was not enough, it is also extremely quick and easy to make! Yes, you can have your caramelatte (better than Starb*cks) in less than ten minutes – although the caramel thickens up nicely if you leave it in the fridge for a while. What to do with a caramel sauce, you ask? Well, there is caramel latte, obviously, and then there is icecream, pancakes, cakes – and if you just have it straight of the jar (as I like doing) – no harm done! This yummy decadent caramel sauce contains hardly any sugar and only very little fat! Have I mentioned that it is oh sooooo easy?

120 ml unsweetened almond milk
100 g erythritol
1 tbsp molasses
30 g vegan spread or butter (you can use any fat content you like, even light spread)
generous pinch of kosher salt
2 tsp vanilla

4 steps to yumminess
Place all ingredients bar the vanilla in a small saucepan over medium heat and stir vigorously until well combined. Bring to the boil, and reduce heat to low. Let simmer for 5-10 minutes, constantly stirring. depending how thick you want your sauce to be (it will firm up quite a bit more when chilled). Add vanilla and simmer for 30 seconds or so more, then pour caramel in a glass jar and let cool. Use immediately or transfer to fridge. If the sauce becomes too firm in the fridge, just microwave it for a minute or melt it in a bain-marie before pouring.

Enjoy!

Gluten Free Vegan Crusty Soda Bread (yeast free, gum free)

Quick and Easy Gluten Free Bread

Gluten free bread sucks. Do you agree to this statement? I used to. No matter where in the world, and no matter whether from a breadmix, or a bakery – gluten free bread just sucked. And even if it tasted anywhere near something you would serve a human being, it was filled with crap. I know, I know what you are going to say – one doesn’t need bread, or any carbohydrates for that matter. There is absolutely nothing wrong with low-carb or paleo, ans, in fact, I believe many of the western world’s problems could be solved if people ate low(er) carb!

But, heck, I am German and married to an Italian – there is just no way I’m gonna give up bread forever, and even though I am gluten intolerant, there must be a way to make gluten free bread that doesn’t suck! Gluten free bread that doesn’t have a whole shelf of creepy ingredients in it. Gluten free bread that doesn’t have a dozen eggs in it (that’s not bread, that’s cake! And If I crave bread, I don’t want cake – sorry, Marie Antoinette!).

This was an experiment. One that turned out well. One that my (gluten eating) hubs couldn’t get enough of. One that reminded me very much of the texture of a good ol’ German sourdough – even though the taste is more in the tradition of the Irish soda bread. I didn’t have any dried yeast, so had to resort to soda. With an old trick I knew (putting a bowl of water in the oven), my bread got a lovely crust. And thanks to all-time favourite flax, this is egg free, but you won’t miss any eggs – the trick with the flax eggs worked! So this is not only gluten free, it is yeast free, gum free, egg free, and dairy free. And it doesn’t suck.

Gluten free? Check. Dairy free? Check. Yeast free? Check. Egg free? Check. Vegan? Check. Gum Free? Check. Soy free? Most naturally. Full of fibre and omega 3? Check. Sugar free? You have the option. Yummy? Check. Easy and quick to make? Check.

You can start now. You should have the ingredients. And it is really really easy. You don’t even need to preheat the oven – you really don’t!

Makes one loaf

150 g potato starch
100 g sorghum flour
50 g arrowroot
2 tbsp baking soda
2 tsp celtic sea salt
2 tsp sugar or honey
250 ml hot water (ca. 40 ° C)
3 tbsp ground flax seed, dissolved in 9 tbsp water (equals 3 flax eggs)
4 tbsp apple cider vinegar
1 tbsp olive oil

Mix the dry ingredients (potato starch, sorghum, arrowroot, soda, salt, sugar if using) in food processor with dough blade until one colour. Slowly add oil, flax eggs and honey, if using, with the blender running. Add vinegar and hot water and mix until you get a supple, uniform dough. There should not be any lumps in it whatsoever – it should be the smoothest thing ever. Turn off the processor, and with a silicon spatula, scoop dough into loaf pan. Sprinkle the loaf with sorghum or any other gluten free flour and notch several times with a sharp knife. Place on middle rack in an oven, and place another tray filled with water below the loaf pan. Turn the oven to 230 ° C and let bake for 35 minutes. Turn off the oven, and let the loaf cool on a wire rack.

Delicious Gluten Free bread with Olive Oil and Sea Salt or...
Delicious Gluten Free bread with Olive Oil and Sea Salt or…

Enjoy!

..with butter!
..with butter!

Vegan Paleo Carrot Cake 2.0 {low carb, low fat}

Paleo Carrot Cake
Paleo Carrot Cake

THIS. IS. THE. CARROT CAKE.

I know I should not be so obsessed with something I thought up and made myself. But this carrot cake is – honestly – a stroke of genius.

I know.

In case you don’t, let me tell you – you can find literally TONS of recipes for “paleo carrot cake” on the net. After all, which cake should be more suitable to adapt to a grain free, sugar free diet than this carroty, nutty yummyness and goodness?

However, what is a carrot cake without frosting? It’s nothing! And what do most “paleo” carrot cake recipes offer you as a frosting? Cream cheese frosting! Dairy cream cheese frosting!!! Hello???!!!! How on earth is it paleo with a cream cheese frosting??? What’s the point making a great, healthy, grain free, paleo carrot cake when you ruin your efforts with a dairy frosting? NOT GOOD!

It’s been a while since my first carrot cake recipe, and as I am continuously trying to improve my recipes, I wanted to come up with a true paleo, grain-free version of my favourite cake – not only gluten free, which is still relatively easy, but totally grain free, gum free, starch free and, of course, refined sugar free. And it is vegan, too! And with a dairy free frosting. Yes. A carrot cake with no worries, basically.

Since I couldn’t find a recipe online which appealed to me, I experimented with my two new favourite ingredients – almond flour and coconut flour. By the way, I ended up making muffins again as they are easier to handle and to give away than a slab of cake – but the amounts stated in this recipe should be enough for a round, 9 inch layer cake. The frosting is as easy and foolproof as the whole recipe – just coconut cream with a bit of maply syrup for sweetness and vegan margarine for firmness. Easy peasy!

These beauties are so yummy you won’t even care how many calories are in them, but just in case you are interested – one of these carrot cake muffins contains 100 kcal. 100! That’s less than two apples! Only that these keep you fuller for much longer than apples do. These muffins have all you need to face the day – brimming with protein, vitamins, minerals, fibers, and with few complex carbs, few healthy fats. You can/should have one carrot cake muffin for breakfast. Have two. Have three, and even after three muffins you will still have ingested fewer calories than with your standard bowl of sugary cereals and milk. Three muffins equal the carb intake of 1 banana.

They stay fresh for a long time (you should store them in a fridge though).

The best thing is – my hubs, who is so not into healthy eating, loved them, and that’s the whole point of healthy baking – that nobody thinks it’s healthy!

P.S.: I take back my statement about frosting. These carrot cakes you can have without frosting, they are that good. But frosting doesn’t hurt anyone. 😉

Makes 18 muffins

50 g rice protein powder
75 g coconut flour
25 g almond flour
generous pinch of salt
1,5 tsp. soda
1,5 tsp. cinnamon
1 tsp nutmeg
1 tbsp molasses
40 g coconut syrup or date syrup or other liquid sweetener
1 banana, mashed
2 t vanilla
4 flax eggs (1 flax egg = 1 tbsp flaxseed, dissolved in 4 tbsp filtered water)
300 ml almond milk
5 large carrots, grated
60 g chopped walnuts
100 g chopped dates

For the frosting
Solidified part of 1 tin full-fat coconut cream, stored in the fridge overnight
1 tsp vanilla
1 tsp maple syrup
1 tbsp nuttelex or vegan margarine or coconut oil
stevia to taste

Preheat oven to 180 °C and line a muffin mould with paper. Mix the dry ingredients for the batter (protein powder, flours, salt, soda, spices, flax) until one colour. In a separate bowl, combine wet ingredients (molasses, honey, banana, vanilla, eggs, almond mik) until well combined. Stir wet ingredients into dry ingredients and blend well with hand blender. Stir in carrots, nuts, and dates. Scoop batter into 18 muffin moulds and bake in preheated oven for 20 minutes or until a toothpick comes out clean. Transfer to a cooling rack and allow to cool completely before frosting – if at all frosting.

Carrot Cake with Maple Frosting

For the frosting, beat coconut cream (only the solidified part at the top of the tin!) with stevia, vanilla and maple syrup until it becomes the texture of whipped cream. Add margarine and whip until it gets to a frosting-y texture. Add more fat if it is not solid enough for your liking. Only use on completely chilled (overnight) muffins and always store in fridge!

Enjoy!

Gluten Free Vegan Foccaccia {no yeast!}

Mediterranean Style Gluten Free and Yeast Free Bread

Today it happened. Today was the day I made the decision it was time to enter new gluten free territory. To try the object of desire of countless celiacs and gluten free folks. To make with my own two hands the thing that turns good olive oil and coarse sea salt into the most desirable, seductive ménage de trois, the loyal companion of a good merlot, the reliable foundation for freshly churned butter, the satisfying partner of a bowl of steamy, creamy soup: Bread. Gluten free bread.

I made gluten free bread! I still can’t believe my luck! I tried gluten free bread, and it worked! I can serve my half-Italian husband Italian-style bread to dip into oil and salt. To nibble straight of the loaf pan. To enjoy with a chunky piece of good, salted butter.

Gluten free bread.

No, not that gluten free bread you buy in the supermarket, no no! I mean – fantastic gluten free bread. Yummy. Delicious. Easy to make. And – yup – healthy. And satisfying. And it makes you happy. What? Yes.

You read right: Today I made a bread that is GLUTEN FREE AND YEAST FREE AND VEGAN. And is healthy. Let me tell you what you will get when you try my experiment:

-proteins from brown rice, buckwheat, millet, eggs, chickpea, flax for your muscles
-calcium from brown rice for your bones and teeth
-magnesium from brown rice, millet to calm your nerves
-fiber from brown rice, millet, chickpea, flax to promote digestion
-iron from brown rice, sundried tomatoes and chickpea to boost your power
-zinc from brown rice to fight infections
-niacin from millet and sun-dried tomatoes for hairs and nails and to lower cholesterol
-omega 3 from flax and chia for healthy heart and brain function
-healthy fat from olive oil and olives – see above
-antioxidants from millet and sundried tomatoes to protect you against cancer
-serotonin from millet to make you happy. 🙂

Great with olive oil, coarse sea salt and a dry Merlot

Yes, all that in less than 30 minutes! (hooray!)

Shall we?

For one 20×20 cm baking pan

100 g brown rice flour
50 g millet
50 g chickpea flour
50 g buckwheat flour
25 g flax
25 g arrowroot
1,5 tsp sea salt
1,5 tsp baking soda
1 tsp xanthan
3 tsp apple cider vinegar
2 tbsp chia seeds, dissolved in 6 tbsp water (“chia eggs”)
5 tbsp olive oil (use a good brand)
1 tsp maple syrup or agave
approx. 120 ml or more warm water
sundried tomatoes, olives (as much as you like) or anything else you’d like to put in!
coarse sea salt to decorate

Preheat oven to 180° C. Use your food processor or any other standing blender. Whisk together all dry ingredients (flours, flax, salt, xanthan, soda, arrowroot) until well blended (one colour). Add the chia to the dry ingredients. Add vinegar, oil, and maple syrup and beat in food processor for a few seconds until incorporated. Pour warm water through your processor’s feeder until batter becomes smooth, firm and sticky (the texture is a bit like marshmallow) and homogenous. You might need to experiment with the amount of water (approx. 120-150 ml). With a wet spoon or spatula scoop into oiled pan. and bake for 20 to 25 minutes. Brush with olive oil, sprinkle with coarse sea salt and bake for another 5 minutes.

Easy, healthy, and delicious

Turn off the heat and let rest in the oven until lukewarm. Remove from pan and serve. Goes well with olive oil, dips, or dukkah.

Tip: Try herbs, garlic, roast onions, chili or walnuts for yummy alternatives to olives and tomatoes!

Yummy and quick
Yummy and quick

Enjoy!

The ultimate, perfect, low-carb, vegan whipped cream

Vegan whipped cream that doesn't taste vegan
Vegan whipped cream that doesn’t taste vegan

I have two predicaments right now. One is, I spend too much on groceries – which is not a sin, but saving money is always preferable. The other is that I don’t seem to tolerate nuts very well, much as I like them. I felt it was time to move away from my original vegan cream recipe which used nuts on to a super creamy, super delicious whipped cream made purely of coconut which is ready in seconds, kind to the tummy, very very easy to make and not least quite a lot cheaper than the nut version – and as close to the real thing as you can get!

Honestly, if you don’t have dairy for whatever reason and you are craving whipped cream (or need it in a recipe) then look no further. I am yet to find a recipe for a healthier, cheaper and easier vegan whipped cream. It can’t get better than this. I am not one to dance around the kitchen, but this one made me do just that. Aaaah, this is soooo good!!!

200ml cold full-cream coconut milk – it has to be solidified and look like the coconut milk in this recipe
1 tsp vanilla (this is not mandatory, but it’s killer)
2 tsp of erythritol or other sugar

Whip up all ingredients in a cold bowl with cold beaters. Scoop out of the bowl with your fingers and be in heaven Serve with cake or icecream or use it for my vegan gluten free carrot cupcakes or ginger snaps. You can add some spices, such as ginger, cinnamon or even chocolate powder for a creative touch to your recipe.

Enjoy!

Instant, healthy, low carb (no carb), vegan, paleo chocolate mousse

The yummyness, the fluffyness, the beauty - chocolate mousse can actually be good for you!
The yummyness, the fluffyness, the beauty – chocolate mousse can actually be good for you!

Marveling at the Wonders of Instant, Healthy, Low-carb, Vegan, Paleo Chocolate Mousse or I Want it All, Act I, Scene I

Test Eater: Wow, this looks great! You must have spent ages making this!
Chef: Not even a minute, dear.
Test Eater: Um. So it’s bought stuff, ay? I thought you make things from scratch!
Chef: All from scratch, darling. (Well, I didn’t harvest the coconut or the cocoa.)
Test Eater (tries some): This is heaven! Honestly, this is one of the best chocolate mousses I have tried, and I am picky you know…actually, I shouldn’t really have a treat like that… (becomes serious) It must be loaded with sugar and carbs!
Chef: Not a trace. This is virtually carb-free.
Test Eater: Yeah right. So it’s filled with bucket loads of artificial sweeteners and other poisonous stuff!
Chef: Just the sweetness of nature, honey. (Well, it doesn’t actually contain honey because it’s carb-free.)
Test Eater: Wow. So I can have as much as I want – but you can’t, since you can’t have dairy! And we can’t offer it to XXX – she’s a vegan!
Chef: In this dessert, there is not a cow in sight – nor any other animal.
Test Eater: OK, I give up. What IS this stuff, and how did you make it?
Chef: Scroll down to the recipe!

Common dilemmas and how to solve them. A practical guide.
Problem 1: You need your chocolate fix and you are extremely impatient and/or short of time.
Solution 1: Make this chocolate mousse.

Problem 2: You have an insatiable sweet tooth, but you are trying to eat more healthily.
Solution 2: Make this chocolate mousse.

Problem 3: You are on a low-carb and/or paleo diet, but you miss chocolate mousse.
Solution 3: Make this chocolate mousse.

Problem 4: You love chocolate, but you are worried about all the unhealthy ingredients in it.
Solution 4: Make this chocolate mousse.

Problem 5: You need/want to cut out dairy, but you need/want chocolate mousse.
Solution 5: Make this chocolate mousse.

Problem 6: You are a vegan, but you suddenly have an odd craving for chocolate mousse.
Solution 6: Make this chocolate mousse.

Problem 7: You need your chocolate fix, and you need it now.
Solution 7: MAKE. THIS. CHOCOLATE. MOUSSE. NOW.

It takes one minute to make. One minute! Doesn’t matter whether you are suffering from a very sudden, very intense chocolate craving that does NOT allow postponement or whether you need a goodie for a surprise guest or whether you just can’t be bothered spending hours making a great dessert – this is it. Got the in-laws over for Christmas? Why spend hours making dessert when you need/want the time for your beauty routine/yoga lesson/wrapping presents/unwrapping presents? You can make this in one minute. Or less. One minute, that’s 60 seconds. That’s how long it takes – maximum. And that’s a promise. (OK, your coconut milk must be refrigerated, but you should have a couple of tins in your fridge anyway – at least when you are trying my recipes ;-))

I know not everyone cares whether desserts are healthy, but this one is. Spot on. There is no more than three ingredients (four if you count the water): Coconut meal, coconut milk, raw cocoa. That’s it. No sugar, no grains, no dairy, no processed crap, no GMO, no thickener, MSG, emulsifier, colourant or flavouring. Just. Pure. Goodness. Straight from mother nature. It is real, it is paleo, it is nutritious.

It is low-carb, if not no-carb, it is absolutely sugar free, but without nasty sugar replacements that can spike your blood sugar. This is as low GI as it gets. And it is very filling!

It is absolutely dairy free, and it goes without saying that it is also gluten and soy free. It is vegan. It is a very allergy-friendly dessert as even many nut sufferers can have coconut.

Oh, and for those who are interested – it is also veeeeeery delicious. Not to mention divine.

Dear vegans, low-carbers and paleoists, here comes the one-minute-guide how to have your mousse and eat it, too. Thanks for reading, my friend, and if you can spare one more minute of your precious time, you better make this. NOW.

Note: This has quite a strong flavour. If you like your stuff very sweet, you should probably add some stevia or erythritol. Use honey to make it paleo. I don’t sweeten it, as I don’t like my things overly sweet, but then – I’m special. 😉

Serves 1 very hungry chocoholic or 2 normal people 😉

4 tbsp coconut flour
4 tbsp solidified coconut milk (should have been stored in the fridge overnight)
4 tbsp cocoa powder
4 tbsp filtered water

The coconut milk should look like this:

solid coconut milk
solid coconut milk

Mix all ingredients bar the water in a small bowl, then slowly add the water while stirring until smooth.

Tip: Use less water to get chocolate halva!

Enjoy!