Kale & Chickpea Curry {vg, gf, lf}

I am amazed again and again at how the most simple meals are often the most delicious and satisfying. There you are, pondering for hours over what you could do with all the produce that “needs to go”, browsing recipes, flavour combinations…when all you need is just some common sense and a look in your pantry! You find yourself with a lot of fresh veggies for whatever reason (a very good problem to have imho). Maybe you had a green thumb this season, your neighbour ended up with way too much stuff, or you are savvy like me and just buy anything in the shop that’s marked down for quick sale. No need to let your precious 5-a-day die a slow death in your crisper section. As long as you got some stock, spices, legumes and tinned tomatoes in your pantry (and you want to make sure you always do), you can pretty much do anything from a chili sin carne to soup to vegan bolognese. Or in this case a curry. A kale & chickpea curry, to be precise.

Admittedly, it doesn’t happen very often that I end up with too much kale. I belong to the weird species who really and truly enjoys kale. I love munching on it and also in smoothies. Long story short, if I buy kale, I tend to use it up pretty quickly while it is still in its prime. However, one day I bought a LOT of kale that was marked down. Apparently, there were not many other people around who belong to the kale appreciation society like me. While I froze some of it to be used in smoothies, I was wondering what to do with the rest of it. I mean, there is only so much raw kale you can munch on before your jaws are sore and your digestive system pays for it! What to do?

So I had kale (obviously, the whole previous paragraph was carrying on about that). I had tinned chickpeas and tomatoes. There were frozen green beans, vegetable stock and also an array of exotic spices, as well as a couple of potatoes (that also needed to go).

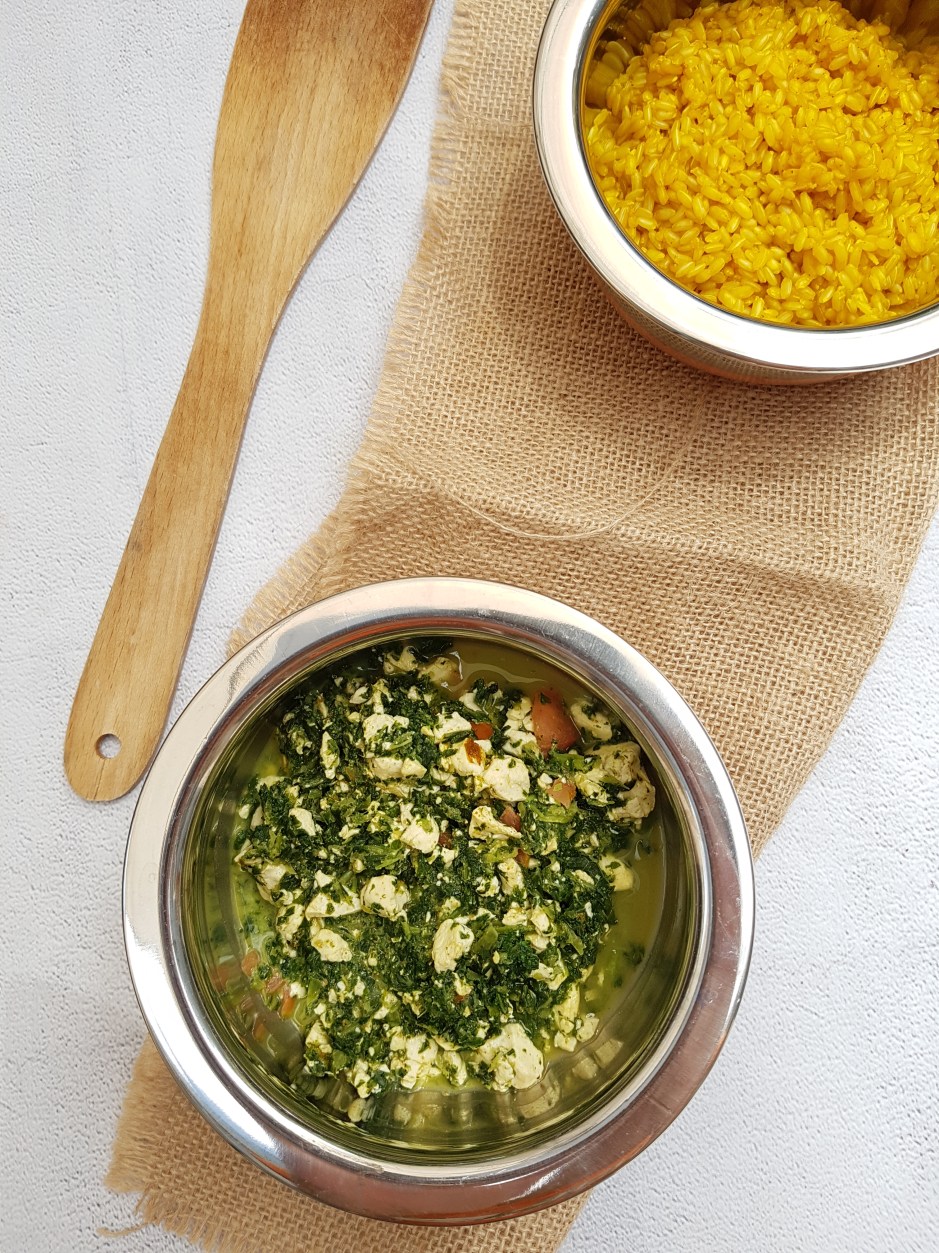
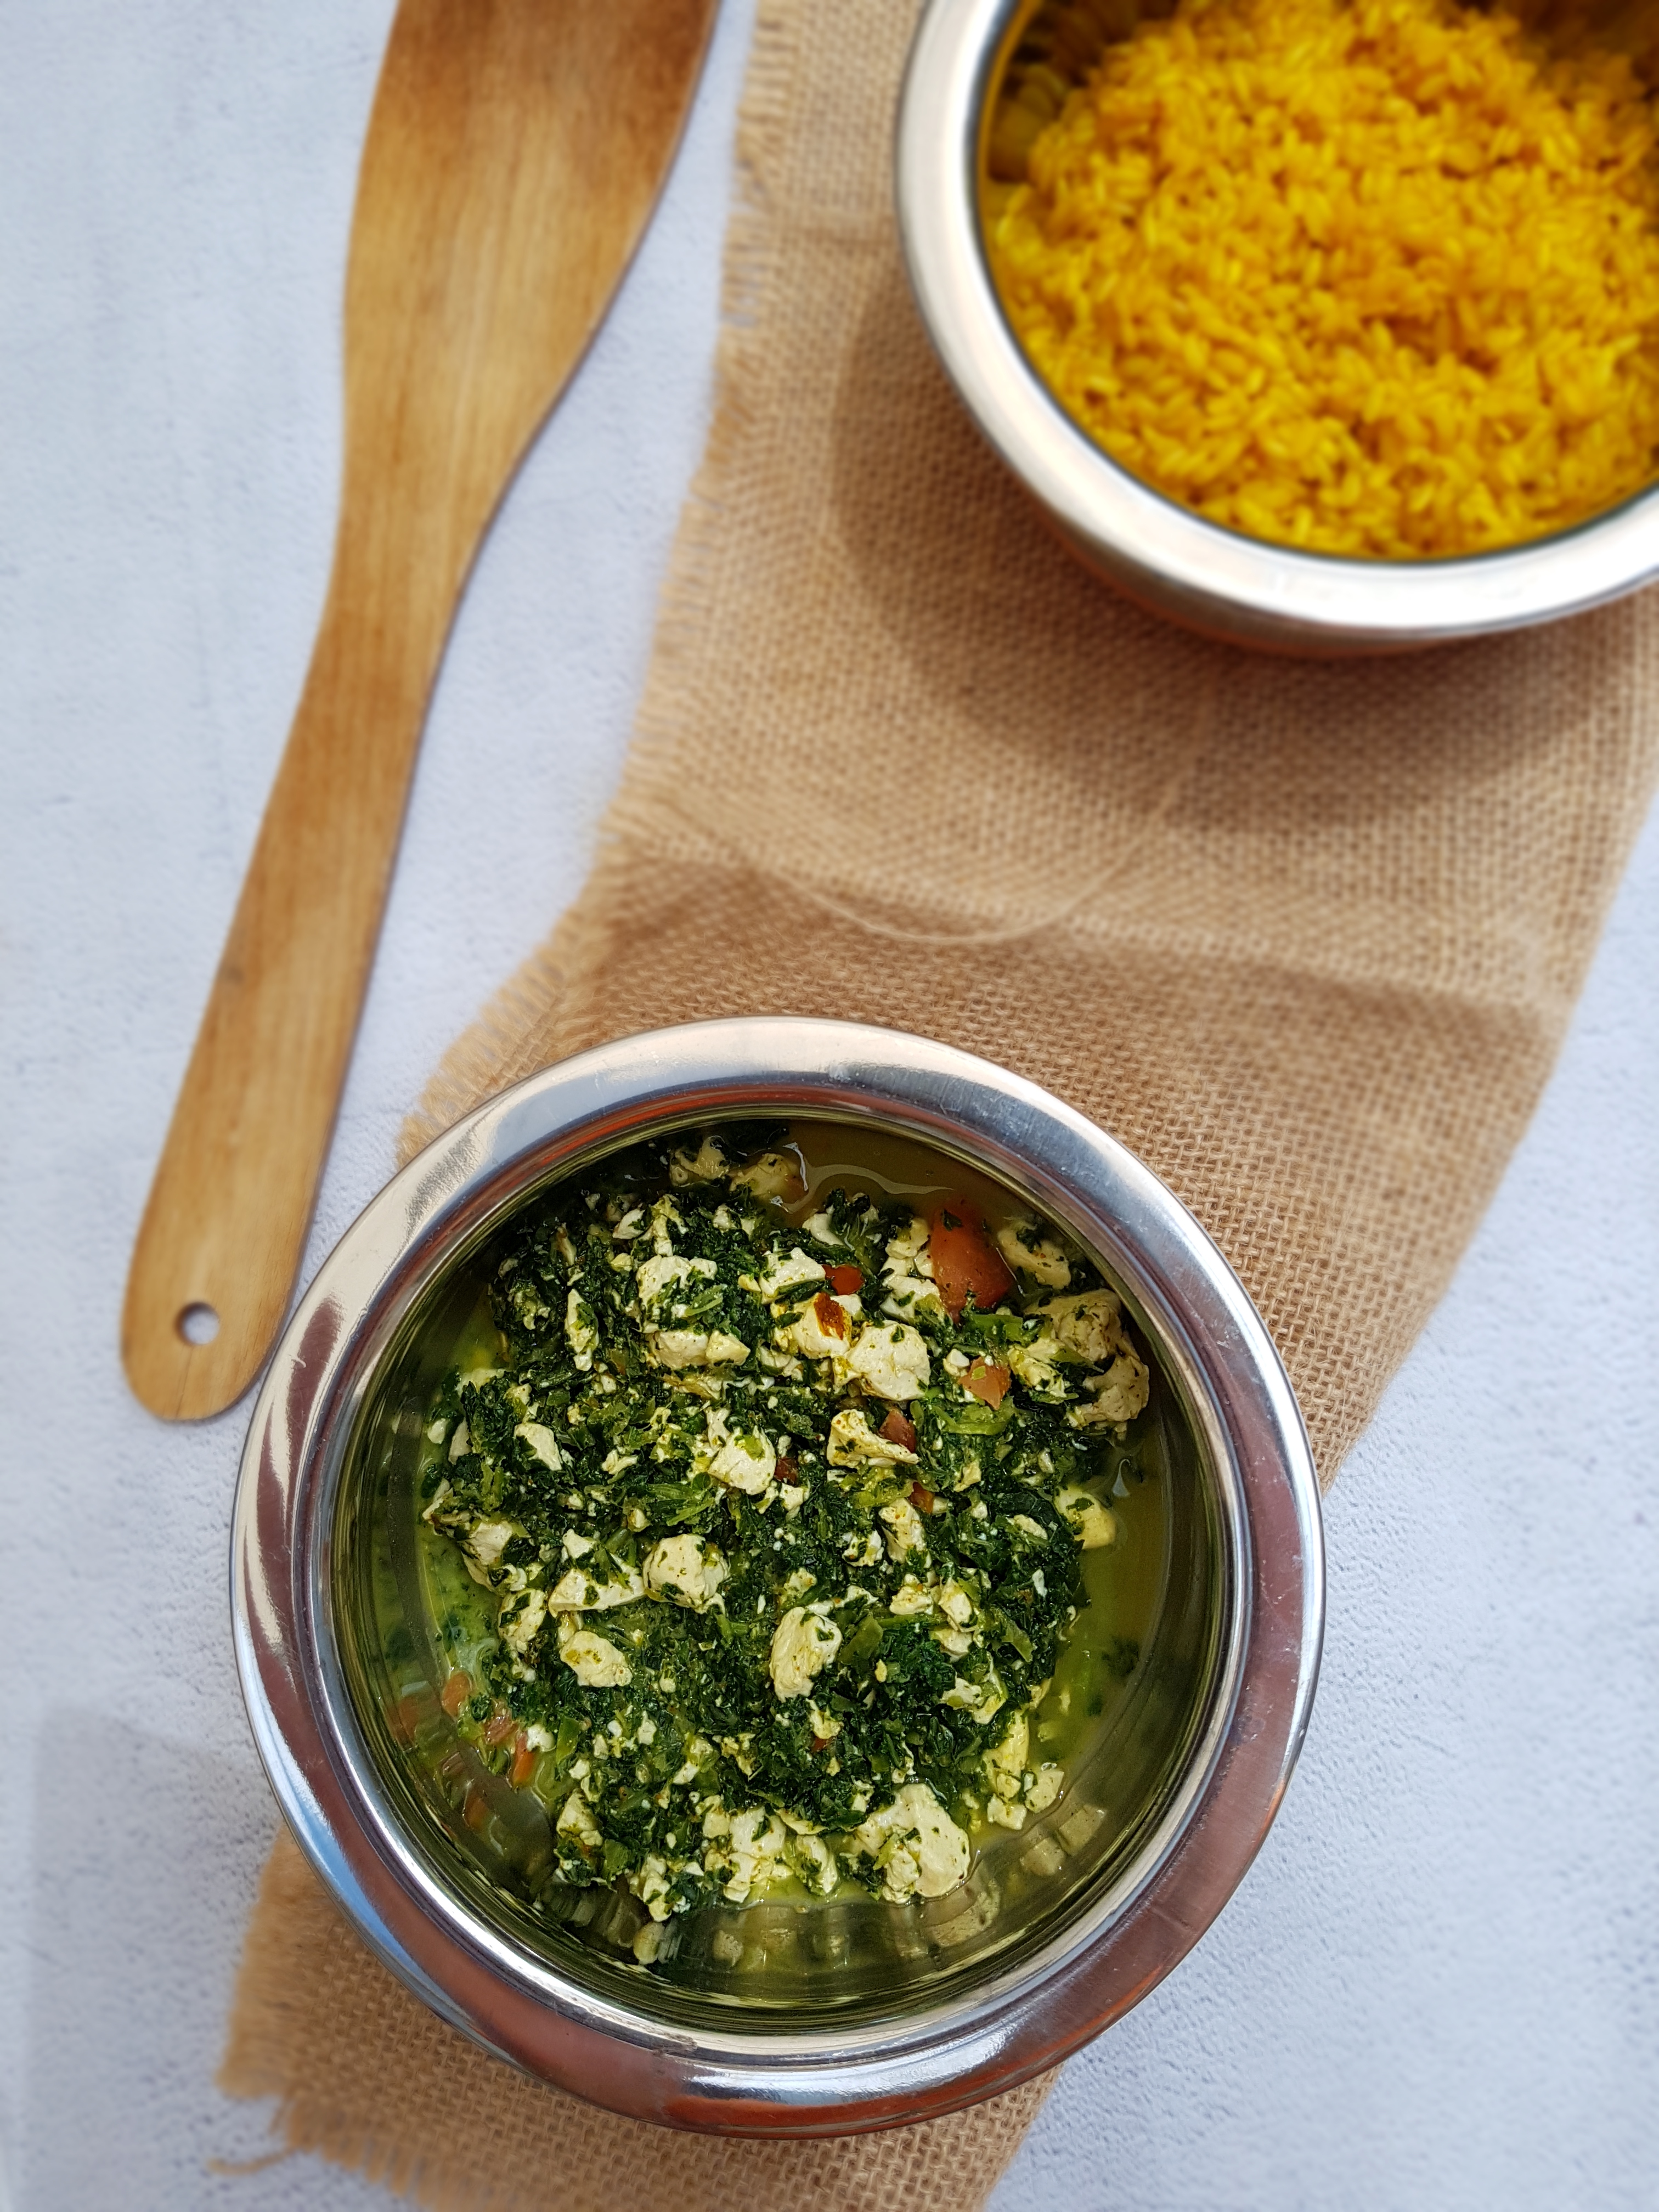
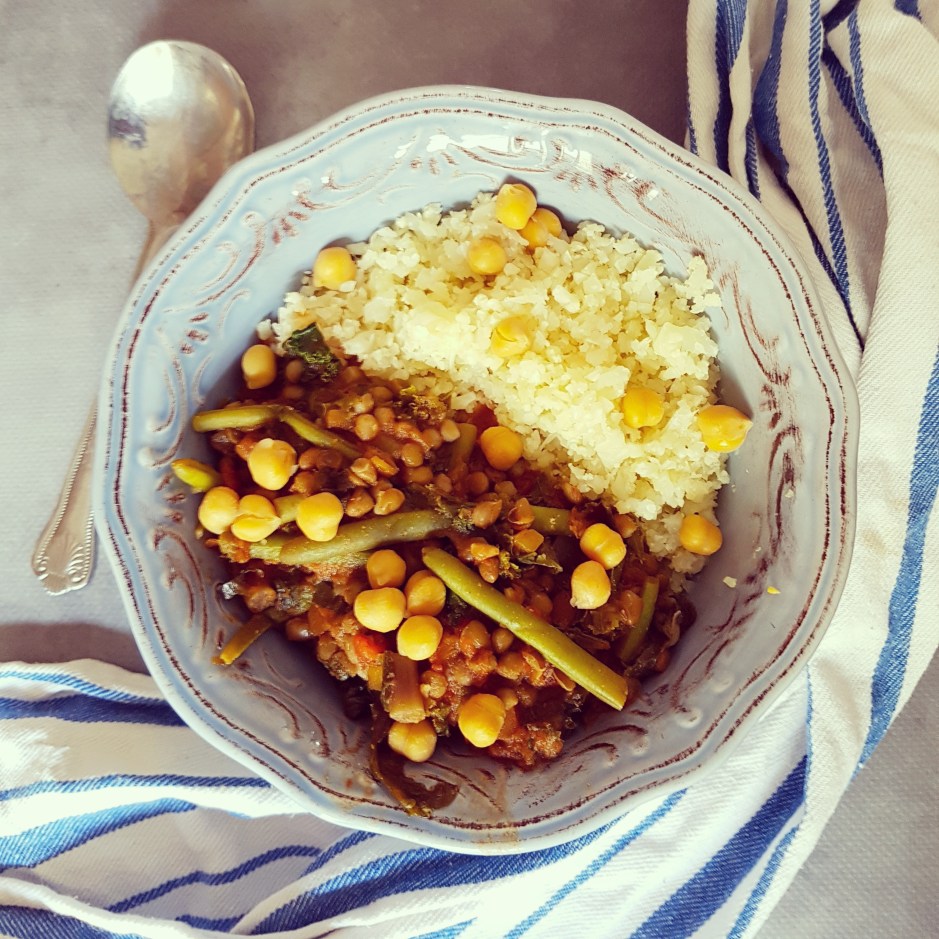
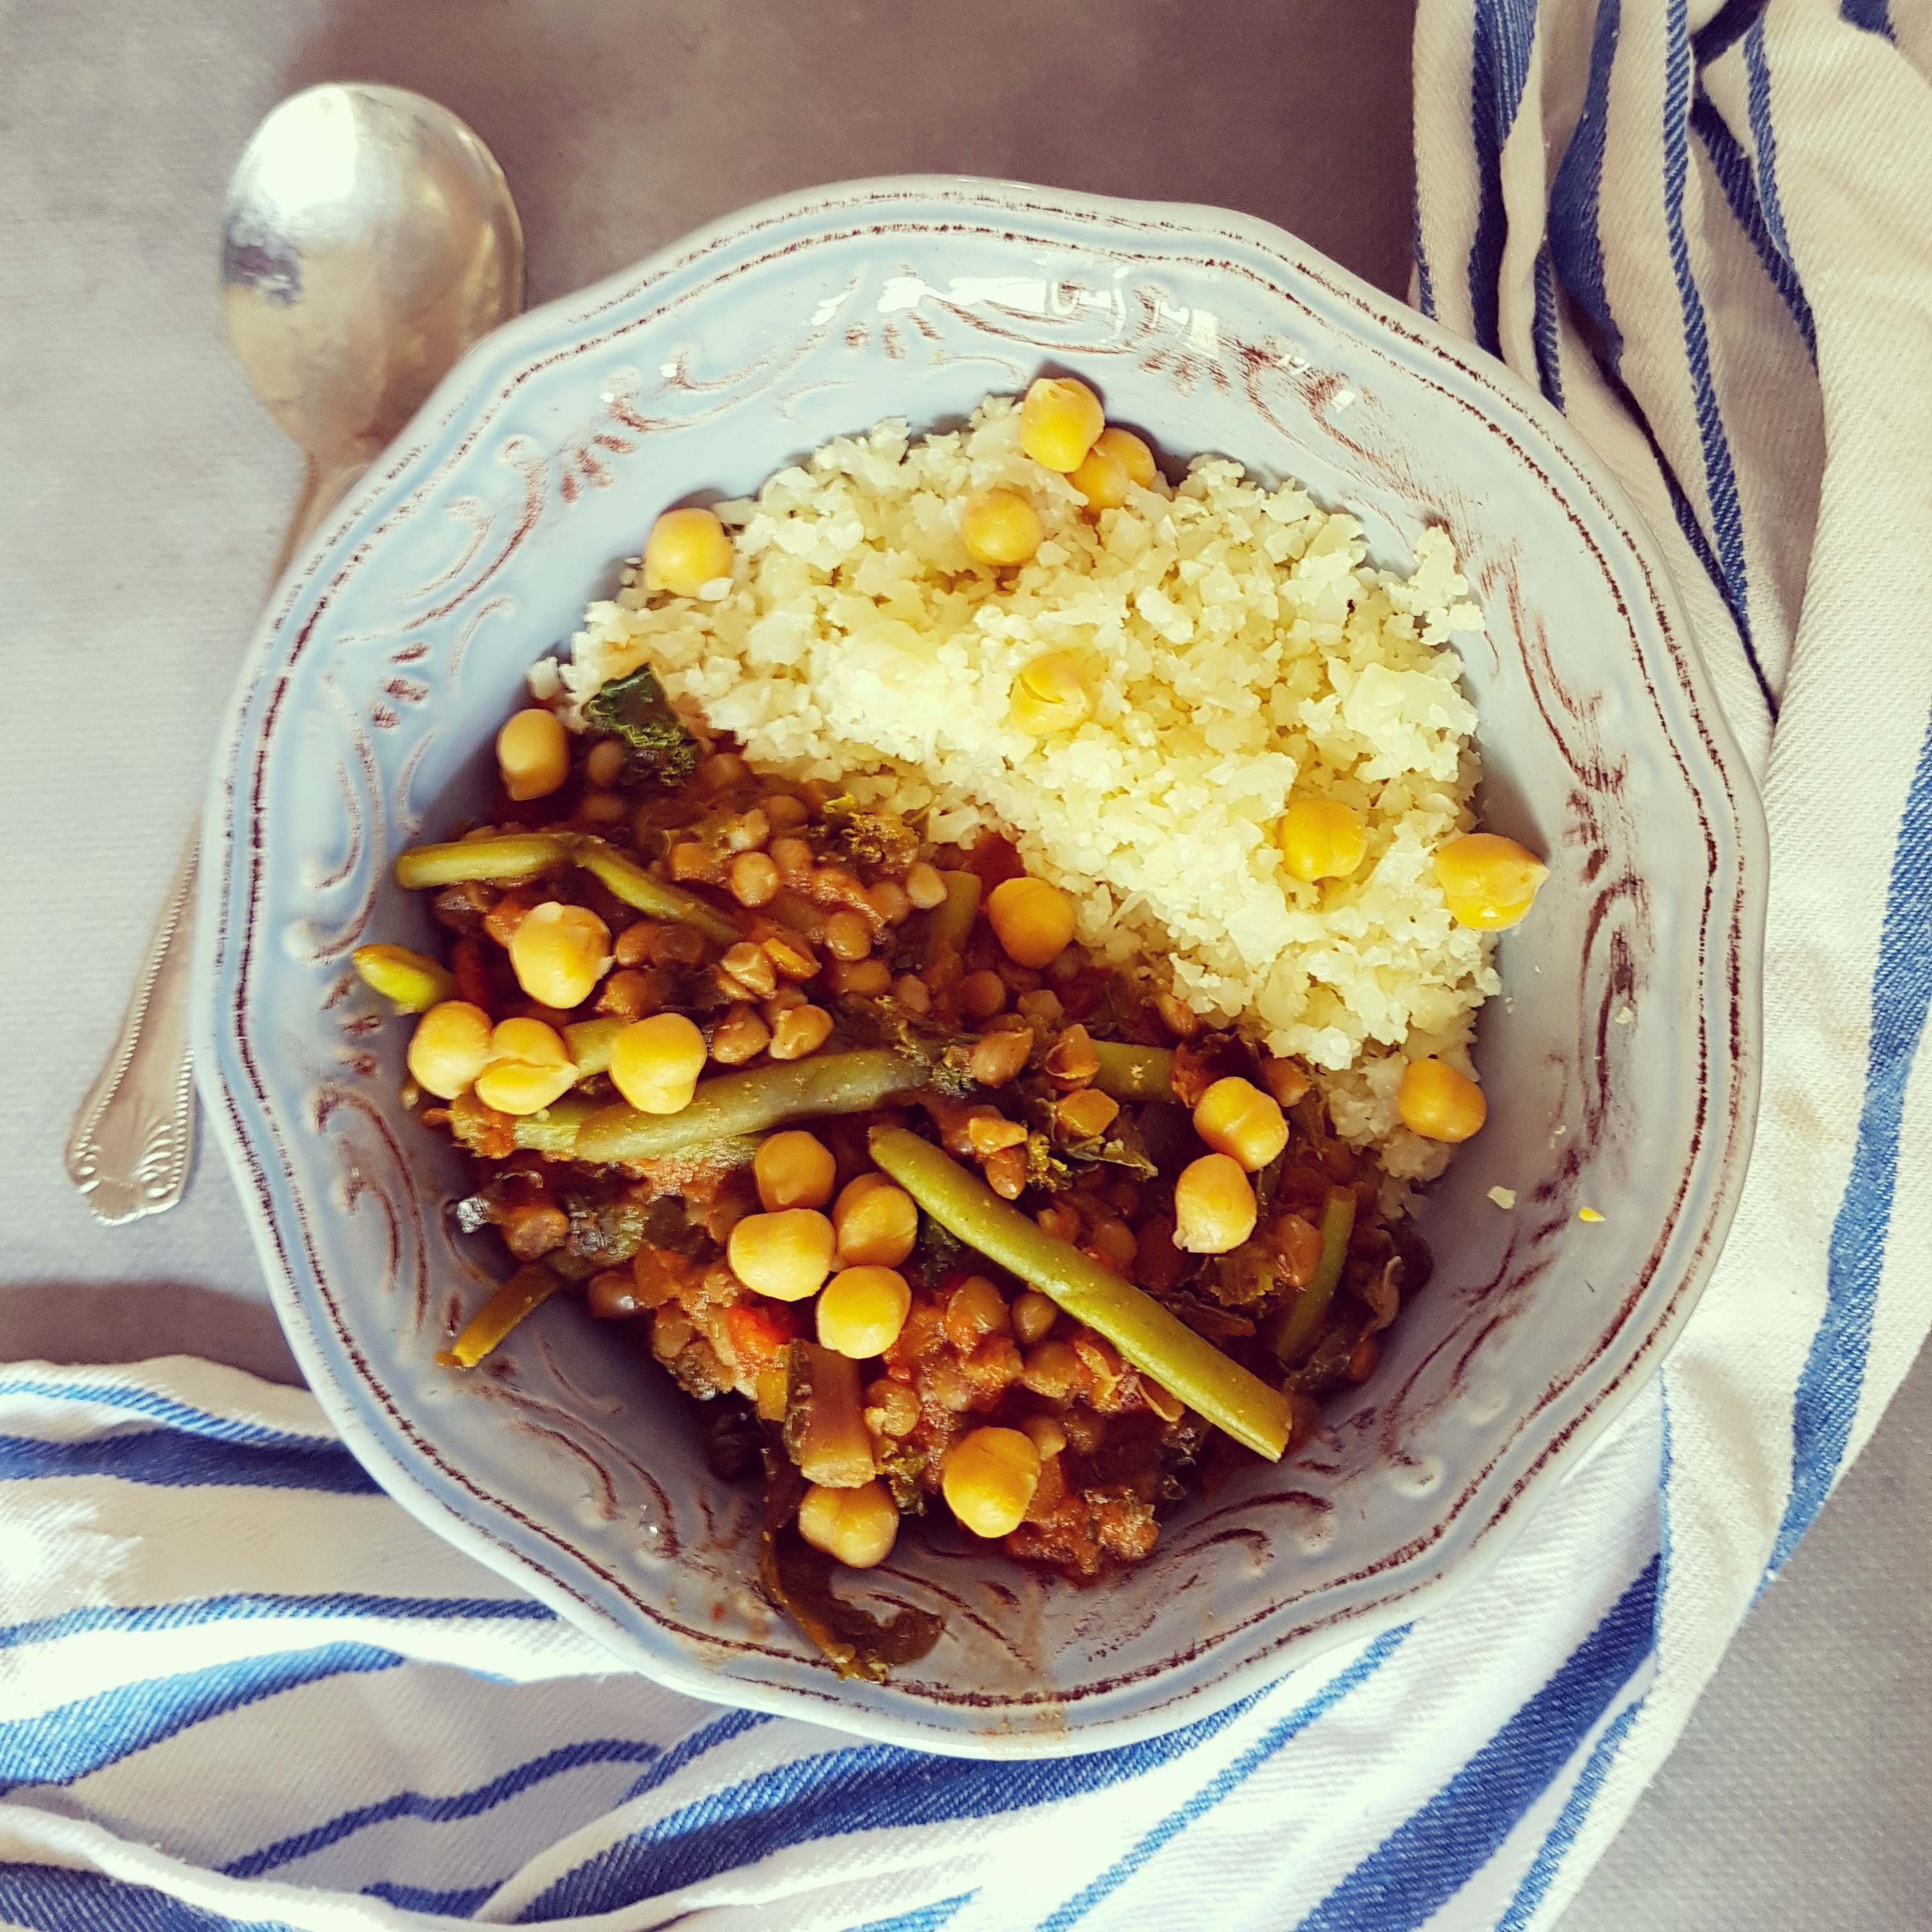
I am glad I trusted my intuition to throw all this together. Because the end result was delicious, warming, satisfying, comforting, and my omnivore husband loved it too! I served it with cauliflower rice (as pictured) to boost our veggie intake even further, but it would definitely be delicious with any kind of rice! It is vegan, gluten free and very low in fat while brimming with nutrients, protein, healthy carbs and fiber. It is also a very cheap meal, requiring only basic ingredients.

Another plus side is that this delicious kale & chickpea curry takes less than 15 minutes to make! I know what it’s like to be flat out after a day’s work when you are hangry but cooking is the last thing you want to do. If you ever find yourself with some kale on a busy weeknight, here is your solution to keep everyone happy, fed and healthy!

Kale & Chickpea Curry

Kale & Chickpea Curry

Serves 3

1 l vegetable stock
half tbsp mild or hot curry powder
3 cloves garlic, minced
1 tsp each cumin seeds, mild or hot chili powder, ground ginger, and turmeric
Large bunch of kale, washed and finely chopped
approx. 350g green beans (frozen)
2 large potatoes, peeled and chopped
1 tin diced tomatoes
salt and pepper
1 tin chickpeas, drained and rinsed (see here for a delicious way to use the chickpea brine!)
a dash of lemon juice

Pour a dash of vegetable stock to cover the bottom of a large, heavy saucepan and water sauté the garlic and spices (curry powder, cumin, chili, ginger, turmeric) for a couple of minutes until aromatic. Add some more stock to prevent the spices from burning. Add kale, beans and potatoes, and then season with salt and pepper. Stir to coat the vegetables, add the remaining stock and diced tomatoes, bring to the boil, reduce the heat and simmer for 15 minutes until the potatoes are tender. If the consistency becomes too dry for your liking, add a bit of water or some more stock. Add the chickpeas and lemon juice and adjust seasonings. Serve with rice or cauliflower rice.

Enjoy!

Warming Winter Cabbage Stew {vg, gf}

It’s that time of the year again. No, not the tax return yet – though that one is looming large too. It’s autumn here in Australia, and with autumn comes, inevitably, winter. While, unlike in the Northern hemisphere, winter in Down Under does not mean Christmas and gingerbread (but rather five consecutive month of rain and inefficient heating, in Melbourne anyway), it is time for warming stews and all sorts of comfort food. Ironically, I feel the cold much more since moving from Germany to Australia, which is probably due to the less than perfect insulation of houses around here. All the more reason to tuck into a steaming bowl of my warming winter cabbage stew, which features all the beauties of the season – potatoes, pumpkins, carrots, …yes, and cabbage. You saw that coming, didn’t you?

Cabbage is generally not a vegetable that people – no matter if vegan or omnivore – are especially excited about. Grossly underrepresented in fine dining spots and hipster cafés alike, cabbage often leads a desolate existence, wilting away in the supermarket next to its en-vogue cousins kale and cauliflower. You don’t see many hashtags saying #cabbageyeah, and it is admittedly not the first veggie I seek out when I visit the farmer’s market. In short, the chances of me ever making cabbage stew were ridiculously low. Not so much because I disliked it but rather because up until recently, it was not a vegetable that occurred to me.

A mistake indeed, as it turned out. Luckily for me (even though I thought it was unlucky at first), my organic vegetable delivery box last week featured one whole head of a drumhead cabbage. Neatly packed in cling wrap. (I never understand why organic delivery services use cling wrap. But that’s a topic for another day.) Needless to say, I wasn’t quite sure what to do with it, so off it went into the crisper. Where it stayed. For a while.

If you know me, you know that I am a big advocate of zero waste. I simply can’t stand throwing out food and can’t really remember when I last threw out food. Being a scientist at heart and pained by the sight of the poor cabbage in my fridge, I started doing my research. And while I was doing this, I started to fall in love with this unsightly and slightly smelly vegetable.

Cabbage has been consumed by many cultures of the world for thousands of years, and for very good reason. It is high in vitamin C to boost your immunity in the colder months, It is linked to the prevention of type 2 diabetes, boasts a number of antioxidants great for cardiovascular health, and provides an array of other vitamins and minerals, such as vitamin K, B6, B1, B2, phosphorus, maganese, potassium, magnesium and calcium, to name just a few. It is a great source of fiber and with its hearty, pasta-like texture, it provides comfort at virtually zero calories, so it is a great weightloss food!

Needless to say, this stew is ridiculously easy to make, a great way to rescue slowly dying veggies from your fridge and it is very cheap too!

Warming Winter Cabbage Stew

Warming Winter Cabbage Stew

Serves 6

4 green onions, cut in small rings (white and light green part only)
3 gloves garlic, minced
half a drumhead cabbage, shredded into bite-sized pieces
4 carrots, cut into bite-sized pieces
a quarter pumpkin, cut into bize-sized pieces
4 medium potatoes, cut into bize-sized pieces
4 cups vegetable stock
1 tin diced tomatoes
salt and pepper to taste
additional spices such as chili, cayenne pepper, or curry powder to taste

Throw the washed and prepared vegetables into a large stockpot or cast-iron pot, Cover with stock, tomatoes and spices, stir well, cover, and cook for about 45 to 60 minutes until potatoes, pumpkin and cabbage are tender. Adjust the spices and serve or keep in the fridge for a few days.

Enjoy!


Autumnal Lentil Buckwheat & Beetroot Salad {vg, gf}

While Melbourne is enjoying a glorious late summer these last days, it is only a little more than a week until the official beginning of autumn. The evidence is mounting that the cooler season is approaching with big steps. The leaves are changing colour, chestnuts and acorns are adorning the pathways, and the days are getting shorter. Time for warming and earthy dishes such as this lentil buckwheat & beetroot salad with oranges.

It is no secret that lentils and buckwheat are a match made in heaven with their hearty textures and grounding flavours. Together, they also form a complete protein which is why this salad is so valuable for vegans. Beetroot with its sweet earthiness complements the qualities of lentils and buckwheat perfectly, while fresh oranges not only provide a hefty dose of vitamin C to rev up your immune system for the colder season, but with their juicy and tangy flavour lift this dish while chopped walnuts add heart-healthy fats and another textural element to this salad. A generous dose of parsley and spices provides for some bite while a mild dressing made of orange juice, balsamico and maple syrup achieves a perfect balance of flavours.

This is a very simple yet satisfying and wholesome starter or even main meal. I don’t cook the buckwheat as it would get all mushy, but rather roast raw buckwheat groats which makes for some wonderful crunch and nutty aromas. I used brown lentils from the tin although you can cook dry lentils and use them here. As for the beetroot, you can use freshly cooked, packaged or tinned beetroot.

Lentil Buckwheat & Beetroot Salad

Serves 4

1 cup raw buckwheat grouts
1 tin brown lentils, drained and rinsed
2 large oranges, chopped
3 cooked beetroot bulbs, chopped
2 handfulls of fresh parsley
salt, pepper, paprika, chilli and cardamon to taste
4 tbsp fresh orange juice (from the oranges)
3 tbsp balsamic vinegar
3 tbsp maple syrup
2 tbsp chopped walnuts

First, prepare the dressing by cutting your oranges open and squeezing out roughly 4 tbsp of fresh orange juice into a small bowl. Mix with equal amounts balsamic vinegar and maple syrup and adjust the ratios to taste. You may want to add some salt and pepper or other spices or add them to the finished salad. Dry roast the buckwheat in a large non-stick frying pan until golden and aromatic. This should only take a few minutes. Add to a large mixing bowl, then add the lentils, oranges, spices and dressing and mix well. Do not add the beetroots at this stage to avoid colouring of the remaining ingredients. Divide the lentil buckwheat orange mix to four salad plates and top with chopped beetroot, fresh parsley and walnuts.

Enjoy!

Fat Free No Bake Express Vegan Sheperd’s Pie {gf}

In theory, the heading says it all. But it does not. What I am going to present you today is absolutely knock-your-socks-off crazy delicious! Don’t believe “fat free”, “vegan”, and “delicious” go together? Hear me out. It’s beginning to look a lot like autumn here in Melbourne, so it’s that time of the year where you are tired of your barbecue and dish out the comfort food again. Just kidding. I mean, tired of barbecues? Never! But yeah, as the days get cooler and the shorts and sandals make way for cardies and boots, you wanna have the matching recipes up your sleeve. And this express vegan sheperd’s pie is one of them.

Vegan Sheperd's Pie
Vegan Sheperd’s Pie

Like most of my recipes, this baby is a bit of a rush job. One night we were coming home very late and very hungry. Our crisper greeted us with some not-so-crisp vegetables. Limp carrots, wilting celery and rotting onions, I’m looking at you. In short, there were a few things that just screamed “sheperd’s pie”. But sheperd’s pie and quick doesn’t really go together. Or does it?

I am excited to present you with a truly express vegan sheperd’s pie. A sheperd’s pie that, on top of being easy and quick, is gluten free, vegan, and insanely delicious. Yes, it is. I am generally more of an Italian/Asian food girl. I prefer light, flavoursome dishes to traditional Northwest European comfort food. But I’d gladly have two helpings of this sheperd’s pie any time. To be honest, I wasn’t sure whether this would work out. Apart from my crisper with said sad veggies (pun intended, sorry not sorry), my pantry was practically empty. I had no stock or fancy spices at hand so I used water and a bit of good ol’ salt and pepper instead. Also, I had run out of plant milk so the potatoes on top is just that – potatoes. I really used minimal ingredients and minimal equipment. But with maximum results.

As you know if you have been following my blog, I’m pretty lazy. I mean, erh, busy. Really. Or maybe I just can’t be bothered standing in the kitchen for one hour straight. So I like to take shortcuts. Microwaving instead of boiling potatoes? Be my guest. Whatever, I’m going to give you a few options here. Every step comes with an option for lazy bums like me and with an option for people who have too much time on their hands, i.e. people who peel their vegetables. Ugh. Ain’t nobody got time for this. If you peel your vegetables, you obviously got way too much time on your hands. (PM me for my address.) I don’t deny that the end result looks prettier if you peel your vegetables. But I take that “no worries” thing seriously.

Express Vegan Sheperd's Pie
Express Vegan Sheperd’s Pie

And that’s why this express vegan sheperd’s pie is virtually fat free, it’s no bake (so that you can still enjoy this beauty in the peak of summer), it’s ridiculously quick compared to normal sheperd’s pie recipes. It is get-on-your-knees scrumptious (as confirmed by my sheperd’s pie snob husband). And it is also very cheap with a few simple ingredients and no fancy equipment. You’re welcome. And for the avoidance of doubt, this sheperd’s pie is also vegan and gluten free. But you know that already.

Express Vegan Sheperd’s Pie

Serves 4

1kg potatoes, washed, peeled (if you can be bothered), and roughly chopped
optional: a dash of plant milk and some salt and pepper for the potato mash
1 onion, diced
handfull of spring onions, washed and chopped
3 cloves garlic, minced
1 pound (approx. 500g) carrots, washed, peeled (if you can be bothered), and chopped
1 whole celery bunch, washed and chopped
2 cups dry green lentils, rinsed
4 cups either vegetable stock or water and some extra spices such as herb salt, white pepper etc.

First things first, cook your potatoes like you normally do. (I do mine in the microwave, but that’s just me.) In the meantime, heat a large stockpot or French oven and cover the base of the pot with some water. You can use oil, but I like my water sautés. Sauté the onion, spring onions and garlic for a few minutes, then add the carrots, celery and lentils. Add the stock or water and spices. Cover and cook until lentil are tender. Adjust spices.

Meanwhile, puree the potaotes in a high-powered blender (if you are lazy) or mash by hand. Add plant milk and some more spices if desired. I use some of the liquid from the lentil-vegetable mix as the starch will lend a lovely texture to the mash and the pie filling will be less liquidy if you use part of it for the spud. Just saying. Scoop the vegetable mix into a baking dish and scoop the prepared potato mash on top. Bob’s your uncle.

Enjoy!

P.S.: Love lentils? Check out my lentil bolognese, lentil stew and lentil burgers!


Crispy Oil-Free Potato Wedges

I loooove potatoes. Seriously. They are so much more than a side dish. Not only do they taste delicious, they are so filling and satisfying that they make for a complete meal. I love them in any state – boiled, baked, roasted, mashed, fried…but they are at their best in the form of chips or wedges. Now, if this sounds greasy and unhealthy to you, dripping with trans fats and all sorts of nasties, hear me out. It is possible to achieve the perfect crispy oil-free potato wedges. No oil and no deep-frying required!

These are not the result of an air-fryer (if you are remotely familiar with instagram you would have come across the latest craze that is air-fryers). No fancy or expensive equipment required, just a good ol’ oven, a baking tray and 40 minutes of your time. That’s all!

While rice, noodles, pasta and (gluten-free) bread all have their merits, nothing will keep you full for as long as a good plate of spuds. Being much lower in carbohydrates and calories than other “side dishes” and with their favourable nutritional profile, potatoes are closer to vegetables than starchy sides. They are fat and cholesterol free and bursting with iron and vitamin C. Vitamin C actually improves the absorption of iron which is why potatoes are extremely valuable for vegans and vegetarians. They contain more potassium than a banana, are a good source of vitamin B6, fiber, magnesium and antioxidants as well as the so-called “resistant starch”. Resistant starch works like soluble fiber which contributes to improved insulin sensitivity, lower blood sugar levels, reduced appetite and improved digestion.

Enough said about the benefits of spuds, I bet you just want to know how to achieve the perfect crispy oil-free potato wedges! Crispy wedges without any oil? What’s the secret ingredient? Yes, there is actually a secret ingredient. And that is…water! I knew that in gluten-free bread baking, putting a tray of water into the oven helps the bread to form a proper crispy crust. I thought that this must also be possible with potatoes! While I have achieved good results dry-roasting potatoes before, adding some water to the tray definitely put these babies onto a new level. Unlike with bread where a separate water tray is put into the oven, the water is added directly to the tray with the potatoes on it.

Crispy Oil-Free Potato Wedges
Crispy oil-free potato wedges

Serves 4

1kg potatoes, washed and cut into wedges
1-2 tbsp coarse sea salt
1 tsp paprika
halt a cup plain water

Preheat the oven to 230 °C. Spread the prepared wedges onto a non-stick (or lined) baking tray. Mix the salt and paprika in a small bowl. Sprinkle the spice mix over the potatoes and rub into the wedges. Add the water to the tray. Bake for approx. 40 minutes, turning halfway.

Enjoy!

Spicy Lentil & Black Bean Stew {vg, gf}

My love for lentils continues. I’m still not tired of lentil bolognese, lentil hummus, lentil pâté and lentil burgers. And with autumn clearly on the way here in Melbourne, it’s time for soups, stews, spice and all things nice again. And because I love black beans too (black bean chocolate cake, anyone?), here’s a spicy lentil & black bean stew, just for you.

To make things clear, you could really use any legumes in this one. I just found that the combo lentils and black beans was really yummy and filling. This dish is a bit of a crossover between Moroccan and Mexican, but that will vary depending on the spices you use. This stew is actually so dirt easy to make that it almost can’t be called a recipe, but I found it so delicious that i thought I’d post it anyway. It really is one of my easiest and most straightforward recipes (I know I say that a lot), but basically, if you have tinned tomatoes, some legumes and spices in your pantry, you can start right now, and in less than half an hour have a crowd-pleasing meal that is tasty, satisfying, warming, comforting, nourishing, keeps well in fridge and freezer, and is good for you.

I have already mentioned the numerous health benefits of lentil, beans, and tomatoes – the staples in this spicy lentil & black bean stew – at length, so if you are interested what goodies you put into your body with this baby, a google search will tell you! 🙂 Feel free to add more vegetables to boost the goodness of this wonderful stew. Like all my recipes, this spicy lentil & black bean stew is both gluten free and vegan, and it is also low in carbs and practically fat free. All of the comfort with none of the guilt.

Spicy Lentil & Black Bean Stew

Serves 3

1 large onion, sliced or chopped
2 garlic cloves, minced
1 tbsp ground coriander
1 tbsp ground cumin
a pinch of chilli powder (optional)
salt and black pepper to taste
400 g can diced tomatoes
1 cup water
half a cup dry green lentils
400 g can black beans, rinsed and drained
fresh parsley to serve

Heat a heavy-based saucepan or cast iron pot and sauté the onion in a bit of water to prevent sticking for a few minutes or until soft and translucent. Add the remaining spices (garlic, coriander, cumin, chilli, salt and pepper) and cook for another two minutes. Add the tomatoes, water, lentils, and black beans. Bring to the boil and simmer until the lentils are soft, about 20 minutes. Adjust the spices and serve with fresh parsley.

Enjoy!

Buckwheat & Lentil Burgers {vg, gf}

I did it. I created the perfect vegan (and gluten free) burger. This was preceded by one year of consistently trying to develop a recipe for a vegan gluten free burger that: a) would not fall apart when flipping, b) appeal even to the most ardent meat eater (my husband). I don’t want to spoil the ending for you guys, but: Everything sorted itself out in the end. I feel such a sense of achievement. Here they are…drumroll…my perfect buckwheat & lentil burgers.

If you are after a recipe for a vegan and gluten free burger, this buckwheat & lentil burger is the only one you’ll ever need! Both buckwheat groats and lentils are not only very cheap, but they are bursting with fiber and protein to make a meat burger pale in comparison. Far from just being another hipster food, buckwheat has traditionally been consumed for thousands of years, and for good reason! It is shock-full of antioxidants for a healthy heart and glowing skin and it boasts a unique amino acid combination compared to other grains. Buckwheat has been linked to lower cholesterol and blood pressure, and even the grain-phobic paleo community is in favour of buckwheat (which is actually not a grain, but a seed). Other benefits include an array of vitamins and minerals such as magnesium, manganese, phosphorus, and folate. And as buckwheat cooks a lot quicker than rice or quinoa, it is a great hassle-free addition to your pantry.

Lentils are a favourite among vegans and vegetarians. With a whopping 18 grams of protein per cup they keep you full and happy and are the perfect argument when you get asked: “Where do you get your protein?”. Lentils’ high level of soluble fiber has cholesterol-lowering benefits, improves digestion and keeps your arteries clean. Besides, its slow-burning carbs provide sustained energy and keep cravings at bay. All the more reason to include lentils in your diet more often – whether you are vegan or not!

Back to these burgers. So they are a nutrition bomb, easy to make, and – yes – they are indeed delicious. They are “meaty”, hearty, comforting, filling, satisfying, they don’t crumble, they are perfect. Bursting with high-value plant protein while boasting a moderate amount of healthy carbs and being low in fat, they make for a perfect main meal or snack. They are ready in 20-25 minutes – no chilling of the “batter” required – and freeze beautifully. So please add this recipe to your repertoire. You will know why!

Buckwheat & Lentil Burgers

Makes 12 burgers

1/2 onion, diced
2 cloves garlic, minced
One cup dried green lentils
One cup raw buckwheat groats
2 cups vegetable stock
2 cups water
3 tbsp spice blend of choice (I used turmeric, cumin,coriander, cardamon, black pepper, nutmeg, cayenne pepper and paprika)
1 tsp salt
1/3 cup LSA
2 tbsp chia seeds

Sauté the onion and garlic in a large stockpot until soft and the onion is translucent. Add the lentils, buckwheat, stock and water and simmer together until the lentils are soft and the liquid is absorbed (this will take around 15-20 minutes). Let the mixture cool down a bit, then transfer to a high-powered blender with the spices, salt, LSA and chia. Blend in increments until you achieve a malleable mass. Be careful as the mixture will still be hot. Once no longer hot to the touch form 12 patties. Heat a non-stick pan (you might need to slightly oil it). Once it is hot, fry the patties about three to four at a time, depending on the size of your pan. Fry for approx. 3-4 minutes, then check with a spatula if they are dry underneath. If they seem dry and move easily around the pan, flip. They should be browned on the fried side. Fry for 3-4 minutes on the other side. (Depending on your stove and pan, it may take up to 5 minutes.)

Enjoy!

Skinny Parsnip and Peanut Soup (4 ingredients!) {vg, gf}

I do love a good soup, regardless of the weather. And I happened to have a lot of parsnips in this week’s vegetable box delivery (hello, autumn!). Parsnips that were slowly wilting away, screaming at me: “Turn me into a soup!”. I listened to them. And because I am a sucker for unconventional combos, the result was a parsnip and peanut soup. A skinny parsnip and peanut soup, to be precise.

To be honest, I am not the hugest fan of parsnips. I don’t particularly like their texture and the taste does nothing much for me, not even roasted. Throw the good ol’ spud and peanut butter into the equation, however, and magic happens. You don’t even necessarily need the peanuts, I just think it really adds some depth of flavour and it actually works really well with the parsnips and potatoes even though it seems like an unusual pairing. The starchiness of the root vegetables and the creaminess of the nuts just takes this soup to a whole new level of goodness. I used defatted peanut butter powder (pb2) to lower the fat content. However, you could use ground peanuts (or other nuts) or peanut butter instead and this soup would still be very low in calories albeit satisfying.

As a full-time working mum far away from my family (sniff), I take my commitment to create easy, quick and hassle-free recipes very seriously. This soup requires just four ingredients (yes, four!) and a minimal amount of time to prepare. It is also ridiculously fool-proof so you will have absolutely no excuses not to try it! Given that the required ingredients are fairly cheap, this is also a very budget-friendly soup. It is ideally suited to prepare as a big batch and store leftovers in the fridge or freezer. Presented in a beautiful bowl and with some fancy toppings, this soup is also impressive enough to serve at your next dinner party.

Note that if you don’t have or don’t want to use vegetable stock, it’s totally fine to use water instead (that’s what I did). You just need to add salt, pepper and other spices (such as garlic powder) to taste. The stock will make it even more flavoursome but I have tried it both ways and it works beautifully with just the water as well. For what it’s worth, I don’t peel my veggies as it all gets blended up anyway and I use organic but I know tut shat most peaople like to peel their veggies. 😉

Skinny Parsnip and Peanut Soup

Serves 2-4

1 lb (ca. 500 g) potatoes, washed, peeled (optional), and cut into small pieces
4 parsnips, washed and cut into small pieces
3 cups vegetable stock (or water plus salt, pepper, garlic powder and other spices to taste)
2 tbsp powdered peanut butter OR peanut butter OR ground peanuts (or other nut butter or nut meal)

Steam or microwave the vegetables until tender. Bring stock or water and spices to the boil, add the steamed veg and peanut butter/powder, stir and then blend with a stick blender until smooth and creamy. The soup will seem to be liquid and frothy at first, but hold on and it will turn creamy!

Enjoy!

Healthy Vegan Palak Paneer (Tofu and Kale Curry)

Indian cuisine is delicious, flavourful, nourishing and has great options for vegan and gluten free dietary requirements. But let’s face it, with its ample use of oil, cream and cashews, it is generally not the healthiest food going around. If you fancy spicy Indian flavours without sacrificing your waistline, I am here to your rescue with this super-quick, ultra-easy, mega-delicious and, yup, healthy vegan palak paneer (aka tofu and kale curry).

I know that palak means spinach and not kale, and that paneer is the name of an Indian cow’s milk cheese, neither of which feature in this dish. Consider my version as a hipster take on palak paneer: lots of protein and only very little fat from silken tofu in combination with superfood kale. Though it is a perfectly good option to use spinach or other leafy greens here, kale is what I had on hand, so kale it was. You could use firm tofu instead of silken tofu here, but I find the silken tofu makes this dish a bit more creamy.

This healthy vegan palak paneer is really easy to put together with just a handful of basic ingredients. Hello easy weeknight meal. Probably the only obscure ingredient I used was powdered peanut butter aka pb2 which might be hard to get so you can use ground cashews instead which would be more authentic but also packs more fat. I used a very light coconut milk for drinking from Vitasoy with only 2% fat which is almost nothing but still conveys this dreamy coconut flavour. You could use a fuller fat coconut milk or other plant milk instead.

Healthy Vegan Palak Paneer

Serves 2

1 block (300g) silken tofu, pressed to remove moisture and cubed
half a tsp or more of sea salt
4 tsp powdered garlic
1 tsp ground ginger
1-2 tsp mild or hot curry powder or garam masala
pinch of kashmiri chilli if you like it hot
250g fresh or frozen kale, thawed
half a cup very light coconut milk or plant milk
2 tbsp powdered peanut butter or ground cashews
a tbsp desiccated coconut

Heat the tofu in a large frying pan with salt, garlic, ginger, curry powder and chilli. You can use a bit of oil or, as I prefer, a bit of water to prevent sticking. Cook for a minute, add the milk, then add the kale and mix with the tofu without breaking up the tofu too much (it should still have the shape of cubes). Adjust the spices according to your tastebuds and cook a few more minutes until your desired consistency is achieved. Add the powdered peanut butter or ground cashews and coconut. Serve with saffron rice or with my 5-minute gluten free naan.

Enjoy!

Tofu Stir Fry with Black Bean Noodles {vg, gf}

Stirfry for me is the ultimate comfort food. It is vibrant, full of flavour, satisfying and warming, and I love how versatile it is. Stirfrying means cooking more quickly. Vegetables therefore retain more nutrients. And because stirfrying is so quick, it means less time standing in front of the stove and more time eating! Stirfrying for the win! Here goes my vegan tofu stir fry with black bean noodles. It is ultra quick (about 15-20 minutes) so there are absolutely no excuses for not dishing up a delicious and healthy meal on a week night! (Or any night, for that matter.)

Now, this does not need to be a tofu stir fry and you don’t need to use black bean noodles. I just used them as I think they work well together. I have come to really appreciate bean noodles. They are quite a bit lower in calories and higher in fibre than regular or processed gluten-free noodles/pasta, and they cook in a fraction of the time. If you can’t get your hands on black bean noodles, not to worry! Just use your favourite noodles or zoodles instead. This dish will still be delicious. If you don’t like tofu you could use tempeh (also have a look at my tempeh curry recipe here) or if you avoid soy simply use more veggies or try something new by making chickpea “tofu”. The options are endless.

That’s what I like about these kind of meals. No-one nowadays has the time or desire to go shopping every day so it’s imperative to have a handfull of standby recipes in which you can use whatever you have on hand.

Tofu Stir Fry with Black Bean Noodles

Serves 2

1 pack (300g) tofu, cubed
4 tbsp tamari
2 tbsp maple syrup
4 cloves garlic, minced
1 tbsp apple cider vinegar
1 tbsp ground ginger
half a tbsp sesame oil

dash of fresh lime juice
salt, pepper and chilli to taste

black bean noodles or other noodles (amount to taste)
dash of water or vegetable stock
about a pound (approx. 450-500 grams) mixed vegetables such as green beans, broccoli, sweetcorn, green peas, capsicum, carrots…
cashew nuts, fresh coriander, fresh chilli to serve (optional)

Mix the tamari, maple syrup, garlic, oil, vinegar, ginger, lime juice and spices in a medium bowl, then add the tofu and let sit for 5-10 minutes to soak up the marinade. Prepare the noodles according to the manufacturer’s instructions. Heat water or stock in a large frying pan or, better, a wok, and blanch the vegetables for a couple of minutes. Take out the veggies, then add the tofu with all of the marinade, cover and let cook for 5-10 minutes. Add the veggies, mix in thoroughly and cook for another two minutes. Turn off the heat, toss in the noodles and mix everything through. Adjust the spices and let sit for a minute. Serve with cashews, coriander and chilli according to your liking and…

Enjoy!