Gluten Free Sugar Free Scottish Shortbread

The best shortbread out of Scotland - and gluten and sugar free, too!
The best shortbread out of Scotland – and gluten and sugar free, too!

I love shortbread. In fact, I’d go miles for a true Scotch shortbread. And I don’t even like biscuits and cookies normally. Scottish shortbread was one of the first things I missed on the gluten free diet. And pizza. And crusty bread. And carrot cake. Not because you cannot get gluten free shortbread in the supermarket. You can. It tastes alright. I wanted a shortbread that doesn’t taste alright. I wanted a shortbread that tasted freaking awesome, fantastic, to-die-for, melt-in-the-mouth – and I got it.

I wanted to create a healthy-ish gluten free version of classic Scottish shortbread, not any old shortbread, but that rich, buttery, sandy, melt-in-the-mouth type of shortbread like made by Walkers brand which I absolutely adored in my pre-gluten-free days. With just three ingredients – organic salted butter, stevia, and a healthier gluten free flour blend with protein-rich and low-carb sorghum flour, my Scottish shortbread is totally free from any sugars, trans fats, flavourings, and preservatives, while featuring the taste, flavour, and the oh-so-good texture of the original. it took several attempts to create the perfect gluten free AND sugar free shortbread, but here is one that you should definitely not postpone to make!

Although I know that any Scotsman would be shocked by the concept of sugar free shortbread, my aim is to re-create old favourite recipes in a healthy and allergy-friendly way. In fact, shortbread is the only type of cookie where refined sugar can be totally replaced, as it is meant to be pale anyway and doesn’t need browning like other cookies do.

You will find that this shortbread is nothing short of divine, and – without wanting to flatter myself too much – probably the best you’ll get served outside of the highlands. It is very easy to make, too. The most important thing: Don’t EVER skimp on the butter! The butter is the star ingredient here, and that’s also why there cannot be a vegan Scottish shortbread. You can of course replace the butter with vegan spread if you must, and the result would no doubt be yummy, but it wouldn’t be Scottish shortbread. At all. Use BUTTER! Use organic butter, not homebrand or anything like that. Use salted butter. I know all those shortbread recipes out there calling for unsalted butter. Don’t listen to them. Use salted butter. If you can’t/don’t want to use salted butter for whatever reason, remember to add a generous pinch of sea salt to the dough. Remember there is THREE ingredients (counting the flours as one). There is no baking powder, no egg, no xanthan, and no vanilla! I didn’t even add flax, which I normally do with everything. This is a purist food! A note on the sweetener: If you use stevia, you can taste it in the final product. I like stevia and think it is the best calorie-free sweetener around, but if you loathe the taste of stevia, use erythritol, xylitol, or another granulated sweetener.

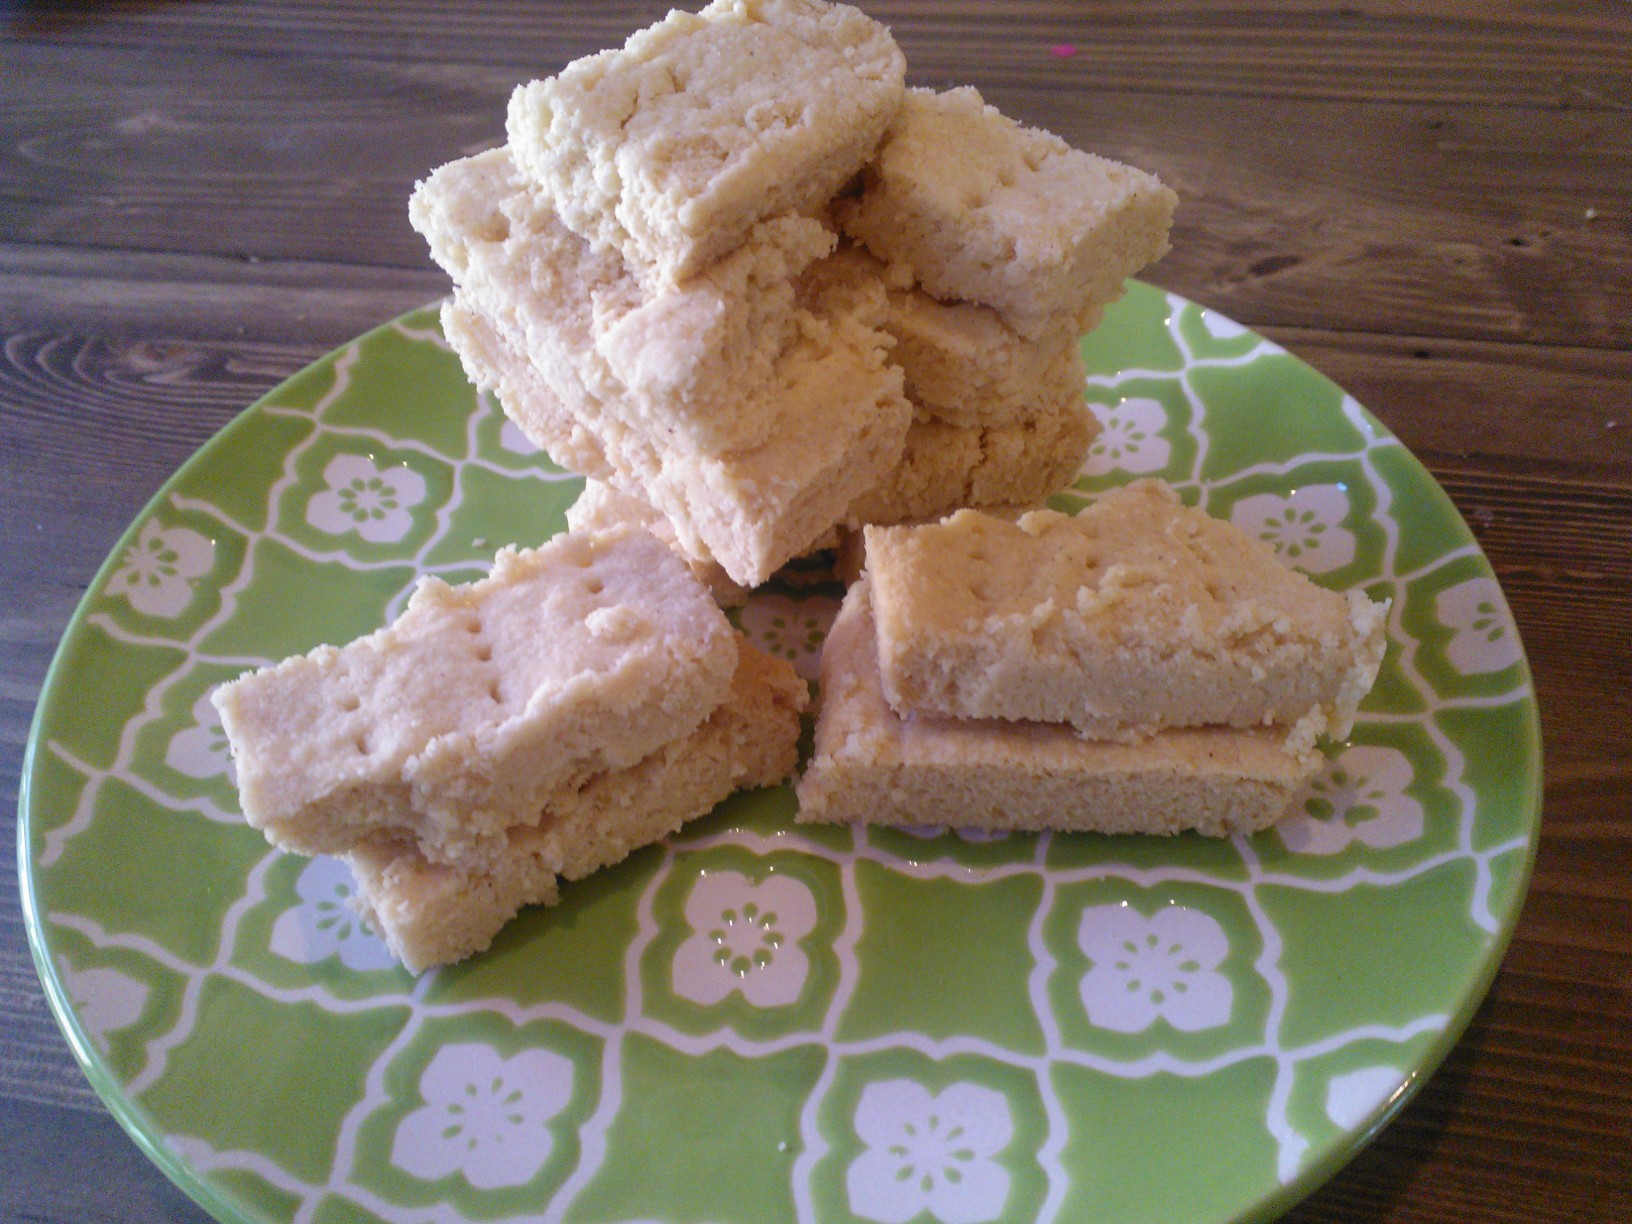
Makes 18 thick Scottish shortbread fingers (20×20 cm baking pan)
Adapted from Gluten Free Baking Bear

170 g organic, salted butter, 10 minutes out of the fridge (if using unsalted, you MUST add salt to the dough)
1/4 cup stevia, erythritol or other granulated sweetener (use slightly more if you like it sweet)
100 g sorghum flour
140 g arrowroot
60 g white rice flour

Preheat the oven to 150 °C. Make sure that your butter is cold! Do not use butter that is room temperature or warmer, or you will seriously ruin your dough! Mix the stevia and flours in a bowl until one colour. Now add the butter in chunks and rub in the dry mass WITH YOUR HANDS. The idea is that every bit of flour gets covered by butter. This is the fun part, especially if you get to lick your fingers in between! The dough will first resemble crumbles, and as the butter gets soft while you knead, the dough will soon come together as a ball, and the mixing bowl ends up clean and dry. No need to refrigerate the dough ball – just keep having fun!

Now press the dough into the baking pan. Tip: To lift out the shortbread more easily later, you can line the pan with some baking paper. Unfortunately, the shortbread will always crumble a little bit, which cannot be completely avoided. It doesn’t matter. Once, you have pressed the dough in evenly and pressed it flat with your hands, divide the dough with a rubber spatula into 18 bars (6×3). Next, poke holes into the bars with a fork, making sure the fork hits the bottom of the pan. Every bar should have three to four rows of “fork holes”. Place in oven and bake for approx. 40 minutes or until the edges turn VERY LIGHTLY GOLDEN. Some recipes say up to 60 minutes, but you must make sure not to over-bake the shortbread, as Scottish shortbread tends to be rather a little but underdone and crumbly instead of crispy and burnt.

Turn off the oven, take out the pan and let it cool down a bit before re-cutting the lines with the spatula and transferring the shortbread into the fridge. The shortbread will assume its unique and divine texture in the fridge. Lift out of the pan and devour.

Enjoy!

Gluten Free, Ultra Low Fat Gooey Chocolate Cake (egg-free, dairy-free option)

Almost Fat Free Chocolate Cake with Chia Seeds!

Do you feel guilty after a big slab of chocolate cake? Does one bite of chocolate cake make you want to devour the whole thing? Have you tried “low-fat” chocolate cakes from the shop, finding them dry, tough and unpalatable and/or featuring a plethora of ingredients you really shouldn’t put into your body?

Yes?

Well, then I have the solution!

The solution? My ultra low fat, ultra fluffy, ultra gooey, ultra chocolatey chocolate cake! With only 2 or 3 g of healthy fat, mainly omega 3, (depending what yogurt you use and how big your slabs are ;-)), and still reasonable 17 g of carbs per slice, this moist and fluffy yummyness beats any store-bought cake by a mile – in terms of nutritional facts AND taste! And that without any processed ingredients!  The secret to this wizardry? Chia seeds and (vegan) yogurt, which replace both the oil/butter and the eggs in this cake.

So don’t think that I sacrifice nutritious whole foods for the sake of going low fat – chia seeds are one of nature’s most nutrient dense food sources and, in fact, the highest plant based source of omega 3, fibre, and protein. With as much protein per 100 g as a steak, almost 20 g of omega 3, and a whopping 37,5 g of fibre (this is 150 % your RDA), chia seeds are one of those superfoods that shouldn’t be left behind in no worries cooking and baking! As they are hydrophilic, they can be ground and mixed with water before baking to replace eggs and even oil – a bit like flax seeds, albeit kinder to your tummy!

I used conventional gluten free all-purpose flour for this cake and am currently devising a “whole grain” version with healthier flours to lower the carb content. Meanwhile, bake this cake and grab a slice, as it is seriously good and seriously healthy, even with the conventional flour!

Makes one round 24 cm spring pan or twelce slices

160 g gluten free all purpose flour
50 g unsweetened natural cocoa powder
1 1/2 tsp baking soda
1 tsp salt
1/4 cup sugar
1/4 cup stevia
4 tbsp chia seeds, ground and mixed with 12 tbsp water to a paste
1 tbsp vanilla
500 g yogurt of choice (fat-free is okay!)

Preheat the oven to 180 ° C. In a medium bowl, sift the flour, cocoa, soda, and salt. In another medium bowl, beat the sugar, stevia, “chia eggs”, and vanilla. Fold in yogurt until well combined. Now stir the wet ingredients into the dry ingredients and mix on low just until combined. Do not overbeat. Scoop into greased or silicone sringpan and bake for 20-25 minutes or until it passes the toothpick test. Make sure not to overbake the cake, or else the centre will not be nice and gooey!

Enjoy!

Vegan, Sugar Free Berry and Rosewater Protein Shake

Berry and Rosewater Smoothie - no fat, but a lot of protein!
Berry and Rosewater Smoothie – no fat, but a lot of protein!

If you like Turkish Delight and berry smoothies, you are gonna love this. If you don’t like Turkish Delight, but like berry smoothies, you can leave out the rosewater and have a berry smoothie. Not just any old berry smoothie, but one that is very low carb, very low fat and jam packed with protein! One that doesn’t only taste great, but which keeps you going for hours. And you are gonna love it.

200 g non-dairy yogurt or non-dairy milk or a combination of the two
100 g berries of choice (I used mixed)
1 cup of icecubes
1 scoop rice protein powder
stevia to taste (I used approx. 1 tbsp)
a few drops of rosewater essence (can use other essence such as peppermint or vanilla or omit)

Blitz all ingredients in a blender or mini food processor and serve.

Enjoy!


Healthy Dark Chocolate Truffles (vegan, sugar free, paleo, dairy free)

Healthy AND Decadent Chocolate Truffles

Doesn’t the title make your heart jump? And look at the picture – if this doesn’t make your mouth water, I honestly don’t know what would. Everyone wants chocolate truffles! (Even those who profess they don’t want them.) Well, now, whether you are a die-hard paleoist, a convinced vegan, on a diet, or a chocolate truffle connoisseur – you can now have your truffles and eat them too!

With just four ingredients – yes, FOUR (okay, I didn’t count the vanilla and the salt)! – and not a trace of refined sugar or dairy in sight, there is simply no reason not to enjoy decadent dark chocolate truffles anymore! Save the flight to Belgium (and your feeling of guilt) for another day. These chocolate truffles are so healthy you can have them for breakfast (I do, anyway). With 3 g of net carbs and 3 g of healthy fats per truffle, you can have two truffles. Or three. Or four. You will probably be satisfied after one or two though, as they are filling and surely curb your cravings for a long time! You can probably even go on a chocolate truffle diet by replacing your usual afternoon snack with one of these beauties – you will definitely save calories, be more satisfied, and put a lot of goodness in your body on top of it all.

Still not convinced? My I quote my sweet husband saying: “They taste like proper chocolate truffles!” If you don’t know my husband, let me just tell you he is a junk food addict. He loves sugar, wheat and processed nibblies. For him, fruit is an apple pie and veggies are potato chips. I have a hard time getting healthy stuff into him. So there, if he says they “taste like proper chocolate truffles”, it is the best proof that THEY TASTE LIKE PROPER CHOCOLATE TRUFFLES.

No go forth and make chocolate truffles.

Makes 15 truffles

60 g coconut flour
60 g nut butter, peanut butter or tahini, soft
60 g agave syrup, honey (if not strictly vegan) or any other liquid sweetener, melted
30 g unsweetened cocoa powder
1 tsp vanilla
pinch of salt

Mix all ingredients, preferably by hand until well combined. You will get your hands very sticky, but that’s the fun part of it. You get to lick your fingers. Mhm…chocolate fingers! With slightly moist hands, shape 15 truffles and cover with sifter cocoa.

Tip: Add some peppermint oil for a delightful chocolate peppermint truffle!

Enjoy!

Watermelon Vinaigrette (paleo, low fat, sugar free, dairy free, gluten free, vegan)

Healthy, Fruity Watermelon Vinaigrette

Yes, the title is correct – this is a vinaigrette with watermelon in it! And it works just beautifully! If you don’t believe that a watermelon vinaigrette works, you better see for yourself, as this is whipped up in a matter of minutes, with just a handful of ingredients! I have tried it on Greek Salad, Salade Nicoise, as well as chicken salad, and it is absolutely fabulous no matter what you put it on! Delightfully sweet and refreshing without a hint of any industrial sugars, this low-fat dressing is sure to jazz up your summer salads!

Serves 2

3 cups fresh watermelon, roughly chopped
1 tbsp apple cider vinegar
1 tbsp lemon juice
1 tbsp extra virgin olive oil
salt and pepper
fresh mint, basil, and parsley

Blitz all ingredients in a food processor until the desired consistency is reached and serve with freshly prepared salad. Lovely! Keeps in the fridge in an airtight container for up to five days.

Enjoy!

Healthy Peanut Butter Biscuits (Vegan, Gluten Free, Starch Free, Grain Free, Low Carb)

Healthy Grain Free Biscuits

My husband loves biscuits. I mean, he LOVES LOVES LOVES biscuits. There used to be times when not a day went by without him buying a colourful packet full of concentrated bombs made of wheat, sugar, processed and hydrogenated oils, emulsifiers, thickeners, and preservatives. And for him, those bombs served as a perfect substitute for breakfast, not to mention that no cup of tea was complete without them. Luckily for me, my gluten intolerance has prevented me from following suit for some time, but even I admit that I DO long for a nice, crunchy bickie along the way – and I don’t even have a sweet tooth!

As probably everyone is aware, the plethora of “gluten free” biscuits lining the supermarket shelves at exorbitant prices might be gluten free – and some of them might even be quite tasty – but they are a far cry from healthy. What I wanted was tasty biscuits that even though they cannot quite replace broccoli are healthy-ish, without creepy ingredients, don’t break the bank, are quick and easy to make, and that even my junk addicted husband would eat. And that happen to be gluten free.

What I came up with was not only gluten free, but also dairy free, soy free, egg free, vegan, and almost sugar free. With just the right amount of almond flour left to produce two dozen of yummy cuties, some ideas, and a healthy dose of curiosity, I set out to create one of my most successful experiments, the result of which hubbs happily gobbles down – and asks for more. Him snooping around the biscuit tin and devouring a handful of these biscuits at work is probably the most convincing argument that these biscuits are good. Very good.

My husband never bought biscuits from the shop again.

They actually don’t taste overly peanut-buttery, so if you really fancy peanut butter, you might want to replace all the vegan spread with the peanut butter and even add some peanuts to the dough. This is a great base for an all-time favourite biscuit recipe, as it is so versatile. You can use other nut butters, giving it a different flavour each time, or you can add cocoa powder and chocolate chips for chocolate biscuits, or dried fruit and oats for muesli biscuits. The choice is yours. They are whipped up in a jiffy and take only 12 minutes to bake. So whether you fancy a morning or afternoon snack right now or need something sweet to conclude a nice meal, head to the kitchen now! These babies are so healthy you can even have them for breakfast!

As the title reveals, my biscuits are not only gluten free, but completely grain free and starch free, thanks to lovely almond flour and my favourite ingredient flax, both of which come with a healthy dose of satisfying protein and fiber, as well as healthy fats, including omega 3! I would recommend using some sort of “real” sugar for a nice texture and colour, but you can probably use stevia throughout if you follow a strictly non-sugar diet. I used half brown sugar and half stevia for the biscuits displayed in the picture, and with 7 g of carbs per large biscuits, they are still fairly low-carb even if you use some regular sugar. I used vegan spread and flax as egg replacer to make a truly vegan biscuit, but feel free to use real butter or beat an egg in the dough – both of which improve the flavour even further. Note that I used reduced-fat spread, as the almond flour already contains a lot of fat. Feel free to use full-fat margarine if fat is not your worry, or butter as mentioned above.

Chilling the dough for 30 minutes before baking improves flavour and texture slightly, but is not a must. If you don’t chill the dough, the biscuits’ appearance is a bit “rougher”, but they are yummy nonetheless!

Makes 24 biscuits
Inspired by Erin

250 g almond meal (blanched for lighter biscuits or natural as in the pictures)
7 tbsp brown sugar or other sugar
7 tbsp stevia or other sweetener
20 g ground flax seed
1/2 tsp baking soda
1/2 tsp sea salt
80 g peanut butter, smooth or crunchy
40 g reduced fat vegan spread
2 tsp vanilla

Preheat oven to 180 ° C and prepare two baking sheet. Cream peanut butter, spread, sugar, vanilla and stevia until light and fluffy. Mix the almond flour with the soda and salt and carefully fold into the wet ingredients. The dough should be sticky and wet. If it appears to dry, add 2 tbsp of water. Once blended well, you can chill the dough for 30 minutes to achieve smoother looking biscuits (see picture below the cookies on the right hand side). If you are in a hurry or very hungry, just skip this step and put up with coarser looking biscuits.

right: cookies with dough being chilled before baking, left: cookies with the dough not being chilled

Take 1 tbsp, form into a round shape and place onto baking sheet. Repeat with the rest of the dough until you have 24 biscuits. You will probably need two sheets as there needs to be space between the biscuits (they will spread out during the baking process).

Bake for 12 minutes – they might still appear slightly raw, but you must switch off the oven now, otherwise you risk them getting too hard as they will continue too harden. Let them rest in the hot oven for a few minutes, then take out and let cool (if you have the patience).

Store in an airtight (preferably metal) container where they will keep for up to five days.

Enjoy!

Low Fat Gluten Free Baked Falafel

Falafel - gluten free, vegan, and low fat!
Falafel – gluten free, vegan, and low fat!

Before Sushi took rank 1 as my favourite food in my late twenties, it was undeniably falafel – and still is, actually. Especially since it is a bit easier to replicate at home than sushi! I love, love, loooooove falafel! Have I mentioned that I am in love with falafel? It is just one of those dishes that makes you think “who the eff needs meat”? Don’t get me wrong, I love meat! But falafel makes lving without a lot easier since it is just so delicious! To me, it is the perfect summer dish with fresh salad, a crispy gluten free pita, homemade hummus, and a glass of dry and ice-cold white wine. Falafel is also very good for you! Chickpeas provide protein, fibre, manganese, iron, and complex carbs, making you feel full for a long time! Chickpeas are also naturally low in fat, so one more reason to dig into those falafels – provided you don’t eat the conventional deep-fried version, which nullifies all the health benefits of the falafels.

Since I adore falafel but don’t believe in deep-frying (especially not deep-fried in recycled trans-fats, yikes!), I wanted to come up with a way to have them oven-baked, not fried. I am happy to announce that it worked! Falafel is naturally meant to be a rather dry dish, so in my view, it doesn’t really matter that the baked falafels might be a little bit drier than the store-bought ones. I think they are just as yummy, and if them being low-fat means that I can have more, I don’t complain either! I prefer not to use any oils besides olive oil and coconut oil; however, olive oil is not suitable for deep-frying, and neither is coconut oil, plus its flavour simply doesn’t work in middle eastern cuisine. So that’s why my falafels are baked!

Another issue is that falafel in a snackbar are most of the time glutenated as they contain wheat flour – a big, big no-no! So that’s why my falafel has chickpea flour, which makes a whole lot more sense as it improves the flavour a lot and naturally enhances the chickpea aroma. One more thing, please do not waste your money on those ready falafel mixes – there is nothing wrong with them per se, but they are basically just chickpea flour with a bit of salt and spices in them. They are chickpea pancakes and have absolutely nothing to do with falafel, no matter what the package says, and they are far too overpriced for what you get. If you want quick and instant falafel-style patties, just mix some chickpea (besan, garbanzo) flour with hot water, lemon juice, salt, and parsley and fry it, which makes for a filling and quick dish, but is simply not falafel! Again, you can make “falafel” patties by buying your own chickpea flour instead of expensive “falafel” mixes!

Which takes me to the second point – even though falafel is relatively easy to make, you have to start one day before you eat them – that’s because you need to soak dried chickpeas over night. Yes, you read right, unlike hummus for which we use canned chickpeas, falafel requires the dried chickpeas, which are half the size of the canned ones. Believe me – don’t try this recipe with canned chickpeas. I don’t say that it’s not delicious, but it’s just not the same! You really need to use the dried chickpeas!

This recipe is adapted from the Shiksa in the Kitchen, but I obviously don’t deep-fry the falafels, since this is a recipe for baked falafel – duh! There is another superb recipe in Yotam Ottolenghi and Sami Tamimi’s book Jerusalem, which recommends using a meat grinder.

Makes 30 falafels

375 g dried chickpeas, soaked overnight in a big bowl, covered in water twice their volume (or so that 5 cm water are above the chickpeas in the bowl)
1 onion, chopped (omit if low FODMAP)
1 garlic clove (omit if low FODMAP)
3 tbsp coriander, chopped
2 tbsp parsley, fresh, chopped
2 tbsp chickpea flour
1 tsp cumin
1,5 tsp salt
1 tsp ground coriander
generous grind of black pepper
generous pinch of cayenne pepper
pinch of ground cardamom
1/2 tsp baking soda (optional)

Drain and rinse chickpeas well. Process with all ingredients bar the baking soda to a coarse paste. Do not overprocess it! Scrape the sides down while you are processing it. It should more look like couscous than a paste, but it must still hold together! Place in a big bowl and fluff with a fork to smash any chickpeas that are not processed. Chill mix for 1 hour before using. If you are using baking soda, use it right before baking. You can omit it, but the falafels do get fluffier with the soda.

Preheat the oven to 210 °C and line a baking tray with baking paper (or use a silicon sheet). With wet hands, shape balls or patties out of 2 heaped tablespoons of the falafel mix. Bake for 30 minutes in total, turning around half way through until lightly golden. Serve with gluten free pita, salad, hummus, and tzatziki.

Tip: It’s great to toss the falafels in a bit of sesame before baking!

Enjoy!

Healthy Skinny Hummus

WP_000530
Healthy Skinny Hummus – super easy, super quick!

As you will know, store-bought hummus is brimming with things like canola oil and other creepies; what could be one of the healthiest foodstuffs around comes jam-packed with unhealthy fats, artificial flavours…and when you look at the so-called “skinny versions” – they are even worse! Not to mention, quite pricey too for a tiny tub! Actually, it is so easy and so quick to make hummus yourself there is absolutely no excuse not to make it yourself! Plus, you can control exactly what’s in it! And save some money on the side. I just use a dash of very good EVOO for a batch so my hummus is really quite low fat, but feel free to omit or use more olive oil than that! I wouldn’t recommend skipping the olive oil altogether, as it is essential for the flavour of this Middle Eastern dish.

1 can of chickpeas, drained and rinsed
5 tbsp lemon juice
1 tbsp extra virgin olive oil
1 tbsp tahini, hulled or unhulled depending on whether you like a more robust or more subtle flavour
1 tsp kosher sea salt
spices to taste (a true hummus needs garlic, but you can omit if you are low FODMAP; I always do! Chilli is great if you like it hot!

Combine all ingredients bar the oil in a food processor while adding 40-50 ml of water. Process until smooth. Serve the hummus in a bowl, make a well in it and put 1 tbsp of oil in the well. Serve with toasted gluten free bread or crudités. Hummus keeps in the fridge for 3-5 days. I currently have a batch in the freezer, so will let you know if it turns out alright!

Enjoy

Ultimate Detox Soup

Do you have new year’s resolutions? Well, my hubby’s is to learn German (which is a very good resolution), I want to become a better baker in 2014, and chances are, you plan to eat healthier or make more home-cooked stuff instead of takeaways – in which case you have come to the right place!

Actually, the title is a little bit confusing – the soup we’re dealing with here is far from a tasteless broth fasting. In fact, it is a warming, hearty, thick, stew-like soup, which is very comforting on cold winter days (as they are now in the Northern Hemisphere), and at the same time, it is the perfect light soup to give your digestive system a break, reset your taste buds and gain back the energy you lost in a holiday-carbohydrate-induced stupor (and maybe lose a couple of pounds, too!).

The good thing is, my magical soup doesn’t taste like anything that resembles the words “diet” or “detox”, but it is pure goodness in a bowl, consisting of nothing but fresh vegetables, water, a dash of olive oil, lemon juice, and a few spices. There is no stock powder, no MSG, no unhealthy fats, no sugar whatsoever, and only minimal amounts of coarse sea salt.

It really is the easiest thing to do – just shovel all ingredients in a stock pot and simmer for 45 minutes. It is the ideal way to make use of any leftover veggies that are withering in your fridge. No excuse to throw away any food anymore! (I hate wasting food.) It is a very inexpensive pleasure, too (if you buy your veggies from the market). And you can adjust the flavour to your liking – use any veggies you like (or which need to go), use herbs and spices (I love spicy food, so I use liberal amounts of chili powder – very good for your metabolism -, paprika, black and red pepper, ginger, cardamom, coriander, nutmeg, you name it). You can use curry powder and a dash of coconut milk for an exotic flavour. Or you can just keep it basic with s+p, garlic, chives, and parsley. Or make it Mediterranean style with crushed tomatoes, basil, and oregano (and a bit of shredded Parmesan). The options are endless.

In taste and texture, this soup resembles a classic pea and ham soup – only far, far healthier! So, chances are, your family will love it too! I sometimes add a bit of protein such as marinated tofu or tempeh. It’s all yours to make this your personal detox soup.

The Ultimate Detox Soup

Serves 6

1 kg fresh vegetables (e.g. leeks, carrots, cauliflower, broccoli, lettuce, parsnips, turnips, peas, green beans, tomatoes, zucchini, mushrooms, celeriac, pumpkin, capsicum, squash…)
water to cover
herbs and spices (salt, pepper, paprika, chili, ginger, cardamom, coriander, nutmeg, oregano, parsley, basil, chives…)
extra virgin olive oil to taste
lemon juice to taste
any add-ons to serve (e.g. tofu, tempeh…)

Rinse, drain, and chop the veggies into 1-inch pieces. Place on the bottom of a heavy stock pot and cover with enough water. Bring to the boil, add herbs, spices, EVOO, and lemon juice, and simmer uncovered for 45-55 minutes. Take off the heat and purée with a stick blender. Serve by itself or with a protein add-on and fresh parsley.

Enjoy!


Gluten Free Vegan Banana Muffins with Maple Frosting

Gluten Free Egg Free Banana Maple Muffins

Next time you see a bundle of overripe bananas in the supermarket marked down to next to nothing, don’t walk on by! There is sooo much you can do with ripe bananas! I just cut them up and chuck them in the freezer where they keep nicely until I want to create a recipe with them – or I just have them as they are! There is truly nothing more divine than frozen bananas, and they are great in smoothies and milkshakes, too!

My hubs asked me for some cakes he could take to work, so I made some banana muffins – some without frosting for on the road, and some with frosting for a little indulgence at home! These are wonderfully moist, packed with fiber from flax, and they are delicious in many ways. Due to the mashed banana inside, there is no need to add heaps of fat, so they are are a healthy cheat treat for those wathing their waste lines! The vegan maple frosting works beautifully with the banana flavour, too. Oh, and they are pretty foolproof, so you better start making them now – your kids will love you for these! (My hubby is a bit like a child in that he loves unhealthy things – he gobbled these up though, so I am secretly snickering behind his back that these are healthier than he thinks. I didn’t tell him about the flax!)

Makes 12 muffins

3 over-ripe bananas, mashed
100 g arrowroot starch
50 g white rice flour
50 g brown rice flour
100 g sugar or other sweetener (you should use at least some “real” sugar to achieve a nice texture and colour)
90 g low-fat vegan spread
50 g honey
30 g flax
3 tbsp almond milk
1 tbsp molasses
2 tsp baking soda
2 tsp vanilla

Frosting
75 g powdered sugar
60 g low-fat vegan spread
5 tbsp maple syrup
2 tbsp almond milk
1 tsp vanilla

For the muffins, preheat oven to 180 ° C. Melt spread, sugar, honey, molasses and vanilla over low heat until spread is melted. Turn off the heat and whisk in the mashed bananas and almond milk (I know it’s tempting, but don’t eat this mix – at least not all of it!). Mix flours, flax, and soda in a different bowl, and slowly add banana-butter-mixture to the flour mixture. Mix until well combined, then scoop into muffin pan and bake for approx. 20 minutes or until muffins pass the skewer test. Turn off heat, let muffins rest in the pan for 10 minutes, then turn to wire rack and let cool completely.

Only scoop the frosting on top of the muffins once they have cooled down completely, as otherwise it will melt. Whip all ingredients for the frosting until light and fluffy, then store in the fridge until stiffened up and decorate the muffins.

Tip: Mix some walnuts or other nuts or chocolate chips mixed in the muffin batter.

Enjoy!