Carrot Cake Bliss Balls {vegan, gluten free, nut free, refined sugar free}

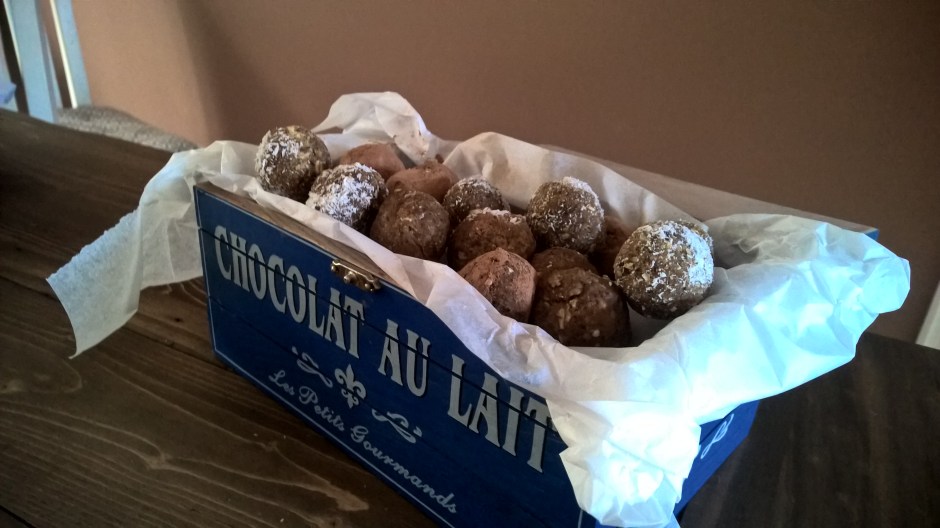
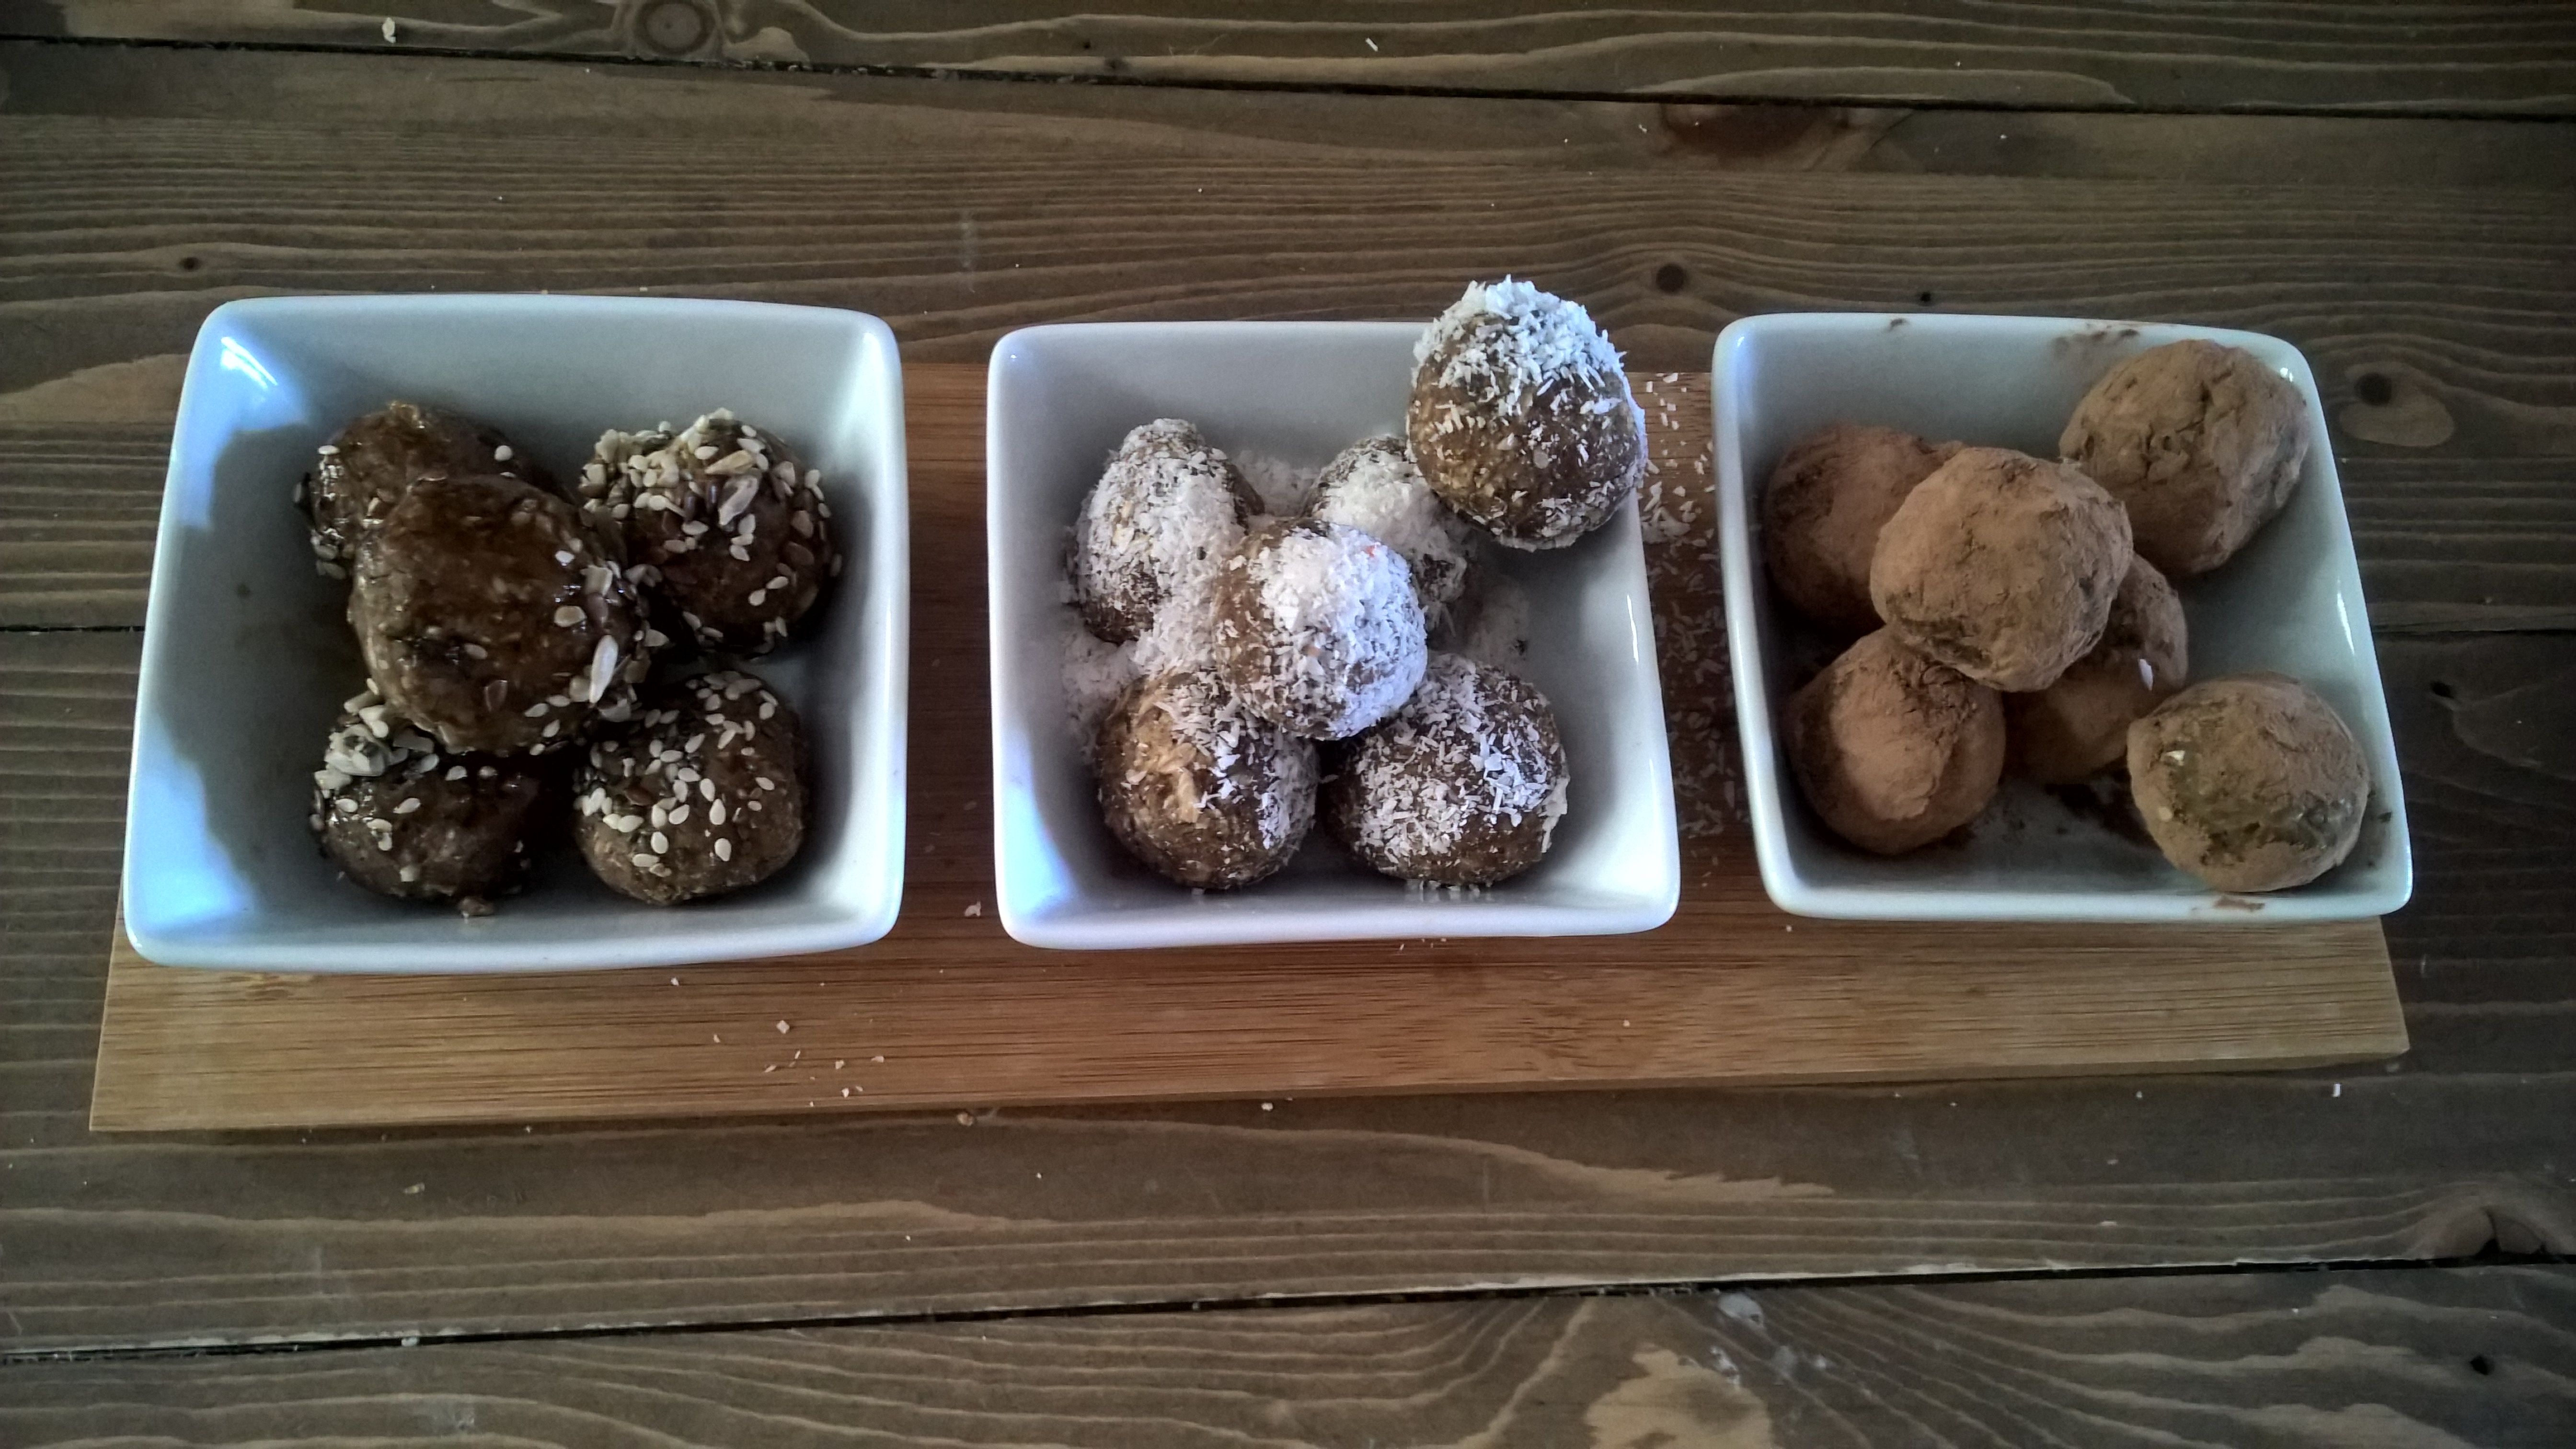
The other day, I got upset at my hubby for buying expensive Medjool dates instead of those dry, hard, brittle dates from the drygoods section that are indefinitely cheaper. (When you have a midget and a mortgage, you tend to worry about financials.) How wrong of me! One bite and it was bliss all the way. I just could not get over that wonderful caramel taste. It reminded of the most exquisite butterscotch toffees. Then, that luxurious velvety texture…I had to admit once more that hubs had been right all along, and that he had hit the jackpot with these beauties. Bliss. Seriously. And what better way to make use of a blissful ingredient than bliss balls? Carrot cake bliss balls it was.

Carrot Cake Bliss Balls

I am not a newbie to bliss balls (see here), but have always been reluctant to splash out on Medjool dates rather than dried dates. The latter, obviously, require some soaking before you can do something bliss ball-y with them, so not having to soak the Medjool dates was another win for lazy, I mean, busy me. It so happened that I had some carrots to use up, too, so something in my head screamed “carrot cake”. While I don’t have a particular sweet tooth, I have a bit of a weakness for carrot cake (as can be seen here, here, and here).

What I love about carrot cake is that you can fix your 3.30 snack attack without the sugar rush as the carrots and nuts in carrot cake provide for some fibre and protein to soak up the carbs that would otherwise wreak havoc in your bloodstream. Plus, the wintery spices give it a bit of a festive and mysterious touch. In short, I figured that Medjool dates+carrots+oats+a few spices and a bit of coconut might be worth a try. Yes, even the precious Medjool dates could not be precious enough for some healthy experimenting.

I have to say that this is one of my recipes I am most excited about, if I dare say so myself! I can’t believe just how good these are, with none of the guilt! And as they are low in fat and refined sugar free, they are even material for a kid’s party – none of the kids will notice they are devouring something healthy, and you don’t have to worry about the sugar crash. They are also nut free, as coconut is botanically not a nut and most people who are allergic to tree nuts can safely eat coconut. Coconut also provides vitamins and magnesium, with the carrot adding a beta carotene and fibre boost and the dates being an excellent source of iron, manganese and long-lasting energy.

These balls are so easy to make with just a few ingredients, so there is no reason not to make these today and fight the munchies!

Carrot Cake Bliss Balls {vegan, gluten free, nut free, refined sugar free}

Carrot Cake Bliss Balls

Makes 18 (possibly more if you don’t eat as much of the batter as me! :-D)

2 large carrots, grated
10 Medjool dates, pitted
1 cup oats
3 tbsp desiccated coconut
2 tsp cinnamon
2 tsp molasses or coconut syrup
1 tsp ginger
1/2 tsp nutmeg

Just blend all ingredients in a high powered blender until you reach a malleable consistency. Shape into walnut sized balls and enjoy straight away or store in the fridge.

Enjoy!


Lowfat Vegan Pâté

Lowfat Vegan Pâté sounds a bit like a plumber (or any other tradesman for that matter) who is quick, good and cheap. It’s pretty much impossible to tick all three boxes. In fact you’d be very lucky if you can tick two of them. A pâté, this French appetiser made of butter, cream (sorry!), raw liver (more sorry!) and cognac (sorry not sorry), is generally neither low in fat nor vegan. While there are recipes for vegetarian and vegan versions of pâté, I am yet to find one that is not full of nuts and oil. I believe an appetiser should not contain all your calories for the day so I created one that is much lighter and healthier than all its colleagues, be they vegan or not, yet still filling and satisfying.

With Christmas done and dusted for another year, chances are you are in need for a bit of a reset. I always believe that tomorrow starts today and that you should not postpone your commitment to a healthier life. Whether you want to go down the vegan route or not, having a repertoire of easy and delicious plant-based recipes can help you on the way to a cleaner and greener life. The good news is, there is absolutely no need to sacrifice your old favourites in favour of a healthy and ethical lifestyle. Hello, creamy Alfredo pasta, decadent chocolate mud cake and hearty Bolognese!  Yup, all vegan, gluten free and low fat. And now you are in for another treat: lowfat vegan pâté!

This one came about coincidentally. I was feeling peckish and craved some gluten free crackers with a delicious spread. Having had pretty much all hummus varieties under the sun (here, here and here), I was looking for something a little different and just threw some random things into my blender. The result looked and tasted like a French liver pâté. Eureka! I had created a lowfat vegan pâté! Consisting of pumpkin, beans, olives and oats this savoury little beauty comes with a bucket full of fibre, beta carotene, protein and a little healthy monounsaturated fat from the olives. No nasties, no processed crap, no cruelty, no worries. Just pure goodness in a cute serving bowl (one of the main reasons I love making dips is that I can make use of all my serving bowls).

That’s not where the awesomeness stops, however. This spread – provided you have the pumpkin mash ready to go, but you could also use babyfood – comes together in less than five minutes. You read that one right. You likely have all ingredients at hand and if not, it’s going to be a very short trip to the supermarket. Best thing is, both my husband and daughter cannot get enough of it, and since neither of them is into healthy eating, I take this as a big compliment! Healthy stuff that doesn’t taste healthy. How good is that?

So here is to lowfat vegan pâté – it looks and tastes like a “real” pâté, but without the fat and the cruelty!

Lowfat Vegan Pâté
Lowfat Vegan Pâté
Lowfat Vegan Pate

One tin mixed beans (can use lentils or any brownish beans although the texture will be slightly different)
1/2 cup pumpkin puree or savoury vegan babyfood such as mashed (sweet) potato
1/2 cup oats
1/4 cup nutritional yeast

a handfull of kalamata olives
salt and pepper to taste

Just blend all ingredients in a high-powered blender and store in an airthight container in the fridge. Can be enjoyed straight away but the texture will improve after chilling for 30 minutes.

Enjoy!

Lowfat Lentil Carrot Hummus {vg, gf}

Have you ever considered making hummus with lentils? If you haven’t noticed already, I love all things legumes with their only downside being a little hard on the ol’ stomach at times. Which is why lentils are great. i have mentioned before that lentils might be easier to digest for some and with their hearty, meaty flavour are a nice alternative to chick peas and other beans. With lots of garlic, carrots and red peppers and only very little fat coming from healthy tahini paste, this hummus is infinitely better for you and tastes – in my humble opinion – better than any store-bought hummus! It is also incredibly quick to make with ingredients you likely have in your pantry. I’d consider this an allround win.

This lowfat lentil carrot hummus has been tried and tested by friends and family. It never fails to hit the spot, so give it a go! Tasty with just the right amount of spice, much lower in fat than store-bought hummus and very filling. I doubt you’ll be in a hurry to buy hummus from the shop again! It is also vegan, gluten free, soy free, refined sugar free, and nut free – a great recipe to have in your repertoire for entertaining as you’ll tick most dietary requirements! Tip: Try it with my 5-minute vegan gluten free naan bread!

Lowfat Lentil Carrot Hummus
Lowfat Lentil and Carrot Hummus (pictured with falafel, naan bread and garlic sauce)

1 tin lentils, drained and rinsed
½ cup grated carrots
½ cup roasted red peppers (can be from the jar)
2 garlic cloves, minced
1 tbsp dukkah (optional)
3 tsp souk spice mix or blend your own with a pinch each of black pepper, allspice, cumin, coriander, turmeric, cinnamon, paprika, cardamom, cayenne, and nutmeg
2 tsp lemon juice
2 tsp tahin (omit if you want to make it fat free)
pinch of salt

Just blitz everything in a high-powered blender and –

Enjoy!

Cookie Dough Bliss Balls {vg, gf}

Do you like polishing off raw cookie dough from a mixing bowl? I know you do. Would you like it even more without butter, sugar, white flour, eggs and salmonella? Then you’re in for a treat.

These were a bit of a lucky dip for me. As you know, I love all things legumes. They are a great meat replacement, make hummus (one of my favourite foods) and you can use the liquid from tinned chickpeas and white beans to create healthy egg-free desserts (it’s true!). Beans, chickpeas and co. are also a great replacer for eggs and oil in baked goods and sweet treats, which sounds right up my alley!

I am admittedly a bit late to jump on the bliss ball bandwagon. I like substantial meals – even in between meals! – and bliss balls always seemed a lot of effort for not much benefit! Well – my stance has changed with these little beauts!! Which is even more surprising as I just shoved everything together that I thought might or might not belong in bliss balls: cannellini beans (I know…), oats, dates, seeds, protein powder, tahini and all the other good stuff. Gave it a good blitz, rolled it in balls and stored it in the fridge – and there was bliss! Minimal effort, minimal mess, maximal bliss. Legumes for the win!

I love it how these taste like raw cookie dough, and I think you’ll love it too! And you can tell your mum that you are officially allowed to have these – no more secretly guiltily licking off spoons. These goodies are loaded with omega-3s, fibre, antioxidants, magnesium, protein, iron and much more for a happy mood, glowing skin, brain power and healthy digestion. Let’s tuck in!

Cookie Dough Bliss Balls {vegan, gluten free, refined sugar free}
Healthy Cookie Dough Bliss Balls

Makes 25 bliss balls

1 425 ml tin of cannellini beans, drained and rinsed (reserve the liquid and make mousse au chocolat!)
1/2 cup hemp seeds
1/4 cup LSA or flax seeds
1/2 cup rolled oats
1/2 cup pitted dates
3 tbsp vegan vanilla protein powder
2 tbsp coconut syrup or maple syrup
2 tbsp tahini
1 tsp vanilla extract
pinch of sea salt
optional: cocoa powder, coconut flakes etc. for rolling

Start by pulsing the beans together with the dry ingredients (hemp seeds, LSA, oats, protein powder, sea salt) in a high-powered blender until well blended. Add the wet ingredients (dates, coconut syrup, tahini, vanilla extract) and blitz in 15 second increments until well incorporated. You will probably need to add a bit )1-2 tbsp) of filtered water or plant milk to achieve a dough-like consistency. The dough should be easily malleable. Shape 25 little balls, roll in optional toppings if desired and store in the fridge.

Enjoy!


Healthy Vegan Iced Coffee

Now this is a big deal! Are you guilty of spending too much money on iced coffees and frappés from a certain coffee shop with nine letters? Frozen drinks with lots of sugar, fat, artificial ingredients and other nasties? I used to when I was in my twenties. I was lucky enough that the only damage they did back then was the damage they did to my wallet. But why would you want to put crap in your body and spend top dollar? Seriously, even if you order the “light” version of these commercial frozen coffee drinks, do you know all the ingredients that are in it? Do you even want to know?

Wouldn’t it be nice if you could make yourself a healthy iced coffee that tastes better than anything you get in the shops, is good for you, ready in a minute (I dare say you queue much longer if you buy an iced coffee) and costs a fraction? This one has been a bit of a lucky find. One afternoon (yes, afternoons are when this stuff happens), I was hungry and thirsty at the same time and needed caffeine. Sounds familiar? I also craved my daily protein boost, so I quickly threw together everything I could think of to help me with this: almond milk, water, coffee, cacao, maca and protein powder. An ice cold drink was in order so I added some ice to this concoction. A quick blitz and while I expected something like a smoothie, the result was very similar to the iced coffees I binged on a good ten years ago. Success!

A drink that is surprisingly close to a store-bought iced coffee, but much, much healthier and not overly sweet! I actually did not add any sugar at all, with the sweetness coming from my vegan vanilla protein powder. If you don’t want to use a flavoured protein powder, then dates would be a great natural sweetener with an additional magnesium boost. The maca gives an additional energy boost, and you could add any other supplements or superfoods you are normally using to give you that morning or afternoon lift. If you are worried about the jitters but still love the taste of coffee you can of course use decaf coffee!

Healthy Iced Coffee {vegan, gluten free, refined sugar free}
Healthy Iced Coffee
Healthy Iced Coffee

Serves 1
½ cup plant milk
½ cup filtered water
1-2 tsp (decaf) instant coffee
2 tsp raw cacao
1 tsp maca
1 tbsp vegan vanilla protein (I use Amazonia Raw Fermented Paleo Protein)
2 handfulls of ice

Just blitz all ingredients in a high-powered blender and…

Enjoy!

10-minute Lowfat Vegan Mushroom Alfredo gf, df, soyfree, nutfree)

As promised on my Instagram account, here comes the easiest, healthiest and best 10-minute lowfat vegan mushroom alfredo you’ll ever make.

I don’t say this lightly. This is serious stuff. I am aware that there is no lack of vegan Alfredo recipes, a lot of which involve tofu (which can be an issue for some) or cashew nuts and/or coconut cream, therefore being very heavy. In short, alfredos, whether vegan or not, are not exactly lowfat. I have made alfredo sauces using cauliflower which is a better option to achieve that creamy consistency that we crave but the flavour of the cauliflower (and the smell of your kitchen when cooking it) can be a bit overwhelming when all you are after is mushrooms, creams and garlic. What I wanted was an Alfredo sauce which fulfilled the following criteria:

-relatively low in fat
-takes 10 minutes to make from start to finish
-requires about 5 ingredients
-is economical
-tastes divine

I’m so excited because my mushroom Alfredo does all that! With only coconut oil, garlic, plant milk, mushrooms (duh!), cornstarch and plenty of herbs and spices, there are no obscure or hard-to-get ingredients, no nasties and you don’t need to set aside your precious weekend for meal prepping – all you need is the commercial TV break on a weeknight. Sounds good? Sure does!

You can use any plant milk you like or have on hand. If you are not worried about the soy/nut issue, then soy or nut milk is perfectly fine to use. I like oat milk as it makes the sauce really unctuous, however, it is quite a bit higher in carbs than other non.dairy mylks and also sweeter, so you might want to keep that in mind. I have tried this recipe with both almond and oat milk and love them both! So it’s completely up to you. What’s not up to you is the spice part. There is garlic, sea salt, fresh black pepper and fresh parsley, which is not a lot of spices. They are therefore not negotiable. If you don’t like or can’t have garlic, pepper and/or parsley (seriously???), then you can try to omit them, but it really won’t be the same.

Lowfat Vegan Mushroom Alfredo

Serves 2

1/2 to 1 tbsp refined coconut oil
3 garlic cloves, minced
250 g button/cup mushrooms
250-350 ml unsweetened plant milk (depending how much water is sweat out by your mushrooms)
1 tbsp cornstarch, mixed with equal amounts water to form a paste
sea salt and fresh black pepper
parsley
any other herbs of choice

Melt the coconut oil in a large saucepan and fry the garlic until aromatic. Add the mushrooms and fry until they start to wither. Add the plant milk, starting with a cup (ca. 250 ml). Whisk in the dissolved cornstarch and keep whisking until no lumps are left and the sauce starts to thicken. Add salt, pepper and spices and some more plant milk until the sauce has your desired consistency. Serve with pasta of choice.

Enjoy!


Healthy Madras Curry with Chickpea Tofu

Please, can you please all make this curry? Seriously, it’s soooo good! Like, I-want-to-eat-all-servings-by-myself type good. And guess what? Because this curry is really light and healthy, you can! If you are organised and disciplined (I am neither), you double or triple this recipe and freeze leftovers as it freezes really well and makes for a great stand-by on busy weeknights (I already see you dialling that takeaway number, but you will never again after you have tried this recipe). If you are looking for an alternative to Indian takeaway, enter my healthy Madras curry with chickpea tofu!

What I love about our local Indian takeaway is how you can customise the protein and the degree of spiciness in the dishes. What I am less keen on is the amount of cheap oils, butter and cream in Indian takeaway curries and the feeling that you have swallowed a whale (or turned into one). So I’ve been looking to come up with a good alternative that is healthy, easy, quick, inexpensive and, most of all, tasty. It seems like I nailed all these briefs at the first time! This stuff is hearty, satisfying, exotic, just the right amount of spicy, filling without sitting like a rock in your stomach, nourishing and comforting!

Using light coconut/almond milk, this dish is a lot less heavy than traditional Indian dishes and very low in fat, with the fat mainly coming from healthy coconut oil. If you like things extra creamy, you could use full-fat coconut milk or cashew cream although I really prefer the lightness of my recipe. I love my carbs so I tend to serve brown rice on the side with also lends this meal a nice crunch, but if you limit your carbs, you could try cauliflower rice. As a protein, I used Burmese chickpea tofu to create a soy-free vegan meal. I don’t mind soy anymore but I try to not go overboard with it. You can of course use “normal” tofu, tempeh, paneer or whatever protein suits your taste buds and dietary requirements.

If you aren’t familiar with chickpea tofu though, I’d definitely recommend trying it. I made mine using the recipe by the incredibly talented vegan Richa. I looked at several recipes for no-soy tofu, and hers was by far the most straightforward one. It literally comes together in ten minutes and is set in the fridge in under an hour. I was so pleased to have found a cheap, easy, healthy and lowfat alternative to regular tofu! The texture is almost the same as tofu and it has a subtle, not overwhelming earthy chickpea flavour which I love. I actually make a big batch and munch on it as a snack. With its gooey, slightly rubbery consistency, it feels like having naughty cheese, only that due to the chickpea flour, chickpea tofu is low in fat while boasting fiber, iron, potassium, manganese, copper, zinc, phosphorus, magnesium, folate, vitamin B-6 and thiamine!

Sounds too good to be true? Then get cooking!

Healthy Madras Curry with Chickpea Tofu

Makes 3 servings

1 tbsp coconut oil
1 onion, peeled and finely chopped (optional, leave out for low FODMAP)
3 garlic cloves, peeled and minced
1 tbsp ginger powder
2 tsp cumin
2 tsp dried coriander
1 tsp curry powder or garam masala
a pinch of turmeric
chili powder or fresh chilis, to taste
1 recipe chickpea tofu, chopped
1 tin (400g) tinned tomatoes

sea salt and pepper to taste
dash of lemon juice
dash of light coconut milk or almond milk

500 g steamed vegetables such as broccoli, cauliflower, green beans, peas
brown rice or cauliflower rice, to serve

Heat the coconut oil in a deep saucepan and add garlic, onion if using, ginger, cumin, coriander, curry powder, turmeric and chili powder. Fry the spices until they are aromatic. Add the chopped chickpea tofu and fry until lightly browned, then add the tomatoes. Season with salt and pepper. Leave to simmer for 15 minutes, adding a little bit of water as necessary. Stir in lemon juice, coconut milk and vegetables and serve immediately with rice.


Enjoy!

Gluten Free Vegan Avocado Brownies

Luscious chocolate brownies that are vegan, oil-free and gluten free sounds like an oxymoron, but if you have avocados, you can make the impossible a reality. With their neutral taste and creamy texture, avocados are the perfect replacement for nasty processed oils and antibiotics-laden eggs. Avocados are also a perfect complement to dark chocolate and cacao, so using avocados to make brownies was a no-brainer for me.

Now, every man and his dog seems to make chocolate cake with avocado as a “secret” ingredient these days, so I am probably not going to shock anyone anymore by saying that these yummy gooey brownies have avocado in them. Both my husband and daughter love avocado, and they are in season right now, so needless to say, we are going through quite a few at the moment. As they ripen very quickly, this recipe doesn’t only make sure that you get your dose of healthy monounsaturated fats in one super-fudgy yet good-for-you brownie, it is also a great way to rescue any avocados you might have lying around that are past their prime! I hate wasting food so if you can create something nutritious to fix your chocolate cravings while being good to your wallet and the planet too, then why not?

Honestly folks, if you don’t try this, you are really missing out! These brownies are seriously rich and chocolatey and so fudgey it’s ridiculous. Your junk-loving friends, relatives and kids will never be able to tell that they pack a punch: Besides superfoods avocado and raw cacao, there is oatmeal for healthy carbs, protein and fibre, vegan protein powder to keep you full and satisfied as well as coconut flour, psyllium and flaxmeal for some more protein, fibre and nutrition! Needless to say, they are gluten free, vegan, dairy free, soy free, refined sugar free and oil free! How about that? Like most of my recipes, this is a fuss-free affair – melt chocolate, mix everything together and bake for 20 minutes. Easy as that!

Shall we get baking?

Gluten Free Vegan Avocado Brownies

60 g vegan dark chocolate
150 g brown rice syrup, divided
flesh of 1 large ripe avocado, mashed
1 large ripe banana, mashed
50 g ground rolled oats
2 tbsp rice or pea protein powder
2 tbsp raw cacao
1 tbsp flaxmeal, almond meal or LSA
2 tsp coconut flour
1 tsp psyllium husks, flaxmeal or chia seeds
1 tsp gluten free baking powder

Preheat oven to 180 °C or 350 °F and grease a 20x20cm baking pan. Melt chocolate and 100 g brown rice syrup in a double boiler until melted and smooth. Let cool slightly. In a different bowl, mix avocado, banana and 50 g brown rice syrup until smooth. Stir in melted chocolate mix until smooth, add all remaining ingredients and blend until smooth. Spoon into baking pan and bake for 20 minutes.

Enjoy!

Vegan Chocolate Mousse with Aquafaba

I used to have a go-to chocolate mousse recipe which I always fell back to. It only contained fresh eggs, dark chocolate and very little sugar – no dairy at all. It was the absolute hit at every dinner party or family gathering, even with chocolate mousse snobs. I have never been a fan of cream and dairy so was quite pleased with myself of creating a decadent chocolate mousse that was completely dairy free. However, since going plant-based, eggs are obviously off-limits as well, so what was I to do if I wanted to create an easy but still impressive vegan chocolate mousse?

Of course, you literally find millions of recipes for paleo and vegan chocolate mousse on the web, most of which contain avocado, coconut milk, nuts or the like. While these all certainly have their merits, I really wanted to recreate my old favourite chocolate mousse which contained 5 egg yolks and 8 egg whites (which also meant there were always three leftover yolks which is kind of annoying as there is only so much you can do with a yolk) and was therefore light and fluffy, with more whites than yolks. I find those avocado- and coconut-based desserts always very heavy and I wanted something in my repertoire that you could still serve after a rich meal and impress even chocolate mousse purists. So – aquafaba to the rescue! Aqua-what?

If you have been active in the health food blogging community over the past year, you would have likely come across aquafaba. It is the liquid in a tin of legumes, such as (preferably) chickpeas or any white beans. Someone discovered that this liquid is a pretty amazing replacement for eggs and ever since, it’s been all the rage with pictures of vegan meringues, sponge cakes and marshmallows popping up everywhere, all made with aquafaba! There is even a whole Facebook page devoted to this liquid gold so if you haven’t tried aquafaba yet, it might be time to jump on the bandwagon! It will also give you an excuse to use the chickpeas for falafel and hummus! (Can you ever have too much falafel and hummus?)

I only recently heard about aquafaba for the first time. It’s unbelievable how often I just tipped chickpea juice down the drain when I could have made pavlovas and macarons for a whole army! What a great discovery! It means you can simply stock up on tins of chickpeas and use them when you’re ready. You don’t have to worry about salmonella, antibiotics, cholesterol, cruel farming methods or separating the eggs. And it’s better for your wallet as well! Yay for aquafaba!

I have been wanting to share my chocolate mousse recipe with you for years, and I am now all the happier to be able to present you with a veganised version of this heavenly dessert. Have I mentioned, it literally takes minutes to come together. It is perfect to prepare the night before a dinner party or just if you fancy a treat to yourself. You deserve it! Note: This is not a fat-free or low-fat dessert, but it is still sooo much lighter and healthier than egg- and dairy-based chocolate mousse. Our friends and family are in love with this vegan chocolate mousse, and I hope you will be, too!

Healthy Vegan Chocolate Mousse with Aquafaba
Just look how fluffy and airy it is!

Note: Jazz it up with some mint oil, rosewater or orange oil!

Makes 6

Liquid from 2 cans of chickpeas (aquafaba) (approx. 1-1.5 cups or 300ml; use the chickpeas for hummus, falafel or throw into your Buddha bowl!)
200 g dairy-free dark chocolate (at least 80% cocoa)
1/3 cup sugar or stevia (I recommend sugar as the stevia taste can be very pronounced)
dash of vanilla (optional)

Melt the chocolate in a double boiler while constantly strirring until almost completely melted. Turn off the heat and stir until completely melted. Pour chocolate into a bowl and leave to cool for a couple of minutes. Pour the aquafaba into a large bowl and whip with the sugar and vanilla until it resembles marshmallow cream. Now slowly pour the melted chocolate into the aqafaba while constantly stirring until fully combined. Pour into six ramekins and chill in the fridge for a few hours.

Enjoy!

Oil-free Beetroot Hummus

No, this is not a raspberry mousse, much as I’d like one! It’s beetroot hummus – and an oil-free, vegan, gluten free and soy free one no less! The colour, you ask? Tinned beetroot for the win! If you can boost the nutrition of your snack with a multitude of vitamins, minerals and antioxidants all while turning it the most stunning colour ever, why wouldn’t you? And with eight simple ingredients you possible have sitting in your pantry right now (or can easily enough pick up from the store), there is just no reason not to make this hummus and impress your guests and your family (and yourself) with this beauty. This is pretty much an instant affair, so a good candidate if you have friends dropping in unexpectedly.

I am not exaggerating if I say that it tastes absolutely a-maaazing. I love any version of hummus, but the sweetness of the beetroot just works perfectly to offset the earthiness of the chickpeas and the pungent garlic. My toddler is in love with this hummus which is the biggest compliment ever as at the moment she seems to be the pickiest eater ever! So I’m happy that I’ve got something for her that’s pink and still good for her. 🙂

One word of warning – this hummus may be “oil-free”, but due to the lovely tahini it is not “fat-free”, so moderation – if you can! – is key.

Oil-free Beetroot Hummus
Healthy oil-free beetroot hummus

1 tin chickpeas, drained and rinsed
1/3 tin tinned beetroot, drained (not rinsed)
2 tbsp tahini (sesame paste)
1-2 tbsp plant milk (depending on how you like the consistency)
1-2 cloves garlic, minced (depending on your taste)
dash of lemon juice
1 tsp smooth mustard
1 healthy pinch of Maldon Sea Salt

Simply blitz all the ingredients in a high-powered blender until completely smooth, then transfer to a bowl and chill until using. Lasts about one week in the fridge.

Enjoy!