Low Carb Low Fat High Protein Carrot Cake (grain free, dairy free, soy free)

Low Carb Low Fat Carrot Cake

This carrot cake is almost an insolence. Yes, it is low carb AND low fat – for all of you that can’t decide between the two lifestyles (or simply want to eat a truly delicious carrot cake). Talk about having it all. There is many recipes for healthy treats out there, but this cake is gonna make them blush with envy. Not only is this cake moist, scrumptious and totally utterly delicious (tick tick tick). It is low carb and low sugar with the carbohydrates coming from carrots, banana and just a dash of honey (tick tick). It is low fat with the fat coming from eggs and flax (tick). It is high protein (tick), high fibre (tick) and on top of it all, gluten free, grain free, dairy free, nut free and soy free (tick tick tick tick tick). Another decisive advantage is that if you are lazy busy you can just throw all ingredients together in one big bowl in no particular order and without any laborious instructions such as “put the dry ingredients here…mix the wet ingredients there”, separating the eggs, or melting butter or coconut oil (helped by the fact that there is no fat or oil in there). It also neatly pours out of the bowl (thanks to the flax that keeps everything together)

Given the high amount of protein and fibre, this cake will fill you up for a while which is another plus, and the icing on the cake is the icing on the cake (forgive the pun). It is fat free and sugar free, made of cannellini beans – which is the reason why this cake is not paleo. If it wasn’t for the icing, this carrot cake would be perfectly paleo(ish). So for all our primal friends out there, just omit the icing or use your favourite paleo icing instead. As there is eggs and honey in it, this is not a vegan cake, but you might be able to experiment with chia eggs and rice malt/agave/maple syrup though I cannot vouch for the results.

As a word of warning, if you have IBS, follow a low FODMAP diet or otherwise have problems with fibre, this carrot cake might not be suitable for you or you might just want to go easy and enjoy a small amount. The coconut flour in this recipe is full of fibre which is great but might give certain people intestinal discomfort. Try it for yourself. Nothing ventured, nothing gained.

For one cake (approx. 12 large or 24 small slices)

2 heaped tbsp vanilla flavoured pea protein powder
3/4 cup coconut flour
1/2 cup flaxmeal
pinch of salt
1.5 tsp baking soda
1.5 tsp cinnamon
0.5 tsp nutmeg
1 mashed banana
2 tbsp honey
2 tsp vanilla essence
4 eggs
300 ml plant milk
5 large carrots, grated

For the frosting
1 cup cannellini beans, drained and rinsed
4 tbsp stevia
1 tsp vanilla
pinch of sea salt

Preheat oven to 180 °C and line a round baking tin with baking paper. Mix the cake ingredients in a large bowl until a homogenic mass develops (I did this by hand). Scoop into the mould and bake for 20 minutes until a toothpick comes out clean. Transfer to a cooling rack and allow to cool completely before frosting.

For the frosting, process all ingredients in a high-powered blender until completely smooth. You can use it straight away or place in the refrigerator to firm up even more. Tip: If you find the taste of the frosting to bland, you could add spices such as nutmeg or flavouring such as almond or lemon essence.

Enjoy!


Buckwheat and Silverbeet Stew (vegan, gf)

WP_20160430_19_48_17_Pro.jpg
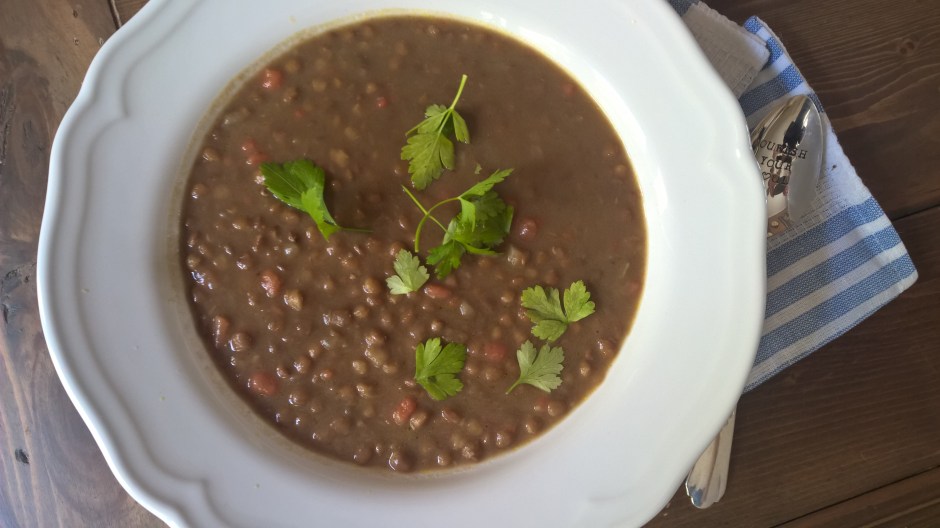
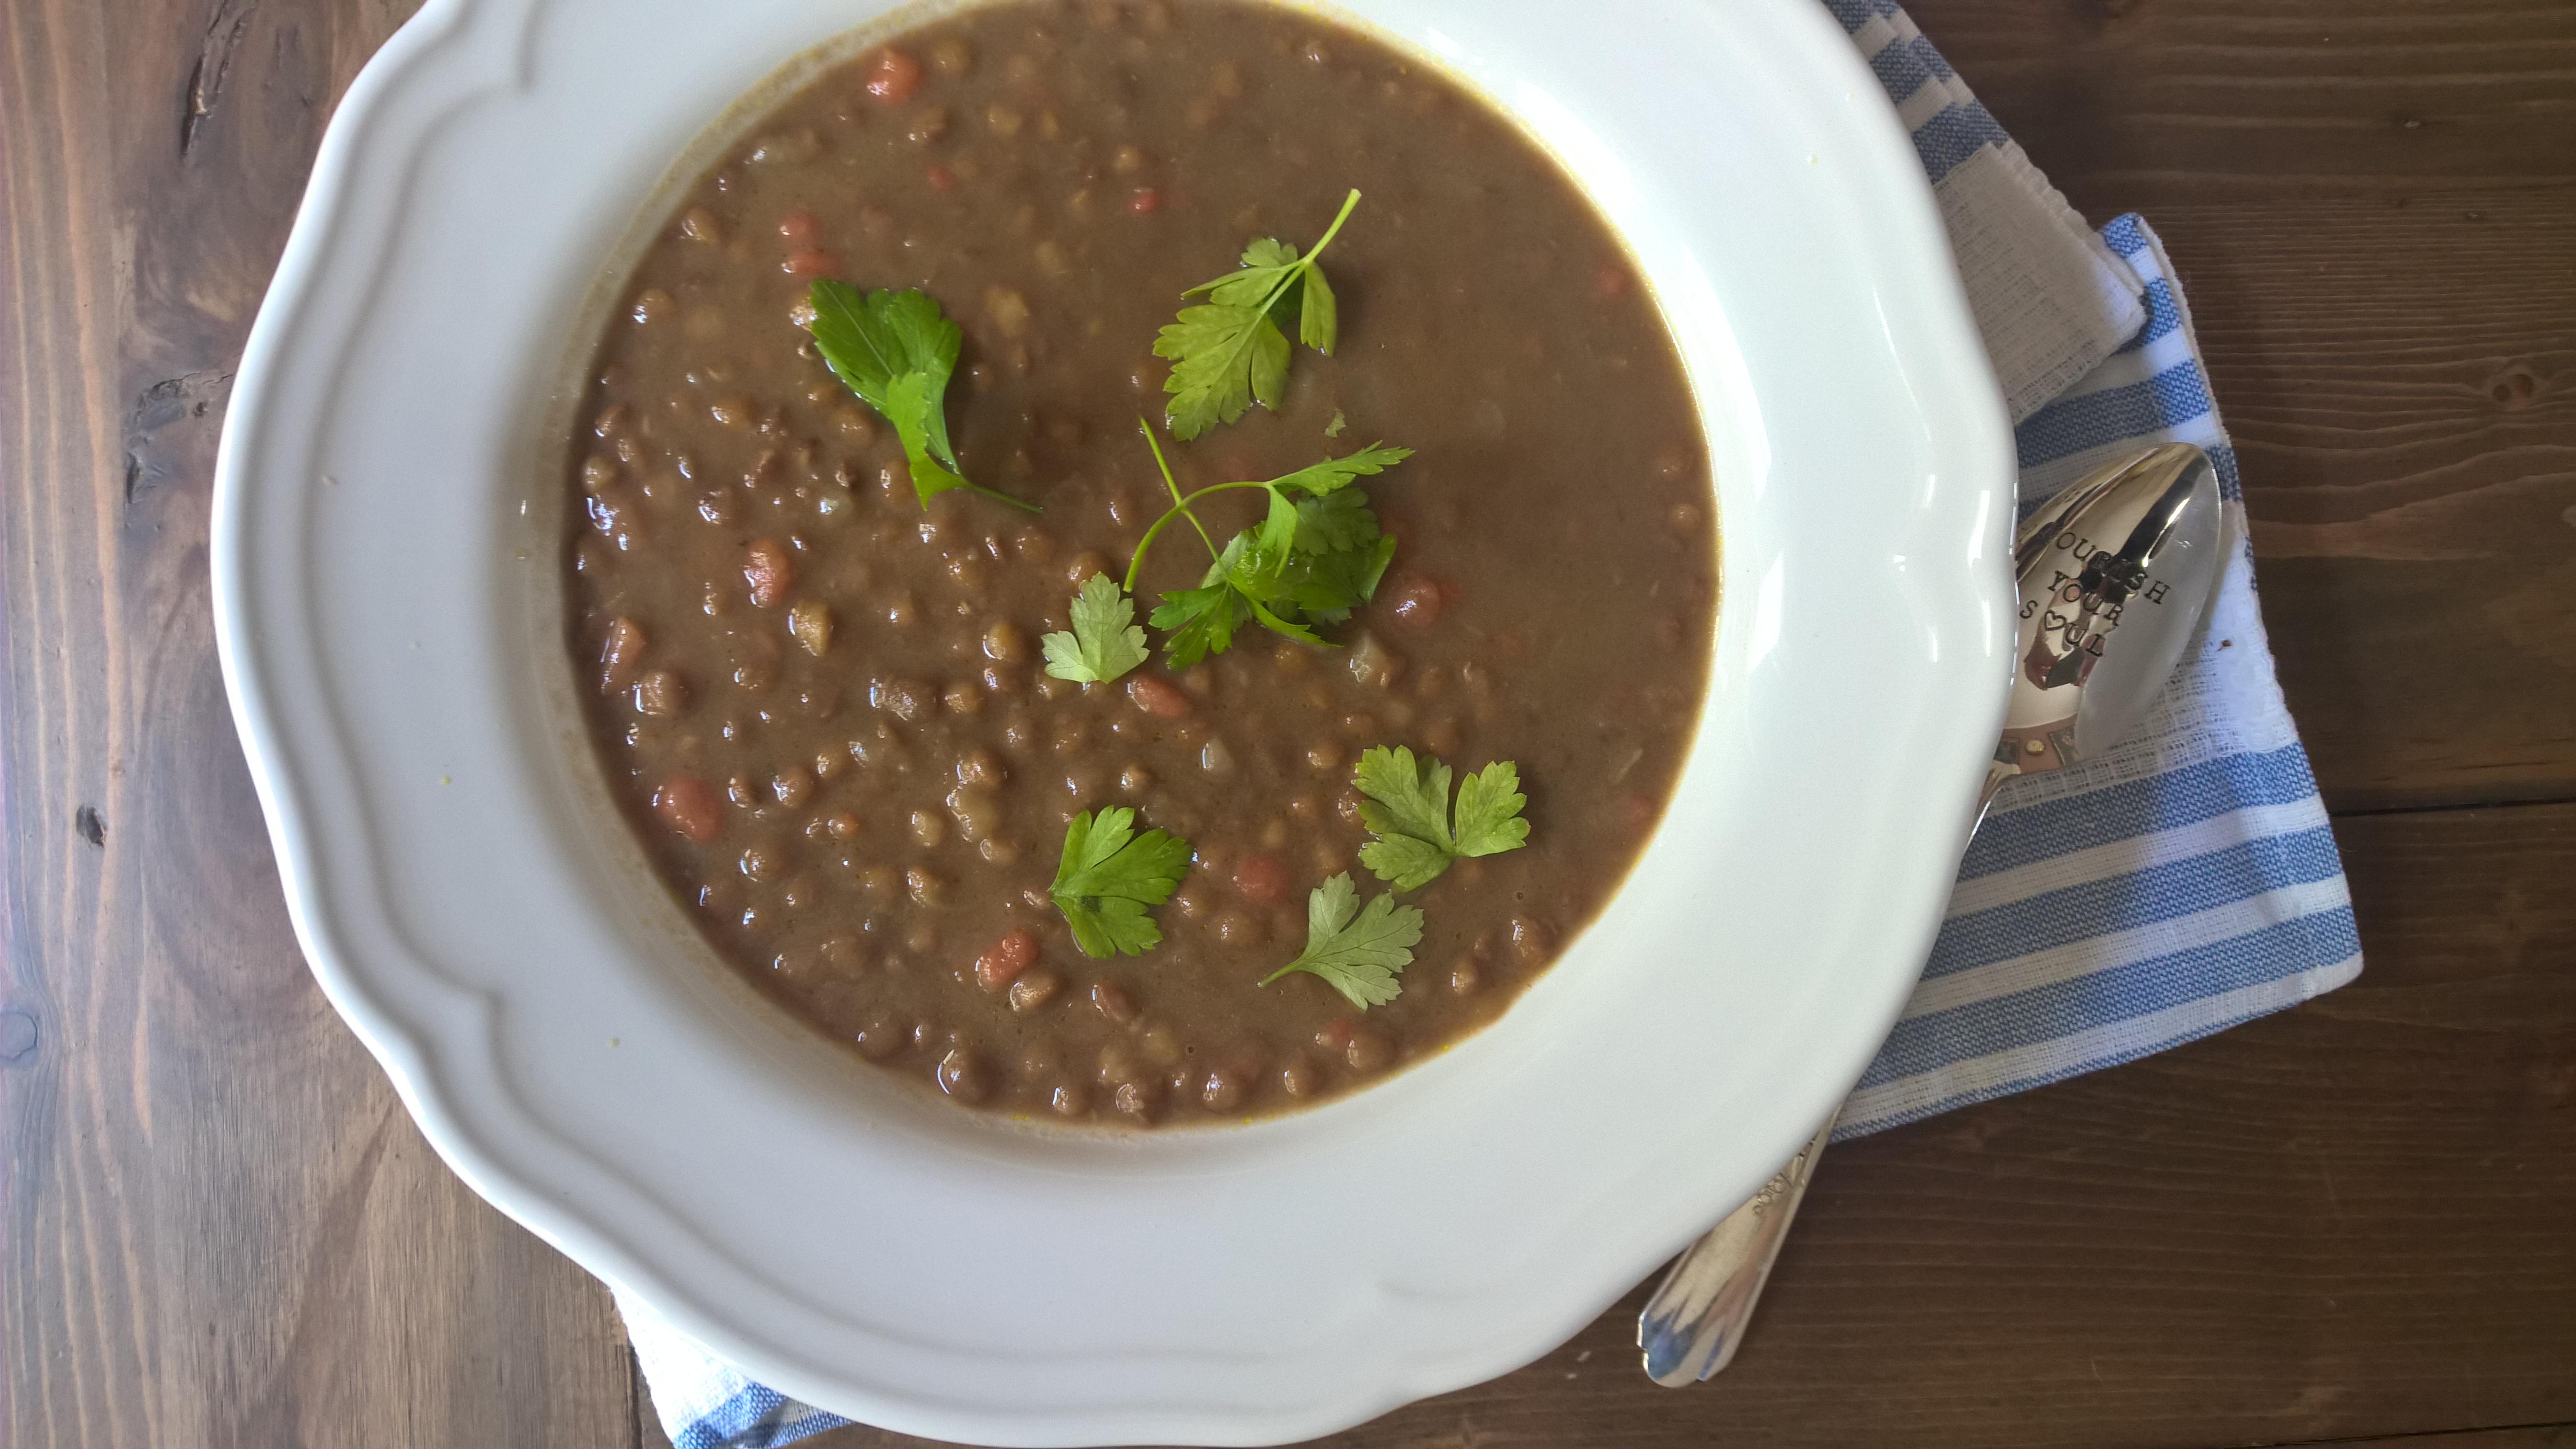
I’d like to call this an “anti flu stew”. It’s got all you need to make you feel just that little bit better when you are fighting those viruses – and even when not. Lots and lots of fresh organic vegetables, beautiful spices, wholesome broth, supergrain buckwheat and antiviral coconut oil. Throwing this stew together was about as much as I was able to while succumbing to the childcare winter germs, but it was well worth it and kept me going for a few nights. If you are lucky, you might even have someone who does it for you. Envy!

This stew is of course not only for the cold and flu, but I was so amazed how I felt after having it compared to before that I stick to anti-flu stew. Actually, as the title suggests, the two stars are buckwheat and silverbeet, but I think it would work with any types of vegetables and grains. It somehow happened that I had a delivery of organic vegetables that day, and half the box was filled with silverbeet. Turning it onto a stew was more an experiment than anything else, but here we go. The silverbeet works a treat but, again, you can sub your favourite vegetable if you haven’t got an organic vegetable delivery with silverbeet in.

I tend to avoid garlic and onions as much as possible due to FODMAPS which are not my tummy’s friend, but since those organic vegetable people like to fill up the boxes with onions, I had quite a bit of onion and garlic, and as both have great antibacterial and antiviral properties, I set priorities and chose to fight those germs (and put up with a bit of bloat). But as always, you can omit garlic and onions even though that might slightly impair the flavour.

This stew freezes very well and tastes great even after days.

1 tbsp organic coconut oil
1 organic onion, peeled and finely chopped
2 organic garlic cloves, minced
spices and herbs of choice (great options are cayenne pepper, chili powder, curry powder, paprika, cinnamon, coriander, ginger, bay leaves, parsley…)
1 bunch organic silverbeet, chopped (or other vegetable)
1 bunch organic broccoli, chopped (or other vegetable)
250 g organic carrots, peeled and chopped
1l vegetable stock
2 x 400 g cans diced tomatoes
1 x 400 g legumes of choice (I used butter beans)
1 cup raw buckwheat kernels
salt, pepper and lemon juice to taste

Heat oil in a cast iron pot over low heat. Stir in garlic and onions and fry well until the garlic is soft and the onion translucent. This can take up to ten minutes. You can fry them for less than that, but the longer you fry them, the more easy on your tummy.

Add vegetables and give them a quick stir until the fragrances are released. Add the prepared vegetables and cook for a few minutes.

Deglaze with tomatoes and stock, add the buckwheat and legumes. Bring to the boil, then turn down the heat and simmer for 20-30 minutes, stirring regularly. Season to taste with salt, pepper, lemon juice and fresh parsley and serve. Due to buckwheat, this stew is very filling without the need of an additional starchy side dish.

Enjoy!

Healthy Snickers / Bounty bar (gluten free, vegan, no bake)

Healthy Snickers Bar - gluten free, grain free, dairy free, refined sugar free
Healthy Snickers Bar – gluten free, grain free, dairy free, refined sugar free

If you asked me what would be better than a Snickers or Bounty, I’d have to say a Snickers AND a Bounty! Don’t you think? But wait – before you run to the nearest vending machine or fuel station to indulge in said lovelies, wouldn’t it be even more satisfying to make these babies yourself, knowing you’d have a healthy treat in the end?

This recipe allows you to whip up your own Snickers/Bounty bar in next to no time! Sure, it needs some chilling, but other than that, the process couldn’t be easier. And as there is no baking allowed, you save some energy, too. Good for the environment, good for your wallet. Oh, and like all my recipes, these bars are not only good for you and easy to prepare, they also taste amazing! And if you belong to the family of health nut cooks and bakers, you should have all ingredients in your pantry ready to go, which is an added bonus (if the weather in your place is like Melbourne at the moment, you surely don’t want to leave the house, not even for buying ingredients!).

Okay, but what IS this, I hear you asking? A Snickers, a Bounty, or what? Well – I think it takes the best of both worlds, i.e. peanuts and coconut. Of course, if you use any other nut butter than peanut butter, then the Snickers aspect would be lost, but it would certainly still be delicious! I could also call these superfood slices as something so yummy, satisfying and still good-ish for you must be a superfood slice, but it seems that these days, superfood slices need to involve goji berries and acai and these ones have neither (feel free to include them though – a goji Bounty bar, wouldn’t that be nice?). Coconut and peanut make a great item and the bitter chocolate topping cuts nicely through the sweetness and gives the whole creation a lift. So the only thing missing is a name!

Maybe just make them and then find a good name. If you come up with one, just let me know. 🙂

Makes 20 slices

For the base:
150g peanut butter (or other nut or seed butter)
100g desiccated coconut
80g rice malt syrup (or honey if not vegan)
25g raw cacao

For the filling:
150g peanut butter (or other nut or seed butter)
80g rice malt syrup (or honey if not vegan)
20g coconut oil, melted
dash of vanilla essence

For the topping:
20g rice malt syrup (or honey if not vegan)
20g raw cacao
20g coconut oil, melted
chopped nuts to decorate (optional)

Line a 20x20cm baking tin with baking or greaseproof paper. Mix the four base ingredients one by one in a large mixing bowl until very well combined. I’d recommend elbow grease here rather than a processor as you’ve got more control and won’t end up with a mess. It shouldn’t take long before a ball forms; adjust the wet/dry ingredients if you have issues with the consistency, but it shouldn’t be a problem. Press the coconut mass evenly into the prepared baking tin and make sure that it sits in there really firmly. If you can, use a heavy item such as a book to press it down even further. Put in the fridge to set.

Meanwhile, prepare the filling by mixing the filling ingredients until everything is mixed through and smooth. Spoon on top of the chilled base and spread evenly with a spatula. Return tin to the fridge.

Lastly, mix the topping ingredients – you might want to place this into the microwave for 20 seconds to make it nice and thin, but strictly no more than 20 seconds. Pour over the chilled slice, sprinkle with chopped nuts if you like and return to the fridge again for at least four hours or overnight before cutting in slices/squares.

This slice freezes very well and can be eaten straight out of the freezer, so it is a great option to make to have a healthy and filling snack on hand whenever you need it.

Enjoy!

Vegan lentil eggplant and sweet potato stew

mouthful. But believe me, you will want to take many mouthfuls of this stew! Imagine you have a dinner party with one friend who is paleo, one vegan friend, one gluten-intolerant friend, one friend with a nut allergy and one friend who needs to follow a low FODMAP diet. What do you do? Scroll down!

But you should also scroll down if you just want to eat the most delicious stew evaaa…with lentils, eggplant, sweet potato, tomato and kidney beans it is health in a bowl, but that doesn’t mean compromising on flavour! Curry powder, ginger and turmeric makes this stew an explosion of flavours on your tongue – the best proof that tasty and filling dishes do NOT require meat, onions or added fats!

With its “meaty” consistency, this stew will satisfy herbivores and omnivores alike, and with its rich flavours simply from vegetables, herbs and spices, it is an indulgent treat without having to worry about fat. The “good” carbs in the legumes and spuds make you fell fuller for longer – needless to say, the lentils and beans pack a decent amount of protein and fibre. You could always add extra protein from quorn, tempeh or – if you are not vegetarian or vegan – chicken or any other meat or fish. And feel free to have it as spicy or as mild as you want! I did not add any salt; all the sodium comes from the stock, so if you use a low-salt stock or broth, this can even be a low-sodium stew.

This stew is gluten free, dairy free, soy free, paleo, vegan and vegetarian, nut free and low FODMAP. I try to avoid onions and garlic as much as possible as they are not my friends. If you can, frying garlic and onions before adding the other ingredients would add even more flavour (if that is possible!). This stew was born out of the need to make use of an eggplant and a sweet potato. Adding the legumes was kind of a lightbulb moment, and I don’t regret having thrown all these ingredients together. Eggplant naturally takes a bit longer to cook than other vegetables so it is not instant but delayed gratification. It will taste even better the next day and is the perfect candidate for dinner parties. You wouldn’t even have to ask your guests for dietary requirements as this stew covers them all!

This stew tastes so good, it is almost an insolence that it is so super healthy and allergy-friendly as well! Try for yourself!

Vegan Lentil Eggplant and Sweet Potato Stew

Makes approx. 8 serves

1 tbs coconut oil
1 large eggplant
, diced in 1cm pieces
1 large sweet potato, cubed (I leave the peel on as I’m lazy but feel free to peel it beforehand!)
1 l vegetable stock
1 tin (400ml) diced tomatoes
1 tin (400ml) lentils
1 tin (400ml) kidney beans
spices (I used Madras curry powder, ginger and turmeric)

Melt the oil in a large stockpot, add the spices and cook until fragrant. Add the eggplant, sweet potato, stock, tomatoes and legumes. Cover, bring to the boil, then open the lid a crack, turn down the heat and simmer until all the eggplant and sweet potato are tender (30 minutes). Give the stew a good whiz with a stick blender until you reach a coarse consistency. Serve as is or with fragrant jasmine rice or freshly toasted gluten free bread.

Enjoy!

Healthy Homemade Granola

Healthy Homemade Granola

Granola. Not only a pretty name, but also a pretty cool snack or breakfast. And while best left to the occasional treat, I can’t think of any fruit salad or compôte that isn’t improved by a sprinkle of crunchy sweet granola. And yogurt wthout granola is just yogurt. I even add it to my porridge sometimes if only porridge doesn’t cut it – carbs anyone?

While still a popular breakfast or snack choice, many are not aware that it is actually really easy to make granola yourself – in fact, it is so easy that I don’t understand why you would want to rely on packed granola from the supermarket that is loaded with sugar, industrial oils and a heap of other ingredients that sound like a chemical weapon.

Making your own granola has an array of health benefits, some of which include:

  1. It is quick and easy, and as granola lasts for aaaages you get maximum results with minimum efforts.
  2. If your house is cold – and that means ten out of twelve months if you live either in Melbourne or Europe! – you get a nice warm kitchen at least (that means if the granola makes it into your oven in the first place, see 4.).
  3. The smell your house gets filled with is divine.
  4. You get to lick your fingers in the process.
  5. You can add whatever you like so it is a great way to use up those stale dried cranberries you bought for Thanksgiving last year. It also means you can make it as healthy (or unhealthy) as you like.

In fact, as granola is so incredibly easy to overeat, you really want to get the most nutrition bang for your calorie buck, and this is where this recipe comes in – which can also be customised in many ways, of course. Oats and/or quinoa or other grains provide fibre and slow carbs for a healthy digestion and stable blood sugar as well as numerous minerals and good protein, a dash of coconut oil (the heatlhiest fat around), and nuts, seeds, and dried fruits for their numerous known health benefits.

3 cups (200g) rolled oats (certified gluten free) or other rolled grain such as quinoa
1/4 cup (50g) melted coconut oil
3 oz (84g) honey, maple syrup or rice malt syrup
1 cup (150g) any combination of nuts, seeds and/or dried fruit: sunflower seeds, sesame seeds, pepitas, dried cranberries, dried sour cherries, raisins, sultanas, slivered almonds etc. are all excellent choices
1 oz (28g) shredded coconut

Preheat oven to 180 °C. Spread the grains evenly on a lined baking sheets. Combine the oil and honey/maple syrup/rice malt syrup, mix into the grains and bake until lightly golden, about 10 minutes. Add the nuts, seeds, fruit, and coconut and bake for another 5 minutes. Take out of the oven and let cool completely. Store in an airtight jar in the pantry (lasts several weeks). Serve with milk of choice, fresh fruit, and/or yogurt.

Enjoy!


5-minute Vegan Gluten Free Naan Bread

The free bread basket you get in restaurants to quench your hunger – I know, sometimes it isn’t even free – is usually just that – a hunger quencher. In my gluten-eating days, I have rarely come across a restaurant that serves a bread basket with bread that actually deserves its name. Since going gluten free, I naturally have to pass on the bread basket – but unlike saying good-bye to thin-crust pizza on Saturday nights and freshly baked croissants in bed on Sunday morning, I happily live without these buckets of stale bread thrown at you that spoil your appetite for the “real” meal.

The only exception is delicious naan bread in Indian restaurants, fresh from the clay oven, only waiting to soak up tangy relishes and condiments. While Indian food has never grown on me as much as, say, Mediterranean or middle eastern cuisine, I’d happily walk miles for a good naan bread – gluten free of course.

The best things in life happen by chance, and my latest creation in the realm of gluten free carby things was born while experimenting with different pancake recipes. (After all, it was Pancake Day on Tuesday.) While I’m still trying to rival the crêpe stand in Melbourne CBD, I might not have come up with a pancake recipe I would be happy to post, but – yup – a recipe for naan bread! How good is that? I mean, you try to create something that roughly looks, tastes and smells like a pancake, a crêpe, a poffertje,a flapjack, or a blintz (any reference to a certain Austin Powers movie is mere coincidence), and what you get is naan! I won’t complain. I guess it’s just life. Do you have that too where when you are looking for something you always find something else? Or is it just me?

I won’t go as far as calling these babies “healthy” because – shame on me- I used plain old commercial gluten free flour which is about as carby as you get. I’ve been a bit slack these days. So the fact that these beauties take less than five minutes to make (and contain just four ingredients (five if you count the fat for frying)) got me sold. Yes, this means you could devour a stack of delicious gluten free naan bread in under five minutes from now.

So while I work heavily at creating a more healthy version of this revelation (I think sorghum and buckwheat are likely candidates), why don’t you go forth and bake. The time starts now.

5-minute Vegan Gluten Free Naan Bread

Makes 4 naan breads

250ml filtered water
150g gluten free self-raising flour
1 tbsp psyllium husk
pinch of sea salt
a little bit of refined coconut oil for frying

Mix flour, psyllium and salt, then gradually add water while constantly whisking until you have a smooth dough. Lightly grease a large non-stick frying pan. The pan should be really hot. Make sure you use a good non-stick brand. Ladle a quarter of the batter inside the pan, fry until bubbling on top, then flip. Let cool before serving (the texture will become more naan-y as it cools down).

Enjoy!

Tropical Smoothie (Breakfast) Bowl

Healthy, Easy, Yummy - the Tropical Smoothie Bowl
Healthy, Easy, Yummy – the Tropical Smoothie Bowl

Whether you want/need to balance upcoming indulgences (yes that’s right), need to cool down in Australia’s summer heat, or are just after a delicious, filling, easy, and, yes, healthy breakfast and/or afternoon snack, a smoothie bowl always hits the right spot – and yes, they are not only for summer. This one is made with banana and mango – hence the reference to “tropical”. But a smoothie bowl wouldn*t be a smoothie bowl if you couldn’t adapt it to your needs.

I just love their versatility – hate mango but love berries? Bingo, enjoy your banana and berry smoothie! Can have dairy – use Greek yogurt. Can’t have dairy? Use avocado or tahin instead. Need a protein boost after your workout? Add a scoop of your favourite protein powder. Got some almond milk leftover? Overripe bananas? You get the picture. You can even add a bit more liquid and have it as a beautiful shake on the run.

Serves one

1 cup lite coconut milk, almond milk, or any other milk of choice
a handful of frozen chopped bananas
a handful of frozen chopped mangoes
a handful of spinach (optional)
a scoop of Greek yogurt, avocado and/or nut butter
a scoop of protein powder (optional)
a tbsp of chia seeds (optional)
any add-ons (e.g. cacao, maca, spices, fruit, seeds…)

Blend all ingredients in a high-powered blender until desired consistency is achieved. Spoon or sip away!


Enjoy!


Paleo Vegan Chocolate Cupcakes (nut free)

Paleo Chocolate Cupcakes

How about sinking your teeth into a luscious, moist, fudgy, chocolatey cupcake…knowing that it’s paleo and vegan? A cupcake that is so delightful that you wouldn’t in the world believe it’s gluten free let alone grain free let alone paleo and vegan? Could that be something you are interested in? Would you like to try a scrumptious chocolate cupcake with lashings of chocolate cream on top (that is paleo and vegan)? I might have you covered!

These super easy and quick cupcakes (in fact, you can also use the dough for muffins or just regular chocolate cake) are whipped up in a jiffy, and while your non-paleo friends will love the indulgent chocolatey taste (while you know that this comes with virtually zero net carbs), it is the texture that is the real marvel here – moist, fluffy…just like the best cupcake you can imagine. And yes, at the risk that I am repeating myself, these babies are grain free – not only gluten free, but grain free! And they are entirely made of coconut flour, so no almonds or other nuts here (as coconut is not technically a nut).

Coconut flour is sky high in fibre, which means that these cupcakes are extremely satisfying. But do not go overboard, as exactly that fact can lead to bloated tummies if you are sensitive. Next to fibre, these delicacies also boast omega 3 from chia seeds, antioxidants and minerals from raw cocoa, healthy fats from coconut oil, and much more…there is really no need to wait for a special occasion!

Makes 18 cupcakes or 6 muffins

100g coconut flour
50g raw organic cacao
1 heaped tsp. aluminium-free baking soda
generous pinch of Himalayan sea salt
4 tbsp. or 10g stevia
2 tbsp. or 30g coconut sugar
3 egg replacers or “flax eggs” (1 flax egg = 1 tbsp milled flaxseed dissolved in 4 tbsp water)
3 tbsp. chia seeds, soaked in 9 tbsp. filtered water
100g full-fat coconut cream
100g melted virgin unrefined coconut oil
dash of vanilla extract
2 tsp. organic apple cider vinegar
100ml warm water

For the frosting:
tin of full-fat coconut cream, chilled overnight
raw organic cocoa to taste
stevia to taste

Preheat oven to 180°C and prepare a muffin/cupcake tray. Combine coconut flour, cacao, baking soda, sea salt, stevia, and coconut sugar in a medium bowl until combined. Mix eggs, soaked chia seeds, coconut cream, coconut oil, vanilla, vinegar, and water in another bowl and mix on medium speed until homogenous. Add dry to wet ingredients and mix until well combined. Bake for 20-30 minutes depending on size or after the toothpick comes out clean. Let cool in the tray and refrigerate. The texture improves in the fridge and they last a long time when stored in the fridge.

Mix the ingredients for the frosting according to your liking and chill until firm enough to pipe onto cupcakes. Sprinkle with hundreds and thousands (optional).

WP_20150624_002

Enjoy!

Millionaire’s Shortbread aka Caramel Slice {gf, vg, soy free, paleo}

Grain free, paleo caramel slice

Millionaire’s shortbread was my childhood heaven like brownies for other people. I fell in love the minute my mum brought a tray from a business trip to Scotland – a crunchy shortbread base + decadent caramel + chocolate = bliss! When a Marks & Spencer’s opened in Frankfurt, we travelled all the way from Berlin just to bite into one of these moreish delights (that Marks & Spencer’s did not last long in spite of their heavenly baked goods, but that is another story).

Making a gluten free version of Millionaire’s shortbread has been on my to-do-list for a couple of years now. In fact, this is a gluten, dairy and soy free blog, so creating a Millionaire’s shortbread fit for No Worries Cooking was a bit like squaring the circle. There were many failed attempts – either the shortbread was ruined (I had heated the butter a couple of times – never do that!), or the caramel was NQR, or the chocolate burned while melting. But now I can finally tick it off the list: Here is a vegan, grain free, dairy free, sugar free, soy free, and, in fact, paleo-ish version of Millionaire’s shortbread! I love ticking off items from my to-do lists, so this was a success on so many levels!

The shortbread base I have slightly adapted from a recipe for paleo all-purpose flour I found here. I am keen to try it in some other recipes as well, but it worked a treat in this shortbread. The caramel is a super quick vegan caramel sauce (of which I will post the recipe separately later), and the chocolate is my favourite, Lindt Excellence 90%. So it is really a lot easier to whip up this treat than I had antcipated, probably less than 30 minutes preparation, which should be the maximum amount of time you wait before trying this great recipe!

For a 20 cm square baking pan

For the shortbread base:
120 g coconut flour
100g almond meal
60g tapioca flour
pinch of salt
1 “flax egg” (1 tbsp milled flaxseed dissolved in 4 tbsp filtered water)
150g coconut oil or vegan butter, softened
50g rice malt syrup or other liquid sweetener

For the caramel:
1 tin full-fat coconut cream, chilled overnight
1 tbs molasses
dash of vanilla extract
generous pinch of sea salt
150g rice malt syrup or other liquid sweetener
dollop of coconut oil or vegan butter

For the chocolate topping:
200g vegan dark chocolate (at least 80% cocoa)

Preheat oven to 180 °C. Prepare one 20 cm square baking pan by lining with baking paper. Mix all ingredients for the shortbread in a large mixing bowl and mix with your hands until everything comes together and the mass resembles crumble. Note: it will take a while to come together, but you should really use your hands as the warmth of your hands will soften the butter, thus helping to combine the fat molecules of the butter with the dry ingredients. (And you get to lick your fingers, yum!) Once the dough resembles a crumbly mass, pack firmly to build a “ball” and chill for up to 30 minutes (though you can skip this step). Press firmly and evenly down the baking pan and pierce holes into the fough with a fork. Bake for approx. 20 minutes until the edges start to lightly golden.

Meanwhile, prepare the caramel. The solid part of the coconut cream should be on top of the tin. Scoop it out and into a small saucepan. The leftover coconut water can be used for smoothies. Add the remaining caramel ingredients bar the butter and slowly heat over medium heat. Bring to the boil, then turn the heat down and simmer until the caramel starts to bubbly and thicken up. Stir, stir, stir! Once the caramel has the desired consistency, turn off the heat and stir in the butter. Pour into the tin on top of the baked shortbread and refrigerate for one or two hours.

Once set, melt the chocolate in a double boiler while constantly stirring until completely melted. Pour on top of the shortbread and caramel and refrigerate again for another hour or so.

Once everything is firm and set, lift out of the tin and cut into squares with a very sharp knife.

WP_20150512_007

Enjoy!

Vegan Superfood Protein Shake

Superfood Shake
Superfood Shake

I have mentioned here before that I like to start my days with rice protein shakes. Rice protein is a very versatile protein powder, it adds great bulk to shakes, making them super thick and luscious, and most importantly, unlike whey, casein or – heaven forbid – soy protein, rice protein is very easily digested and a great option for an allergy-friendly or vegan diet. It is also one of the more affordable protein powders out there. With its excellent amino acid profile (in fact, rice is the grain with the highest quality protein compared to all other grains), rice protein makes for a great post-workout snack and should not be considered inferior to its dairy-containing sibling powders. Just choose a good (preferably organic) brand as brown rice can be loaded with chemicals.

This shake is a real “superfood” shake (as much as I hate that word). Kale (one of the world’s most nutrient dense foods), blueberries (loaded with antioxidants), avocado (a wealth of monounsaturated fats, the healthiest dietary fats), nut butters (vitamin E), cacao (minerals) and banana (oodles of natural antidepressants) are some of the planet’s healthiest foods, while cinnamon helps stabilising your blood sugar (great in the morning or after a workout!). Most importantly, this shake really tastes great and keeps you full for hours!

I did not add any sweeteners here as the banana and the berries are quite sweet already, but you could add a little honey or stevia if you like it a tad sweeter.

300ml almond milk
handful of kale
handful of frozen blueberries
1tb cacao
1tb tahin
half avocado
1 frozen banana
40g rice protein
cinnamon

Blend all ingredients in a high-powered blender and…

Enjoy!