Tofu Stir Fry with Black Bean Noodles {vg, gf}

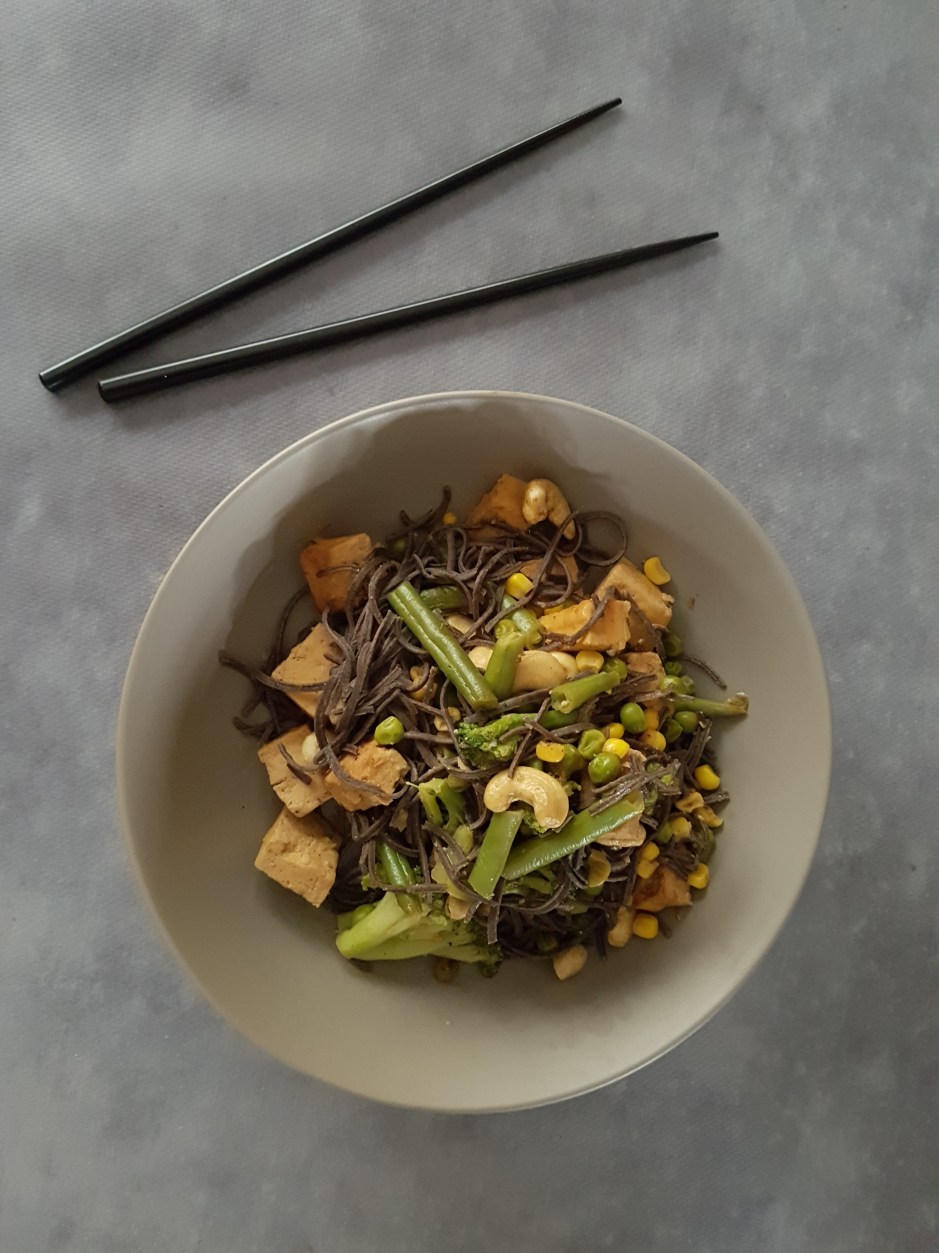
Stirfry for me is the ultimate comfort food. It is vibrant, full of flavour, satisfying and warming, and I love how versatile it is. Stirfrying means cooking more quickly. Vegetables therefore retain more nutrients. And because stirfrying is so quick, it means less time standing in front of the stove and more time eating! Stirfrying for the win! Here goes my vegan tofu stir fry with black bean noodles. It is ultra quick (about 15-20 minutes) so there are absolutely no excuses for not dishing up a delicious and healthy meal on a week night! (Or any night, for that matter.)

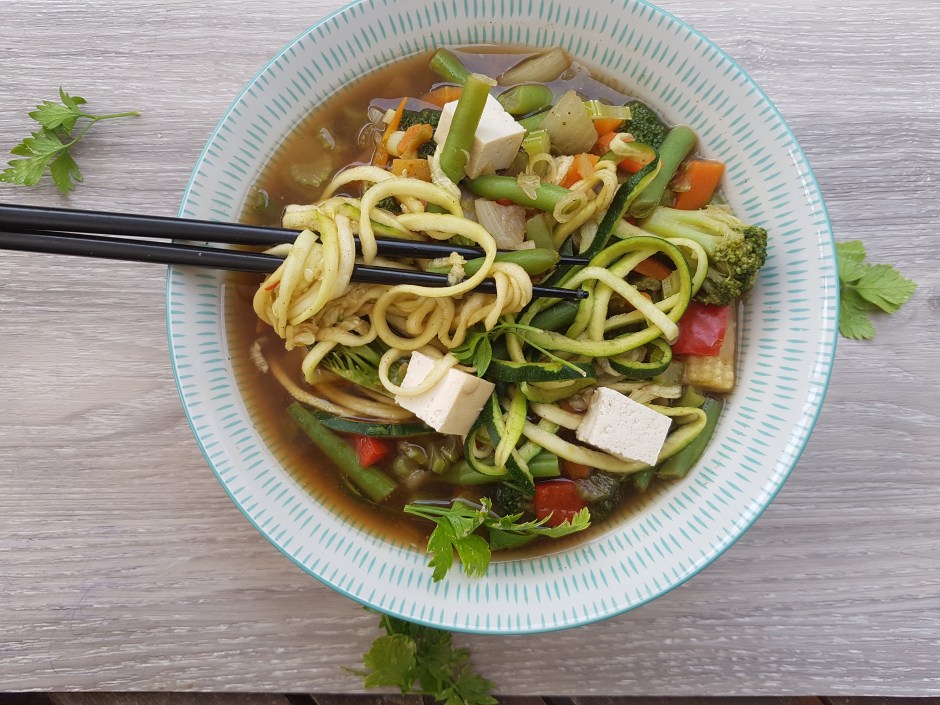
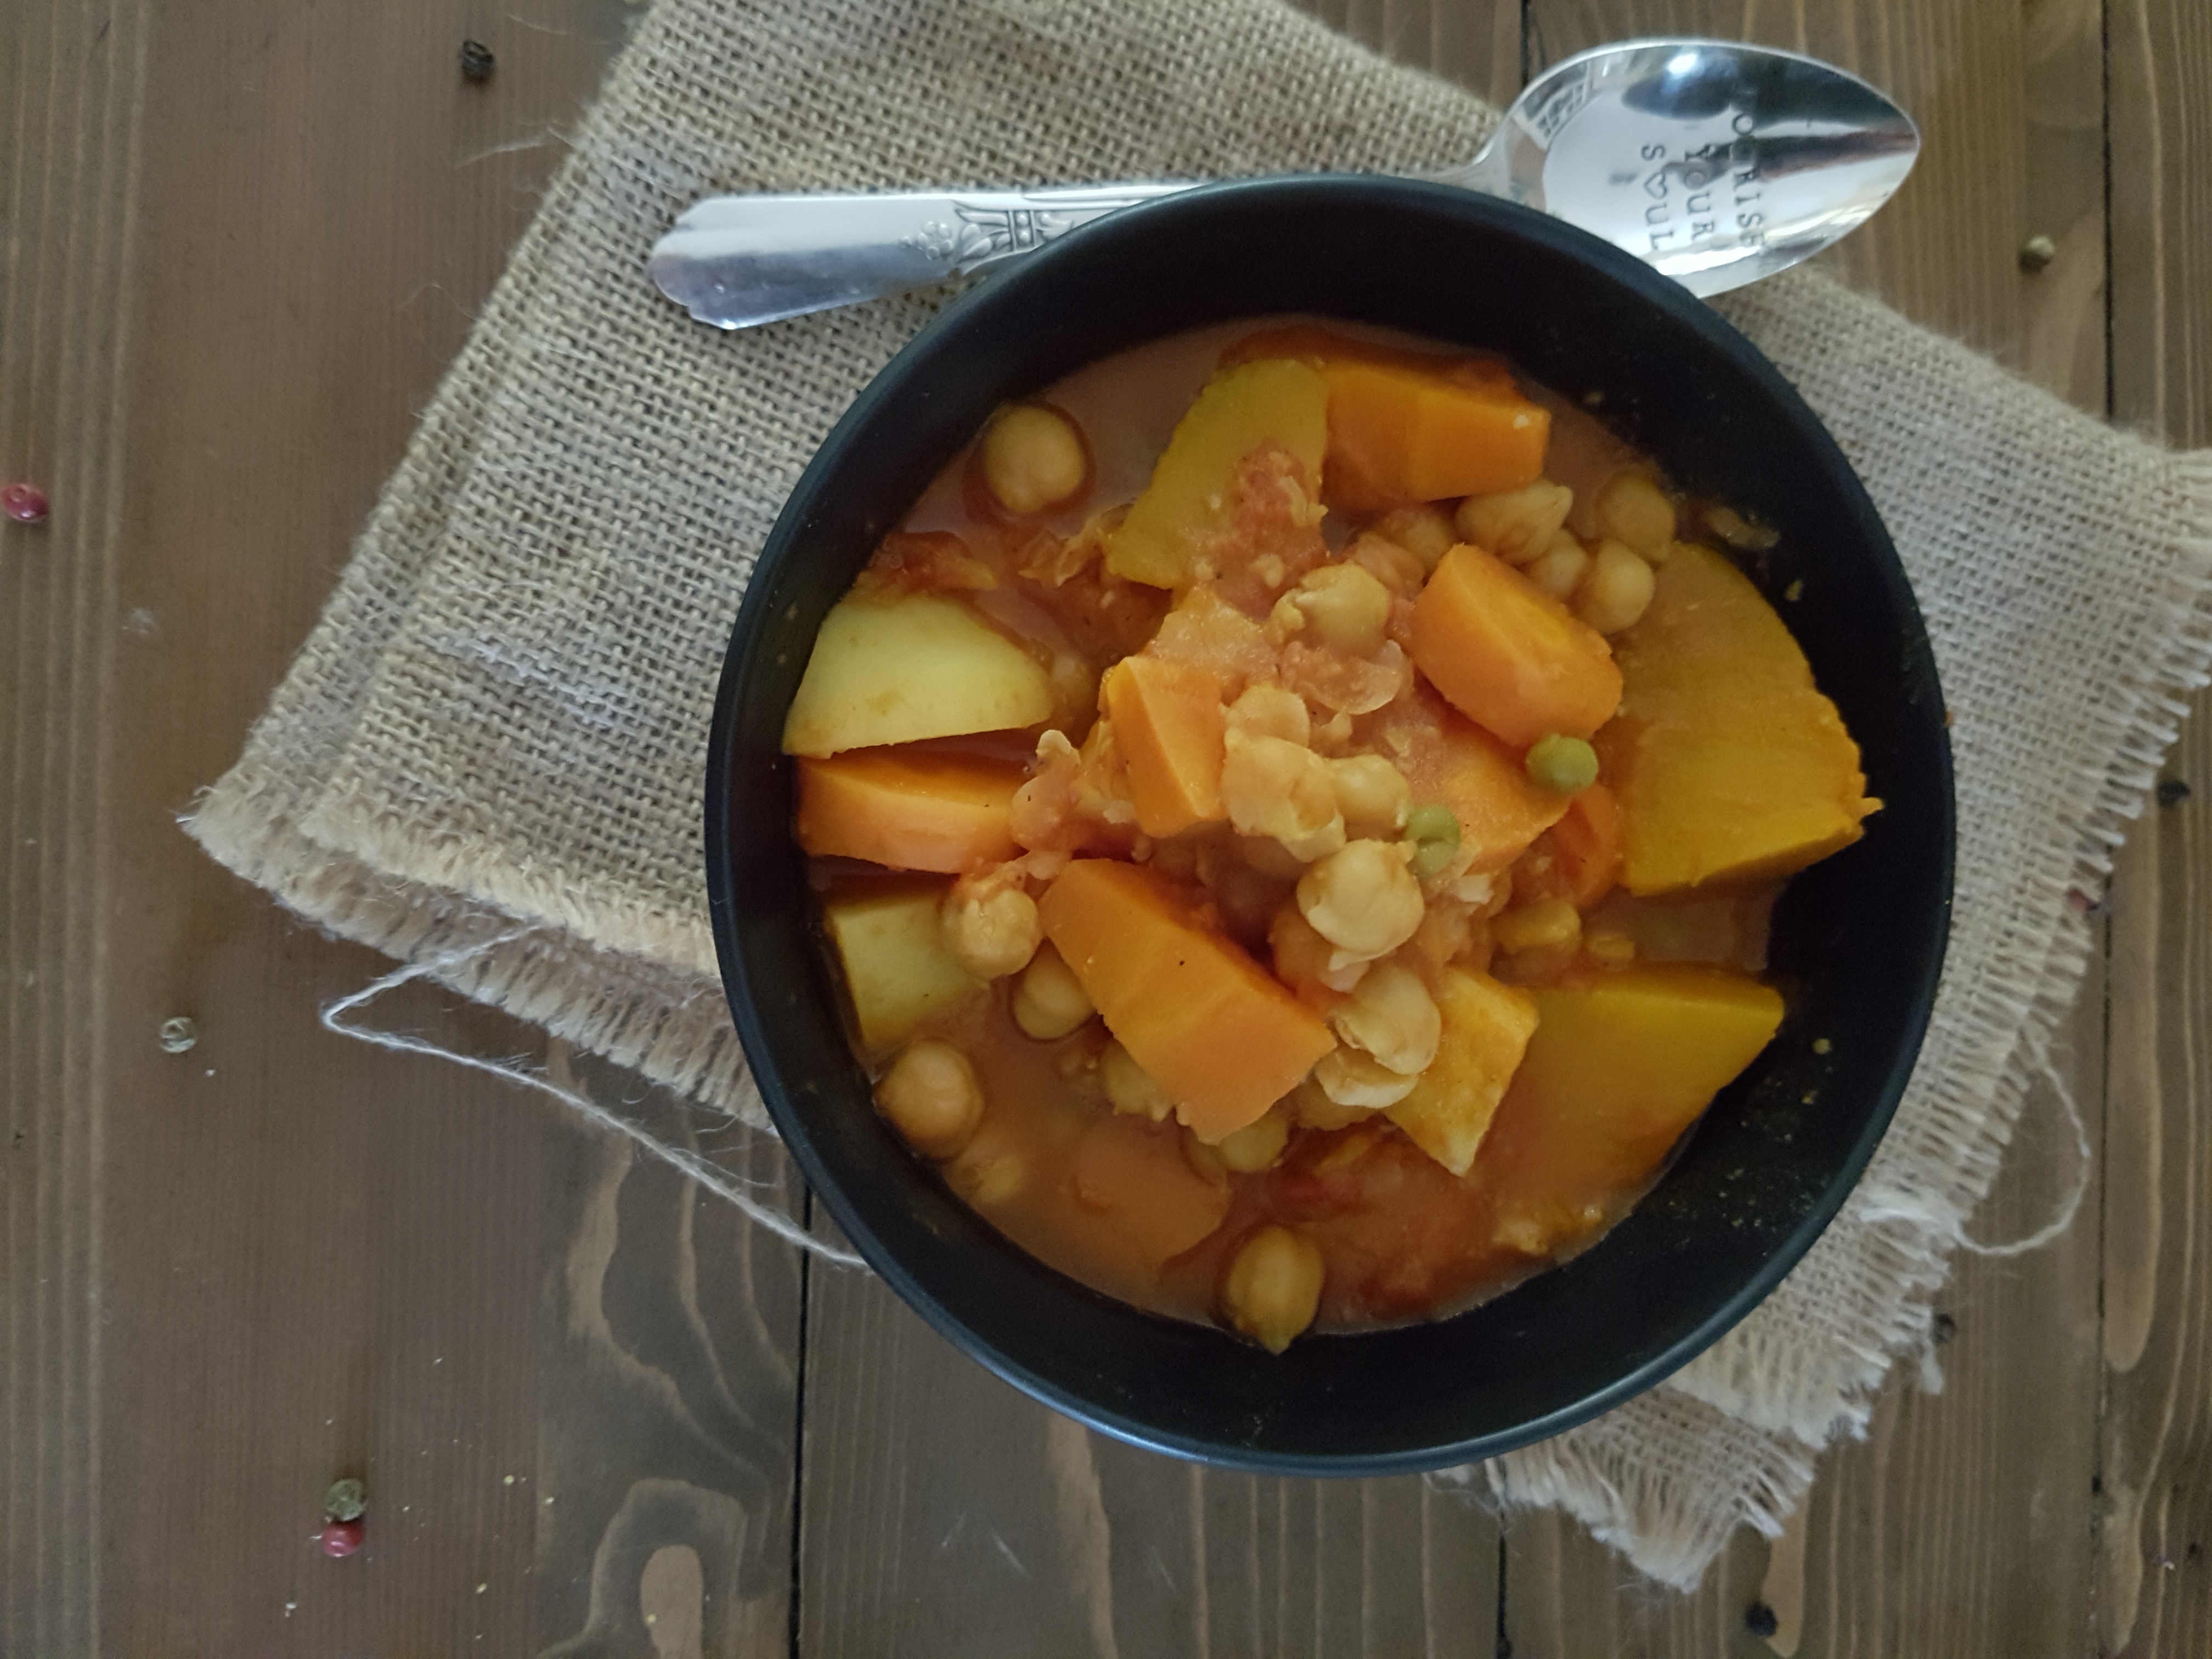
Now, this does not need to be a tofu stir fry and you don’t need to use black bean noodles. I just used them as I think they work well together. I have come to really appreciate bean noodles. They are quite a bit lower in calories and higher in fibre than regular or processed gluten-free noodles/pasta, and they cook in a fraction of the time. If you can’t get your hands on black bean noodles, not to worry! Just use your favourite noodles or zoodles instead. This dish will still be delicious. If you don’t like tofu you could use tempeh (also have a look at my tempeh curry recipe here) or if you avoid soy simply use more veggies or try something new by making chickpea “tofu”. The options are endless.

That’s what I like about these kind of meals. No-one nowadays has the time or desire to go shopping every day so it’s imperative to have a handfull of standby recipes in which you can use whatever you have on hand.

Tofu Stir Fry with Black Bean Noodles

Serves 2

1 pack (300g) tofu, cubed
4 tbsp tamari
2 tbsp maple syrup
4 cloves garlic, minced
1 tbsp apple cider vinegar
1 tbsp ground ginger
half a tbsp sesame oil

dash of fresh lime juice
salt, pepper and chilli to taste

black bean noodles or other noodles (amount to taste)
dash of water or vegetable stock
about a pound (approx. 450-500 grams) mixed vegetables such as green beans, broccoli, sweetcorn, green peas, capsicum, carrots…
cashew nuts, fresh coriander, fresh chilli to serve (optional)

Mix the tamari, maple syrup, garlic, oil, vinegar, ginger, lime juice and spices in a medium bowl, then add the tofu and let sit for 5-10 minutes to soak up the marinade. Prepare the noodles according to the manufacturer’s instructions. Heat water or stock in a large frying pan or, better, a wok, and blanch the vegetables for a couple of minutes. Take out the veggies, then add the tofu with all of the marinade, cover and let cook for 5-10 minutes. Add the veggies, mix in thoroughly and cook for another two minutes. Turn off the heat, toss in the noodles and mix everything through. Adjust the spices and let sit for a minute. Serve with cashews, coriander and chilli according to your liking and…

Enjoy!


Homemade Oat Milk

I know. Every man and their dog is making homemade almond milk these days. And hey, why not? It is easy enough if you have a high-powered blender. Store-bought plant milks are expensive and often have some fillers or other additives, so making your own plant or nut milk is better for your health and better for your wallet. So yeah homemade almond milk is all the buzz right now, but have you tried making your own homemade oat milk?

Like almost everything else I make, making homemade oat milk happened by chance. A while ago, I was making a vegan cashew panna cotta for my husband based on this recipe which calls for blending cashews in water until you achieve a creamy “milk”. I was absolutely blown away how delicious this cashew mylk was and how easy to create – especially given the astronomical prices they charge for nut mylks in the shop! So it has been at the back of my mind to make my own plant and nut mylks.

Then, a couple of days ago, I had tried a new brand of almond milk (not mentioning any names here) which I really did not like all that much. It was overly sweet, had a funny marzipan flavour and curdled horrendously in coffee. I remembered my goal to create my own plant milks. As oat milk has always been one of my favourite vegan milks and oats are also considerably cheaper than nuts, here was my project!

It dod not take much experimenting as this worked out quite well at the first shot. I blended 1 cup of quick oats with 3 cups of filtered water. This ratio produces a very thick and creamy milk which I love but you could also try a ration of 1:4 which would produce a slightly thinner milk. Just experiment! I don’t add any sweeteners but you could try adding a tablespoon or so of your favourite liquid sweetener (maple syrup, date syrup or coconut syrup would probably work best). You could also try adding some vanilla essence or cocoa powder or any other flavour you fancy. Then, just strain the milk in a bottle, chill and enjoy!

Note, there will be sediment so you need to shake your bottle well before every use. This is all natural, so it is not a 1:1 replacement for store-bought mylks which often have a lot of stabiliser and thickeners added. It is not perfect but I think it is a good and economical alternative to store-bought plant milks!

Homemade Oat Milk
Homemade Oat Milk
Homemade Oat Milk

Makes about a pint of oat milk

1 cup quick oats (use certified gluten-free of gluten free)
3-4 cups filtered water
optional: 1 tbsp liquid sweetener, pinch of salt, vanilla essence

Blitz all ingredients on a high powered blender until smooth, milky and the oats are completely broken up. Strain the milk into a bottle. The leftover oat pulp is delicious scooped out and also serves as a great thickener for smoothies and nicecreams! Store your homemade oat milk in the fridge for up to 5 days. Remember that there will be sediment so shake your milk bottle thoroughly before use.

Enjoy!

Salted Caramel Protein Bites {vg, gf}

I know it’s getting a bit much with all my energy/bliss ball-y things lately (see here, here and here). But one bite into these beauties and I knew I could not wait another day to share these with you. I know you guys love salted caramel. And I know you love protein bites. Enter…salted caramel protein bites!

These came about as I tried to recreate one of those crazy expensive and filled-to-the-brim with junk store-bought protein bars. The combination of dates and oats has never disappointed me and I figured that with the addition of my favourite vegan protein powder I’d be able to make the perfect protein bar. But then it just seemed easier to go down the bliss ball route again. So here we are. Unfortunately or fortunately, I tasted the “batter” while making these balls and got so addicted that I devoured a considerable part of the mix (so you might well be able to yield more than 30 balls out of this recipe). I could not get over how much these tasted like salted caramel!

I hate the word amazeballs, but it pretty much does them justice!

Salted Caramel Protein Bites

Makes 30 bites

2.5 cups rolled oats
3/4 cup packed pitted dates (any kind)
1/4 cup coconut syrup (you can try other liquid sweeteners, but I find the coconut syrup really gives it that deep malty, caramelly taste that we want)
1/4 cup filtered water
4 rounded tbsp (ca. 40-45 g) vegan vanilla protein powder (I use Amazonia Raw Fermented Paleo Protein)
dash of vanilla extract
healthy pinch of Maldon sea salt

First, blitz the oats in a high-powered blender until you reach a rough flour consistency. Add the remaining ingredients and blend until the mixture comes together and holds its shape but is not overly sticky. Shape into balls and store in the fridge.

Enjoy!

Vegan Vietnamese Pho {gf}

Brace yourself peeps, because here comes one of the most delicious, wholesome and satisfying meals you’ll ever make. I am not exaggerating. If you like Asian cuisine, you are going to love this. And who doesn’t love a good soup? I am a big fan of soups of all kind. They are easy, quick and yummy. They are extremely flexible and versatile and a great way to use up leftover veggies. Take that, limp celery! Which means they are economical and help to reduce food waste. A big win all round! Depending on the ingredients you use, they are also one of the cheapest meals you can make. And this vegan Vietnamese pho ticks all the boxes.

What I love about pho is that it is so filling and yet very low in fat. It is also a great all-year round meal. In winter it warms you up, and in summer it is a nice light and refreshing lunch or dinner that doesn’t weigh you down. I love Asian cuisines (the authentic ones, not the usual greasebomb takeaway places in Western countries) – whenever I eat Asian, I really feel how the food just takes all the bad things out of my body. However, eating out Asian can be a challenge if you are vegan (or vegetarian, for that matter). Especially the Vietnamese cuisine tends to be meat-heavy, and you can be hard-pressed to find something truly vegan in a Vietnamese restaurant.

This is where my vegan pho comes in. Filled to the brim with veggies, cubed tofu for the protein and “zoodles” instead of noodles (although you can use any noodles you like), this is one explosion of flavours that is low in carbs, calories and fat, but does not skimp on the taste and nutrition front. See for yourself!

Vegan Vietnamese Pho

Serves 2

750ml vegetable stock
4 garlic cloves, minced
a handfull of leeks (only white and light green part, washed and finely chopped)
3 stalks of celery, washed and finely chopped
a pound (ca. 500 g) mixed vegetables (I used carrots, broccoli, green beans, capsicum, onions and baby corn)
a teaspoon ground ginger
teaspoon hot curry powder
a teaspoon of black pepper

half a teaspoon ground cinnamon
half a teaspoon of salt
dash of lemon or lime juice
toppings (optional): fresh coriander, fresh chillies, fried shallots, nuts….

For the zoodles:
2 medium zucchini (or equivalent amount of other noodles)
2 tbsp tamari

And also:
300 g firm tofu, cut into cubes

Fry the garlic in a large saucepan until aromatic, add the stock, leeks, celery and vegetables and bring to the boil. Add the spices, turn down the heat and cook until the vegetables are just tender (do not overcook!). Meanwhile, prepare the zoodles, toss in the tamari and divide into two bowls. Top with the veggies, broth and tofu and top with your toppings if using.

Enjoy!

Raw Vegan Matcha and Coconut Tart {nut free}

I love oxymorons. Hello, healthy brownies, lowfat chocolate cake, vegan bolognese, oil-free muffins and dairy-free icecream. Just like it seems to be a given that brownies are unhealthy and spag bol involves meat, the labels “raw vegan” and “nut free” do not seem to go together. Raw vegan desserts generally contain a lot of raw nuts to replace grains which you cannot consume in a raw state. Not so this raw vegan matcha and coconut tart. I used desiccated coconut instead of nut meal. Coconut is botanically not a nut so many people with a nut allergy are able to consume coconuts. Great news if you have a littlie with a nut allergy! If you are not a fan of matcha or can’t get your hands on some you can omit it (in which case this would be just a raw vegan coconut tart) or use for example some lime zest to make raw vegan lime and coconut tart.

I am usually not a huge fan of raw vegan desserts. Nothing against nuts in moderation, but raw desserts contain such high amounts of nuts that I find them really heavy in the stomach. Also, a dessert or snack should not contain the calories of a full meal which raw desserts often do, so that is why I have not ventured down this path yet. But as I found myself in a situation where I had some avocados to use up, I was thinking of this raw dessert as I have used avocado in icecream before.

Raw Vegan Matcha and Coconut Tart

This is a delightfully creamy, dreamy and comforting dessert that will satisfy any naughty cravings you might have. It is quite a bit higher in fat than I’d prefer but the fat from this tart is super healthy fat from coconut and avocado – the two healthiest fats you can consume! Add to this magnesium, fibre and slow-releasing energy from the dates and it’s clear to see that this indulgence is a healthy treat. Just don’t go overboard – the recipe below yielded 3 small tarts with 10 cm diameter. I’d suggest quartering every tart so that you get 12 individual portions put of this. A little goes a long way!

As I mentioned, I don’t make too many raw desserts, so I hope you enjoy this one!

Raw Vegan Matcha and Coconut Tart

Serves 12

Base:
1 packed cup pitted dates (Medjool or Deglet Noor)
3/4 cup desiccated coconut
2 tbsp raw cacao
pinch of Himalyan sea salt

Filling:
1 large ripe avovado (ca. 200 g)
1 large ripe banana
1/4 cup desiccated coconut
3 tbsp coconut or maple syrup
juice of half a lemon

Blend the ingredients for the base in a high-powered blender, then press evenly into a greased and/or lined baking pan. You can use a 20 cm diameter round pan or three small pans of 10 cam diameter each. Put into freezer. Clean out the blender and blend the ingredients for the filling. Pour on top of the frozen base and let freeze for at least another hour. Store in the freezer.

Enjoy!

Maca Espresso Energy Balls {gf, vg, nut free}

I hope you love all my recipes, but you gotta love these maca espresso energy balls. If you don’t – seriously, what’s wrong with you? Just kidding, I mean, no kidding. These energy balls are so crazy insanely delicious it is actually a sin I haven’t put them on the blog sooner. They are buttery, scrumptious, decadent…I am lost for words. And they pack a serious nutritional punch. All this requires five super-healthy ingredients and five minutes of your time. Yes, that’s right.

Maca Espresso Energy Balls

Want to know what’s in them? Five superfoods that will get you out of your afternoon slump before you have time to yawn:

Medjool dates – chock-full of fibre, aminoacids, potassium, zinc, magnesium, calcium, iron, B vitamins and lots of other goodies.
Oats – one of the healthiest foods on the planet, they contain a type of fiber called beta-glucan, which helps lower levels of bad cholesterol. Plus, manganese, selenium, magnesium, vitamin E and zinc to boot.
Carob or Cacao – carob contains gallic acid which has antibacterial, antiviral and antiseptic properties. Carob also contains vitamins A, B1, B2, B3, D and E. It is a lower fat and naturally sweet alternative to cacao. However, you can totally use cacao instead, which has 40 times the antioxidants of blueberries and is the highest plant-based source of iron.
Maca – rich in vitamin B vitamins, C, and E. It provides plenty of calcium, zinc, iron, magnesium, phosphorous and amino acids and is known to balance hormones and mood. It is also a caffeine-free source of energy.
Espresso coffee – loaded with antioxidants and may even protect against diabetes. Improves cognitive function, mood and fat burning

If that wasn’t a reason alone to get rollin’ – these will also be the easiest energy balls you’ll ever make. Just pulse the ingredients in a high-powered blender and after 15 seconds (!) you will have a malleable dough. No mess, no fuss. Just what you want when you need an energy kick. You can eat them straight away but they will firm up and improve texture in the fridge. They would last a while, at least a week – though I highly doubt that you’ll leave them for that long!

I have mentioned before that I am in love with Medjool dates. The feeling that you are eating something naughty and indulgent when it’s a gem of nature can only be topped by eating bananas! And it’s not only the taste, the texture is just so exquisite, it’s like a buttery caramel fudge made with butter, cream and lots of sugar! None of those nasties in these little babies, however. They are gluten free, dairy free, vegan, nut free, soy free, refined sugar free, and – unlike most recipes for energy balls or bliss balls – very low in fat.

The oats will make sure to fill you up so you don’t need to reach for the bag of Skittles on your co-worker’s desk, while the dates proved slow-releasing carbs without the sugar crash that would normally lead you to yet anouther trip to the vending machine. Carob, maca and just a little bit of coffee (that can of course be caffeine-free if you want) provide a gentle energy kick without the jitters. Maca espresso energy balls for the win!

Maca Espresso Energy Balls

Makes 12 balls

115 g Medjool dates
60 g rolled oats
2 tsp carob (or cacao)
1 tsp maca
1 tsp instant espresso powder


Just blitz all ingredients in a high-powered blender until a doughy ball forms. Shape into 12 balls and store in the fridge.

Enjoy!

Healthy Pumpkin and Chickpea Curry {vg, gf}

There is just nothing quite like curry. It is comforting, nourishing, versatile, flavoursome, filling, easy and inexpensive. It is a great way to use up leftovers and is the perfect candidate for making in batch and then freezing. The only downside is that traditional Indian, Thai and Malaysian curry recipes with their oodles of oil and coconut cream are far from being a “diet food”. While this is not a problem if you indulge once in a while or are not concerned about your physique, there are certainly options to “healthify” a good curry without compromising on taste, and my healthy pumpkin and chickpea curry is one such example.

Curries are especially suitable for creating lower fat and lower calorie versions of. Due to their ample amounts of fragrant herbs and spices, you don’t need to add much oil at all to carry the flavours. Chili, curry powder, pepper and co. satisfy your taste buds without the need for a tin of coconut cream per portion, and also provide a healthy kick for your metabolism. Healthy curries are a reality!

This healthy pumpkin and chickpea curry is not only yummy, it is also easy as. A handfull of ingredients you likely have sitting in your pantry right now and a maximum of 20-25 minutes of your time, of which the actual hands-on time is very little. Sounds good? Go see for yourself!

Healthy Pumpkin and Chickpea Curry

Serves 4

3 garlic cloves, minced
4 large carrots, washed, peeled and chopped
1 large potato, peeled and chopped (may be parboiled to speed up cooking time)
250 g pumpkin, peeled and chopped (may be parboiled to speed up cooking time)
125 g cauliflower, washed and torn into florets
125 g green peas, fresh or frozen
1 400 ml tin of diced tomatoes
350 ml vegetable stock
2 tins of chickpeas, rinsed and drained (reserve the brine for chocolate mousse!)
1 cup almond milk or very light coconut milk
half a tbsp mild curry powder
salt and pepper to taste
dash of tomato sauce

Heat the garlic in a large saucepan until aromatic. Add the carrots, potato, pumpkin, cauliflower and peas and cook for a few minutes while stirring. Add the tomatoes, stock and spices and cook until vegetables are tender. Then stir in the chickpeas, milk and tomato sauce and heat until thoroughly warm.

Enjoy!

Carrot Cake Bliss Balls {vegan, gluten free, nut free, refined sugar free}

The other day, I got upset at my hubby for buying expensive Medjool dates instead of those dry, hard, brittle dates from the drygoods section that are indefinitely cheaper. (When you have a midget and a mortgage, you tend to worry about financials.) How wrong of me! One bite and it was bliss all the way. I just could not get over that wonderful caramel taste. It reminded of the most exquisite butterscotch toffees. Then, that luxurious velvety texture…I had to admit once more that hubs had been right all along, and that he had hit the jackpot with these beauties. Bliss. Seriously. And what better way to make use of a blissful ingredient than bliss balls? Carrot cake bliss balls it was.

Carrot Cake Bliss Balls

I am not a newbie to bliss balls (see here), but have always been reluctant to splash out on Medjool dates rather than dried dates. The latter, obviously, require some soaking before you can do something bliss ball-y with them, so not having to soak the Medjool dates was another win for lazy, I mean, busy me. It so happened that I had some carrots to use up, too, so something in my head screamed “carrot cake”. While I don’t have a particular sweet tooth, I have a bit of a weakness for carrot cake (as can be seen here, here, and here).

What I love about carrot cake is that you can fix your 3.30 snack attack without the sugar rush as the carrots and nuts in carrot cake provide for some fibre and protein to soak up the carbs that would otherwise wreak havoc in your bloodstream. Plus, the wintery spices give it a bit of a festive and mysterious touch. In short, I figured that Medjool dates+carrots+oats+a few spices and a bit of coconut might be worth a try. Yes, even the precious Medjool dates could not be precious enough for some healthy experimenting.

I have to say that this is one of my recipes I am most excited about, if I dare say so myself! I can’t believe just how good these are, with none of the guilt! And as they are low in fat and refined sugar free, they are even material for a kid’s party – none of the kids will notice they are devouring something healthy, and you don’t have to worry about the sugar crash. They are also nut free, as coconut is botanically not a nut and most people who are allergic to tree nuts can safely eat coconut. Coconut also provides vitamins and magnesium, with the carrot adding a beta carotene and fibre boost and the dates being an excellent source of iron, manganese and long-lasting energy.

These balls are so easy to make with just a few ingredients, so there is no reason not to make these today and fight the munchies!

Carrot Cake Bliss Balls {vegan, gluten free, nut free, refined sugar free}

Carrot Cake Bliss Balls

Makes 18 (possibly more if you don’t eat as much of the batter as me! :-D)

2 large carrots, grated
10 Medjool dates, pitted
1 cup oats
3 tbsp desiccated coconut
2 tsp cinnamon
2 tsp molasses or coconut syrup
1 tsp ginger
1/2 tsp nutmeg

Just blend all ingredients in a high powered blender until you reach a malleable consistency. Shape into walnut sized balls and enjoy straight away or store in the fridge.

Enjoy!


Lowfat Vegan Pâté

Lowfat Vegan Pâté sounds a bit like a plumber (or any other tradesman for that matter) who is quick, good and cheap. It’s pretty much impossible to tick all three boxes. In fact you’d be very lucky if you can tick two of them. A pâté, this French appetiser made of butter, cream (sorry!), raw liver (more sorry!) and cognac (sorry not sorry), is generally neither low in fat nor vegan. While there are recipes for vegetarian and vegan versions of pâté, I am yet to find one that is not full of nuts and oil. I believe an appetiser should not contain all your calories for the day so I created one that is much lighter and healthier than all its colleagues, be they vegan or not, yet still filling and satisfying.

With Christmas done and dusted for another year, chances are you are in need for a bit of a reset. I always believe that tomorrow starts today and that you should not postpone your commitment to a healthier life. Whether you want to go down the vegan route or not, having a repertoire of easy and delicious plant-based recipes can help you on the way to a cleaner and greener life. The good news is, there is absolutely no need to sacrifice your old favourites in favour of a healthy and ethical lifestyle. Hello, creamy Alfredo pasta, decadent chocolate mud cake and hearty Bolognese!  Yup, all vegan, gluten free and low fat. And now you are in for another treat: lowfat vegan pâté!

This one came about coincidentally. I was feeling peckish and craved some gluten free crackers with a delicious spread. Having had pretty much all hummus varieties under the sun (here, here and here), I was looking for something a little different and just threw some random things into my blender. The result looked and tasted like a French liver pâté. Eureka! I had created a lowfat vegan pâté! Consisting of pumpkin, beans, olives and oats this savoury little beauty comes with a bucket full of fibre, beta carotene, protein and a little healthy monounsaturated fat from the olives. No nasties, no processed crap, no cruelty, no worries. Just pure goodness in a cute serving bowl (one of the main reasons I love making dips is that I can make use of all my serving bowls).

That’s not where the awesomeness stops, however. This spread – provided you have the pumpkin mash ready to go, but you could also use babyfood – comes together in less than five minutes. You read that one right. You likely have all ingredients at hand and if not, it’s going to be a very short trip to the supermarket. Best thing is, both my husband and daughter cannot get enough of it, and since neither of them is into healthy eating, I take this as a big compliment! Healthy stuff that doesn’t taste healthy. How good is that?

So here is to lowfat vegan pâté – it looks and tastes like a “real” pâté, but without the fat and the cruelty!

Lowfat Vegan Pâté
Lowfat Vegan Pâté
Lowfat Vegan Pate

One tin mixed beans (can use lentils or any brownish beans although the texture will be slightly different)
1/2 cup pumpkin puree or savoury vegan babyfood such as mashed (sweet) potato
1/2 cup oats
1/4 cup nutritional yeast

a handfull of kalamata olives
salt and pepper to taste

Just blend all ingredients in a high-powered blender and store in an airthight container in the fridge. Can be enjoyed straight away but the texture will improve after chilling for 30 minutes.

Enjoy!

Almost Fat Free Vegan Gluten Free Chocolate Cake

I apologise for that very lengthy title, but I just couldn’t NOT share all the attributes of this marvellous creation of mine. In fact, I should have added moist, fudgy, scrumptious, dreamy, chocolatey, rich, moreish, delightful, satisfying, luxurious, decadent, silky…

I wanted to make a cake for my daughter’s birthday, and in my research about healthy baking I repeatedly stumbled across the tip to use black beans instead of oil/butter and flour. Wut? Yes, that’s right. If you have been following me for some time, you know that I am crazy about legumes. I use them to replace meat (try my lentil bolognese and vegan pâté), cheese and dairy (hello vegan garlic sauce! Or how about some vegan cream cheese? Recipes coming soon so stay tuned!). They are cheap, satisfying, healthy, can be stored almost indefinitely and are incredibly yummy and versatile. But if you thought that the use of legumes is limited to savoury goodies, it’s time to tap into new bean realms.

Almost Fat Free Vegan Gluten Free Chocolate Cake

So I conquered my pantry, kidnapped two beautiful tins of black beans and this is what I did with it. To be honest, I wasn’t so sure how this experiment would turn out. When it comes to baking, I tend to throw the baby out with the bathwater. Just gluten free like back in the day when I started my new journey of no worries baking simply doesn’t cut it anymore these days. I want vegan, oil-free and possible also refined sugar free. Speaking of which, I wish I could say that this cake was sugar free. Unfortunately it isn’t. I am going to try a version with dates soon as I think they might go well in here, but I wanted to take it two steps at a time, not three steps, so for the moment, this uses plain old cane sugar. I’d love for you to try this with alternative sugars so if you do, let me know if it works! So this is not low-sugar or low-carb, but I hope that the lack of oil, butter, gluten, dairy and eggs makes up for it. Plus, beans = fibre and protein FTW.

Oh, and have I mentioned that this is a really easy one? No separating of eggs (it’s vegan – duh!), only one bowl, no first-mix-the-wet-ingredients-then-mix-the-dry-ingredients-then-sift-the-flour-crap that ain’t nobody got time for. The baking time is a little longer than I prefer (45 minutes), but the actual active hands-on time is less than 15. So no excuses!

So what does a cake made of black beans look, smell and taste like? The answer is: nothing short of divine.

Almost Fat Free Vegan Gluten Free Chocolate Cake

Makes 1 8-inch (20cm) round cake

2 cups almond milk, divided
1 tbsp apple cider vinegar
2 tins black beans, drained and rinsed
1 cup apple sauce
2 tsp vanilla

1 cup+ gluten-free flour
3 tsp gluten-free baking powder
1 cup organic cane sugar
1 cup raw organic cacao

Preheat oven to 180 °C and lightly grease an 8-inch or 20-cm bake tin with coconut oil. Mix 1.5 cups of the almond milk with the vinegar in a large mixing bowl and let sit for a minute to let the two ingredients react with each other. Blitz the drained and rinsed black beans together with the remaining half cup almond milk until a paste forms. A coarse texture is okay, but there should not be any large lumps.

Add the bean paste together with the apple sauce and vanilla to the almond milk-vinegar mix and beat until combined and a bit frothy. Add the flour, baking powder, cane sugar and cocoa and beat on high until very smooth. There will probably still be some bean skins, but that will resolve during baking. The texture of the batter should be that of a very thick custard. If in doubt, add a couple more tablespoons of flour. Taste the raw batter (no risk of salmonella) and add a bit more sugar if you have a sweet tooth (some of the sweetness will go away during baking).

Pour the batter into the prepared tin and bake on the middle rack for 40-45 minutes or until it passes the toothpick test. Let the cake cool completely before serving.

Enjoy!