Healthy Vegan Palak Paneer (Tofu and Kale Curry)

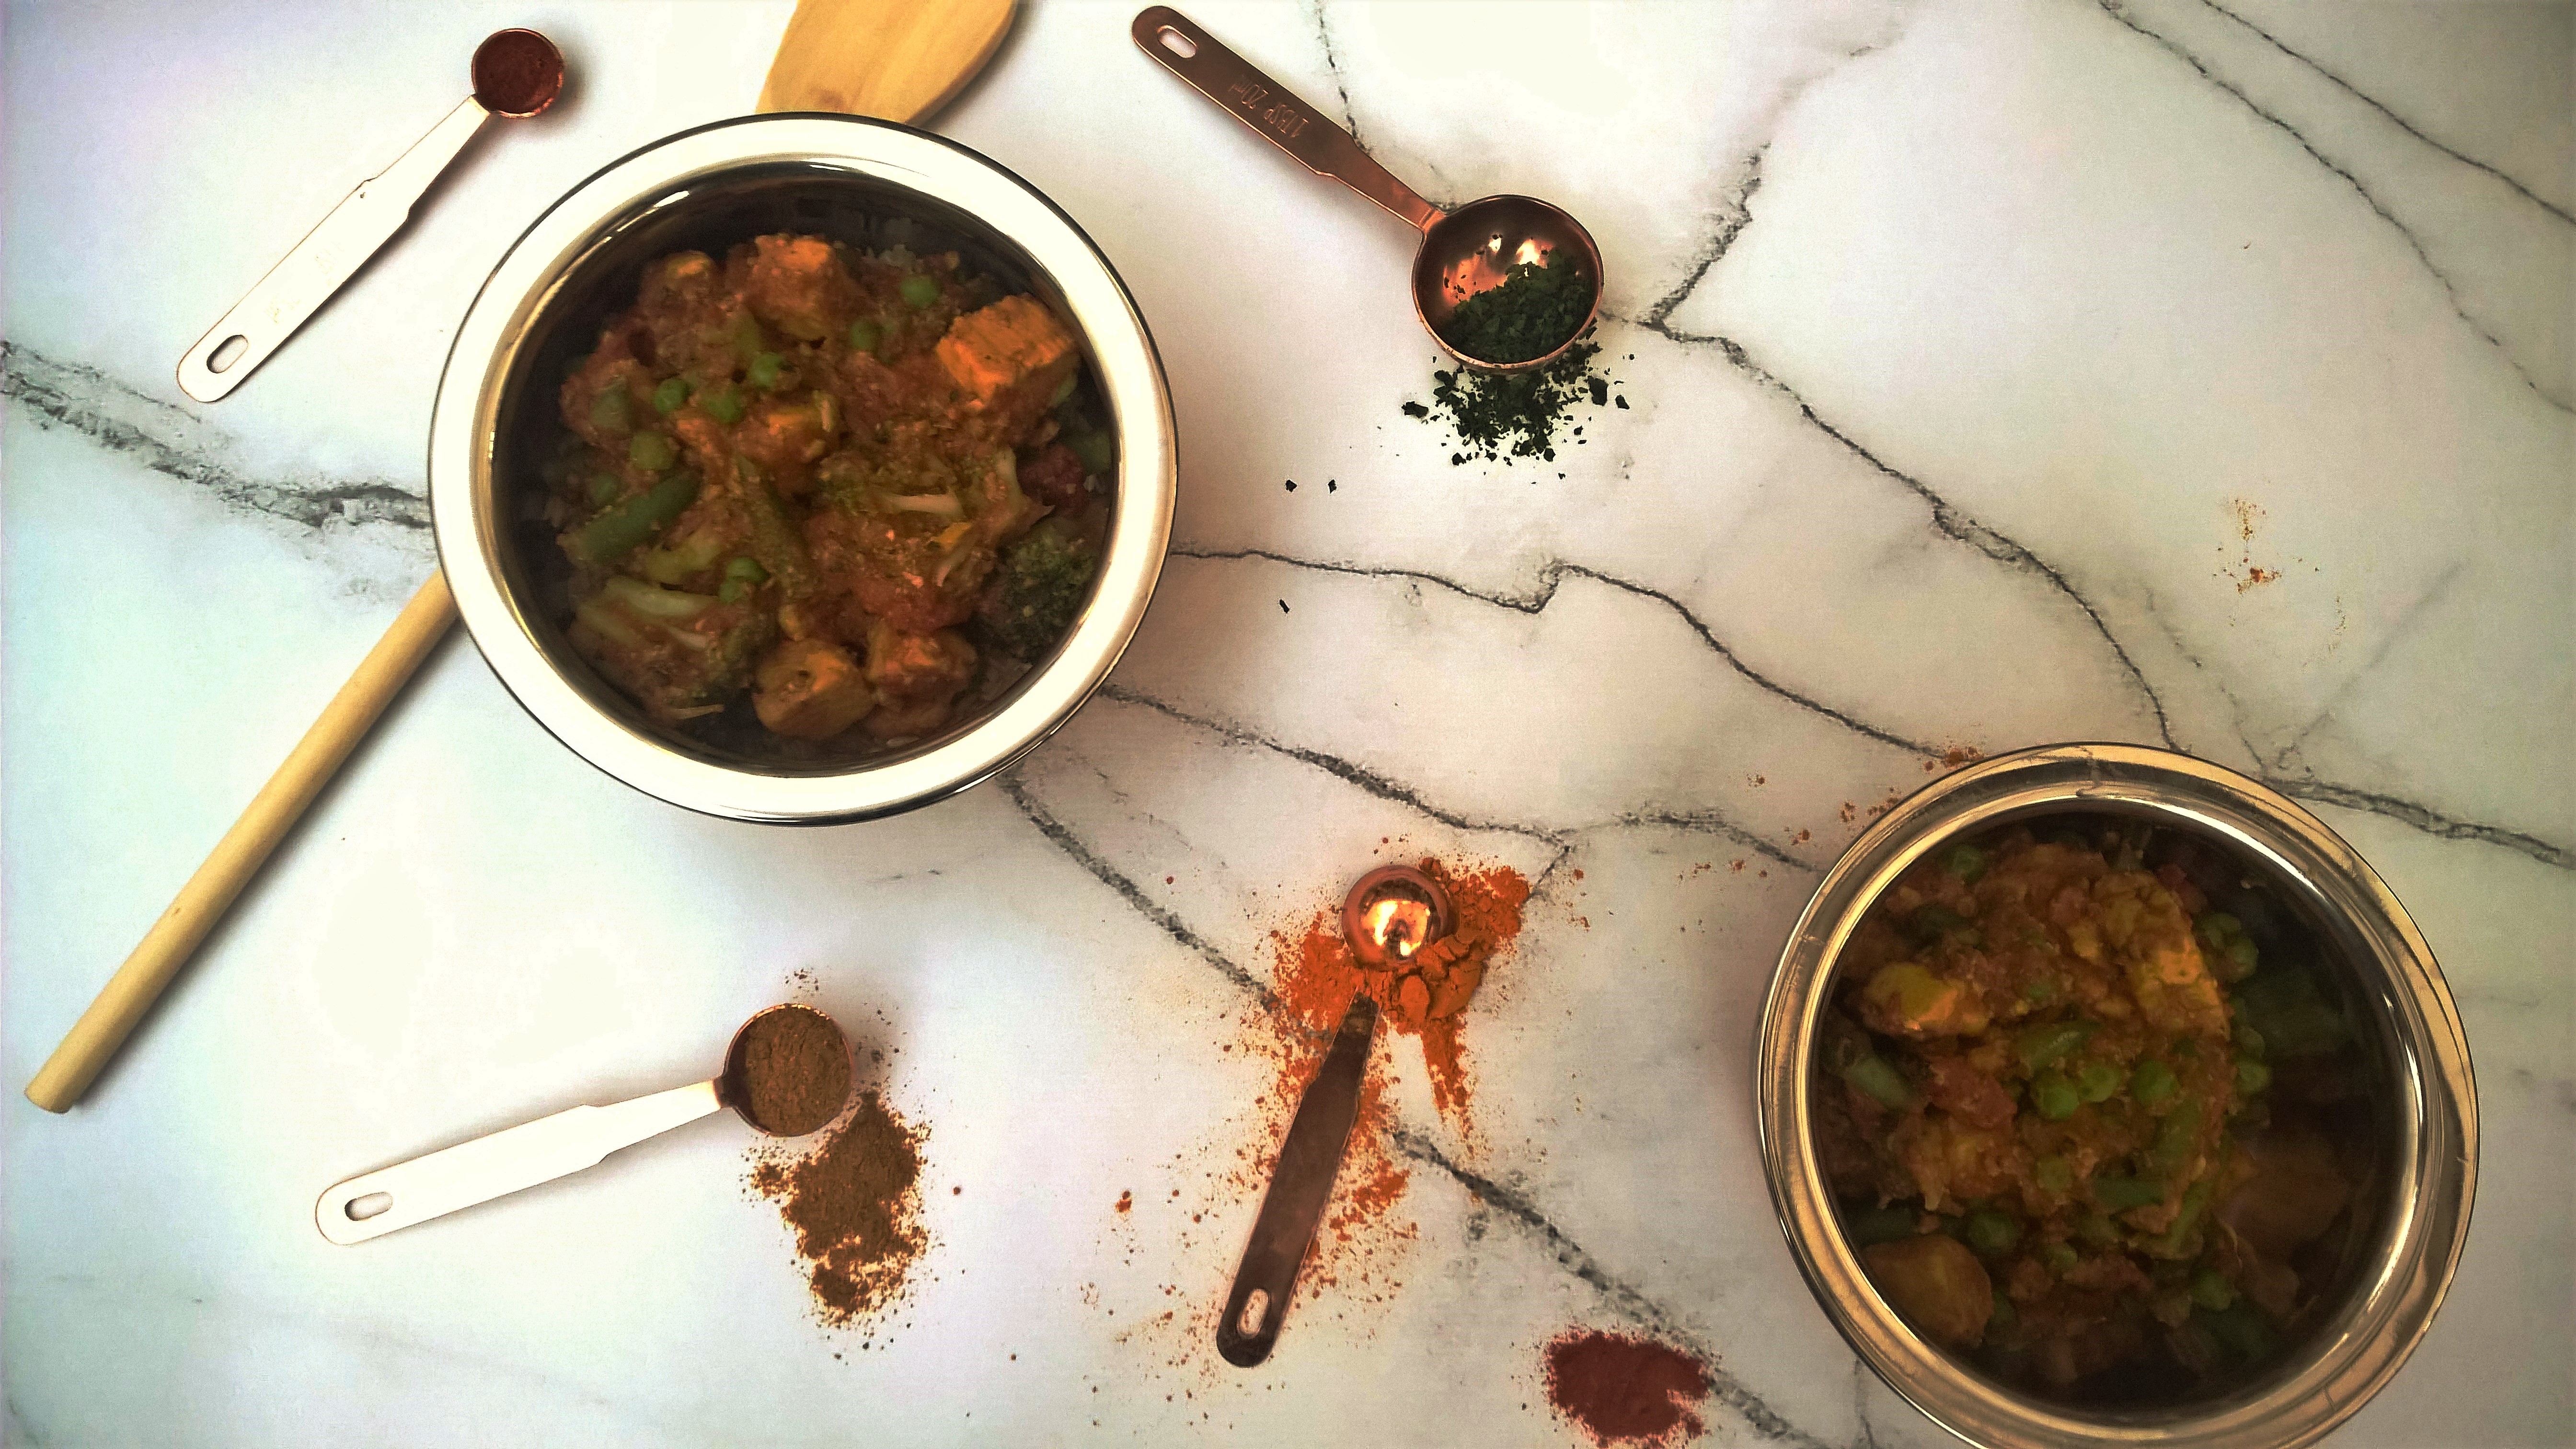
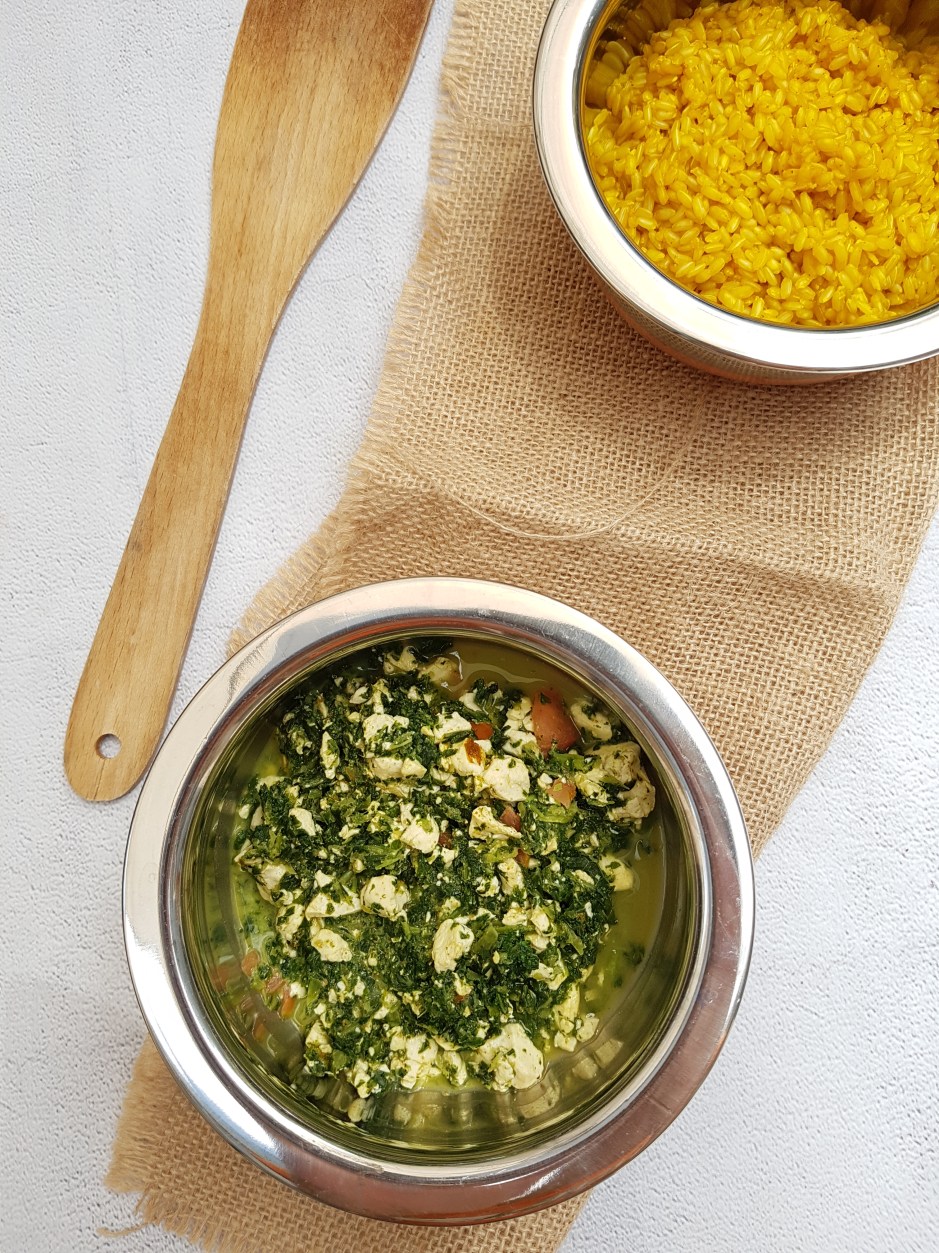
Indian cuisine is delicious, flavourful, nourishing and has great options for vegan and gluten free dietary requirements. But let’s face it, with its ample use of oil, cream and cashews, it is generally not the healthiest food going around. If you fancy spicy Indian flavours without sacrificing your waistline, I am here to your rescue with this super-quick, ultra-easy, mega-delicious and, yup, healthy vegan palak paneer (aka tofu and kale curry).

I know that palak means spinach and not kale, and that paneer is the name of an Indian cow’s milk cheese, neither of which feature in this dish. Consider my version as a hipster take on palak paneer: lots of protein and only very little fat from silken tofu in combination with superfood kale. Though it is a perfectly good option to use spinach or other leafy greens here, kale is what I had on hand, so kale it was. You could use firm tofu instead of silken tofu here, but I find the silken tofu makes this dish a bit more creamy.

This healthy vegan palak paneer is really easy to put together with just a handful of basic ingredients. Hello easy weeknight meal. Probably the only obscure ingredient I used was powdered peanut butter aka pb2 which might be hard to get so you can use ground cashews instead which would be more authentic but also packs more fat. I used a very light coconut milk for drinking from Vitasoy with only 2% fat which is almost nothing but still conveys this dreamy coconut flavour. You could use a fuller fat coconut milk or other plant milk instead.

Healthy Vegan Palak Paneer

Serves 2

1 block (300g) silken tofu, pressed to remove moisture and cubed
half a tsp or more of sea salt
4 tsp powdered garlic
1 tsp ground ginger
1-2 tsp mild or hot curry powder or garam masala
pinch of kashmiri chilli if you like it hot
250g fresh or frozen kale, thawed
half a cup very light coconut milk or plant milk
2 tbsp powdered peanut butter or ground cashews
a tbsp desiccated coconut

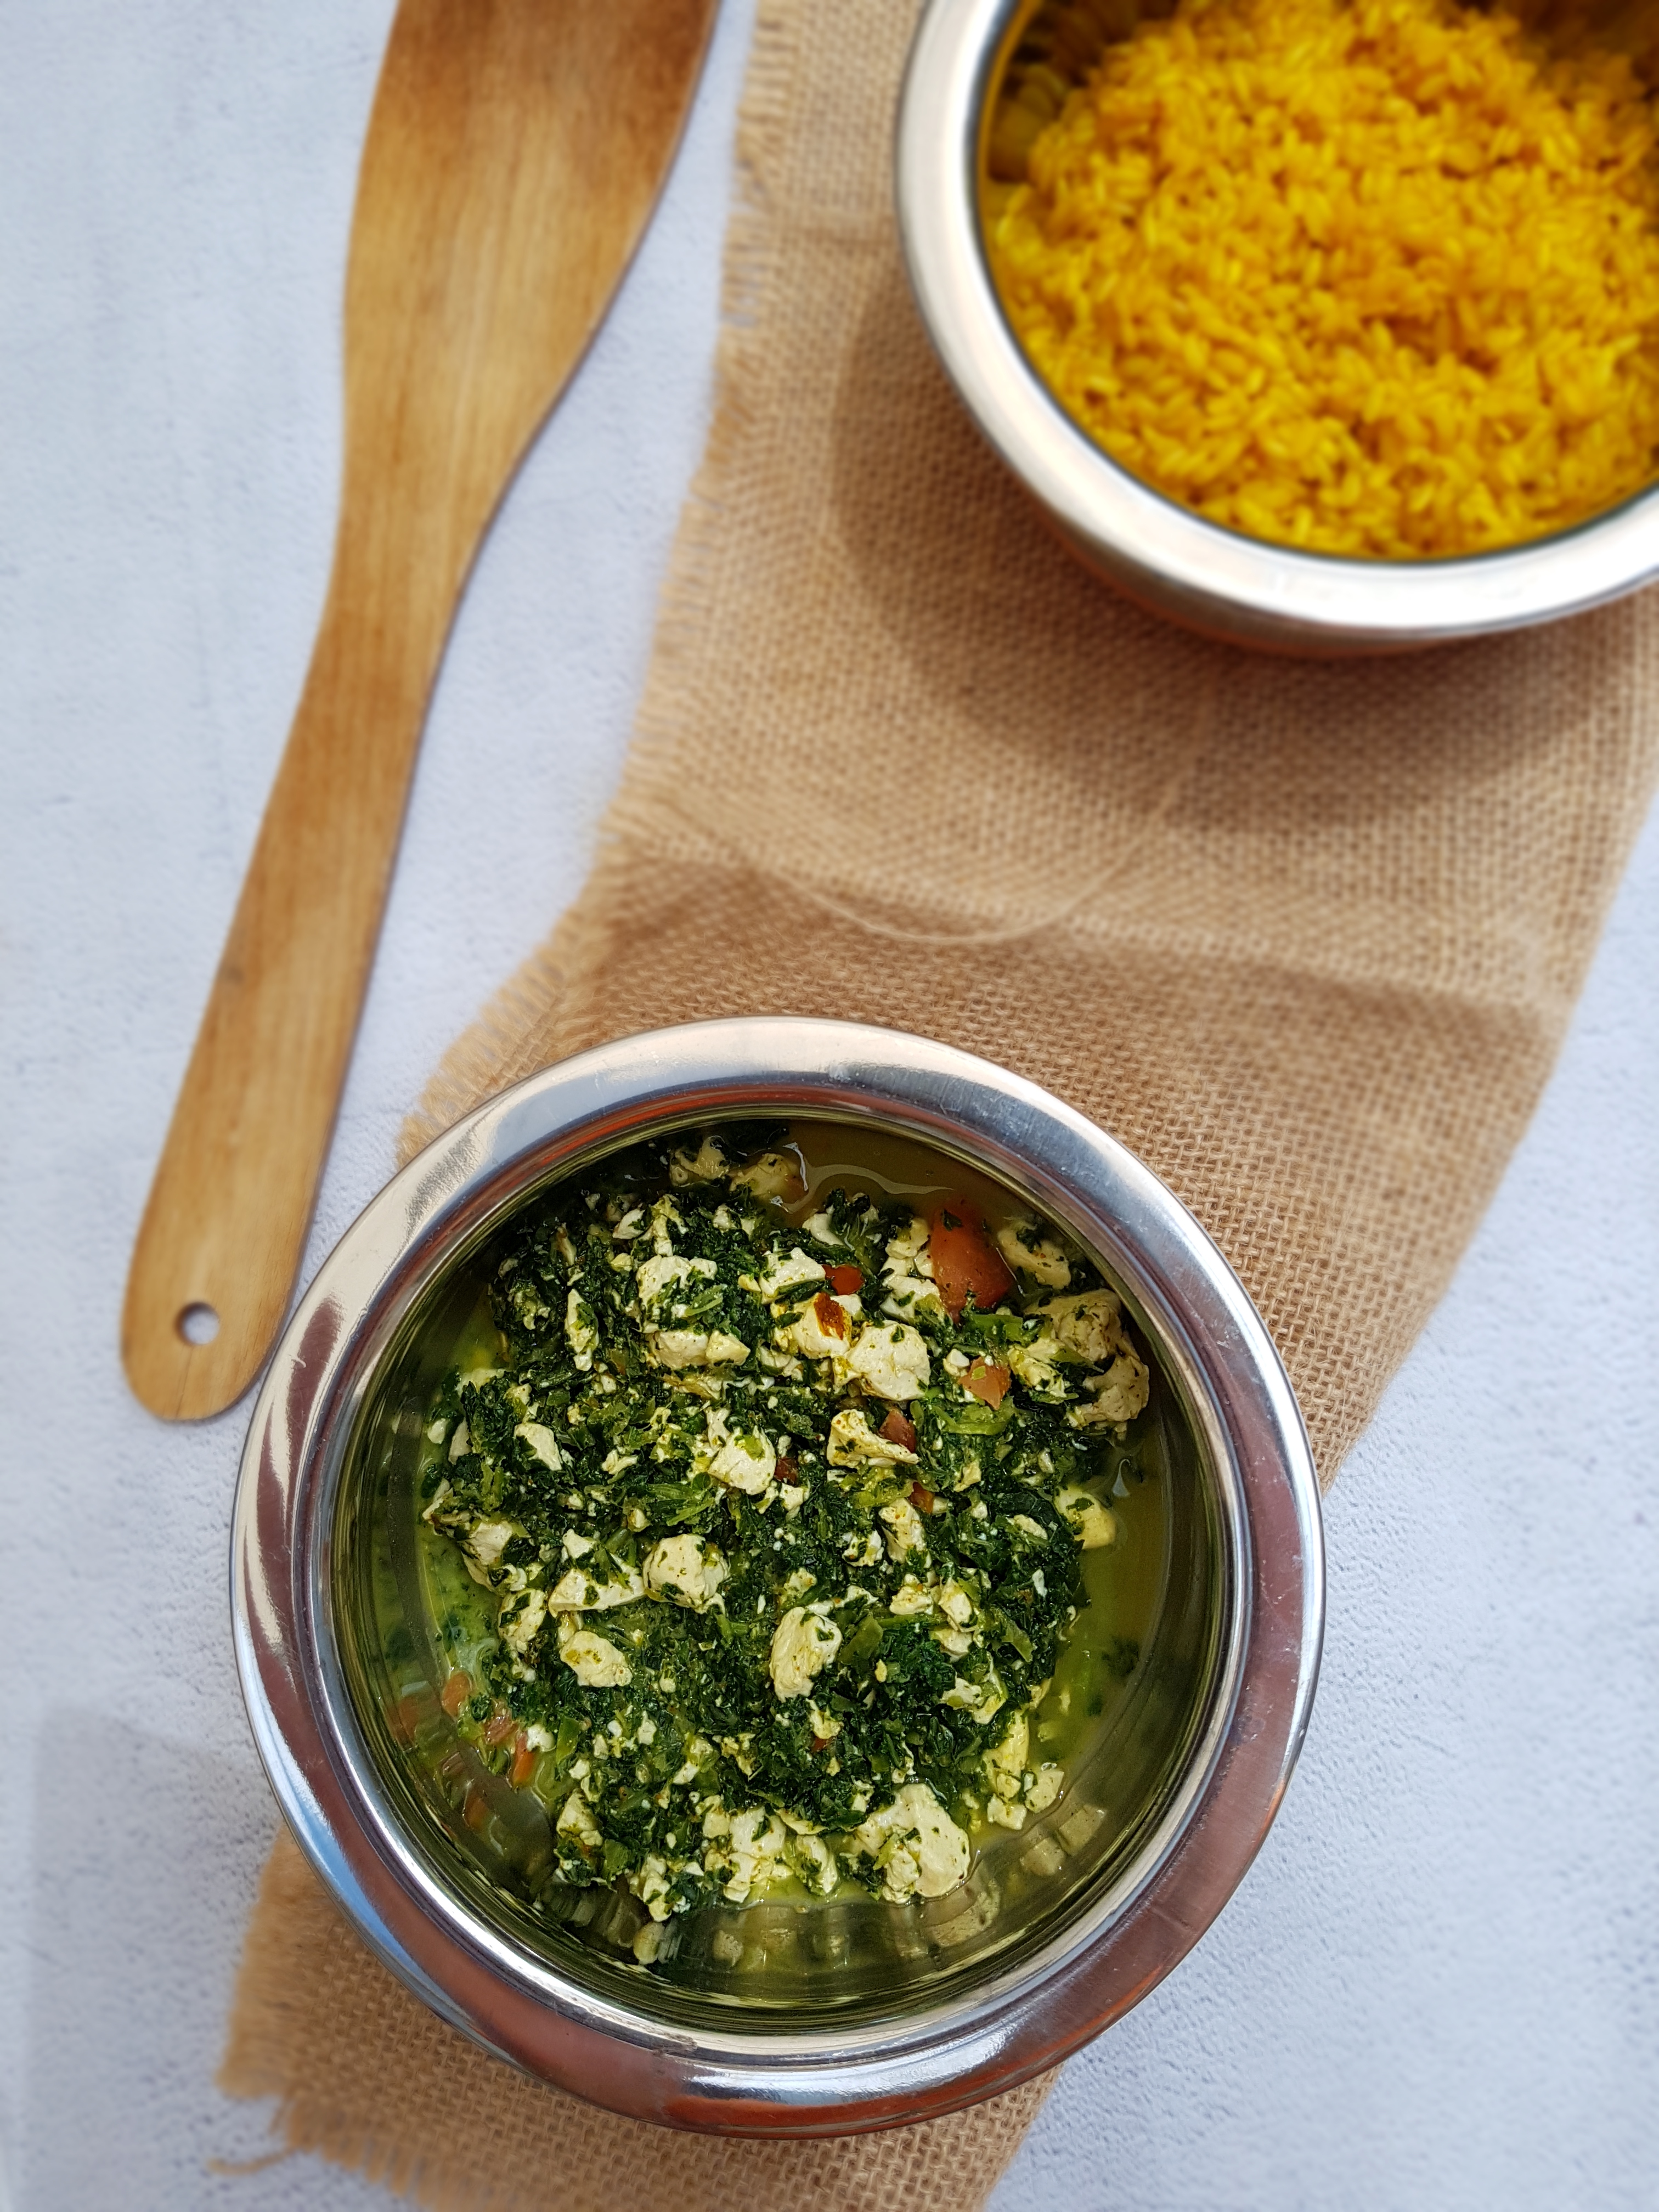
Heat the tofu in a large frying pan with salt, garlic, ginger, curry powder and chilli. You can use a bit of oil or, as I prefer, a bit of water to prevent sticking. Cook for a minute, add the milk, then add the kale and mix with the tofu without breaking up the tofu too much (it should still have the shape of cubes). Adjust the spices according to your tastebuds and cook a few more minutes until your desired consistency is achieved. Add the powdered peanut butter or ground cashews and coconut. Serve with saffron rice or with my 5-minute gluten free naan.

Enjoy!

Tofu Stir Fry with Black Bean Noodles {vg, gf}

Stirfry for me is the ultimate comfort food. It is vibrant, full of flavour, satisfying and warming, and I love how versatile it is. Stirfrying means cooking more quickly. Vegetables therefore retain more nutrients. And because stirfrying is so quick, it means less time standing in front of the stove and more time eating! Stirfrying for the win! Here goes my vegan tofu stir fry with black bean noodles. It is ultra quick (about 15-20 minutes) so there are absolutely no excuses for not dishing up a delicious and healthy meal on a week night! (Or any night, for that matter.)

Now, this does not need to be a tofu stir fry and you don’t need to use black bean noodles. I just used them as I think they work well together. I have come to really appreciate bean noodles. They are quite a bit lower in calories and higher in fibre than regular or processed gluten-free noodles/pasta, and they cook in a fraction of the time. If you can’t get your hands on black bean noodles, not to worry! Just use your favourite noodles or zoodles instead. This dish will still be delicious. If you don’t like tofu you could use tempeh (also have a look at my tempeh curry recipe here) or if you avoid soy simply use more veggies or try something new by making chickpea “tofu”. The options are endless.

That’s what I like about these kind of meals. No-one nowadays has the time or desire to go shopping every day so it’s imperative to have a handfull of standby recipes in which you can use whatever you have on hand.

Tofu Stir Fry with Black Bean Noodles

Serves 2

1 pack (300g) tofu, cubed
4 tbsp tamari
2 tbsp maple syrup
4 cloves garlic, minced
1 tbsp apple cider vinegar
1 tbsp ground ginger
half a tbsp sesame oil

dash of fresh lime juice
salt, pepper and chilli to taste

black bean noodles or other noodles (amount to taste)
dash of water or vegetable stock
about a pound (approx. 450-500 grams) mixed vegetables such as green beans, broccoli, sweetcorn, green peas, capsicum, carrots…
cashew nuts, fresh coriander, fresh chilli to serve (optional)

Mix the tamari, maple syrup, garlic, oil, vinegar, ginger, lime juice and spices in a medium bowl, then add the tofu and let sit for 5-10 minutes to soak up the marinade. Prepare the noodles according to the manufacturer’s instructions. Heat water or stock in a large frying pan or, better, a wok, and blanch the vegetables for a couple of minutes. Take out the veggies, then add the tofu with all of the marinade, cover and let cook for 5-10 minutes. Add the veggies, mix in thoroughly and cook for another two minutes. Turn off the heat, toss in the noodles and mix everything through. Adjust the spices and let sit for a minute. Serve with cashews, coriander and chilli according to your liking and…

Enjoy!


10-minute Lowfat Vegan Mushroom Alfredo gf, df, soyfree, nutfree)

As promised on my Instagram account, here comes the easiest, healthiest and best 10-minute lowfat vegan mushroom alfredo you’ll ever make.

I don’t say this lightly. This is serious stuff. I am aware that there is no lack of vegan Alfredo recipes, a lot of which involve tofu (which can be an issue for some) or cashew nuts and/or coconut cream, therefore being very heavy. In short, alfredos, whether vegan or not, are not exactly lowfat. I have made alfredo sauces using cauliflower which is a better option to achieve that creamy consistency that we crave but the flavour of the cauliflower (and the smell of your kitchen when cooking it) can be a bit overwhelming when all you are after is mushrooms, creams and garlic. What I wanted was an Alfredo sauce which fulfilled the following criteria:

-relatively low in fat
-takes 10 minutes to make from start to finish
-requires about 5 ingredients
-is economical
-tastes divine

I’m so excited because my mushroom Alfredo does all that! With only coconut oil, garlic, plant milk, mushrooms (duh!), cornstarch and plenty of herbs and spices, there are no obscure or hard-to-get ingredients, no nasties and you don’t need to set aside your precious weekend for meal prepping – all you need is the commercial TV break on a weeknight. Sounds good? Sure does!

You can use any plant milk you like or have on hand. If you are not worried about the soy/nut issue, then soy or nut milk is perfectly fine to use. I like oat milk as it makes the sauce really unctuous, however, it is quite a bit higher in carbs than other non.dairy mylks and also sweeter, so you might want to keep that in mind. I have tried this recipe with both almond and oat milk and love them both! So it’s completely up to you. What’s not up to you is the spice part. There is garlic, sea salt, fresh black pepper and fresh parsley, which is not a lot of spices. They are therefore not negotiable. If you don’t like or can’t have garlic, pepper and/or parsley (seriously???), then you can try to omit them, but it really won’t be the same.

Lowfat Vegan Mushroom Alfredo

Serves 2

1/2 to 1 tbsp refined coconut oil
3 garlic cloves, minced
250 g button/cup mushrooms
250-350 ml unsweetened plant milk (depending how much water is sweat out by your mushrooms)
1 tbsp cornstarch, mixed with equal amounts water to form a paste
sea salt and fresh black pepper
parsley
any other herbs of choice

Melt the coconut oil in a large saucepan and fry the garlic until aromatic. Add the mushrooms and fry until they start to wither. Add the plant milk, starting with a cup (ca. 250 ml). Whisk in the dissolved cornstarch and keep whisking until no lumps are left and the sauce starts to thicken. Add salt, pepper and spices and some more plant milk until the sauce has your desired consistency. Serve with pasta of choice.

Enjoy!


Healthy Madras Curry with Chickpea Tofu

Please, can you please all make this curry? Seriously, it’s soooo good! Like, I-want-to-eat-all-servings-by-myself type good. And guess what? Because this curry is really light and healthy, you can! If you are organised and disciplined (I am neither), you double or triple this recipe and freeze leftovers as it freezes really well and makes for a great stand-by on busy weeknights (I already see you dialling that takeaway number, but you will never again after you have tried this recipe). If you are looking for an alternative to Indian takeaway, enter my healthy Madras curry with chickpea tofu!

What I love about our local Indian takeaway is how you can customise the protein and the degree of spiciness in the dishes. What I am less keen on is the amount of cheap oils, butter and cream in Indian takeaway curries and the feeling that you have swallowed a whale (or turned into one). So I’ve been looking to come up with a good alternative that is healthy, easy, quick, inexpensive and, most of all, tasty. It seems like I nailed all these briefs at the first time! This stuff is hearty, satisfying, exotic, just the right amount of spicy, filling without sitting like a rock in your stomach, nourishing and comforting!

Using light coconut/almond milk, this dish is a lot less heavy than traditional Indian dishes and very low in fat, with the fat mainly coming from healthy coconut oil. If you like things extra creamy, you could use full-fat coconut milk or cashew cream although I really prefer the lightness of my recipe. I love my carbs so I tend to serve brown rice on the side with also lends this meal a nice crunch, but if you limit your carbs, you could try cauliflower rice. As a protein, I used Burmese chickpea tofu to create a soy-free vegan meal. I don’t mind soy anymore but I try to not go overboard with it. You can of course use “normal” tofu, tempeh, paneer or whatever protein suits your taste buds and dietary requirements.

If you aren’t familiar with chickpea tofu though, I’d definitely recommend trying it. I made mine using the recipe by the incredibly talented vegan Richa. I looked at several recipes for no-soy tofu, and hers was by far the most straightforward one. It literally comes together in ten minutes and is set in the fridge in under an hour. I was so pleased to have found a cheap, easy, healthy and lowfat alternative to regular tofu! The texture is almost the same as tofu and it has a subtle, not overwhelming earthy chickpea flavour which I love. I actually make a big batch and munch on it as a snack. With its gooey, slightly rubbery consistency, it feels like having naughty cheese, only that due to the chickpea flour, chickpea tofu is low in fat while boasting fiber, iron, potassium, manganese, copper, zinc, phosphorus, magnesium, folate, vitamin B-6 and thiamine!

Sounds too good to be true? Then get cooking!

Healthy Madras Curry with Chickpea Tofu

Makes 3 servings

1 tbsp coconut oil
1 onion, peeled and finely chopped (optional, leave out for low FODMAP)
3 garlic cloves, peeled and minced
1 tbsp ginger powder
2 tsp cumin
2 tsp dried coriander
1 tsp curry powder or garam masala
a pinch of turmeric
chili powder or fresh chilis, to taste
1 recipe chickpea tofu, chopped
1 tin (400g) tinned tomatoes

sea salt and pepper to taste
dash of lemon juice
dash of light coconut milk or almond milk

500 g steamed vegetables such as broccoli, cauliflower, green beans, peas
brown rice or cauliflower rice, to serve

Heat the coconut oil in a deep saucepan and add garlic, onion if using, ginger, cumin, coriander, curry powder, turmeric and chili powder. Fry the spices until they are aromatic. Add the chopped chickpea tofu and fry until lightly browned, then add the tomatoes. Season with salt and pepper. Leave to simmer for 15 minutes, adding a little bit of water as necessary. Stir in lemon juice, coconut milk and vegetables and serve immediately with rice.


Enjoy!

Homemade Apple Cinnamon Granola (Sugar Free, Nut Free, Wheat Free)

Healthy Homemade Granola

Dear friends, Christmas is coming around veeeery fast – too fast if you ask me – but here in the Southern Hemisphere, the days are getting hotter, so the time for a big, steaming bowl of hot porridge are over – for now. It’s time t move on to a lighter breakfast snack, so I tried to make some homemade apple cinnamon granola – a light alternative to oatmeal without lacking a xmas-y touch.

Making granola is not as difficult as it sounds, and in fact, this granola is as HEY – healthy, easy, and yummy – as all my other recipes. You can make a big batch and store it in an open-mouth jar, where it will keep fresh for a while. My granola contains no sugar – only natural fruit sugars – and only a tiny pinch of healthy coconut oil, no other oils, especially not palm oil or other scary things! Besides, this one is nut-free (for a nutty granola see here), so even the nut allergy sufferers among you can enjoy their granola!

I love this as a healthy snack by itself, a nourishing breakfast with almond milk or natural yogurt, or to add some pizzazz to fruit salads and compôtes.

Makes 4 servings

200 g rolled oats
50 g dried apple (unsweetened), very finely chopped
2 tbsp raw honey , agave or maple syrup
15 g coconut oil, melted
generous pinch of cinnamon
generous pinch of sea salt
drop of vanilla

Preheat oven to 150 °C. Combine oats, fruit, cinnamon, and salt in a big bowl. Whisk honey, oil and vanilla in a separate bowl until well combined. Now pour the “wet” ingredients into the “dry” ingredients and mix well with your clean hands as if you prepare a shortbread dough. Be warned though, this is veeery sticky – but the good thing about making homemade things is, you get to lick your fingers legitimately! (And you will with this one, you will!)

Now spread (what’s left of) the mix (after finger-licking) onto a prepared baking sheet (i.e. silicon sheet or a lined baking sheet) and bake for 10-15 minutes until very lightly toasted. Let cool and refrigerate.

Enjoy!

Gluten Free Vegan Crusty Soda Bread (yeast free, gum free)

Quick and Easy Gluten Free Bread

Gluten free bread sucks. Do you agree to this statement? I used to. No matter where in the world, and no matter whether from a breadmix, or a bakery – gluten free bread just sucked. And even if it tasted anywhere near something you would serve a human being, it was filled with crap. I know, I know what you are going to say – one doesn’t need bread, or any carbohydrates for that matter. There is absolutely nothing wrong with low-carb or paleo, ans, in fact, I believe many of the western world’s problems could be solved if people ate low(er) carb!

But, heck, I am German and married to an Italian – there is just no way I’m gonna give up bread forever, and even though I am gluten intolerant, there must be a way to make gluten free bread that doesn’t suck! Gluten free bread that doesn’t have a whole shelf of creepy ingredients in it. Gluten free bread that doesn’t have a dozen eggs in it (that’s not bread, that’s cake! And If I crave bread, I don’t want cake – sorry, Marie Antoinette!).

This was an experiment. One that turned out well. One that my (gluten eating) hubs couldn’t get enough of. One that reminded me very much of the texture of a good ol’ German sourdough – even though the taste is more in the tradition of the Irish soda bread. I didn’t have any dried yeast, so had to resort to soda. With an old trick I knew (putting a bowl of water in the oven), my bread got a lovely crust. And thanks to all-time favourite flax, this is egg free, but you won’t miss any eggs – the trick with the flax eggs worked! So this is not only gluten free, it is yeast free, gum free, egg free, and dairy free. And it doesn’t suck.

Gluten free? Check. Dairy free? Check. Yeast free? Check. Egg free? Check. Vegan? Check. Gum Free? Check. Soy free? Most naturally. Full of fibre and omega 3? Check. Sugar free? You have the option. Yummy? Check. Easy and quick to make? Check.

You can start now. You should have the ingredients. And it is really really easy. You don’t even need to preheat the oven – you really don’t!

Makes one loaf

150 g potato starch
100 g sorghum flour
50 g arrowroot
2 tbsp baking soda
2 tsp celtic sea salt
2 tsp sugar or honey
250 ml hot water (ca. 40 ° C)
3 tbsp ground flax seed, dissolved in 9 tbsp water (equals 3 flax eggs)
4 tbsp apple cider vinegar
1 tbsp olive oil

Mix the dry ingredients (potato starch, sorghum, arrowroot, soda, salt, sugar if using) in food processor with dough blade until one colour. Slowly add oil, flax eggs and honey, if using, with the blender running. Add vinegar and hot water and mix until you get a supple, uniform dough. There should not be any lumps in it whatsoever – it should be the smoothest thing ever. Turn off the processor, and with a silicon spatula, scoop dough into loaf pan. Sprinkle the loaf with sorghum or any other gluten free flour and notch several times with a sharp knife. Place on middle rack in an oven, and place another tray filled with water below the loaf pan. Turn the oven to 230 ° C and let bake for 35 minutes. Turn off the oven, and let the loaf cool on a wire rack.

Delicious Gluten Free bread with Olive Oil and Sea Salt or...
Delicious Gluten Free bread with Olive Oil and Sea Salt or…

Enjoy!

..with butter!
..with butter!

Gluten free, low carb, vegan carrot cake muffins

WP_000398
Carrot Cake with whipped cream filling
WP_000396
Carrot Cake with vegan frosting

Those who think that gluten free cooking is complicated and tasteless hasn’t tried these fantastic carrot cake muffins – they are ready in a jiffy, packed with fibre (they really are satisfying!) and beta-carotene, low carb and low GI, and of course completely gluten free, dairy free, soy free, and sugar free! Have I mentioned that they are extremely yummy, too?

For all frosting addicts out there who cannot or don’t want to have milk, yes, I created a dairy free frosting that tastes like a cream cheese frosting! And no, it does NOT contain Tofutti or any other GMO-laden soy crap. It is made with coconut milk – however, you won’t taste the coconut much in the final product so don’t fret if you are not the biggest coconut fan in the world – you will still like it, I promise. You can find the recipe here and below. Update: I created a new vegan and sugar-free frosting without any nuts. Recipe here.

Alternatively, these muffins are even better filled with my vegan whipped cream! Highly recommended! (see left-hand picture above)

Watch out, these delicious little cakes will be gobbled up before you know it – so better make a bigger batch if you need them for a party! You can easily double or triple this recipe. They last well in the fridge (in fact, they taste even better the next day) and you can freeze them without any worries.

Makes 12 muffins

For the muffin batter
2 eggs or egg replacer to make it vegan
100 g of honey (can be substituted with organic maple syrup or agave nectar)
40 ml olive oil
100 g plain gluten free flour
30 g flax seed
1 teaspoon gluten free baking soda
50 g nuts (almonds and/or walnuts are best, but you can use any nuts) – more nuts improve the flavour even further
1 1/2 cups of freshly grated carrots – the more carrots, the more moist and delicious your muffins will be
1/2 teaspoon xanthan (if your gf flour mix doesn’t contain it already)
1 teaspoon cinnamon
1/2 teaspoon kosher salt (or Celtic sea salt)
1 teaspoon vanilla
10 dates (optional, but adds taste and texture – could be replaced with raisins and/or sultanas)

For the frosting
1/2 can of coconut cream (full fat or light – both work fine)
1 teaspoon of honey
pinch of salt
80 g coconut oil
80 g vegan margarine (Nuttelex) or butter
1/8 teaspoon xanthan to thicken

Muffins:
-Preheat oven to 180° C
-Beat honey, eggs, oil, vanilla in a large mixing bowl until smooth
-In a separate bowl, combine the dry ingredients: flour, flax, soda, xanthan, salt and cinnamon
-Add to wet ingredients and beat until smooth
-Mix in carrots, nuts and dates and transfer batter to muffin pan
-Bake for 30 min or until a toothpick comes out clean

Frosting:
-Heat coconut milk, honey and salt, bring to the boil and let simmer for 10 minutes
-add xanthan, stirring continuously, bring to the boil and remove from heat – the mix should have a shiny surface
-stir in coconut oil, whisking or using a blender
-set to cool for 15 minutes and transfer to fridge for another 2 hours (the longer, the better), until mix has firmed up
-when it is thoroughly chilled, transfer coconut mix to a mixing bowl (you might need to blend it again with a stick blender to make it really smooth), add the margarine or butter and mix with hand blender for 2 minutes until thick and fluffy
-decorate muffins with the frosting using a cake decorator or silicon spatula

Enjoy!

Tips
– use sugar free orange marmalade instead of honey, to get a more tangy and zesty taste
– add some ginger to the dough for some exotic spiciness
– mix some gingerbread or pumpkin pie spice in the frosting for a delish Halloween or Xmas treat
– replace the carrots with cooked pumpkin or sweet potato for an extra luscious treat
– you can of course make this a cake instead of muffins. This recipe is enough for one round 20 cm baking pan. Double this recipe for a bigger cake.