Update: I have updated and veganised this recipe which is now even more delicious and completely vegan! I hope you enjoy it!
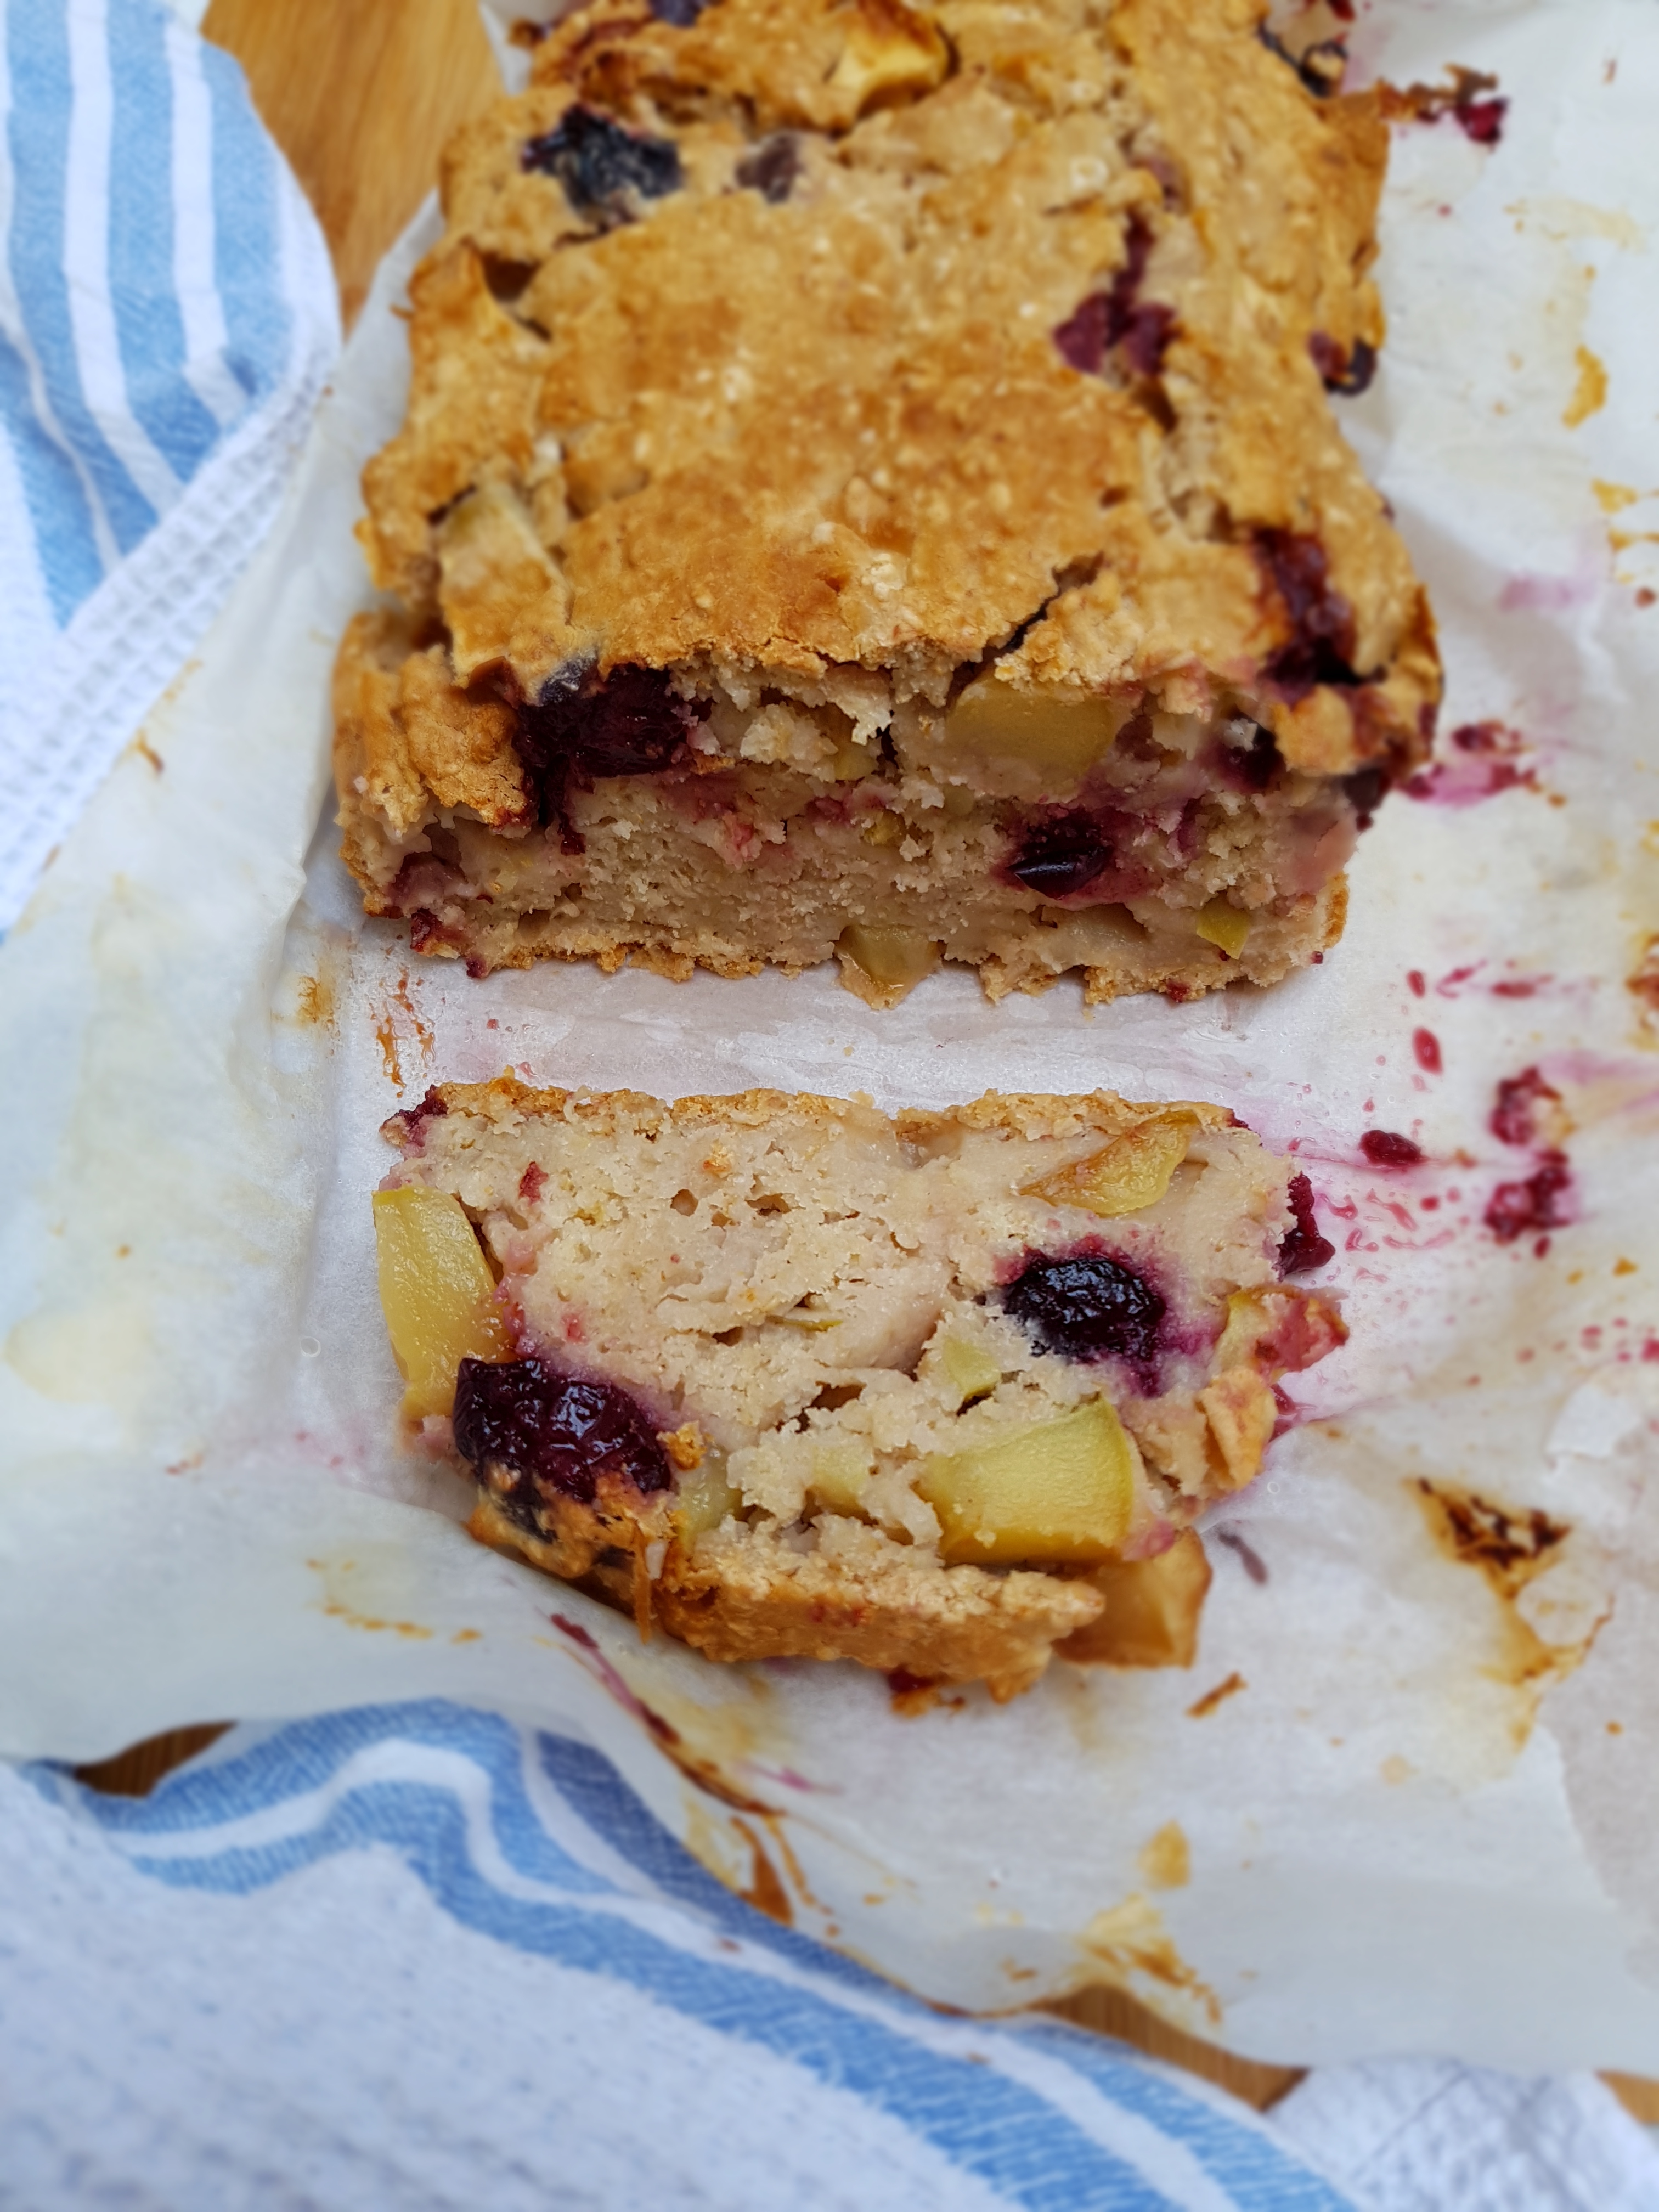
I love healthy and satisfying treat that are a cinch to make, especially since having a toddler, and this delicious, fudgy and moist apple & cherry bread just fits the bill. It’s so good that I just had to share it with you! My husband and kid love it, and it’s vegan, dairy free, egg free, gluten free, soy free and low in fat.
This crossover between a cake and bread can be done with whatever fruit you like/have available, and you could even include nuts in it (which wouldn’t make it lowfat but nonetheless delicious). It is very addictive, comes in handy as a quick snack or breakfast on the go, is very kid friendly, not overly sweet and still super yummy, and it’s a great companion with your afternoon cuppa – in short, go baking now!
The base is actually porridge – yes, oats soaked in water! So if you ever find yourself with leftover porridge, here is a great way to make us of it! No need to first mix the dry ingredients and then the wet – just throw everything together. Doesn’t get easier than that!
Apple & Cherry Bread
Apple and Cherry Bread {vg, gf, lf}
Makes 1 loaf/12-15 slices
1 cup almond milk 1 tsp apple cider vinegar 1 cup quick oats, soaked in cup water (porridge) 1 cup gluten free all-purpose flour
half cup brown rice flour 1/3 cup coconut sugar or raw sugar 1 tbsp gluten free baking powder half a cup unsweetened apple sauce dash of vanilla extract 2 apples, cubed, or other fruit 2 handfuls of frozen cherries or other fruit
Preheat oven to 180 °C. Line a loaf tin with baking paper (if using a silicone mold, you don’t need to line it). Pour the almond milk into a large mixing bowl, add the vinegar and set aside to let it react for a couple of minutes. Add the porridge, flours, sugar, baking powder, apple sauce and vanilla and mix until you achieve a homogenic consistency. Carefully fold in the fruit.
Pour the dough into the prepared tin and bake for 50 minutes until the top is golden brown and the bread passes the “toothpick” test. Turn off the heat and let the bread cool in the oven to firm it up. Once the tin is no longer hot to the touch, take out the bread and let cool completely. Serve as slices and store at room temperature, wrapped in aluminium foil.
The free bread basket you get in restaurants to quench your hunger – I know, sometimes it isn’t even free – is usually just that – a hunger quencher. In my gluten-eating days, I have rarely come across a restaurant that serves a bread basket with bread that actually deserves its name. Since going gluten free, I naturally have to pass on the bread basket – but unlike saying good-bye to thin-crust pizza on Saturday nights and freshly baked croissants in bed on Sunday morning, I happily live without these buckets of stale bread thrown at you that spoil your appetite for the “real” meal.
The only exception is delicious naan bread in Indian restaurants, fresh from the clay oven, only waiting to soak up tangy relishes and condiments. While Indian food has never grown on me as much as, say, Mediterranean or middle eastern cuisine, I’d happily walk miles for a good naan bread – gluten free of course.
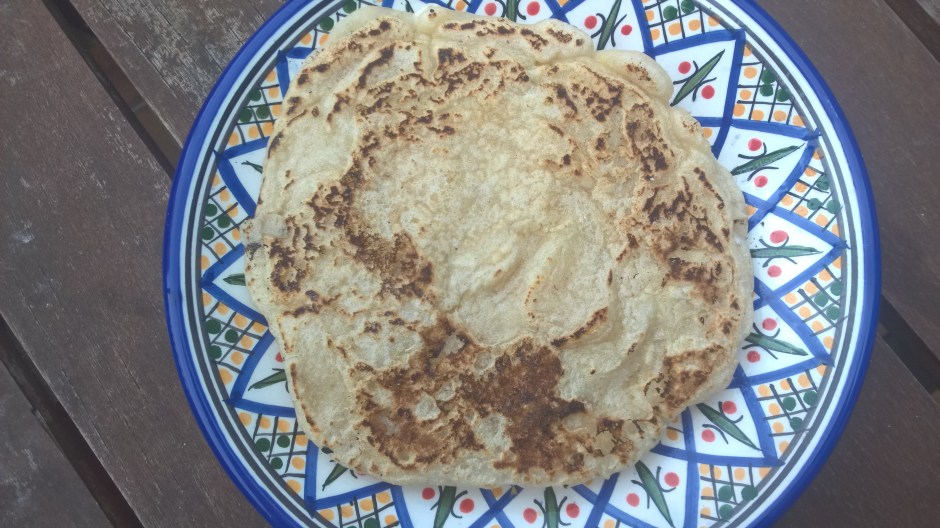
The best things in life happen by chance, and my latest creation in the realm of gluten free carby things was born while experimenting with different pancake recipes. (After all, it was Pancake Day on Tuesday.) While I’m still trying to rival the crêpe stand in Melbourne CBD, I might not have come up with a pancake recipe I would be happy to post, but – yup – a recipe for naan bread! How good is that? I mean, you try to create something that roughly looks, tastes and smells like a pancake, a crêpe, a poffertje,a flapjack, or a blintz (any reference to a certain Austin Powers movie is mere coincidence), and what you get is naan! I won’t complain. I guess it’s just life. Do you have that too where when you are looking for something you always find something else? Or is it just me?
I won’t go as far as calling these babies “healthy” because – shame on me- I used plain old commercial gluten free flour which is about as carby as you get. I’ve been a bit slack these days. So the fact that these beauties take less than five minutes to make (and contain just four ingredients (five if you count the fat for frying)) got me sold. Yes, this means you could devour a stack of delicious gluten free naan bread in under five minutes from now.
So while I work heavily at creating a more healthy version of this revelation (I think sorghum and buckwheat are likely candidates), why don’t you go forth and bake. The time starts now.
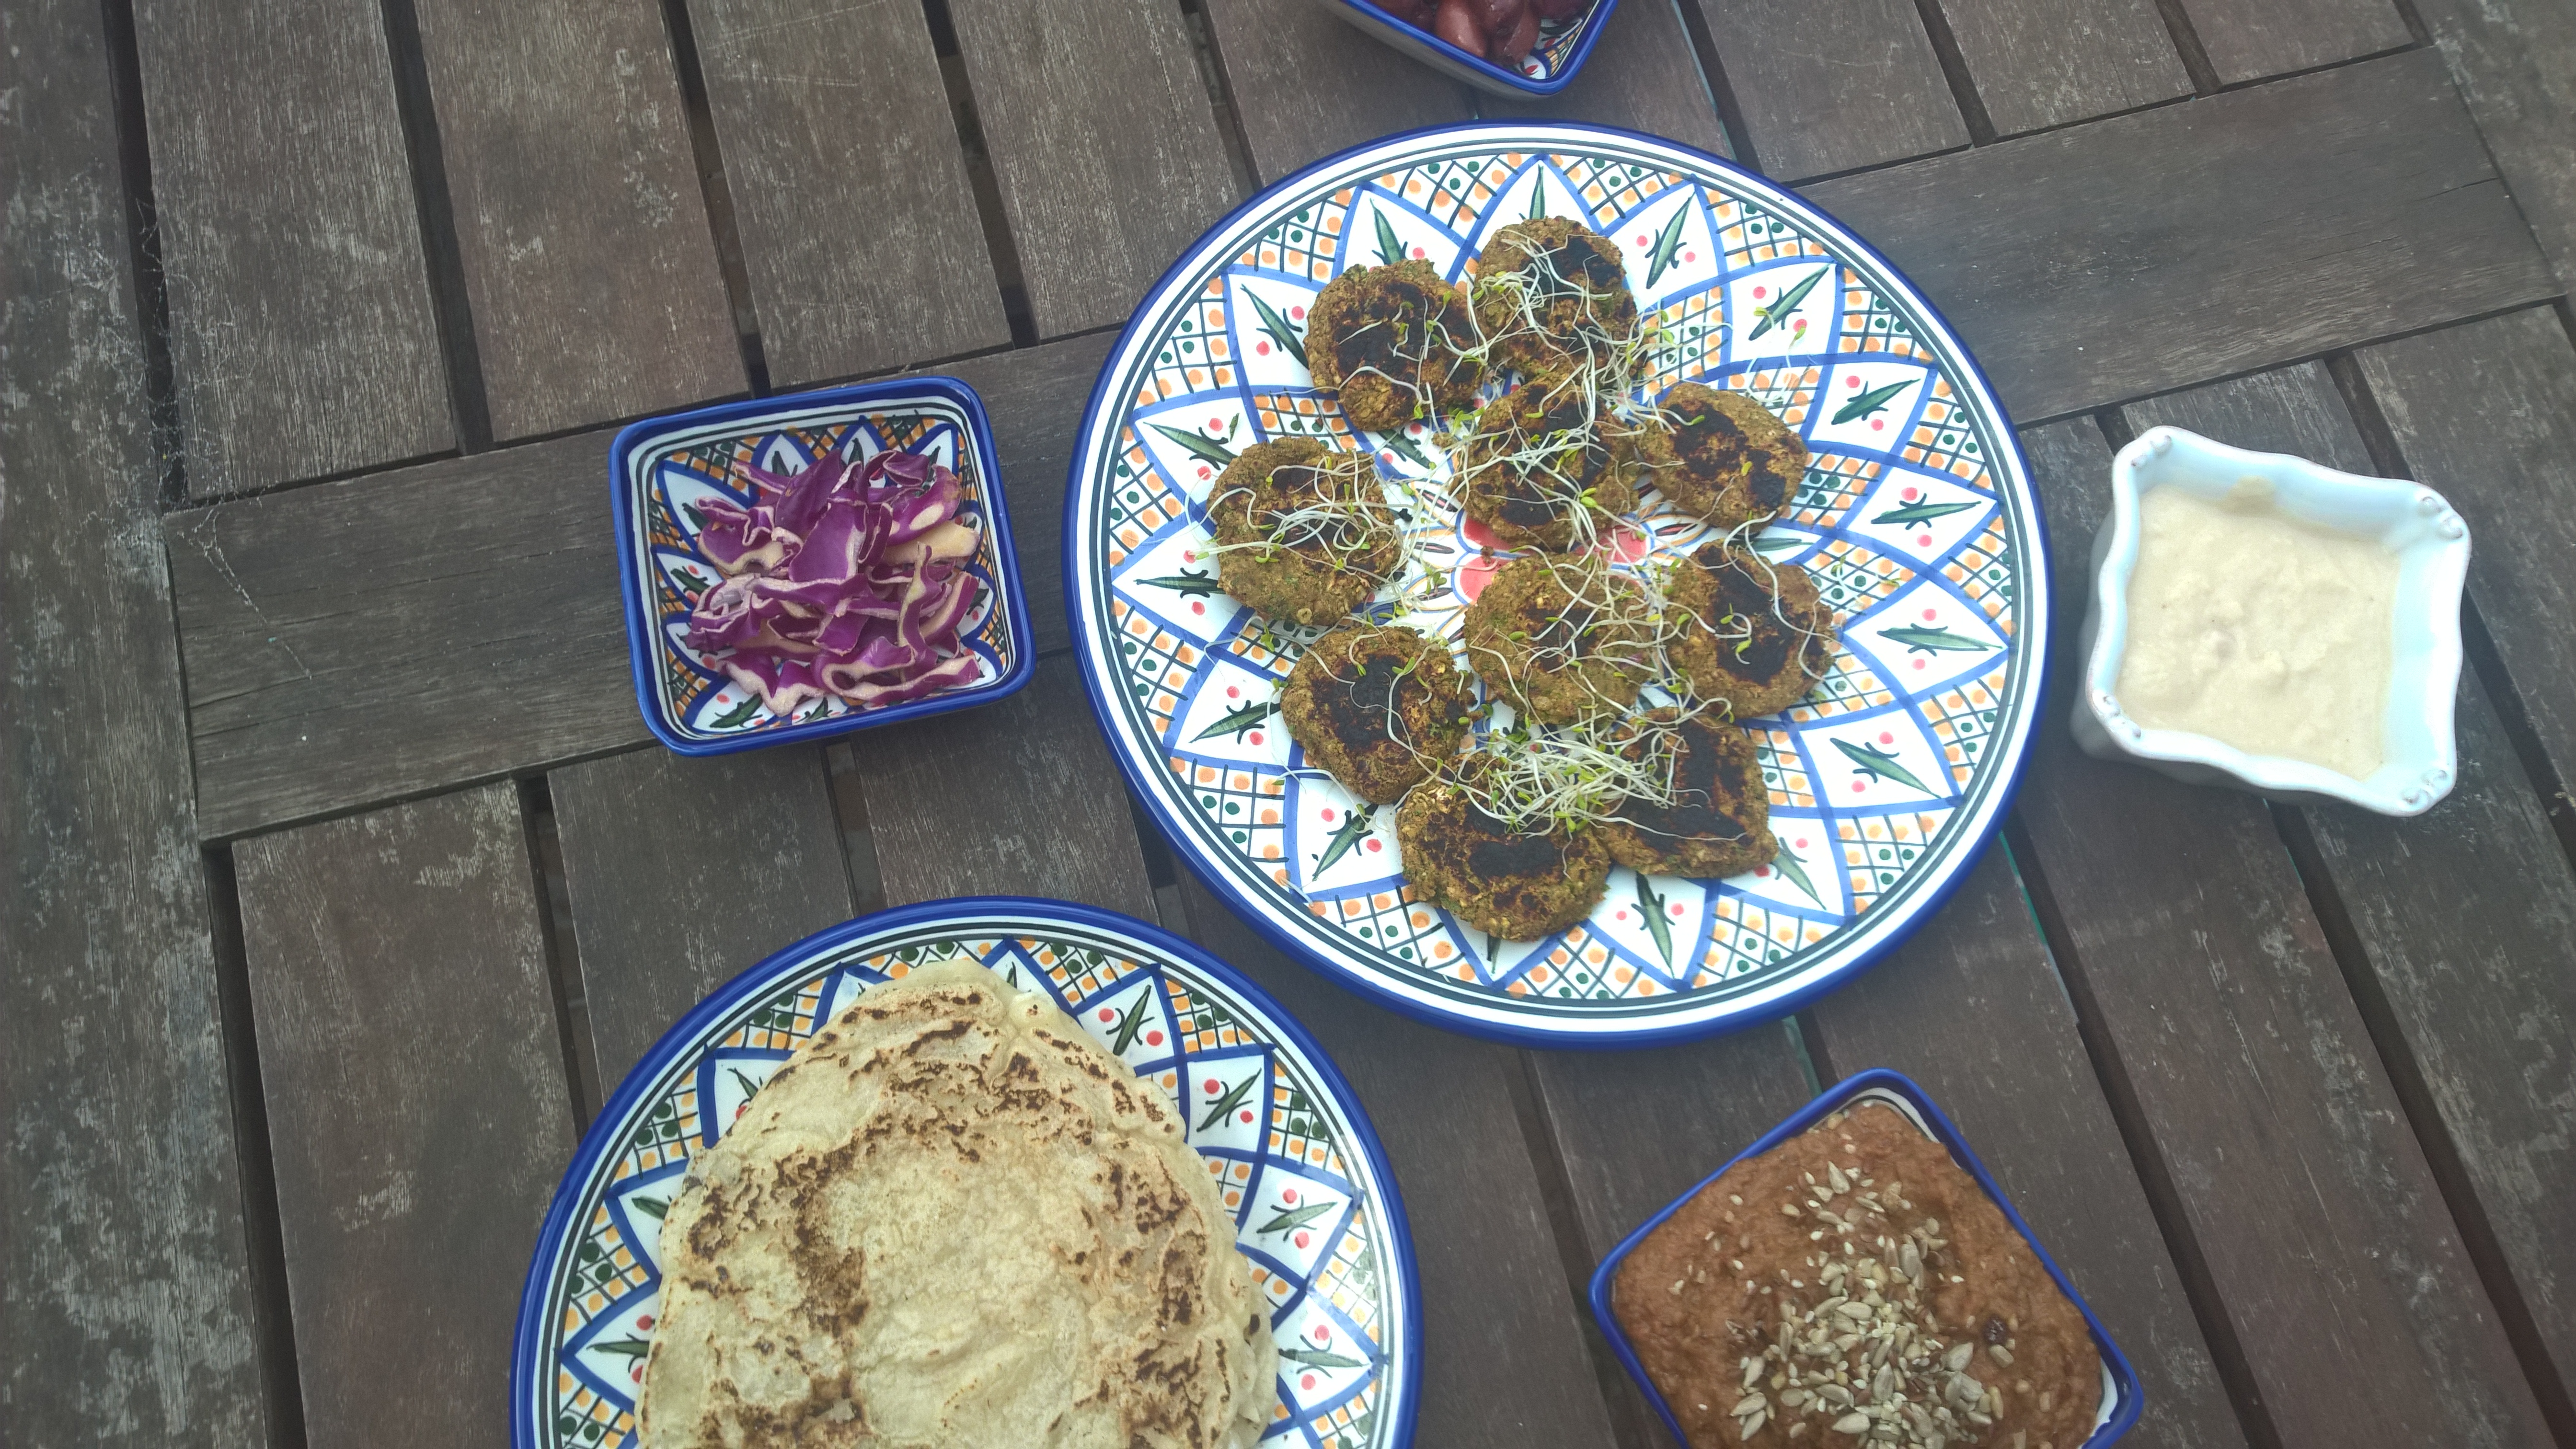
5-minute Vegan Gluten Free Naan Bread
Makes 4 naan breads
250ml filtered water 150g gluten free self-raising flour 1 tbsp psyllium husk pinch of sea salt a little bit of refined coconut oil for frying
Mix flour, psyllium and salt, then gradually add water while constantly whisking until you have a smooth dough. Lightly grease a large non-stick frying pan. The pan should be really hot. Make sure you use a good non-stick brand. Ladle a quarter of the batter inside the pan, fry until bubbling on top, then flip. Let cool before serving (the texture will become more naan-y as it cools down).
The net is swarming with recipes for “paleo bread” these days, which is great. After all, it’s good to know you can get on with your life even if – for medical or lifestyle reasons – you don’t eat “regular” bread. And let’s admit it, we all like bread, at least now and again, even the paleo police!
The thing about “paleo bread” is that it usually contains a bucke load of eggs – hey, don’t get me wrong! I loooove eggs – poached with smoked salmon and avocado smash. Not as an ingredient in bread. I’ve seen paleo bread recipes calling for as much as six eggs. Six! That’s cake. It’s not bread. I wanted bread! (Using six eggs in a recipe is darn expensive too, but that’s another story.)
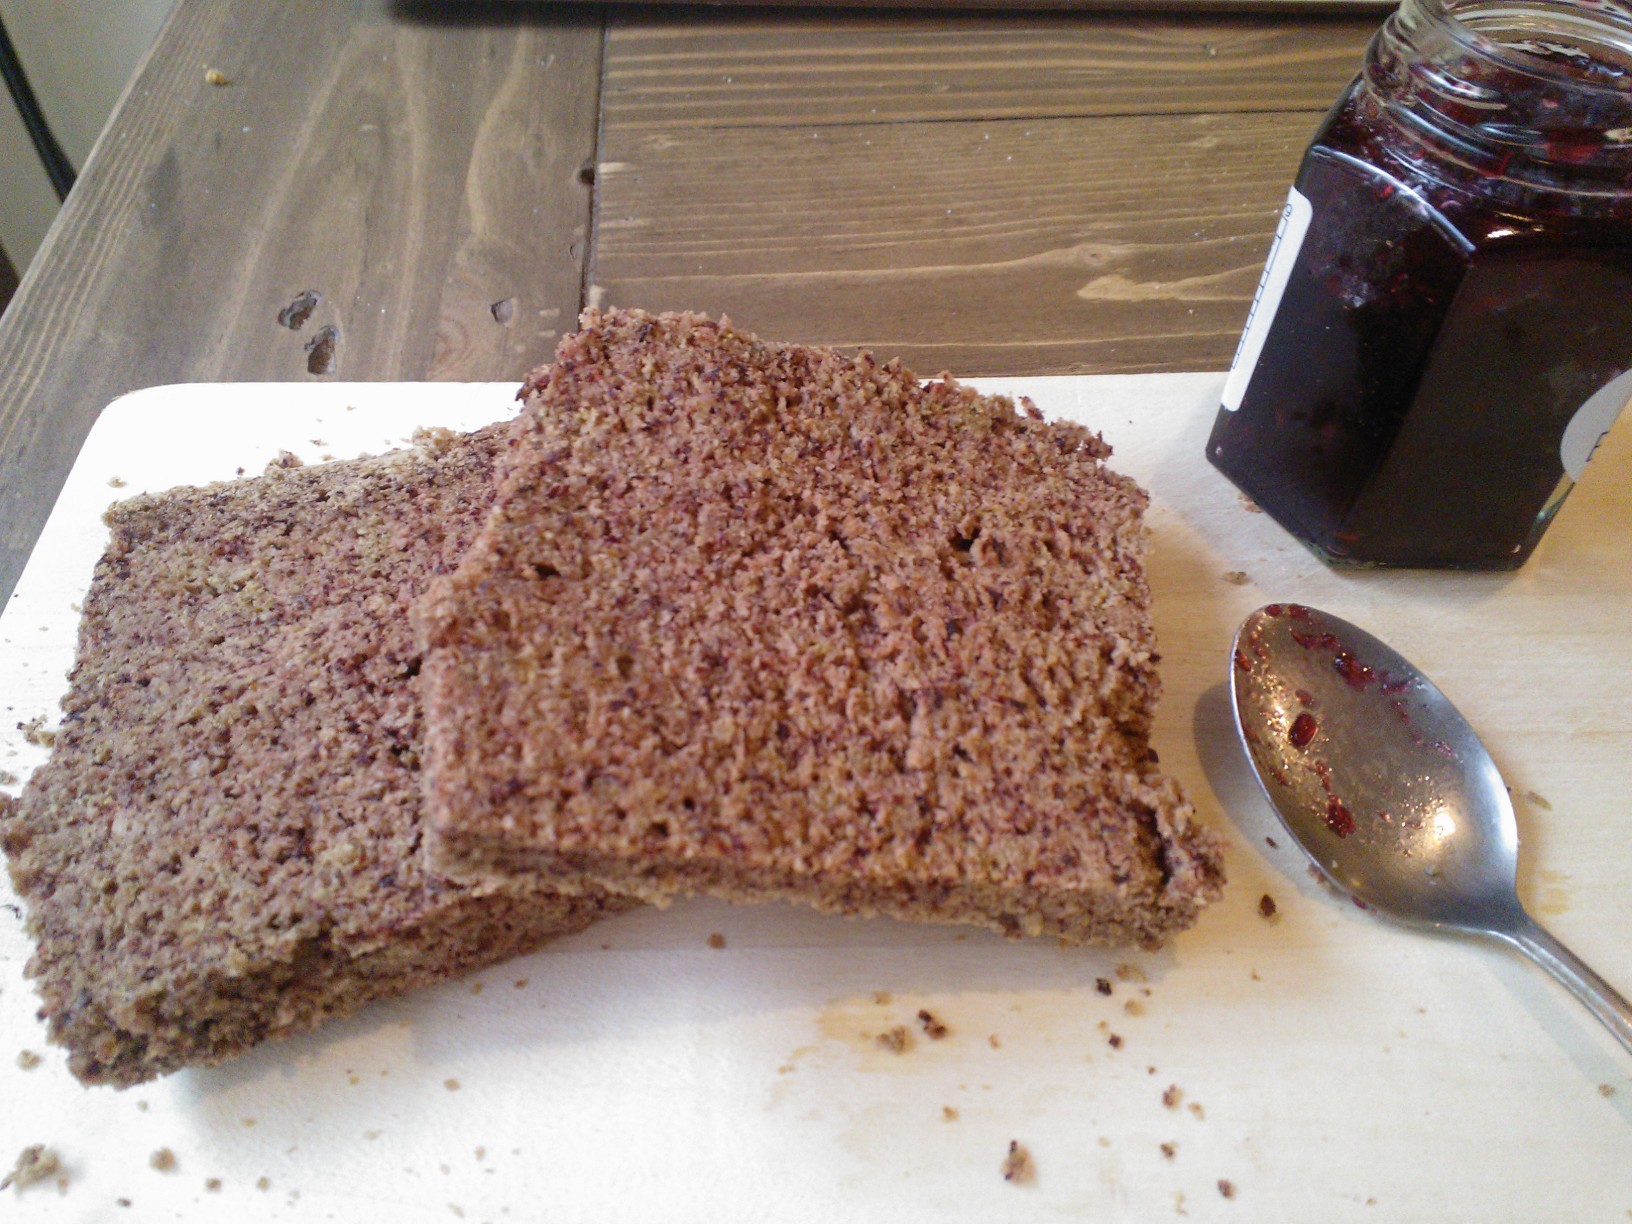
The solution – chia seeds! The “chia gel” made of chia seeds with the triple amount of water is a perfect (and cost-effective) way to replace whole eggs. It also means you can meet your vegan friends and enjoy some nice bread together.
While in theory, you can always replace egg with chia gel, it works especially well in this recipe. The nutty flavours of besan flour and buckwheat flour complement the chia seeds well. This bread is perfect as an accompaniment for light savoury dishes such as soups and salads, and it is also amazingly good on its own or dipped in olive oil.
The best thing about this bread is that it is easy as, and in just a little more than an hour (the majority of which spent on waiting) you can enjoy delicious bread!
Makes one loaf
1 pint (473ml) filted water 2 tbsp extra virgin olive oil 2 tbsp organic apple cider vinegar Chia gel, made of 3 heaped tbsp chia seeds, dissolved in nine tbsp filtered water 125g besan flour 125g arrowroot 125g potato starch 100g brown rice flour 50g buckwheat flour 3 tsp sea salt 1 tbsp raw sugar 1 tbsp dried yeast
Preheat oven to 180 °C. Mix together the wet ingredients in one bowl, and the dry ingredients in another. Mix the wet to the dry ingredients and mix for 2 minutes on low.
Pour the dough in a prepared loaf tin. Cover with a clean cloth and let stand in a warm place for half an hour, and then bake for another half hour: Place on the medium rack and place an empty baking dish with icecubes on the lower rack (this step is not necessary but helps to achieve a crust). Quickly close the oven door and bake for 30-45 minutes or until the bread sounds hollow when knocking on it (this will depend on your oven, the time of year, temperature, humidity, and even the altitude of your home!).
If you thought fast food was unhealthy, think again! Sure, gulping down trans-fat laden chicken wings while you are running for the train is wrong on many levels, but healthy eating doesn’t mean having to skip the hairdresser’s appointment for lack of time. In fact, there are lots of recipes for microwave breads out there. Yes, you read that quite right. There is breads that you can prepare in the microwave in less than two minutes! If this sounds too good to be true in your ears, have a go at my 2-minute Paleo crumpets! This recipe is adapted from Louise Hendon’s Microwave Paleo Bread, and I don’t only enjoy that I can bake delicious gluten free, grain free “bread” and still have time to go for my pamper package at the local day spa, but I also love its nutty taste and subtle flavour as well as that it’s so versatile!
Next to the fact that you can satisfy any cravings for carbs and bread you might have in less two minutes and with virtually no net carbs, these crumpets come jam-packed with fibre, vitamin E, and healthy fats! And let me repeat that once more: They are absolutely and truly paleo, meaning they are grain free, sugar free, dairy free, soy free, and, in general, worry free. Whether you follow a gluten free or low carb diets, these little babies will fit your lifestyle! Lacking the pernicious sweetness of traditional crumpets, these tasty round slices don’t only pair up nicely with ricotta and homemade jam, but I actually love them with butter and gluten free AussieMite or dunked into a hearty soup! There is really no reason not to try this great recipe. Whether as a filling breakfast option, lunch or dinner component or hearty afternoon snack, just whip up a handful ingredients and get your microwave going!
Makes 2 crumpets
30 g almond meal 10 g flax meal pinch of sea salt pinch of baking soda 20 g butter (or oil of choice) 1 egg
Mix all ingredients in a large mug until thoroughly combined. Pat down into mug and smooth surface. Microwave on high for one and a half minutes. The crumpet should easily come out of the mug. Cut into desired thickness and enjoy with favourite topping whilst still warm.
I think we all agree that the ultimate achievement for any gluten free baker is gluten free bread. GOOD gluten free bread. Unlike gluten free biscuits, which – albeit unhealthy- are widely available and reasonably tasty, a delicious gluten free bread is something you will not find in any supermarket, well-stocked as it may be. Finding a HEALTHY gluten free bread is even more of a challenge.
After my attempts at gluten free and yeast free bread (here, here, and here), I decided it was time to have a go at “proper” bread, which also contains yeast. As stated before, I am not a fan of yeast and it might cause issues in some gluten-free folks, but a bread with yeast in is definitely a different animal than yeast-free bread, and I figured that the few times per year I have bread, a bit of yeast won’t kill me.
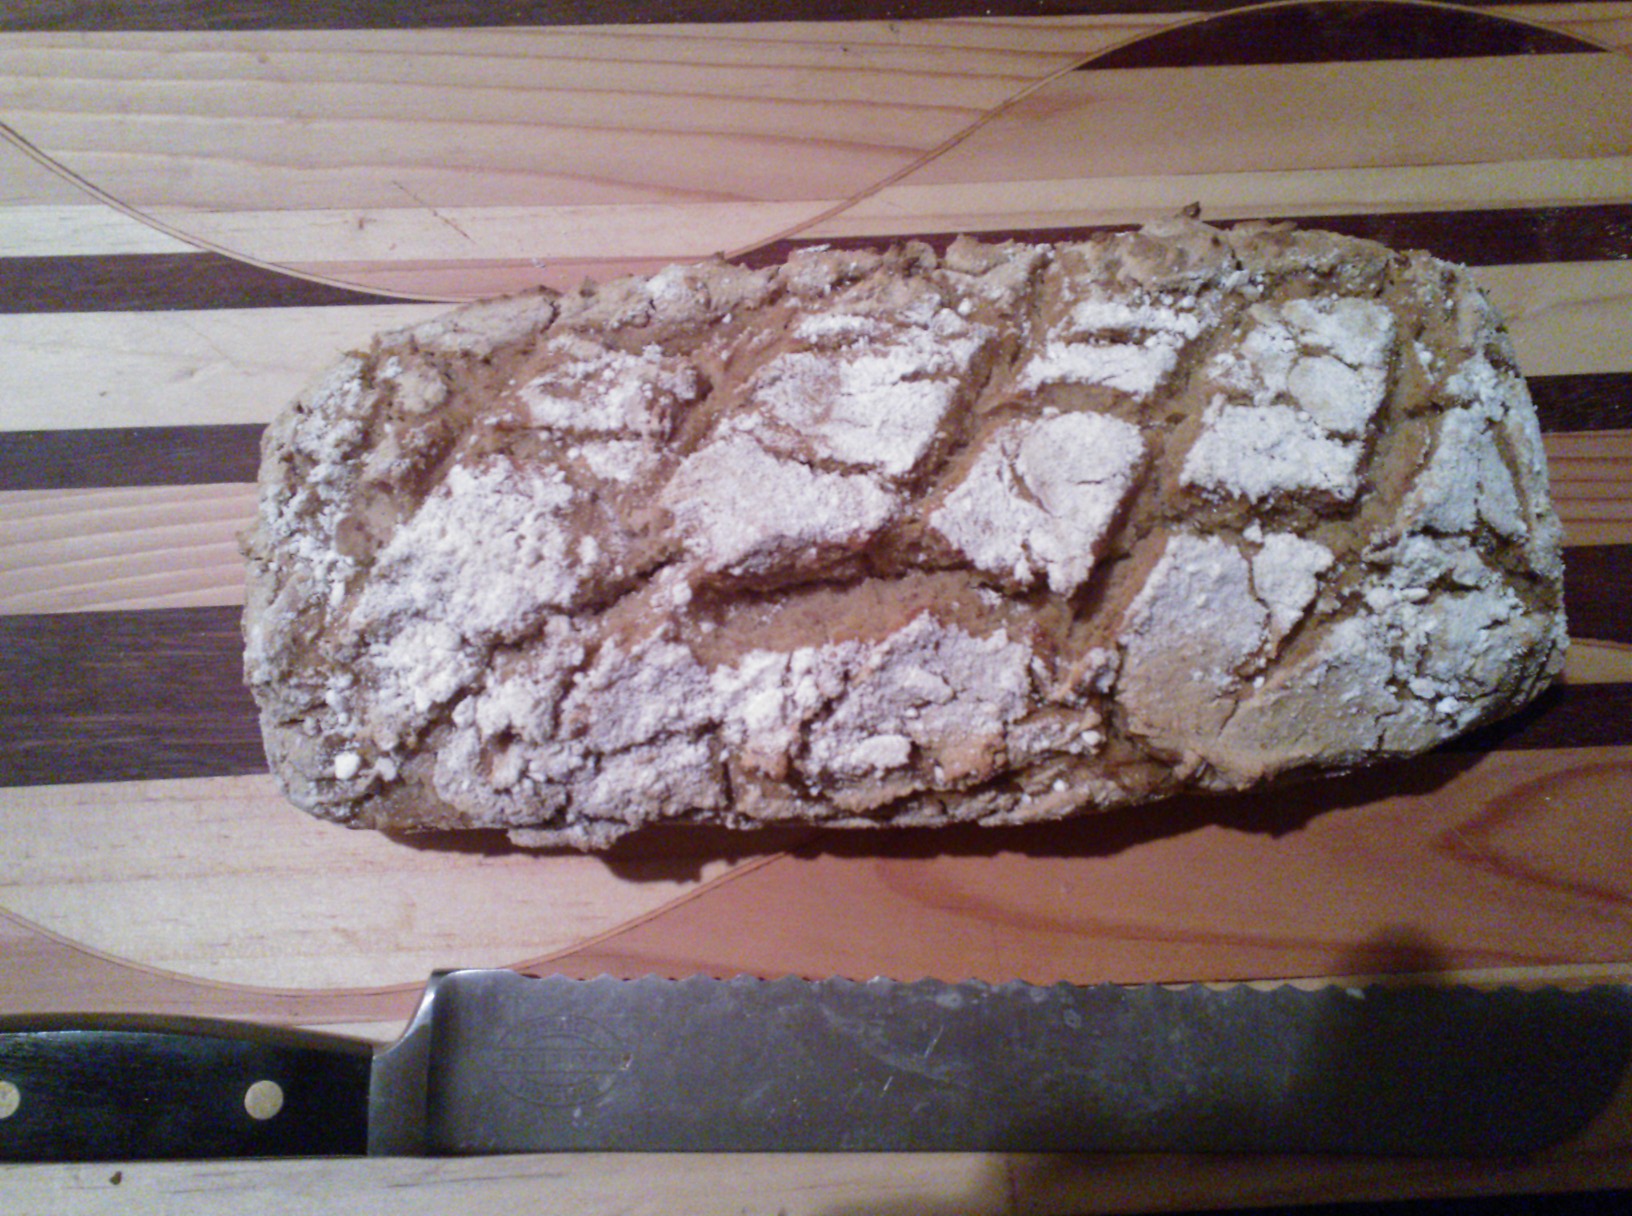
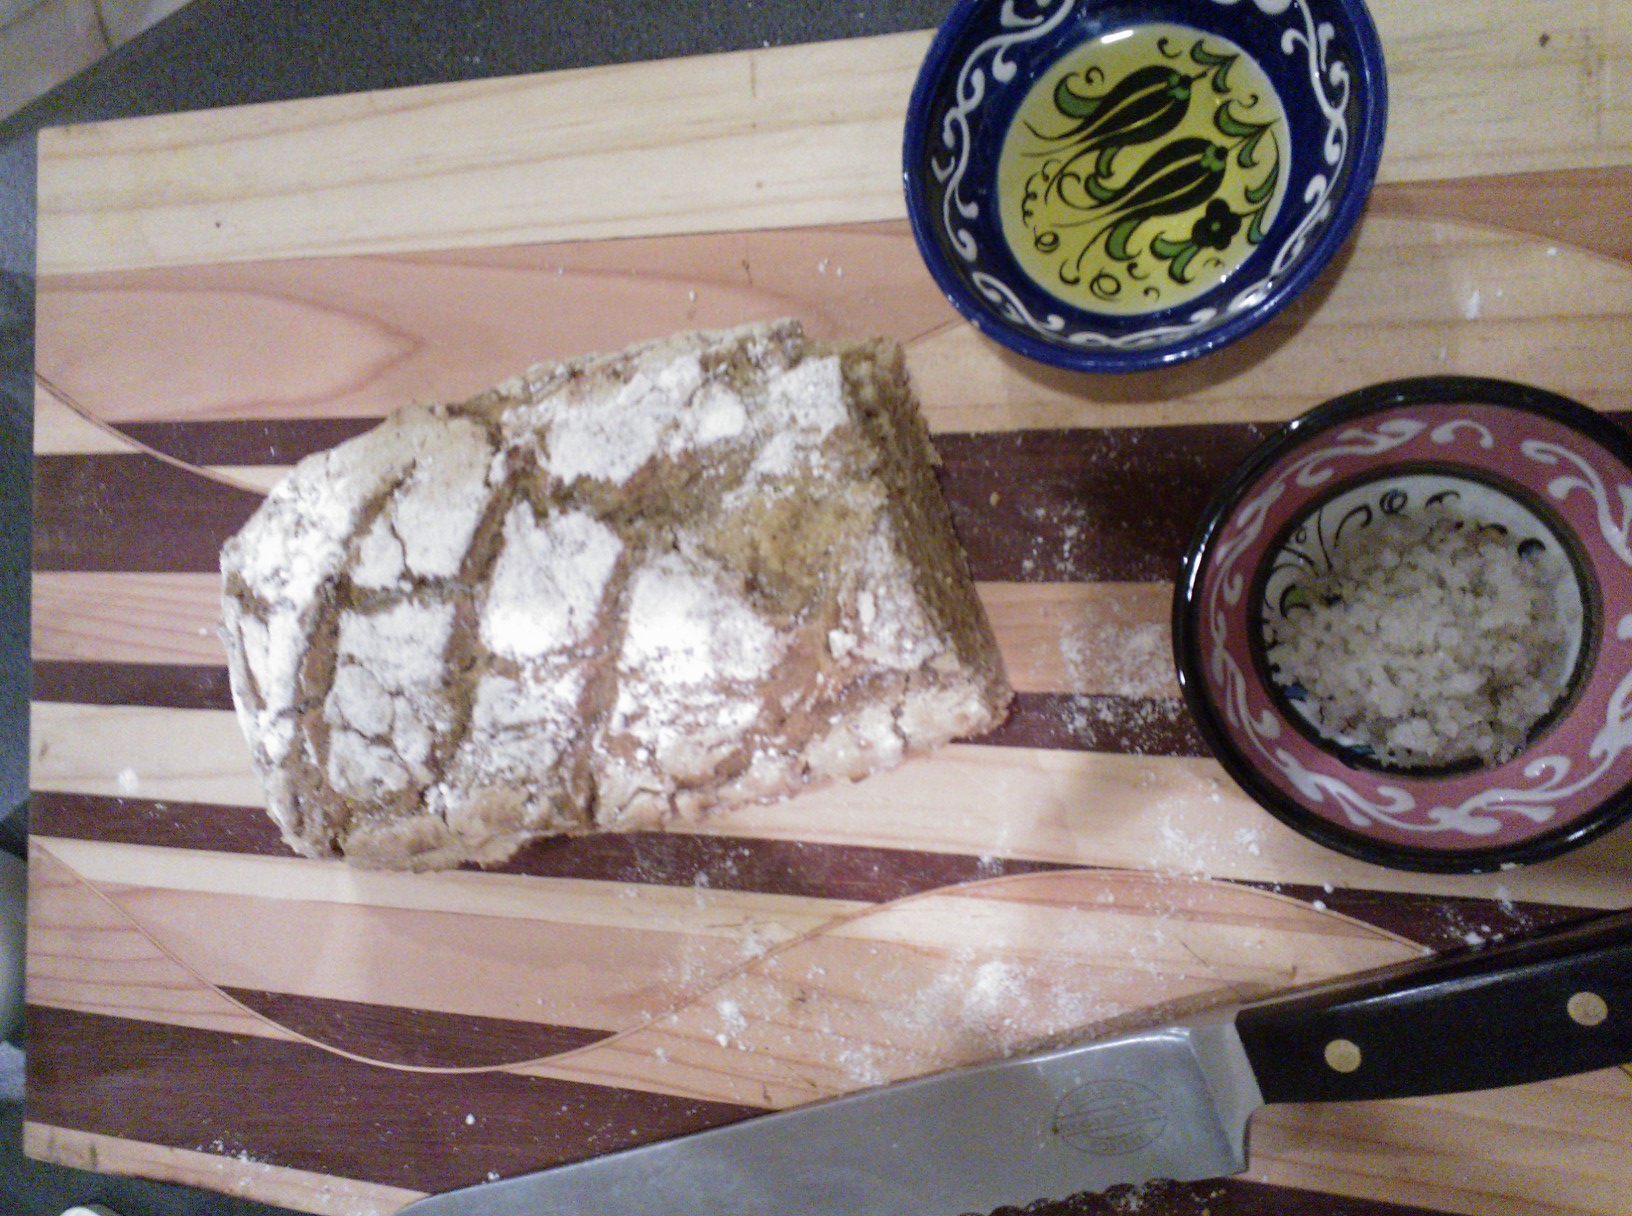
This bread, according to my hubby my “best one so far”, is roughly based on a recipe for crusty boule I found in Jeff Hertzberg and Zoe Francois‘ fabulous book, but I tweaked it quite a bit based on my own research about gluten free flours. I replaced the egg with flax to make a vegan version. I added fresh rosemary from the garden for a nice Mediterranean flavour that would go well with olive oil and sea salt, and walnuts for a nice crunch. The result is an insanely delicious bread.
I could write a novel about this bread, but this would lead too far, I think. Let me just tell you that for now, I am very proud of my achievement to bake a really delicious bread with a crust like I haven’t had anywhere outside Germany – something you won’t get from supermarket bread. A bread that a non-gluten free person would happily eat. A bread that consists of roughly 50 % wholegrains – another thing you won’t find in supermarkets!
Note that you need to follow my instructions closely and use the exact amounts (weigh them) as making gluten free bread is quite a bit more finicky than gluten free cakes or biscuits. Please also note that your dough might behave differently depending on your home’s altitude, humidity etc. You might need to play around a bit.
Makes two 1-pound loaves
450 g gluten free flour (I used 200 g arrowroot starch, 150 g brown rice flour, 100 g sorghum flour) 1 flax egg (i.e. 1 level tbsp ground flax seed, mixed with 1 tbsp water) 1 tbsp honey, melted, or other sugar (DO NOT OMIT OR CHANGE THIS AMOUNT, or otherwise the yeast won’t do its job) 2 tbsp extra virgin olive oil 2 tsp dry yeast 250-300 ml water, lukewarm (use less in humid climate, more in arid climate) 2 tsp sea salt any add-ons (rosemary and walnuts in this case; feel free to add any others)
First, mix the dough. All ingredients have to be at least room temperature. You need to do the mixing in an electric stand mixer, not in a hand mixer! A hand mixer is not powerful enough to whip in enough air to get fluffy bread, and you end up with dense and gummy bread, and we don’t want that. So use a stand mixer or large food processor. Mix the flours, yeast and salt first. Whip oil, honey, water and flax with a blender in a separate bowl and set aside. It is important that you use an electric hand mixer for the wet ingredients to whip air in them! Do not use a common whisk. Use less water first and only up the amount slightly if the bread seems too dry. You can always add more but not take away what’s already in! Too much moisture will cause your bread to become heavy and dense. While processing the dry ingredients, add one third of the wet ingredients through the feeder of the processor, then another third, and then another, blending after each addition. To avoid over-processing, add any add-ons such as herbs and nuts together with the last third of the oil-water-mixture. Stir just until smooth.
Now, give the bread a nice shape. Unlike gluten-full bread, we don’t rise the dough, then shape it, then rise it again, but only let it rise once, and shape it before that. Remember to go very easy on the dough as to not destroy the air bubbles! Do not knead the dough! I know you always walk past the pizzeria and see the guy torturing his dough, but we are talking gluten free here – and gluten free dough is a little bit different! After giving the bread a nice shape, let it rest on a warm counter covered with plastic wrap or a clean tea towel for 3,5 hours. You can now use your dough or store it in the fridge or up to a week! If taking out chilled, let it warm up before baking for 90 minutes.
30 minutes before baking, preheat your oven to 240 °C and slide a Dutch oven in it to heat up. After 30 minutes, serrate the loaf with a big knife, cautiously take out the Dutch oven and cautiously (!) place the loaf inside. Put the lid on the Dutch oven and place in the oven.
Bake for 20 minutes. Then turn the heat down to 230 ° C, lift the lid off the Dutch oven, take a tray and fill it with icecubes, and place beneath the Dutch oven. Quickly shut the oven door and bake for another 15 minutes. The steam caused by the ice will make the nice crust!
After 15 minutes, take out the Dutch oven and with a dairy or candy thermometer, check the temperature inside the bread, which should be between 93 and 98 ° C. If this is not the case, bake for a few minutes more, even if the top looks well done. In this case, cover the bread with foil to protect the crust from getting too burnt. As soon as the bread has reached this temperature, turn off the oven and let the bread cool completely. This is very important, as you will end up with a gummy centre if you attempt to cut the bread beforehand.
There you have it. Gluten Free Bread. The Holy Grail.
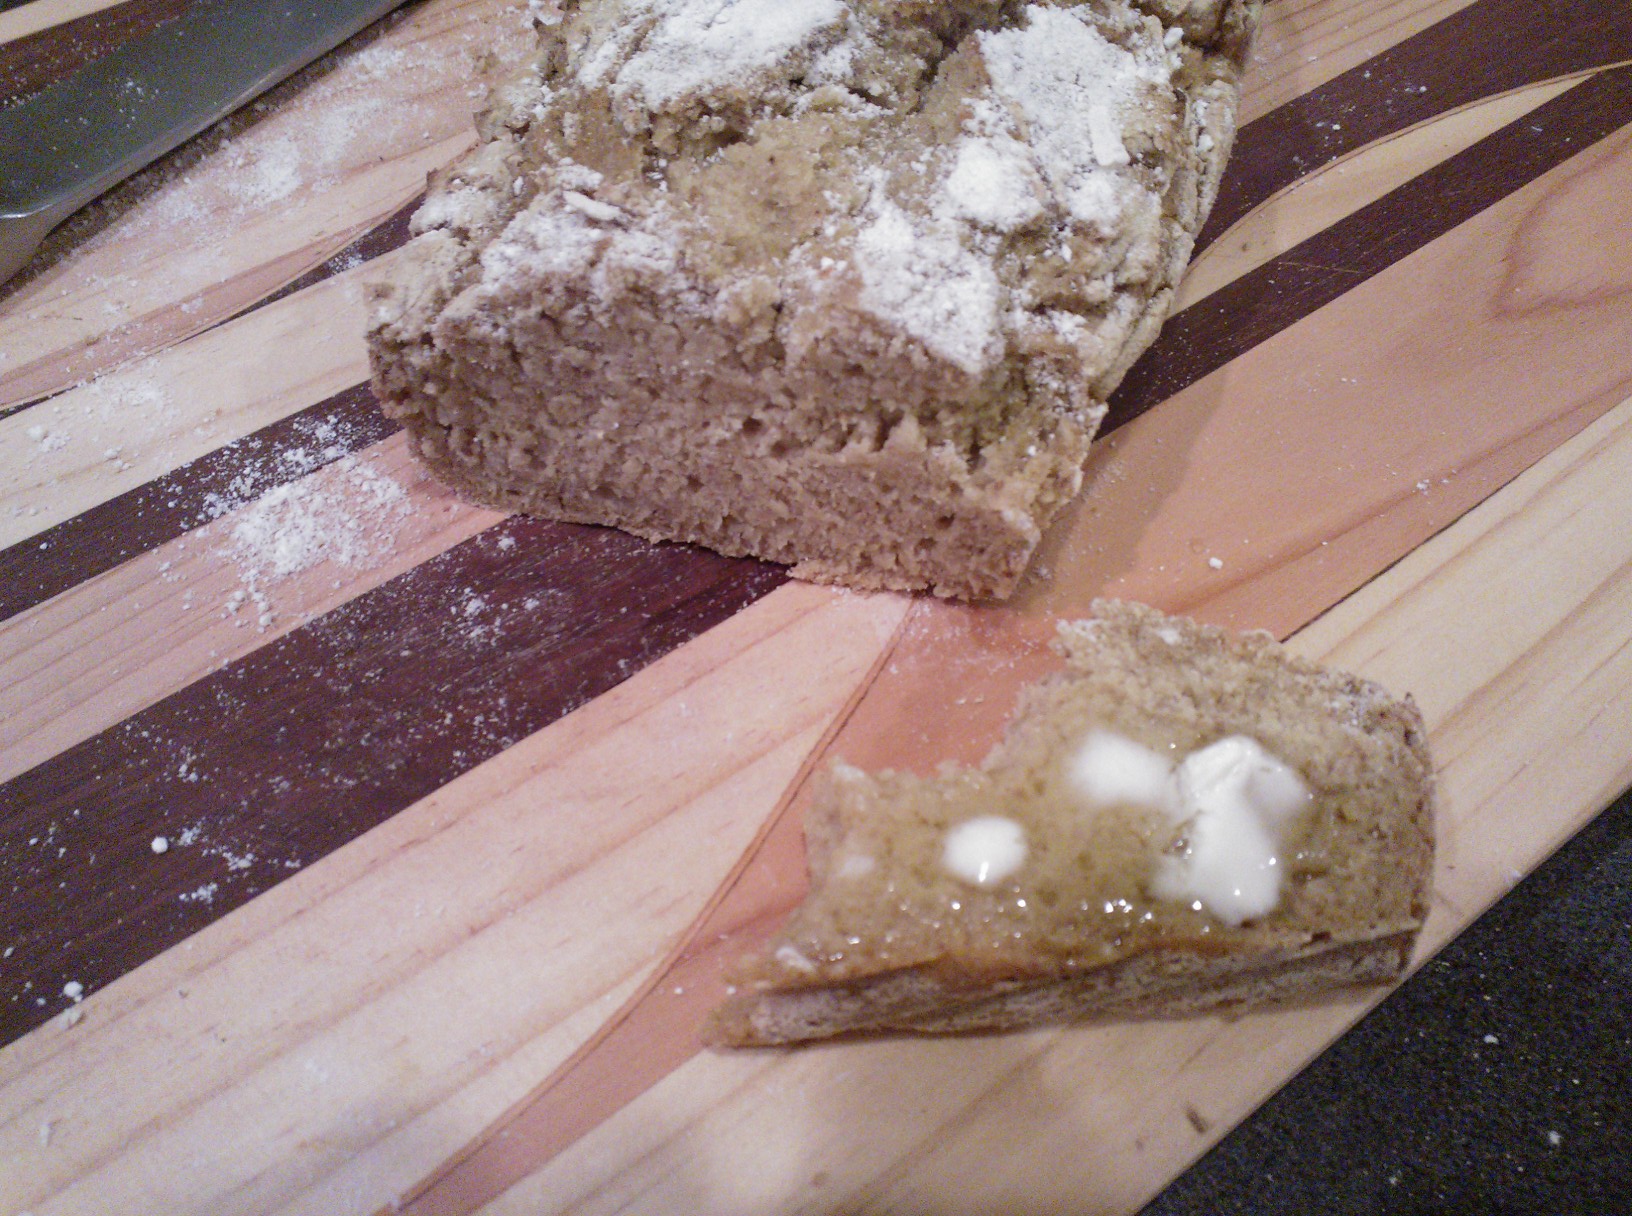
Due to my newly awakened love for homemade jams and nut butters, another gluten free bread was beckoning. I adapted this one from Elana Amsterdam‘s Bread 2.0, but I replaced the eggs with flax to make it truly vegan. I like eggs scrambled or poached on my breakfast plate, but I don’t want them in my bread! This bread is thus very high in fibre and therefore very satisfying – together with the high protein content from the almond and flax, it is ideal to keep you satisfied for a long time. That’s why I call it a breakfast bread – although it’s delicious any time of the day, it just gives you the power you need to perform until lunchtime!
The bread is soft and fluffy in a good way – not the “Aussie sliced sandwich bread style” type of soft. Its nutty aroma and texture which is faintly reminiscent of banana bread (only that there is no banana in it…duh) also makes it a healthy and satisfying afternoon snack, which is sure to keep the 3-4 PM slump at bay. It is very low carb which should be enough to convince even the die-hardest bread haters. This bread is only very lightly sweet; however, I prefer it with sweet spreads or nut butters rather than savoury spreads. Your choice!
Makes 1 small loaf
150 g almond meal 75 g arrowroot starch 25 g ground flaxseed plus 40 g ground flaxseed dissolved in 4 tbsp filtered water (“flax egg”) 1 teaspoon honey 1 teaspoon apple cider vinegar ½ teaspoon baking soda generous pinch of sea salt
As usual, mix the dry ingredients (almond meal, arrowroot, 25 g ground flaxseed, soda, salt) in a large bowl and the wet ingredients (flax egg, honey, ACV) in another bowl. Add the wet ingredients to the dry ingredients and mix well (use a hand mixer or your food processor). Scoop into greased or non-stick 10×20 cm loaf pan and bake at 150 °C for 30 minutes. Let cool completely before serving. Store in a ziplock bag in the refrigerator for up to a week.
Gluten free bread sucks. Do you agree to this statement? I used to. No matter where in the world, and no matter whether from a breadmix, or a bakery – gluten free bread just sucked. And even if it tasted anywhere near something you would serve a human being, it was filled with crap. I know, I know what you are going to say – one doesn’t need bread, or any carbohydrates for that matter. There is absolutely nothing wrong with low-carb or paleo, ans, in fact, I believe many of the western world’s problems could be solved if people ate low(er) carb!
But, heck, I am German and married to an Italian – there is just no way I’m gonna give up bread forever, and even though I am gluten intolerant, there must be a way to make gluten free bread that doesn’t suck! Gluten free bread that doesn’t have a whole shelf of creepy ingredients in it. Gluten free bread that doesn’t have a dozen eggs in it (that’s not bread, that’s cake! And If I crave bread, I don’t want cake – sorry, Marie Antoinette!).
This was an experiment. One that turned out well. One that my (gluten eating) hubs couldn’t get enough of. One that reminded me very much of the texture of a good ol’ German sourdough – even though the taste is more in the tradition of the Irish soda bread. I didn’t have any dried yeast, so had to resort to soda. With an old trick I knew (putting a bowl of water in the oven), my bread got a lovely crust. And thanks to all-time favourite flax, this is egg free, but you won’t miss any eggs – the trick with the flax eggs worked! So this is not only gluten free, it is yeast free, gum free, egg free, and dairy free. And it doesn’t suck.
Gluten free? Check. Dairy free? Check. Yeast free? Check. Egg free? Check. Vegan? Check. Gum Free? Check. Soy free? Most naturally. Full of fibre and omega 3? Check. Sugar free? You have the option. Yummy? Check. Easy and quick to make? Check.
You can start now. You should have the ingredients. And it is really really easy. You don’t even need to preheat the oven – you really don’t!
Makes one loaf
150 g potato starch 100 g sorghum flour 50 g arrowroot 2 tbsp baking soda 2 tsp celtic sea salt 2 tsp sugar or honey 250 ml hot water (ca. 40 ° C) 3 tbsp ground flax seed, dissolved in 9 tbsp water (equals 3 flax eggs) 4 tbsp apple cider vinegar 1 tbsp olive oil
Mix the dry ingredients (potato starch, sorghum, arrowroot, soda, salt, sugar if using) in food processor with dough blade until one colour. Slowly add oil, flax eggs and honey, if using, with the blender running. Add vinegar and hot water and mix until you get a supple, uniform dough. There should not be any lumps in it whatsoever – it should be the smoothest thing ever. Turn off the processor, and with a silicon spatula, scoop dough into loaf pan. Sprinkle the loaf with sorghum or any other gluten free flour and notch several times with a sharp knife. Place on middle rack in an oven, and place another tray filled with water below the loaf pan. Turn the oven to 230 ° C and let bake for 35 minutes. Turn off the oven, and let the loaf cool on a wire rack.
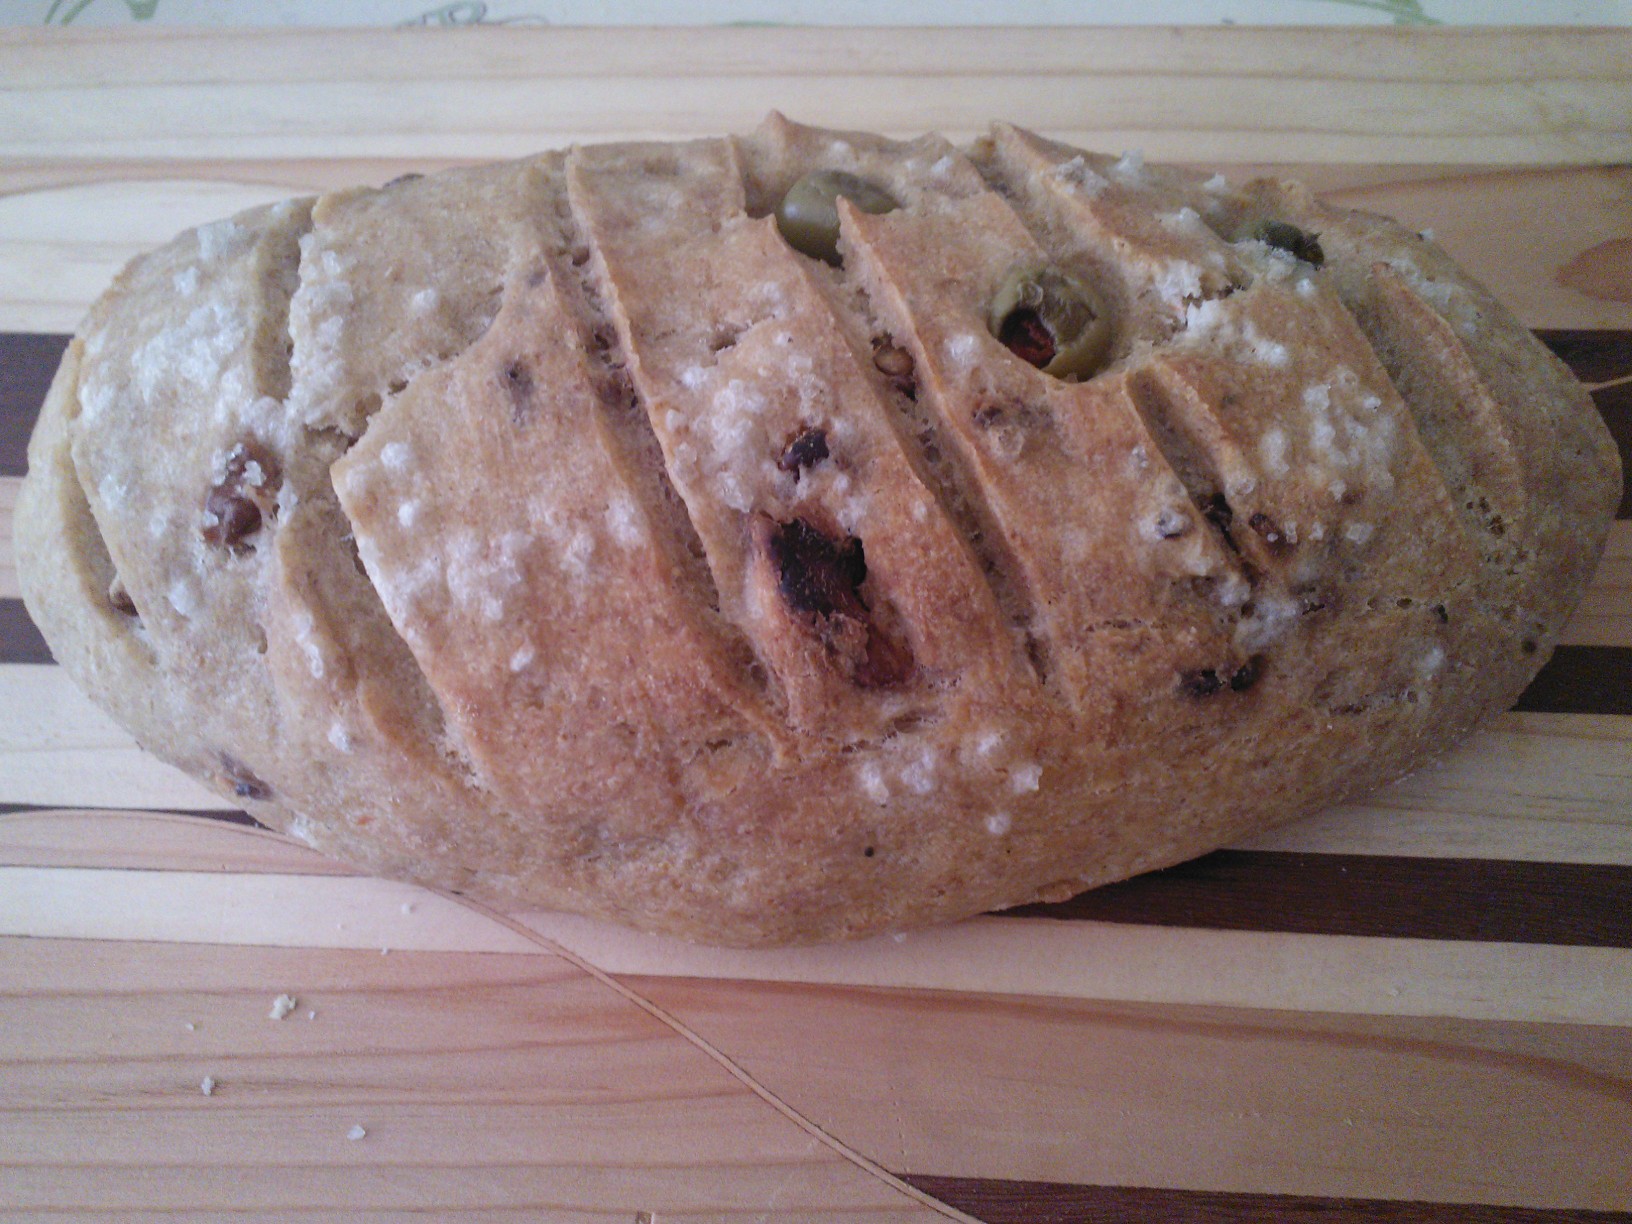
Delicious Gluten Free bread with Olive Oil and Sea Salt or…
Mediterranean Style Gluten Free and Yeast Free Bread
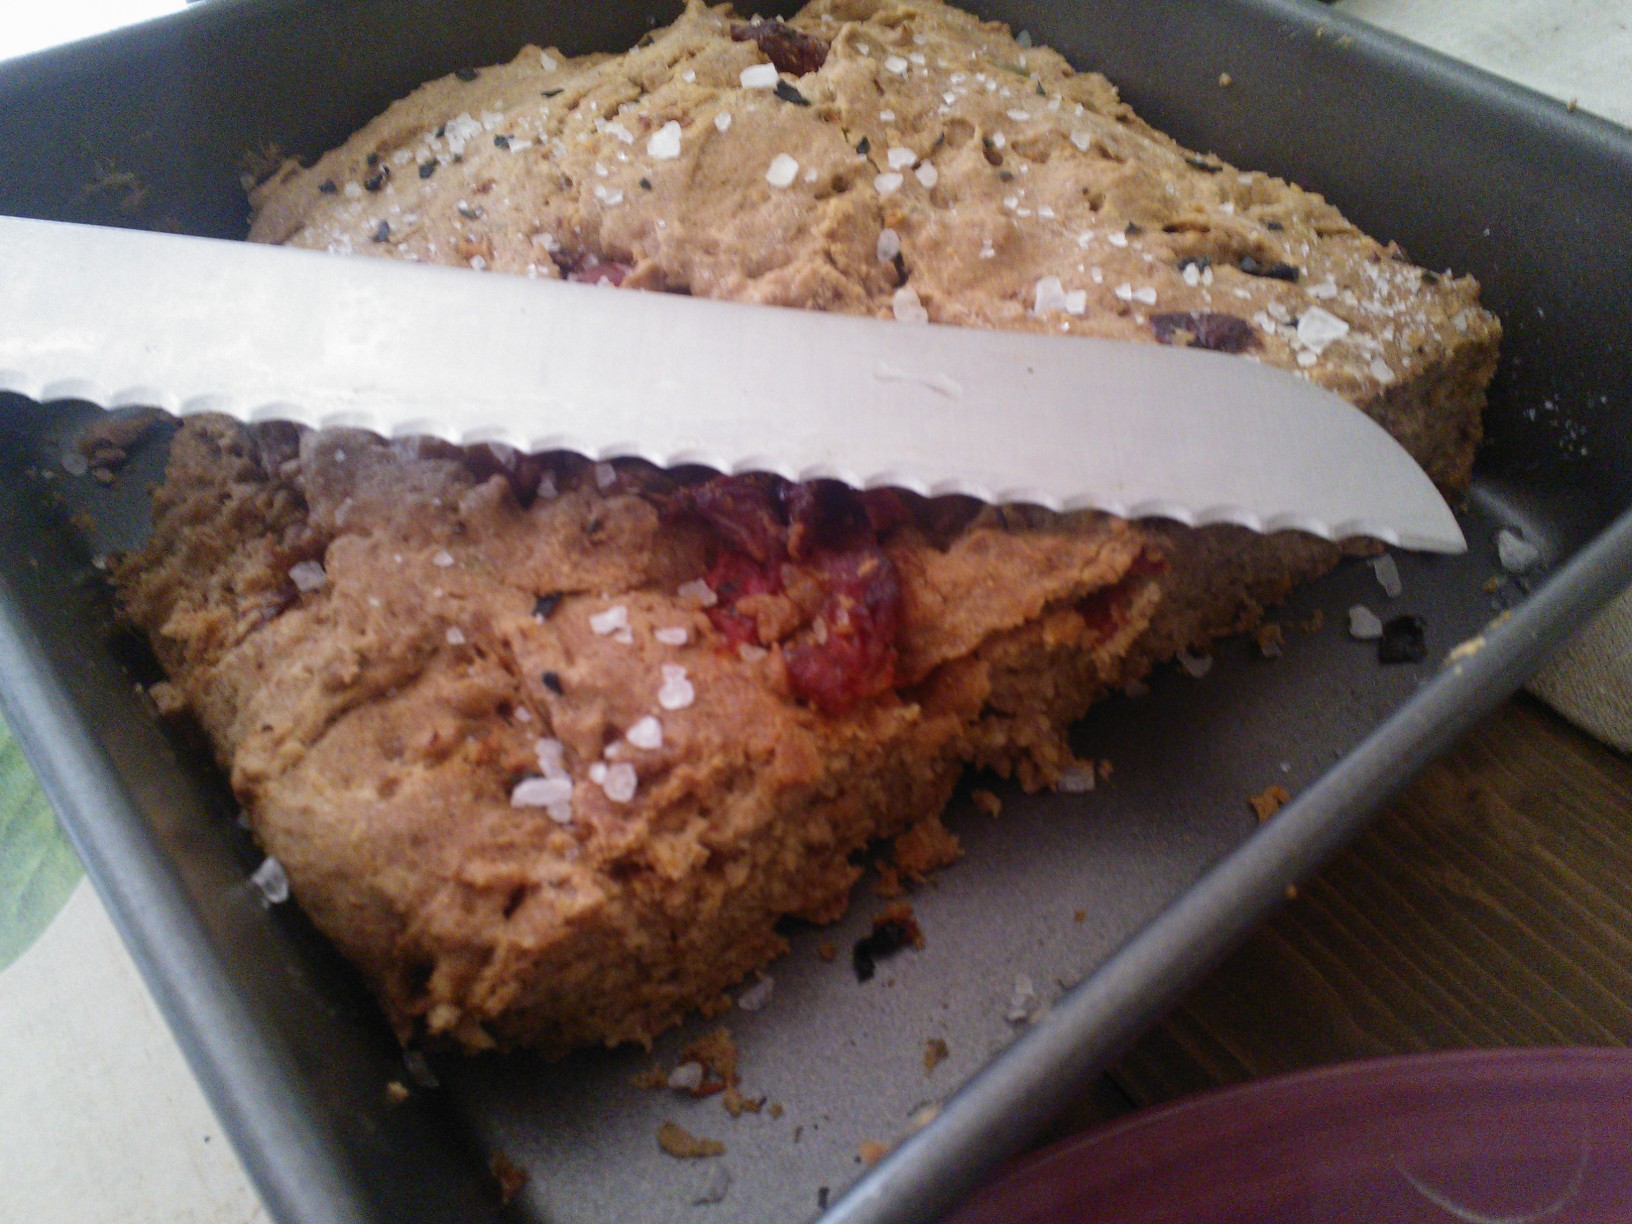
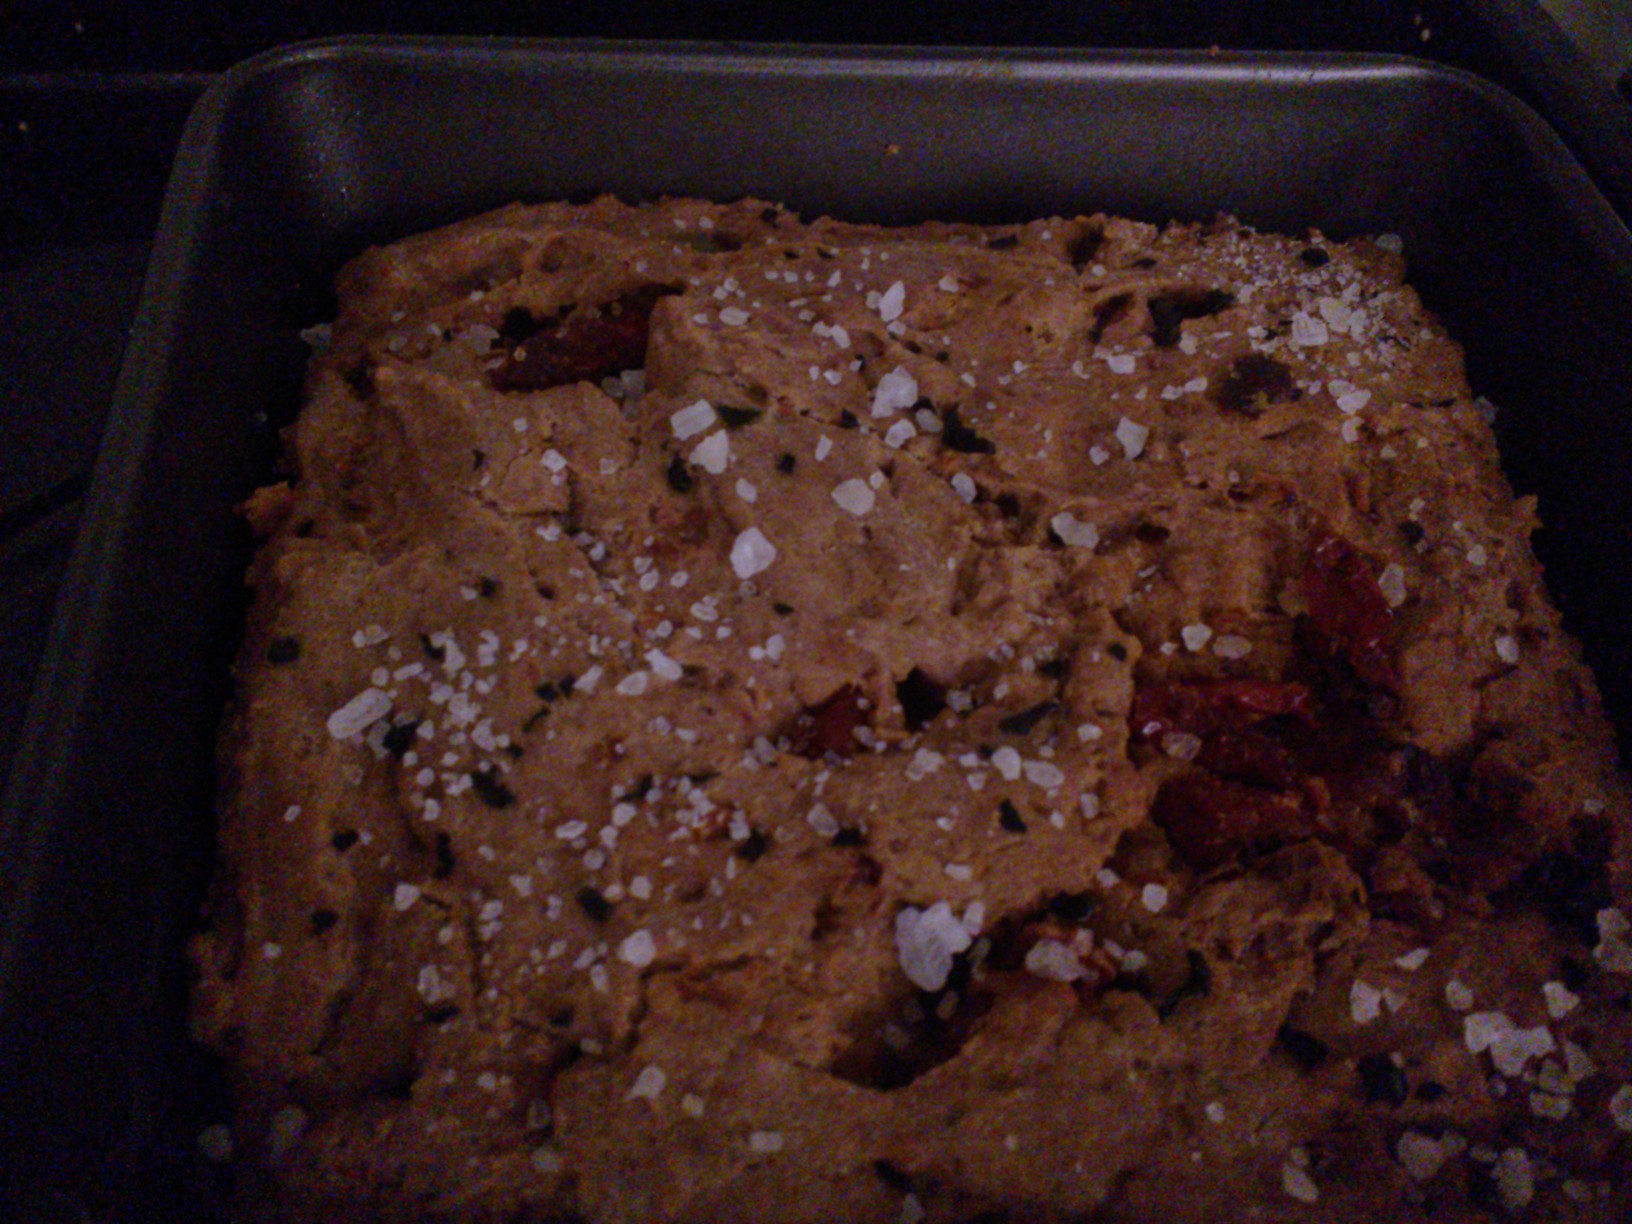
Today it happened. Today was the day I made the decision it was time to enter new gluten free territory. To try the object of desire of countless celiacs and gluten free folks. To make with my own two hands the thing that turns good olive oil and coarse sea salt into the most desirable, seductive ménage de trois, the loyal companion of a good merlot, the reliable foundation for freshly churned butter, the satisfying partner of a bowl of steamy, creamy soup: Bread. Gluten free bread.
I made gluten free bread! I still can’t believe my luck! I tried gluten free bread, and it worked! I can serve my half-Italian husband Italian-style bread to dip into oil and salt. To nibble straight of the loaf pan. To enjoy with a chunky piece of good, salted butter.
Gluten free bread.
No, not that gluten free bread you buy in the supermarket, no no! I mean – fantastic gluten free bread. Yummy. Delicious. Easy to make. And – yup – healthy. And satisfying. And it makes you happy. What? Yes.
You read right: Today I made a bread that is GLUTEN FREE AND YEAST FREE AND VEGAN. And is healthy. Let me tell you what you will get when you try my experiment:
-proteins from brown rice, buckwheat, millet, eggs, chickpea, flax for your muscles
-calcium from brown rice for your bones and teeth
-magnesium from brown rice, millet to calm your nerves
-fiber from brown rice, millet, chickpea, flax to promote digestion
-iron from brown rice, sundried tomatoes and chickpea to boost your power
-zinc from brown rice to fight infections
-niacin from millet and sun-dried tomatoes for hairs and nails and to lower cholesterol
-omega 3 from flax and chia for healthy heart and brain function
-healthy fat from olive oil and olives – see above
-antioxidants from millet and sundried tomatoes to protect you against cancer
-serotonin from millet to make you happy. 🙂
Great with olive oil, coarse sea salt and a dry Merlot
Yes, all that in less than 30 minutes! (hooray!)
Shall we?
For one 20×20 cm baking pan
100 g brown rice flour 50 g millet 50 g chickpea flour 50 g buckwheat flour 25 g flax 25 g arrowroot 1,5 tsp sea salt 1,5 tsp baking soda 1 tsp xanthan 3 tsp apple cider vinegar 2 tbsp chia seeds, dissolved in 6 tbsp water (“chia eggs”) 5 tbsp olive oil (use a good brand) 1 tsp maple syrup or agave approx. 120 ml or more warm water sundried tomatoes, olives (as much as you like) or anything else you’d like to put in! coarse sea salt to decorate
Preheat oven to 180° C. Use your food processor or any other standing blender. Whisk together all dry ingredients (flours, flax, salt, xanthan, soda, arrowroot) until well blended (one colour). Add the chia to the dry ingredients. Add vinegar, oil, and maple syrup and beat in food processor for a few seconds until incorporated. Pour warm water through your processor’s feeder until batter becomes smooth, firm and sticky (the texture is a bit like marshmallow) and homogenous. You might need to experiment with the amount of water (approx. 120-150 ml). With a wet spoon or spatula scoop into oiled pan. and bake for 20 to 25 minutes. Brush with olive oil, sprinkle with coarse sea salt and bake for another 5 minutes.
Easy, healthy, and delicious
Turn off the heat and let rest in the oven until lukewarm. Remove from pan and serve. Goes well with olive oil, dips, or dukkah.
Tip: Try herbs, garlic, roast onions, chili or walnuts for yummy alternatives to olives and tomatoes!