Clean Oatmeal & Raisin Cookies {vg, gf, nf, sf}

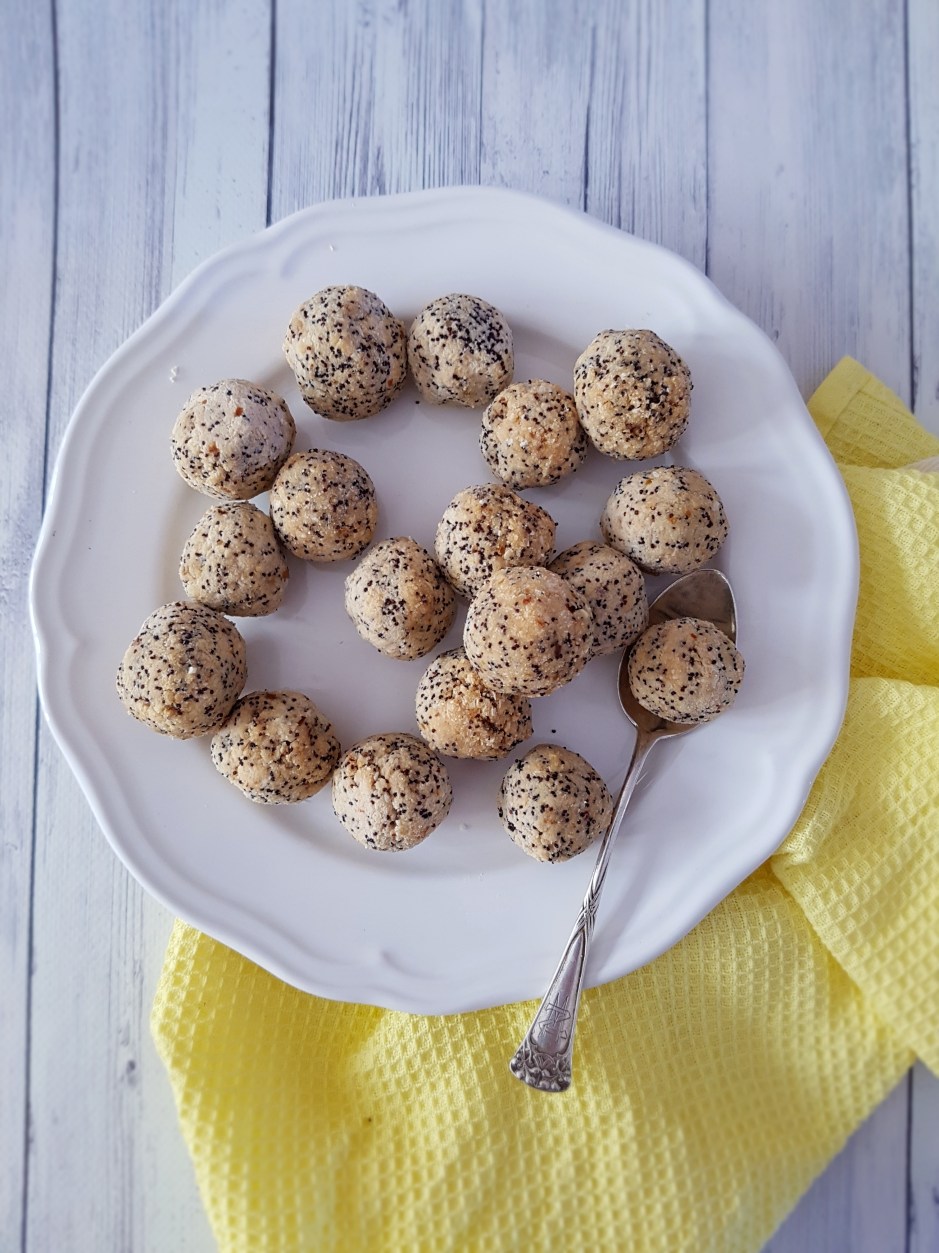
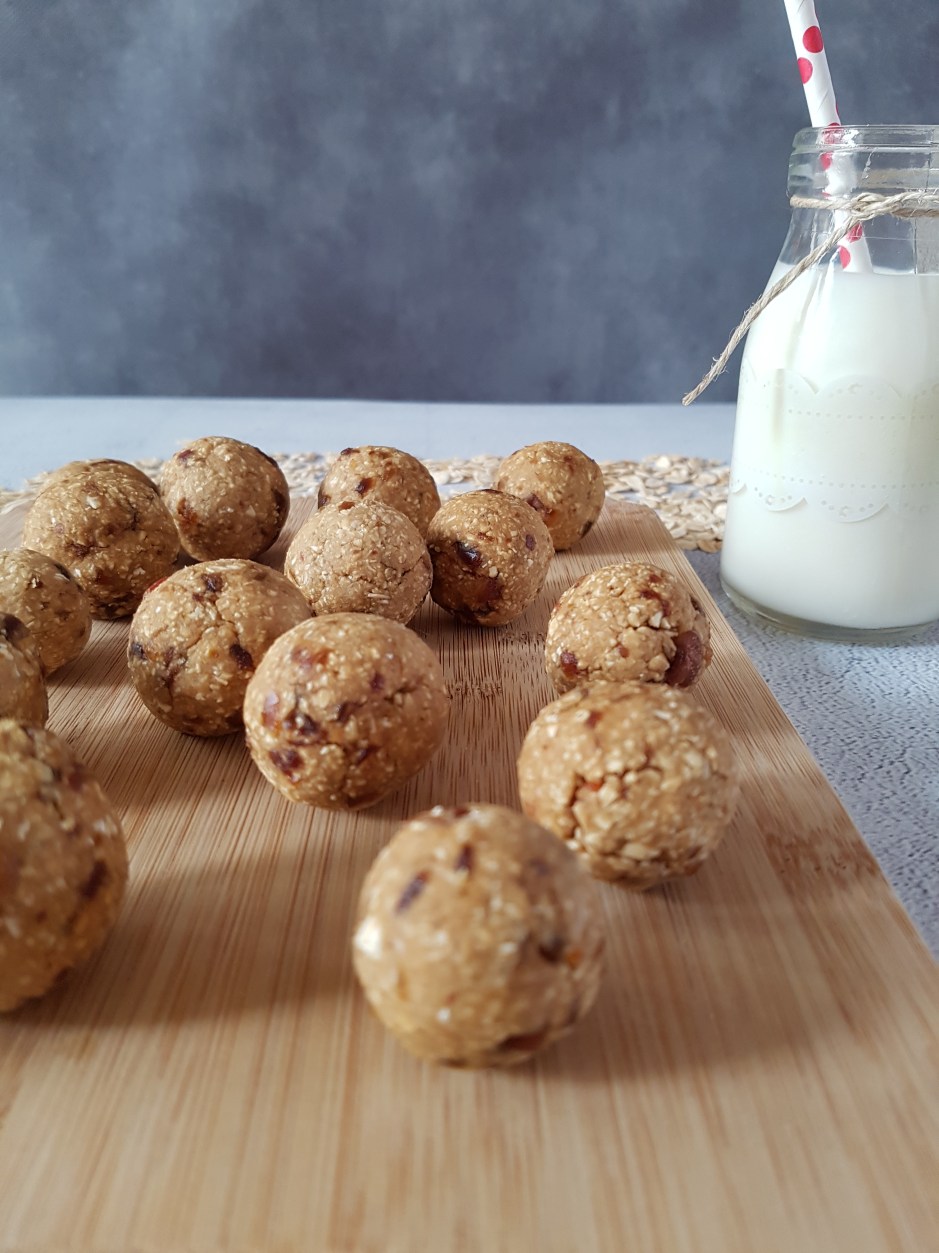
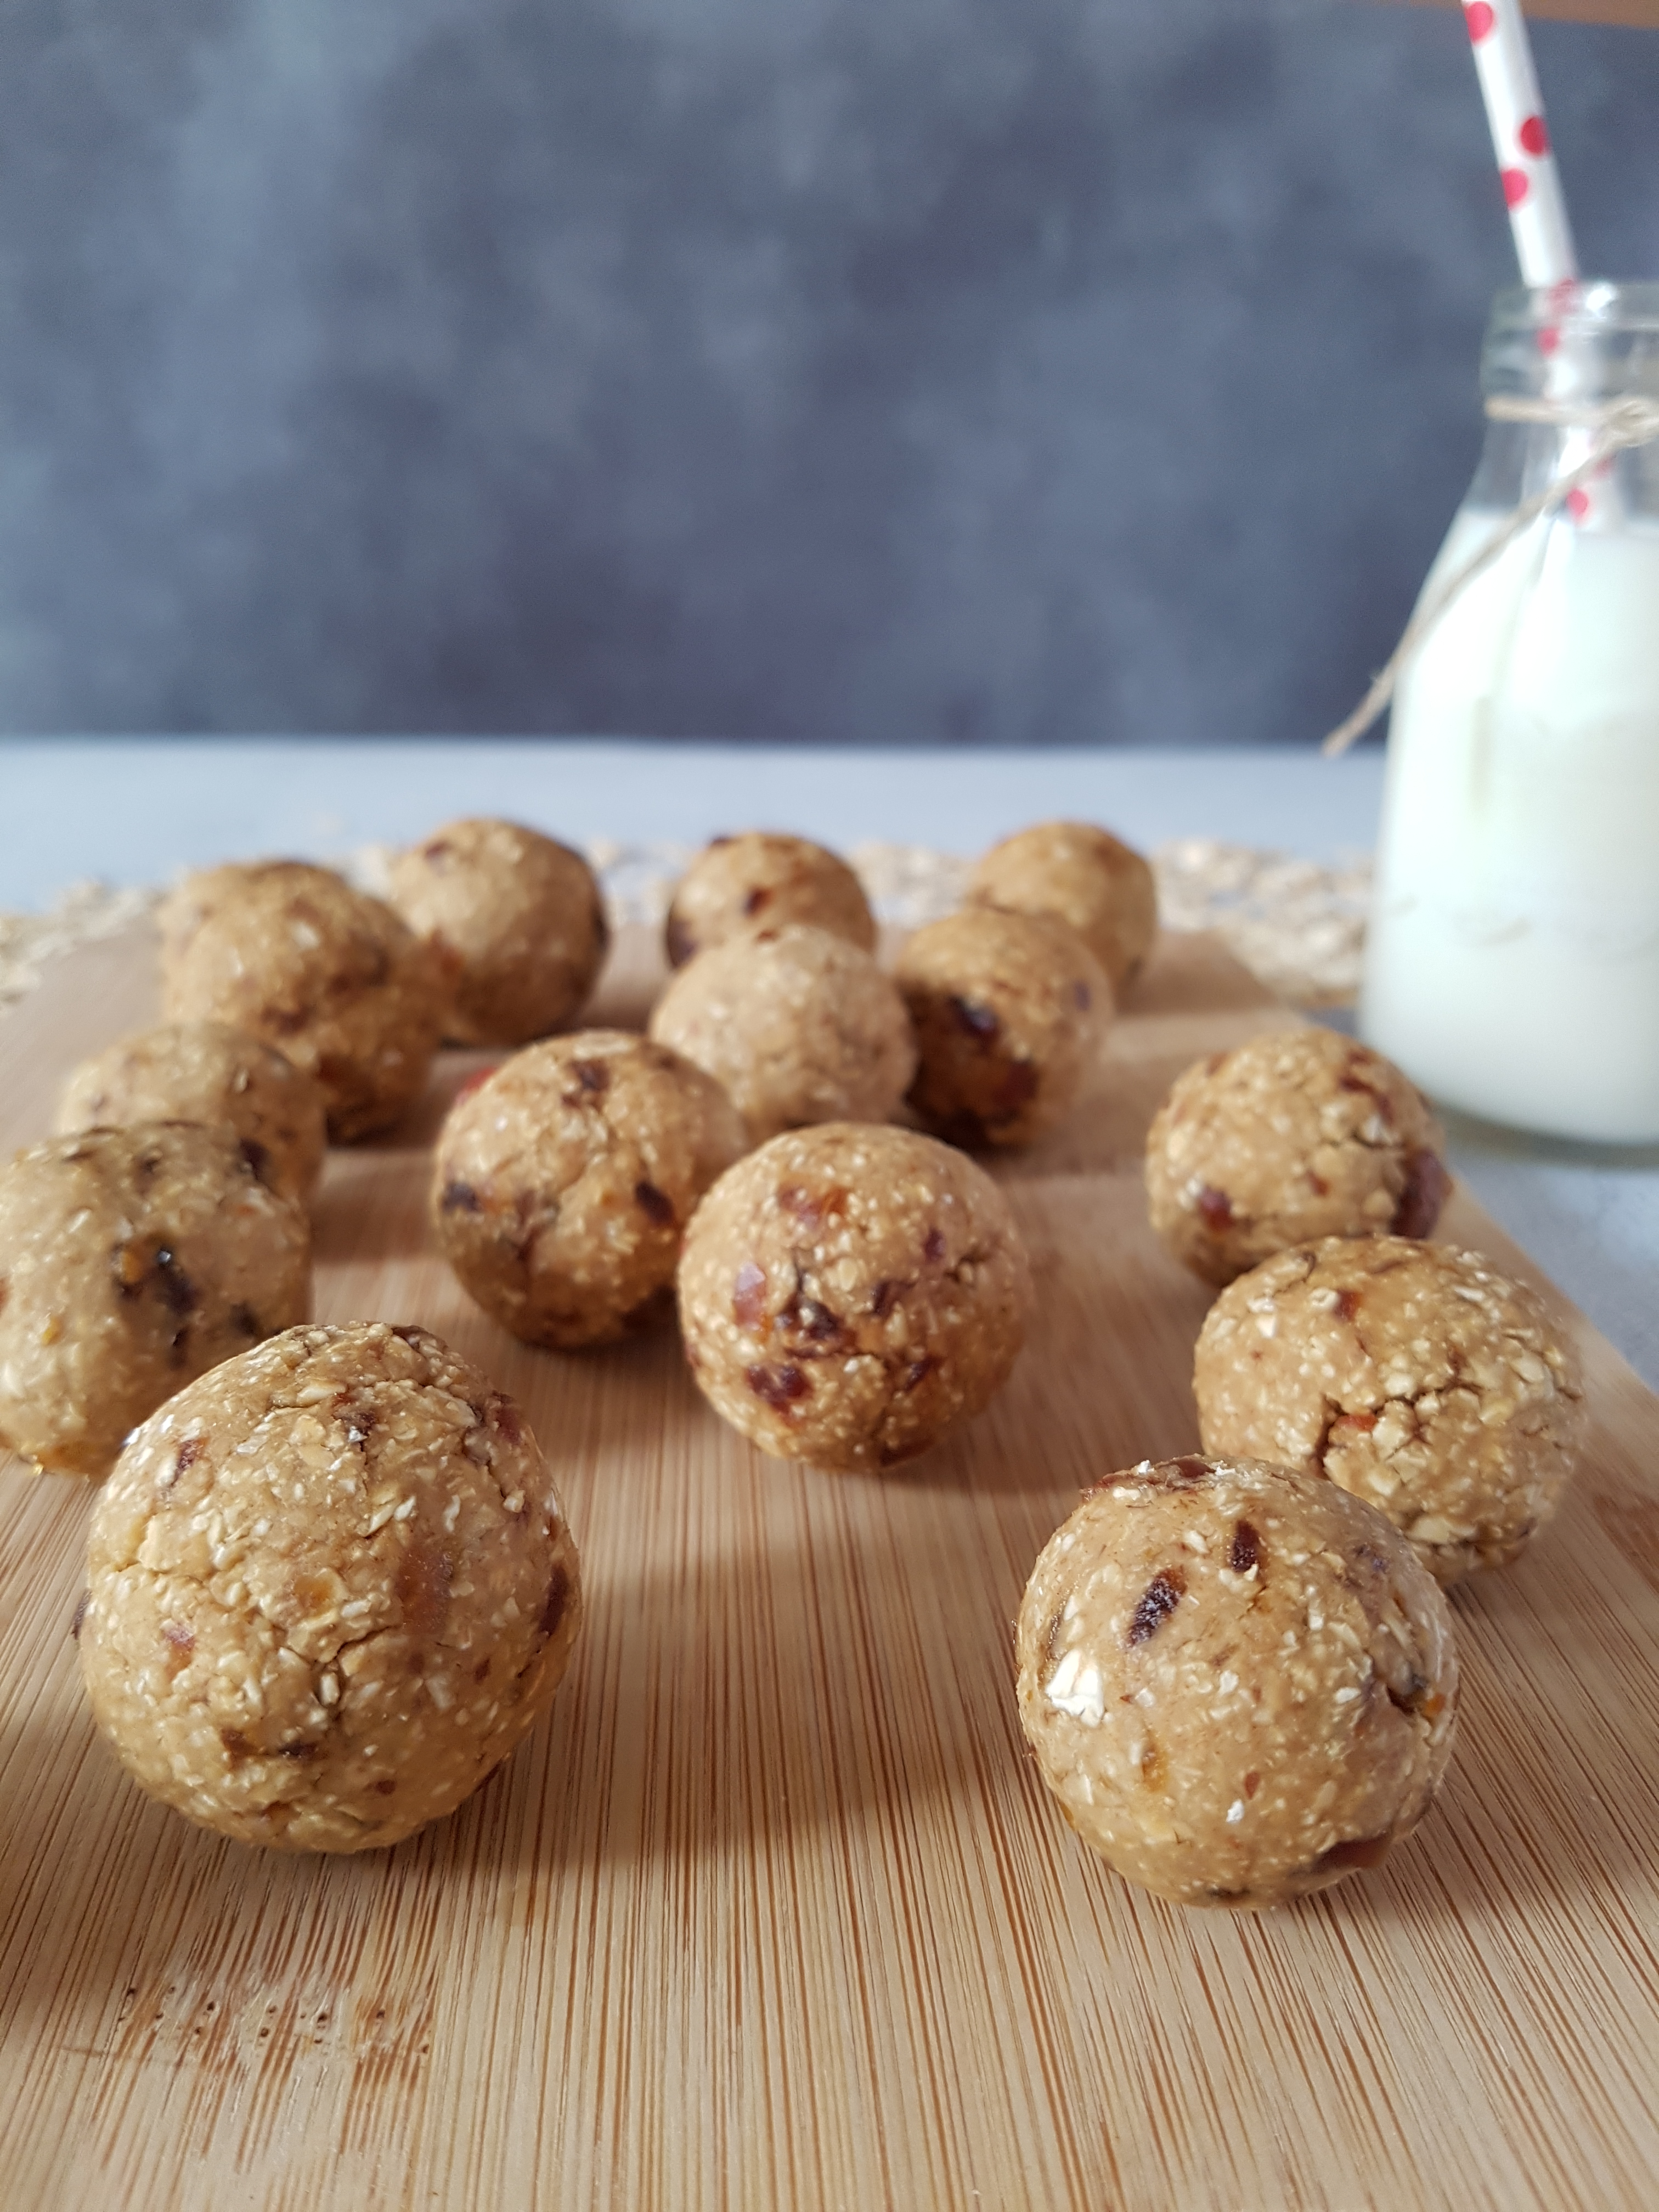
My toddler has a pronounced sweet tooth and it is almost impossible to walk her past the cookie and biscuit aisle unscathed. While Tim Tams, Anzacs and co. might be an effective temporary solution to placate a whingeing 2-year old and prevent a mortifying tantrum, they aren’t exactly what the doctor ordered. Needless to say, this doesn’t only apply to kids but to adults as well. Store-bought cookies and biscuits are loaded with processed ingredients, industrial oils and refined sugar. Moreover, white flour (and yes, this applies to “gluten free” items as well that are essentially all refined starch) is nutritionally deplete and its only benefit is the benefit for the manufacturer – by making you eat more than you want or need. Healthy cookies seem to be a contradiction in itself, but I am here to rescue you with my clean oatmeal & raisin cookies.

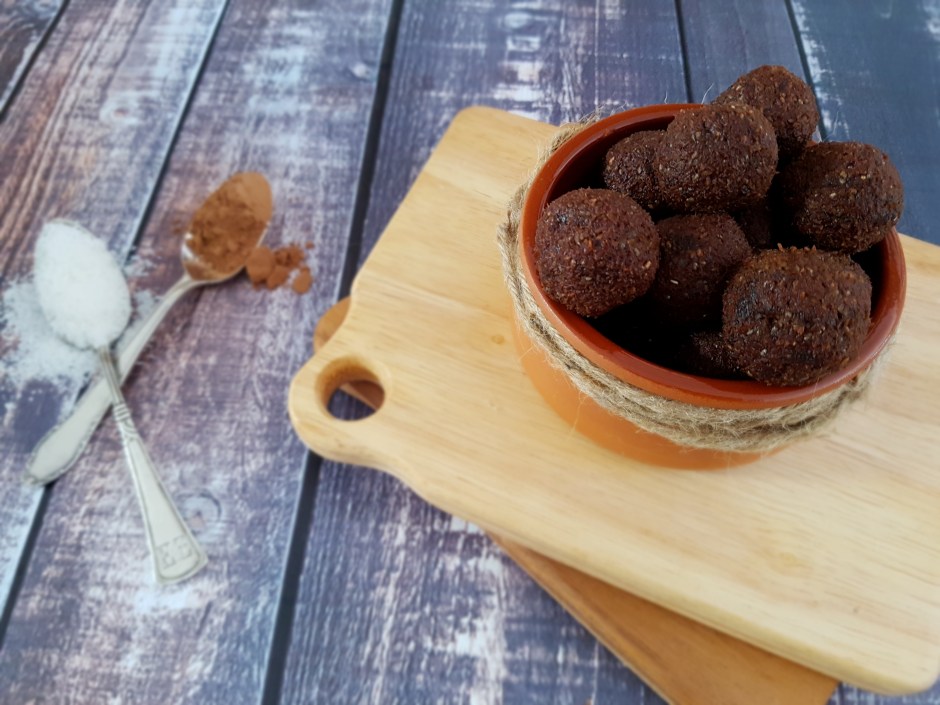
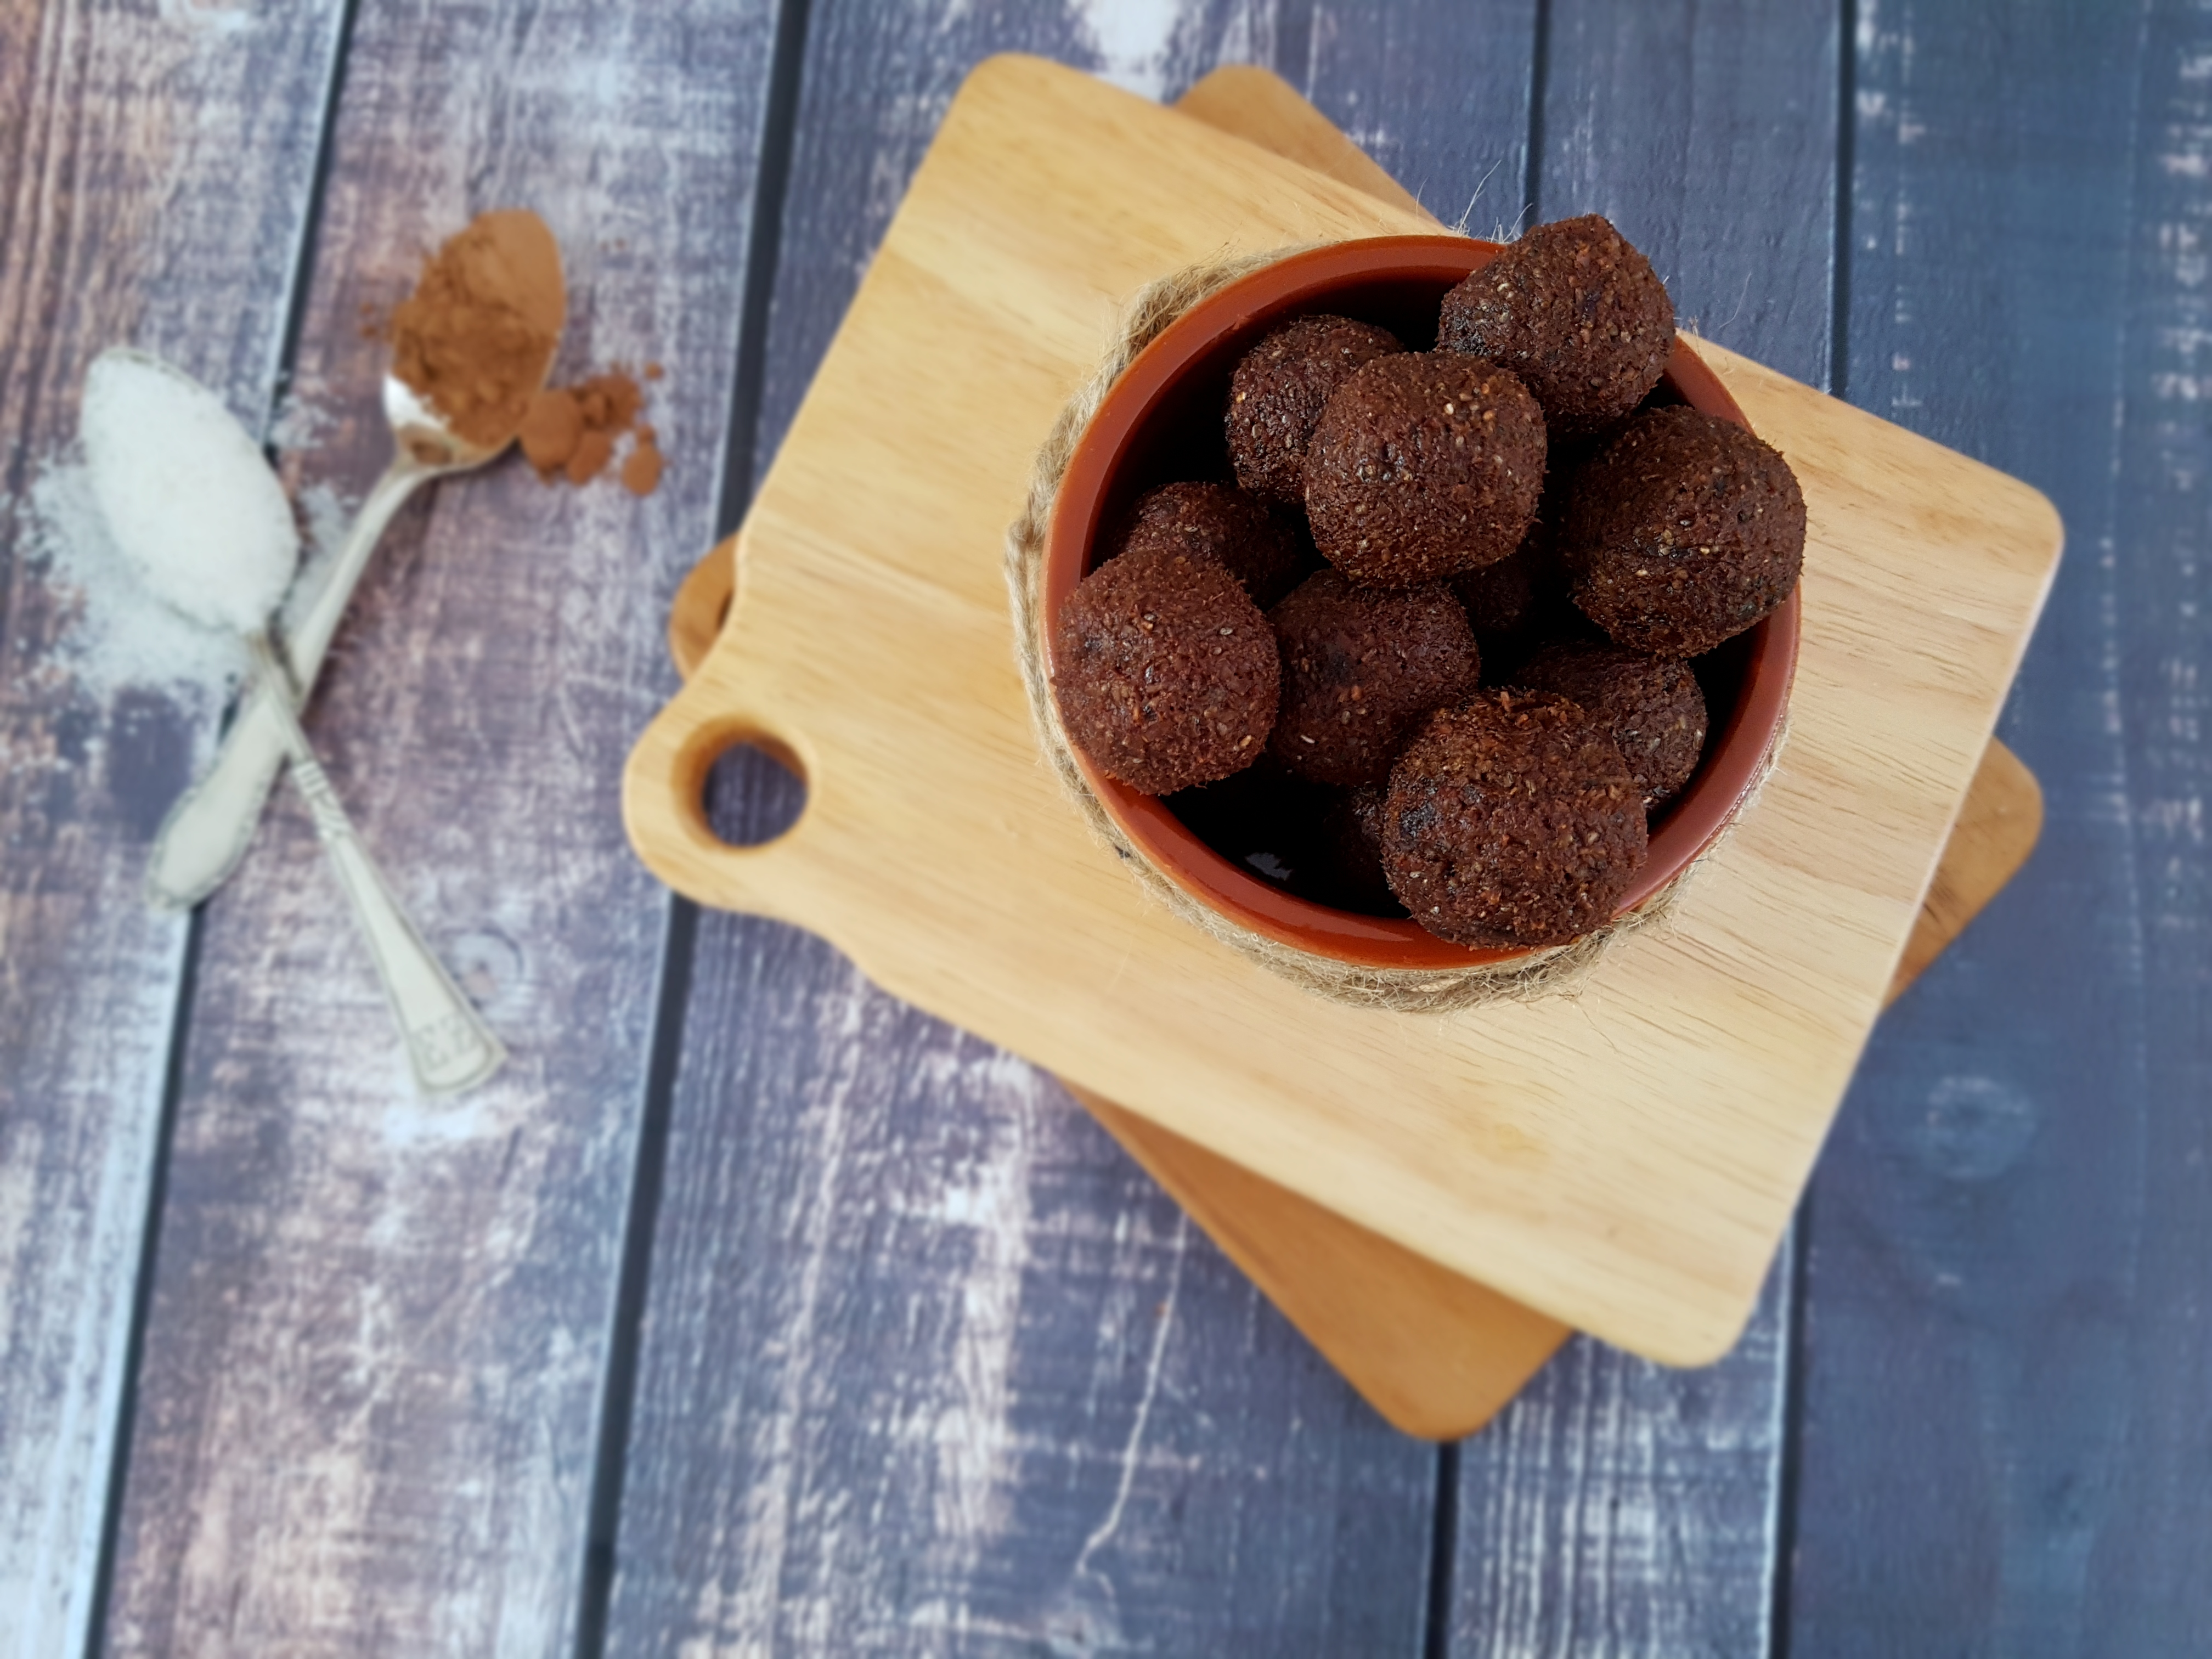
These babies have four ingredients and require five minutes prep time. Loaded with valuable plant-based protein, slow-burning natural sugars, fibre, minerals, and vitamins, they are incredibly tasty and just perfect for when you’re feeling sluggish (and even when you’re not!). They are completely vegan (hence dairy and egg free), gluten free, soy free and nut free and don’t contain any nasties whatsoever. So what’s their secret? Oats and bananas!

In fact, making healthy cookies out of rolled oats and ripe bananas is nothing new. Social media are literally swarming with this concept, so I didn’t exactly invent it myself. I just played around with the ratios and then added some raisins and cinnamon. I was absolutely blown away by the result so if you are interested in some truly clean oatmeal & raisin cookies, here’s my solution. And guess what – my kid loves them and I love them too! (They are husband approved, too.)

Clean Oatmeal & Raisin Cookies

Makes 12

1 (rounded) cup rolled oats (certified gf if required)
2 ripe bananas
a handfull of raisins or sultanas
1 tbsp cinnamon to taste

Preheat oven to 180 °C and line a cookie sheet with baking paper. Mix all ingredients until you reach a homogenic and malleable mass. You don’t need a blender for this, just your hands and some elbow grease. Shape 12 ping-pong ball sized balls and press them flat into a classic cookie shape. Place on the sheet and bake for roughly 15 minutes or until lightly golden on top. Let cool completely, store in an airtight container in the fridge for up to three days (if they last that long).

Enjoy!

Autumnal Lentil Buckwheat & Beetroot Salad {vg, gf}

While Melbourne is enjoying a glorious late summer these last days, it is only a little more than a week until the official beginning of autumn. The evidence is mounting that the cooler season is approaching with big steps. The leaves are changing colour, chestnuts and acorns are adorning the pathways, and the days are getting shorter. Time for warming and earthy dishes such as this lentil buckwheat & beetroot salad with oranges.

It is no secret that lentils and buckwheat are a match made in heaven with their hearty textures and grounding flavours. Together, they also form a complete protein which is why this salad is so valuable for vegans. Beetroot with its sweet earthiness complements the qualities of lentils and buckwheat perfectly, while fresh oranges not only provide a hefty dose of vitamin C to rev up your immune system for the colder season, but with their juicy and tangy flavour lift this dish while chopped walnuts add heart-healthy fats and another textural element to this salad. A generous dose of parsley and spices provides for some bite while a mild dressing made of orange juice, balsamico and maple syrup achieves a perfect balance of flavours.

This is a very simple yet satisfying and wholesome starter or even main meal. I don’t cook the buckwheat as it would get all mushy, but rather roast raw buckwheat groats which makes for some wonderful crunch and nutty aromas. I used brown lentils from the tin although you can cook dry lentils and use them here. As for the beetroot, you can use freshly cooked, packaged or tinned beetroot.

Lentil Buckwheat & Beetroot Salad

Serves 4

1 cup raw buckwheat grouts
1 tin brown lentils, drained and rinsed
2 large oranges, chopped
3 cooked beetroot bulbs, chopped
2 handfulls of fresh parsley
salt, pepper, paprika, chilli and cardamon to taste
4 tbsp fresh orange juice (from the oranges)
3 tbsp balsamic vinegar
3 tbsp maple syrup
2 tbsp chopped walnuts

First, prepare the dressing by cutting your oranges open and squeezing out roughly 4 tbsp of fresh orange juice into a small bowl. Mix with equal amounts balsamic vinegar and maple syrup and adjust the ratios to taste. You may want to add some salt and pepper or other spices or add them to the finished salad. Dry roast the buckwheat in a large non-stick frying pan until golden and aromatic. This should only take a few minutes. Add to a large mixing bowl, then add the lentils, oranges, spices and dressing and mix well. Do not add the beetroots at this stage to avoid colouring of the remaining ingredients. Divide the lentil buckwheat orange mix to four salad plates and top with chopped beetroot, fresh parsley and walnuts.

Enjoy!

Raw Vegan Paleo Lamington Truffles

I have a question for you. Are these guys bliss balls, energy balls, bites or truffles? Or something else entirely? I guess they are a bit of everything. But I used the words “bliss balls” and “energy balls” so often that these are truffles. Raw vegan paleo lamington truffles, just to make things clear.

If you love food and health blogs, like I do, you’d probably know that the raw vegan community and the paleo community don’t love each other. However, why not focus on the similarities rather than the differences? Sure, the paleo diet tends to be meat-heavy, but when it comes to cutting out crap from your diet, I think both vegans and paleo dudes agree! And if you ever happen to have a vegan and a paleo friend over for afternoon tea or if you just want a really delicious treat that’s good for you and won’t weigh you down, make these raw vegan paleo lamington truffles.

The lamington belongs to Australia like the barbecue and the pavlova. If you haven’t heard of a lamington, it’s a sponge cake square coated with chocolate and rolled in desiccated coconut. There’s usually also some cream and/or jam between layers. In short, it’s a delicious albeit sugary and unhealthy dessert that is neither gluten free nor vegan. But my raw vegan paleo lamington truffles are coming to your rescue. No refined sugar, no dairy, no wheat, just five super-healthy ingredients. All the taste of lamington with none of the guilt. And even if you’ve never had a lamington, you are more than welcome to tuck in. Either way, you’ll be pleasantly surprised!

Raw vegan paleo lamington truffles
Raw Vegan Paleo Lamington Truffles

Makes 12

175g dates (about 1 cup packed) (if not using Medjool, you will need to soak them in hot water for half an hour, then drain well)
2 tbsp raw cacao
2 tbsp desiccated coconut
4 tsp LSA or almond meal or flaxseed
3 tsp chia seeds

Blitz the well-drained dates until a paste forms. Add the other ingredients and process until the mix comes together. Shape into 12 balls and store in the fridge for up to a week (I doubt they last that long!)

Enjoy!

Healthy Coco Pops Squares

Of all my unhealthy childhood favourites, sugary breakfast cereals definitely top the list. And of all breakfast cereals coco pops was always the winner. I mean, c’mon, a CHOCOLATE milkshake only CRUNCHY? The flavour of chocolate and the texture of crunch? Can it get any better than this? And don’t even get me started on the cute monkey and his catchy theme song. And coco pops squares…yum! Who needs muesli bars? Coco pops are the best! If you think so too (or have a kid who does), I can definitely help to create a healthier version of a childhood favourite: healthy coco pops squares! Who is in?

Rice bubbles with raw cacao and low GI brown rice syrup instead of all this high-fructose corn syrup provide for a delicacy that will satisfy your sweet tooth without sending your blood sugar soaring. These healthy coco pops squares are light and airy, crunchy with just the right amount of sweetness, and beautifully chocolatey. They are also very low in fat – perfect if you love chocolate but are concerned about the fat grams. This is an indulgence  that won’t weigh you down. And due to the rich taste and satisfying chewy texture of these healthy coco pops squares, a little goes a long way and you won’t need much to get you through the feared 3pm slump.

These healthy coco pops squares are some easy to make and affordable goodies, perfect for gatherings and kids parties, but also to indulge your sweet tooth after a meal without overindulging. Please note that while this is definitely a better-for-you version than traditional coco pops squares, it is still a treat that should be treated like a treat and enjoyed in moderation.

Healthy Coco Pops Squares

Makes 10 squares

3 cups (gluten-free) rice bubbles (I use Freedom foods)
half a cup brown rice syrup
1 tbsp coconut oil
dash of vanilla extract
3 tbsp raw cacao
pinch of sea salt

Line a 10x20cm baking pan with baking paper. Pour the rice bubbles into a large mixing bowl. Gently melt the brown rice syrup with the coconut oil, vanilla extract, cacao and salt until fully combined. Pour into the bowl with the rice bubbles and gently stir through until fully incorporated and all bubbles are coated with the mixture. Press into the prepared pan and press down very, very firmly until very firmly pressed down (and I mean firmly!). Freeze for one hour, then lift out of the pan and cut into ten squares with a very sharp knife. Store in the fridge for up to a week.

Enjoy!

Crispy Oil-Free Potato Wedges

I loooove potatoes. Seriously. They are so much more than a side dish. Not only do they taste delicious, they are so filling and satisfying that they make for a complete meal. I love them in any state – boiled, baked, roasted, mashed, fried…but they are at their best in the form of chips or wedges. Now, if this sounds greasy and unhealthy to you, dripping with trans fats and all sorts of nasties, hear me out. It is possible to achieve the perfect crispy oil-free potato wedges. No oil and no deep-frying required!

These are not the result of an air-fryer (if you are remotely familiar with instagram you would have come across the latest craze that is air-fryers). No fancy or expensive equipment required, just a good ol’ oven, a baking tray and 40 minutes of your time. That’s all!

While rice, noodles, pasta and (gluten-free) bread all have their merits, nothing will keep you full for as long as a good plate of spuds. Being much lower in carbohydrates and calories than other “side dishes” and with their favourable nutritional profile, potatoes are closer to vegetables than starchy sides. They are fat and cholesterol free and bursting with iron and vitamin C. Vitamin C actually improves the absorption of iron which is why potatoes are extremely valuable for vegans and vegetarians. They contain more potassium than a banana, are a good source of vitamin B6, fiber, magnesium and antioxidants as well as the so-called “resistant starch”. Resistant starch works like soluble fiber which contributes to improved insulin sensitivity, lower blood sugar levels, reduced appetite and improved digestion.

Enough said about the benefits of spuds, I bet you just want to know how to achieve the perfect crispy oil-free potato wedges! Crispy wedges without any oil? What’s the secret ingredient? Yes, there is actually a secret ingredient. And that is…water! I knew that in gluten-free bread baking, putting a tray of water into the oven helps the bread to form a proper crispy crust. I thought that this must also be possible with potatoes! While I have achieved good results dry-roasting potatoes before, adding some water to the tray definitely put these babies onto a new level. Unlike with bread where a separate water tray is put into the oven, the water is added directly to the tray with the potatoes on it.

Crispy Oil-Free Potato Wedges
Crispy oil-free potato wedges

Serves 4

1kg potatoes, washed and cut into wedges
1-2 tbsp coarse sea salt
1 tsp paprika
halt a cup plain water

Preheat the oven to 230 °C. Spread the prepared wedges onto a non-stick (or lined) baking tray. Mix the salt and paprika in a small bowl. Sprinkle the spice mix over the potatoes and rub into the wedges. Add the water to the tray. Bake for approx. 40 minutes, turning halfway.

Enjoy!

Spicy Lentil & Black Bean Stew {vg, gf}

My love for lentils continues. I’m still not tired of lentil bolognese, lentil hummus, lentil pâté and lentil burgers. And with autumn clearly on the way here in Melbourne, it’s time for soups, stews, spice and all things nice again. And because I love black beans too (black bean chocolate cake, anyone?), here’s a spicy lentil & black bean stew, just for you.

To make things clear, you could really use any legumes in this one. I just found that the combo lentils and black beans was really yummy and filling. This dish is a bit of a crossover between Moroccan and Mexican, but that will vary depending on the spices you use. This stew is actually so dirt easy to make that it almost can’t be called a recipe, but I found it so delicious that i thought I’d post it anyway. It really is one of my easiest and most straightforward recipes (I know I say that a lot), but basically, if you have tinned tomatoes, some legumes and spices in your pantry, you can start right now, and in less than half an hour have a crowd-pleasing meal that is tasty, satisfying, warming, comforting, nourishing, keeps well in fridge and freezer, and is good for you.

I have already mentioned the numerous health benefits of lentil, beans, and tomatoes – the staples in this spicy lentil & black bean stew – at length, so if you are interested what goodies you put into your body with this baby, a google search will tell you! 🙂 Feel free to add more vegetables to boost the goodness of this wonderful stew. Like all my recipes, this spicy lentil & black bean stew is both gluten free and vegan, and it is also low in carbs and practically fat free. All of the comfort with none of the guilt.

Spicy Lentil & Black Bean Stew

Serves 3

1 large onion, sliced or chopped
2 garlic cloves, minced
1 tbsp ground coriander
1 tbsp ground cumin
a pinch of chilli powder (optional)
salt and black pepper to taste
400 g can diced tomatoes
1 cup water
half a cup dry green lentils
400 g can black beans, rinsed and drained
fresh parsley to serve

Heat a heavy-based saucepan or cast iron pot and sauté the onion in a bit of water to prevent sticking for a few minutes or until soft and translucent. Add the remaining spices (garlic, coriander, cumin, chilli, salt and pepper) and cook for another two minutes. Add the tomatoes, water, lentils, and black beans. Bring to the boil and simmer until the lentils are soft, about 20 minutes. Adjust the spices and serve with fresh parsley.

Enjoy!

Lemon, Poppyseed & Baobab Bliss Balls {vg, gf}

I have a confession to make. I am addicted to bliss balls. /Have you checked out these, these, these and those beauties yet?) They are easy and quick to make, generally require only a few easy ingredients and are a great portable way to beat the mid-afternoon slump (and keep your toddler happy). They are also incredibly customisable. Generally speaking, as long as you got dates and either nuts and/or oats, you can make bliss balls. And you can make them your own. Add cocoa, vanilla, your favourite superfoods…the options are endless. That’s why I thought i come up with something different compared to the standard cacao-based bliss balls and offer you an old favourite: lemon and poppyseed. And because I am a health geek and like my superfoods, they are not only lemon & poppyseed bliss balls, but lemon, poppyseed & baobab bliss balls.

You might not have heard about baobab powder. Touted as the queen of superfoods, it is a highly nutritious fruit of the African Baobab tree. It is naturally raw, vegan and gluten-free and bursting with antioxidants, fiber, electrolytes, minerals and vitamins. Baobab has more fibre than chia seeds and almost 5 times as much vitamin C as goji berries. Please note that the use of baobab is not essential to make these bliss balls work, but I thought it would be nice to include a recipe for a superfood I recently discovered as you might be interested how to use it (I always try to extend the use of superfoods beyond adding to smoothies). Baobab also has a nice subtle fruity flavour that goes well with something lemony.

These bliss balls furthermore boast dates, oats, and coconut flour and are therefore packed with more fibre and minerals. Poppyseeds are a great source of iron, copper, calcium, magnesium and zinc and have been traditionally used in ayurveda for glowing skin. I love these lemon, poppyseed & baobab bliss balls so much. Their tangy taste has something cheesecake-y about them, and due to their high fibre content they keep me full and happy until the next meal. They are also refined sugar-free, with healthy, slow-burning carbs from dates and oats and only very little fat. I hope you enjoy them!

Lemon, Poppyseed & Baobab Bliss Balls

Makes 20 bliss balls

10 pitted dates (any dates will work, but if not using Medjool dates, you will have to soak your dates for a few minutes in hot water to soften them up, then drain well)
1 cup oats, ground to a fine meal
half a cup coconut flour
juice of one lemon (or less if you prefer it less lemony)
half a cup dessiccated coconut
2 tbsp poppy seeds
1 tbsp baobab powder

Blitz all ingredients in a high-powdered blender until well combined and starting to stick together. Leave the mixture in the fridge for ten minutes to firm up, then roll into 20 balls and store in the fridge. They will get more delicious over the coming days!

Enjoy!

Skinny Parsnip and Peanut Soup (4 ingredients!) {vg, gf}

I do love a good soup, regardless of the weather. And I happened to have a lot of parsnips in this week’s vegetable box delivery (hello, autumn!). Parsnips that were slowly wilting away, screaming at me: “Turn me into a soup!”. I listened to them. And because I am a sucker for unconventional combos, the result was a parsnip and peanut soup. A skinny parsnip and peanut soup, to be precise.

To be honest, I am not the hugest fan of parsnips. I don’t particularly like their texture and the taste does nothing much for me, not even roasted. Throw the good ol’ spud and peanut butter into the equation, however, and magic happens. You don’t even necessarily need the peanuts, I just think it really adds some depth of flavour and it actually works really well with the parsnips and potatoes even though it seems like an unusual pairing. The starchiness of the root vegetables and the creaminess of the nuts just takes this soup to a whole new level of goodness. I used defatted peanut butter powder (pb2) to lower the fat content. However, you could use ground peanuts (or other nuts) or peanut butter instead and this soup would still be very low in calories albeit satisfying.

As a full-time working mum far away from my family (sniff), I take my commitment to create easy, quick and hassle-free recipes very seriously. This soup requires just four ingredients (yes, four!) and a minimal amount of time to prepare. It is also ridiculously fool-proof so you will have absolutely no excuses not to try it! Given that the required ingredients are fairly cheap, this is also a very budget-friendly soup. It is ideally suited to prepare as a big batch and store leftovers in the fridge or freezer. Presented in a beautiful bowl and with some fancy toppings, this soup is also impressive enough to serve at your next dinner party.

Note that if you don’t have or don’t want to use vegetable stock, it’s totally fine to use water instead (that’s what I did). You just need to add salt, pepper and other spices (such as garlic powder) to taste. The stock will make it even more flavoursome but I have tried it both ways and it works beautifully with just the water as well. For what it’s worth, I don’t peel my veggies as it all gets blended up anyway and I use organic but I know tut shat most peaople like to peel their veggies. 😉

Skinny Parsnip and Peanut Soup

Serves 2-4

1 lb (ca. 500 g) potatoes, washed, peeled (optional), and cut into small pieces
4 parsnips, washed and cut into small pieces
3 cups vegetable stock (or water plus salt, pepper, garlic powder and other spices to taste)
2 tbsp powdered peanut butter OR peanut butter OR ground peanuts (or other nut butter or nut meal)

Steam or microwave the vegetables until tender. Bring stock or water and spices to the boil, add the steamed veg and peanut butter/powder, stir and then blend with a stick blender until smooth and creamy. The soup will seem to be liquid and frothy at first, but hold on and it will turn creamy!

Enjoy!

Homemade Oat Milk

I know. Every man and their dog is making homemade almond milk these days. And hey, why not? It is easy enough if you have a high-powered blender. Store-bought plant milks are expensive and often have some fillers or other additives, so making your own plant or nut milk is better for your health and better for your wallet. So yeah homemade almond milk is all the buzz right now, but have you tried making your own homemade oat milk?

Like almost everything else I make, making homemade oat milk happened by chance. A while ago, I was making a vegan cashew panna cotta for my husband based on this recipe which calls for blending cashews in water until you achieve a creamy “milk”. I was absolutely blown away how delicious this cashew mylk was and how easy to create – especially given the astronomical prices they charge for nut mylks in the shop! So it has been at the back of my mind to make my own plant and nut mylks.

Then, a couple of days ago, I had tried a new brand of almond milk (not mentioning any names here) which I really did not like all that much. It was overly sweet, had a funny marzipan flavour and curdled horrendously in coffee. I remembered my goal to create my own plant milks. As oat milk has always been one of my favourite vegan milks and oats are also considerably cheaper than nuts, here was my project!

It dod not take much experimenting as this worked out quite well at the first shot. I blended 1 cup of quick oats with 3 cups of filtered water. This ratio produces a very thick and creamy milk which I love but you could also try a ration of 1:4 which would produce a slightly thinner milk. Just experiment! I don’t add any sweeteners but you could try adding a tablespoon or so of your favourite liquid sweetener (maple syrup, date syrup or coconut syrup would probably work best). You could also try adding some vanilla essence or cocoa powder or any other flavour you fancy. Then, just strain the milk in a bottle, chill and enjoy!

Note, there will be sediment so you need to shake your bottle well before every use. This is all natural, so it is not a 1:1 replacement for store-bought mylks which often have a lot of stabiliser and thickeners added. It is not perfect but I think it is a good and economical alternative to store-bought plant milks!

Homemade Oat Milk
Homemade Oat Milk
Homemade Oat Milk

Makes about a pint of oat milk

1 cup quick oats (use certified gluten-free of gluten free)
3-4 cups filtered water
optional: 1 tbsp liquid sweetener, pinch of salt, vanilla essence

Blitz all ingredients on a high powered blender until smooth, milky and the oats are completely broken up. Strain the milk into a bottle. The leftover oat pulp is delicious scooped out and also serves as a great thickener for smoothies and nicecreams! Store your homemade oat milk in the fridge for up to 5 days. Remember that there will be sediment so shake your milk bottle thoroughly before use.

Enjoy!

Salted Caramel Protein Bites {vg, gf}

I know it’s getting a bit much with all my energy/bliss ball-y things lately (see here, here and here). But one bite into these beauties and I knew I could not wait another day to share these with you. I know you guys love salted caramel. And I know you love protein bites. Enter…salted caramel protein bites!

These came about as I tried to recreate one of those crazy expensive and filled-to-the-brim with junk store-bought protein bars. The combination of dates and oats has never disappointed me and I figured that with the addition of my favourite vegan protein powder I’d be able to make the perfect protein bar. But then it just seemed easier to go down the bliss ball route again. So here we are. Unfortunately or fortunately, I tasted the “batter” while making these balls and got so addicted that I devoured a considerable part of the mix (so you might well be able to yield more than 30 balls out of this recipe). I could not get over how much these tasted like salted caramel!

I hate the word amazeballs, but it pretty much does them justice!

Salted Caramel Protein Bites

Makes 30 bites

2.5 cups rolled oats
3/4 cup packed pitted dates (any kind)
1/4 cup coconut syrup (you can try other liquid sweeteners, but I find the coconut syrup really gives it that deep malty, caramelly taste that we want)
1/4 cup filtered water
4 rounded tbsp (ca. 40-45 g) vegan vanilla protein powder (I use Amazonia Raw Fermented Paleo Protein)
dash of vanilla extract
healthy pinch of Maldon sea salt

First, blitz the oats in a high-powered blender until you reach a rough flour consistency. Add the remaining ingredients and blend until the mixture comes together and holds its shape but is not overly sticky. Shape into balls and store in the fridge.

Enjoy!