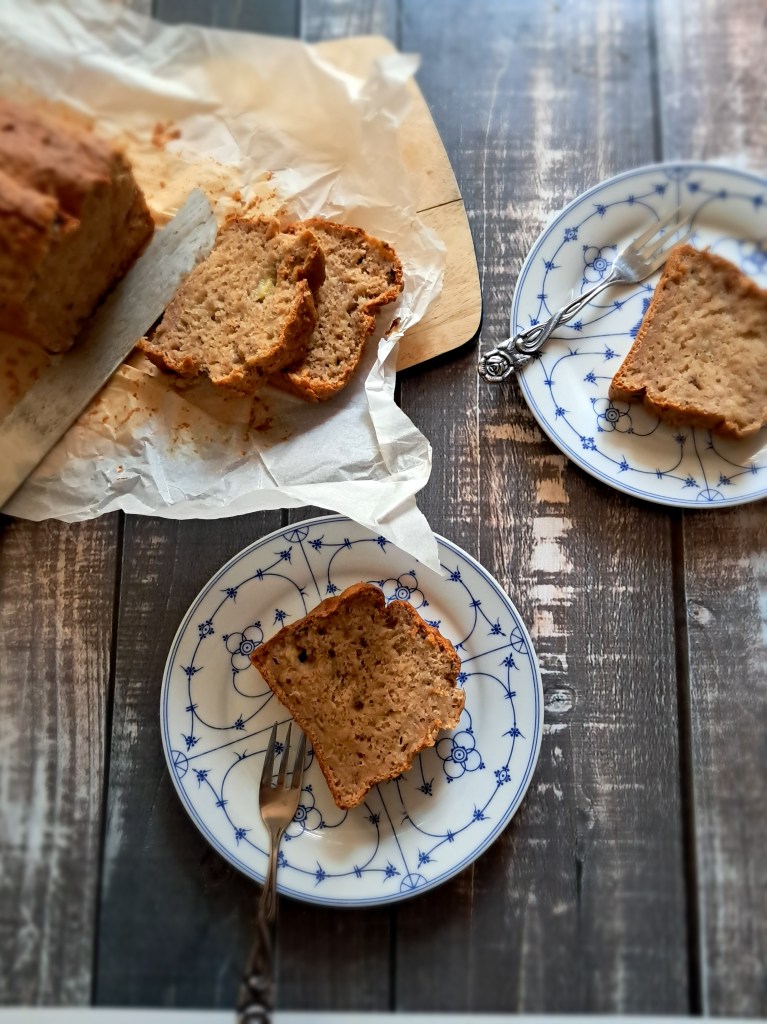
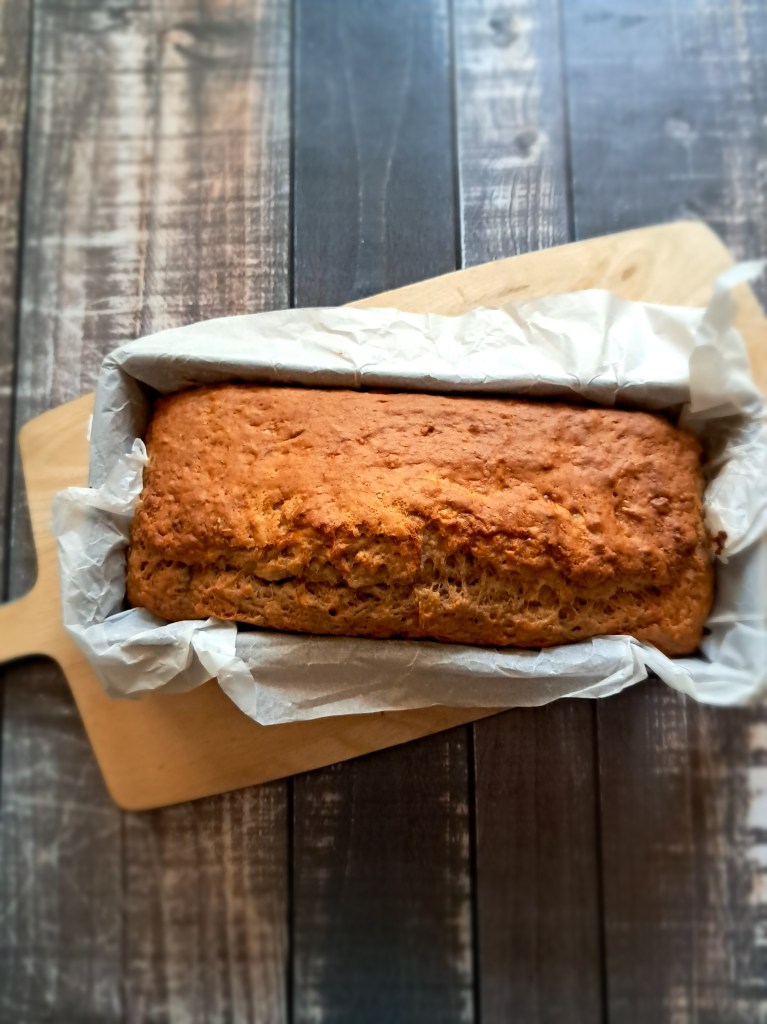
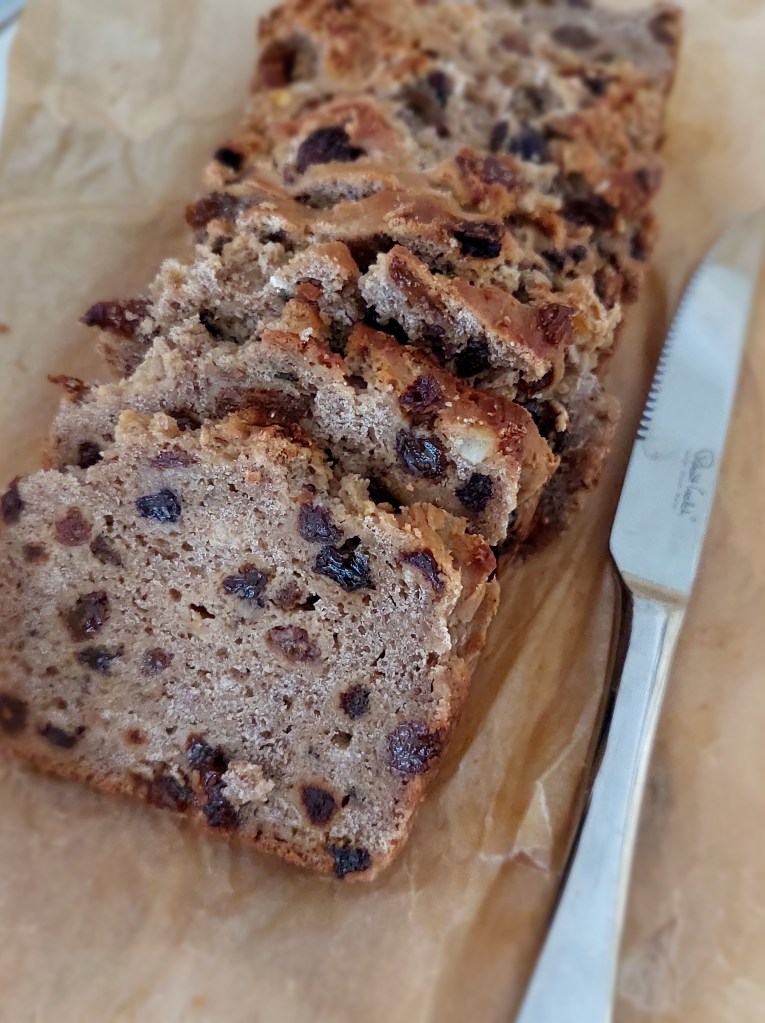
Ingredients 260g self-raising flour (gluten free if required) 40g plain flour (gf if required) 500g overripe bananas, well-smashed/pureed 2 eggs or egg replacer pinch of sea salt vanilla essence 100g sugar of choice 1tsp cinnamon half cup milk or dairy alternative of choice half a cup of apple sauce
Method Preheat oven to 180°C. Line a loaf pan with baking paper, allowing it to overhang. Sift the flours, salt and cinnamon into a large mixing bowl. Stir in the sugar and make a well in the centre. Add mashed bananas, apple sauce, egg replacer, vanilla and milk. Stir until well combined. Spoon batter into prepared pan Bake for 45 minutes. Let cool on a wire rack and cut into slices. Keeps well in the fridge for at least 5 days.
Now this is a real game-changer. If you are sick of rancid-tasting store-bought microwave popcorn and the idea of an oil-free healthy crunchy snack sounds good to you, look no further than this easy recipe for oil free healthy microwave popcorn.
Oil free healthy microwave popcorn
1/4 cup popcorn kernels
1/4 tsp salt (more or less to taste)
2 tbsp water
In a heat-proof glass pyrex dish, mix all ingredients. Cover with an old dish towel (it might get stained) and microwave for two rounds of 3-4 minutes each, around 7 minutes in total, until popping slows down.
You might need more or less time depending on your microwave. Be careful when opening the microwave door as the bowl will be very hot.
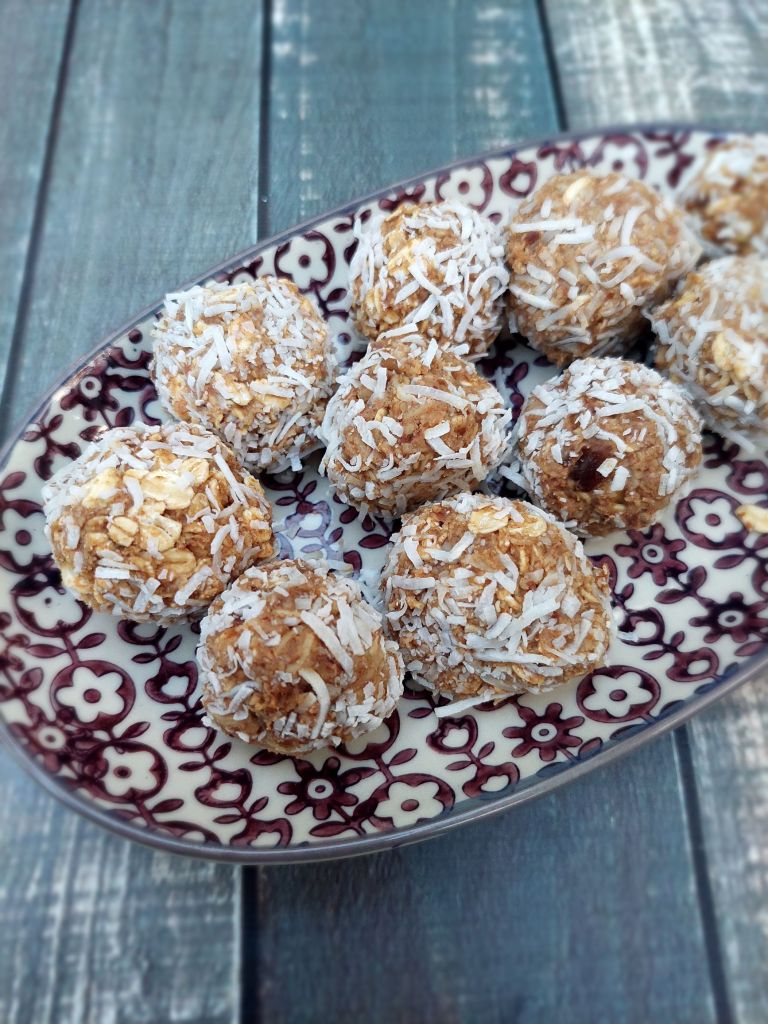
Bliss balls, energy balls, power balls – there are many names for these beautiful little babies that are not only your best mate when the 3pm munchies hit, but also a great addition to your little one’s lunchbox as they are completely nut free and allergy friendly and provide sustained energy thanks to rolled oats, dried dates and a smidge of protein powder!
Of course these are very customisable, but here I am offering my quick, easy, healthy and yummy version for a snack/treat/breakfast that my kids actually eat and that is just as good for grown-ups too!
Makes 24 balls
One cup packed dried dates (approx. 170g)
2/3 (two thirds) cup shredded coconut (approx 40g)
1.5 cups rolled oats (approx 120g)
One scoop vegan vanilla or choc protein
1 tbsp raw cacao
Pinch of salt
Start by soaking the dates in hot water until soft. Drain, but keep the date water. Blitz all ingredients in a high-powered blender while adding the date water gradually until the mixture comes together. If you add to much loquid you might have to add some more of the dry ingredients. It’s okay for the mix to be sticky but it should still be able to be formed into balls.
Roll into balls (roughly 22-28 depending on size) and roll in more coconut or oats as desired. Pop into fridge or freezer until ready to eat.
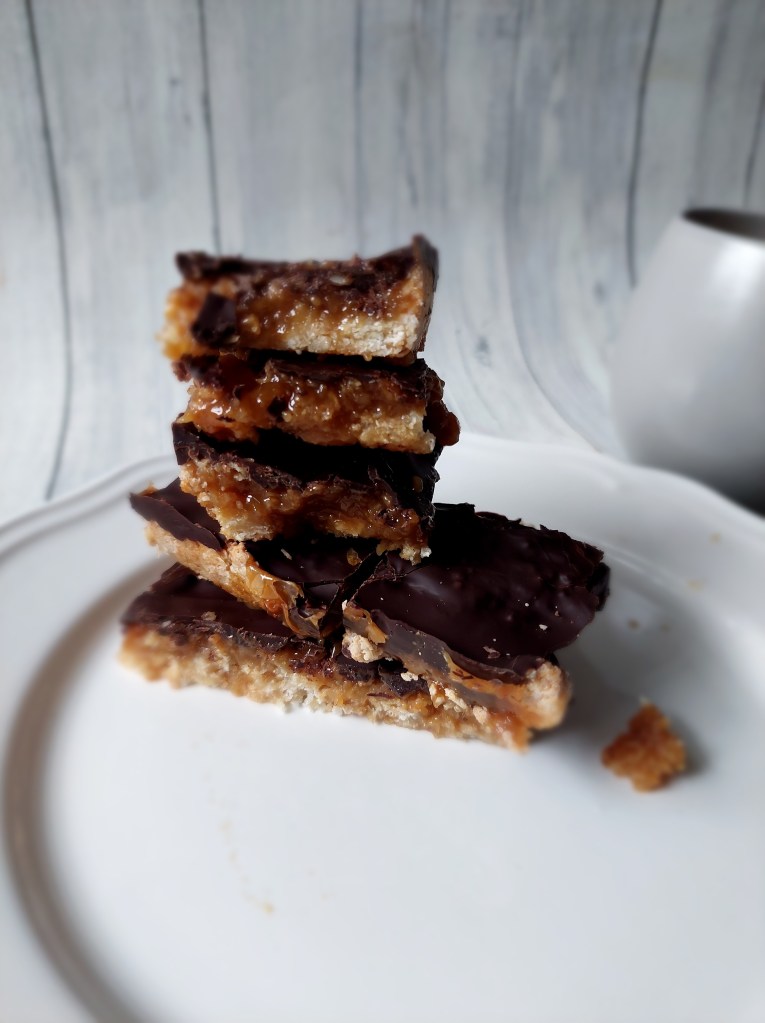
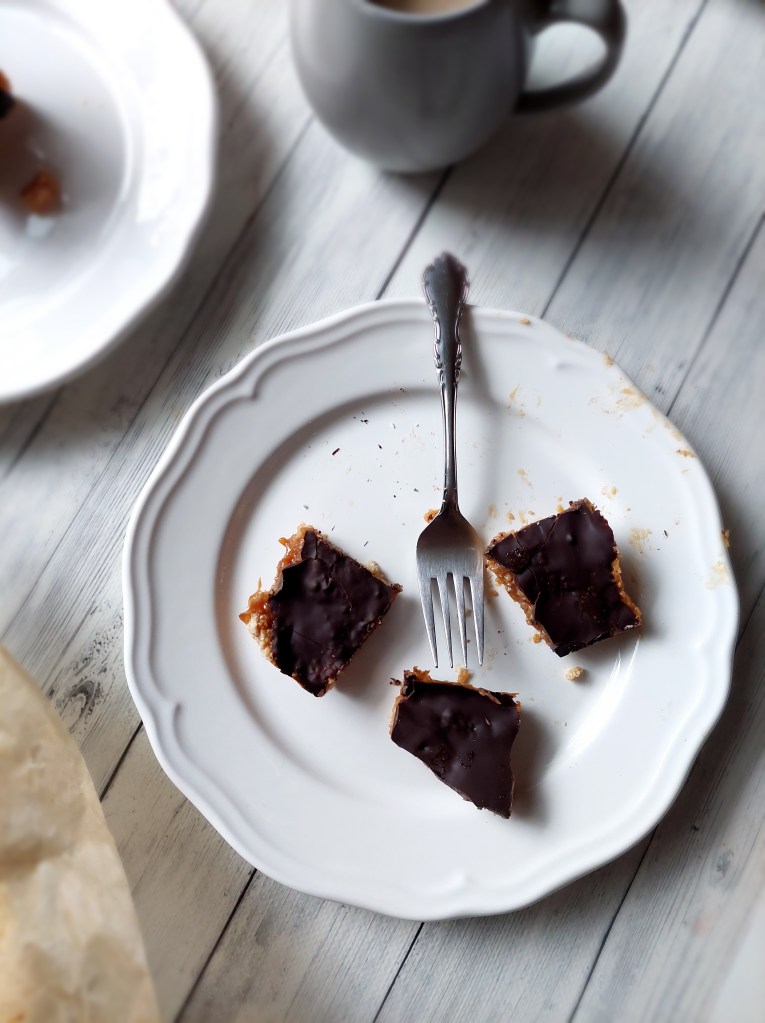
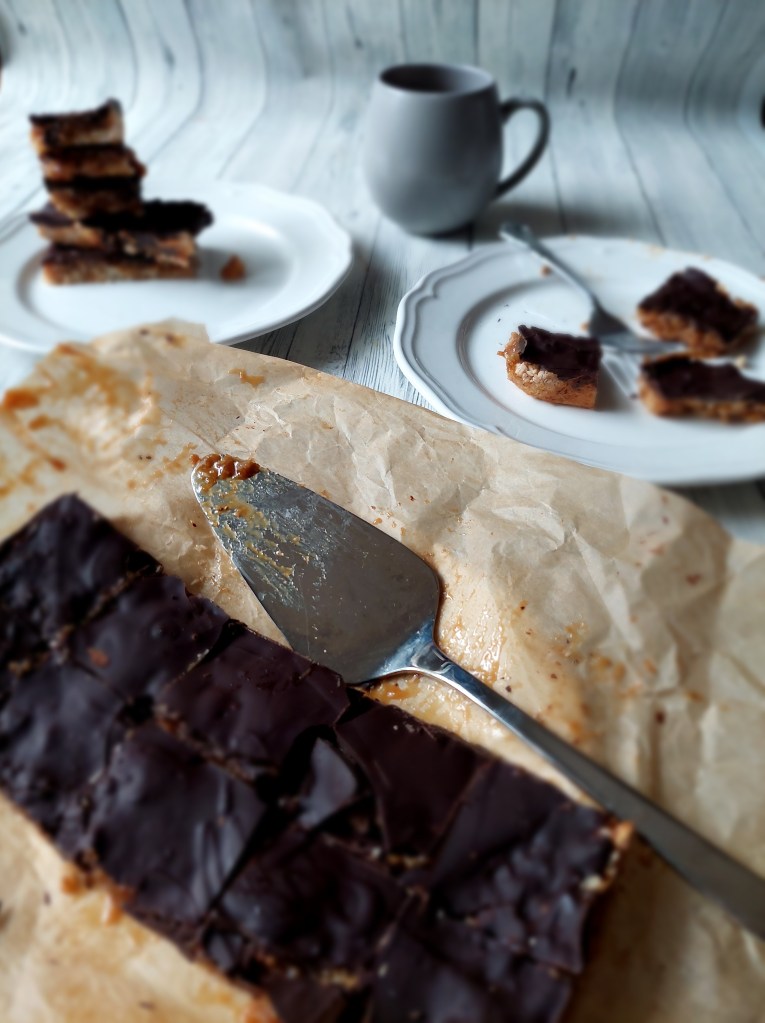
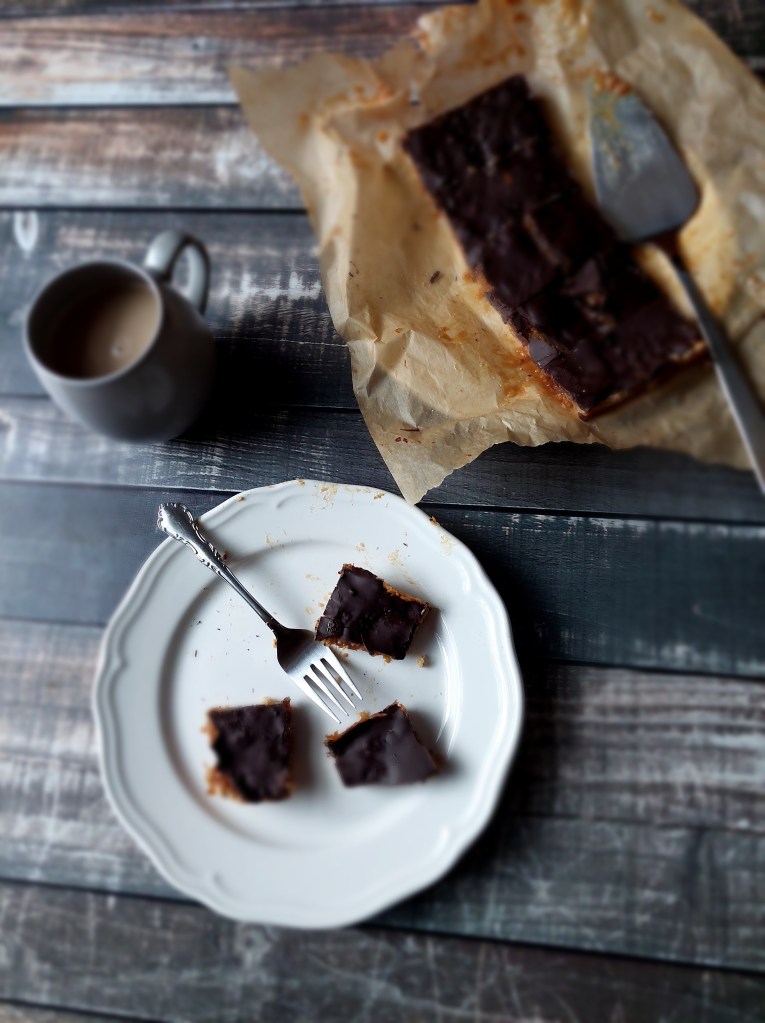
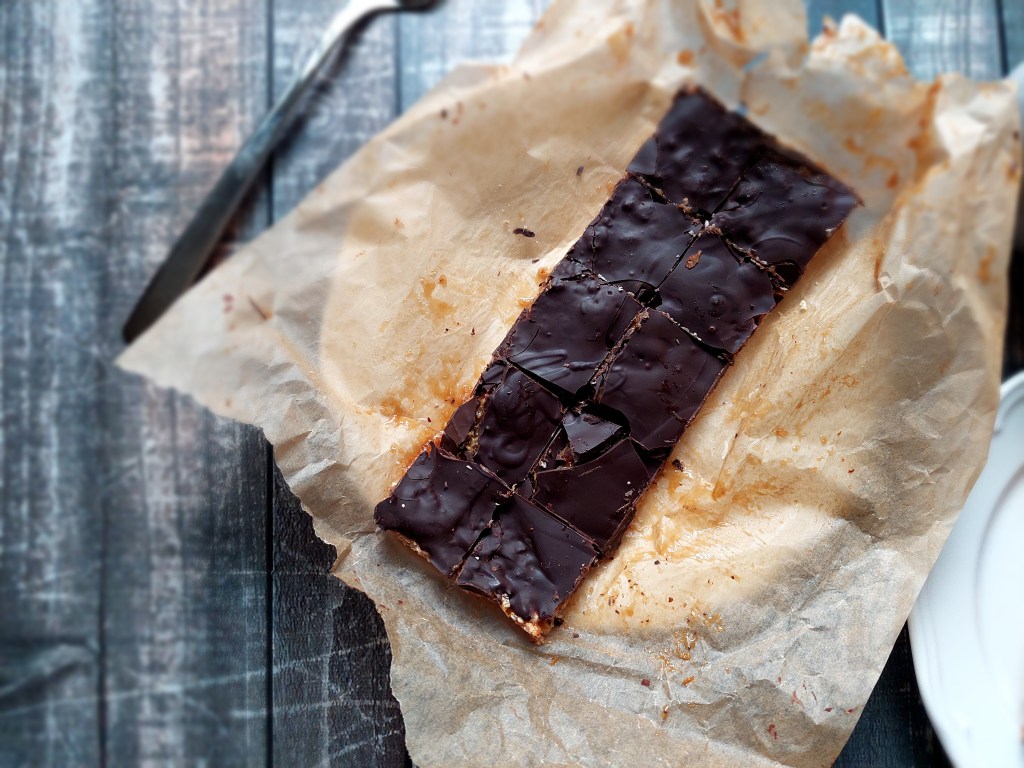
Gluten free, vegan and much lower in fat than traditional caramel slice – what’s not to love?
Making healthier, allergy-friendly versions of old favourites is definitely a hobby of mine. And caramel slice is no exception!
Just look at it – wouldn’t you think it’s the real deal?
Traditional caramel slice comes with a buttery shortbread, but you won’t find any butter or margarine in my version. For the caramel, I used a store-bought vegan condensed milk which is quite low in fat, but you can also make your own. I used dark chocolate for the topping so this is not a “fat-free” caramel slice, but it is much lighter and healthier than the original. And because there is a lot less sugar in it, it is also more satisfying!
My whole family approved of these (which is rare!) and they would be perfect for school’s cake stalls as they come without dairy, eggs or nuts!
Makes 24
One cup gluten free flour One cup apple sauce One cup desiccated coconut
Preheat oven to 180°C and line a slice tin (20x30cm) with baking paper. Combine flour, coconut and apple sauce in a large bowl until mixed well. Press into tin and bake for 15 minutes until golden brown. Pour condensed milk over base and bake for another 10 minutes. Allow to cool Melt the chocolate and pour over base. Let set in the fridge, then slice into squares.
These freeze very well – but I am sure they will be gone before you have a chance to freeze them!
Gluten free, vegan and fat free are usually not attributes that come to mind when hearing “Stollen” – I show you that the impossible is possible!
Tastes just like traditional Stollen – but without butter, egg, oil or wheat!
Today I got a real treat for you! Most of you would be familiar or would have at least heard of “Stollen”, a very dense traditional German spiced loaf typically eaten in the weeks leading up to Christmas.
Behold all this spicy, Christmas-y, fruity deliciousness!
It is basically our version of Christmas pudding and it is certainly never a light dish! Traditional Stollen is made with lots of butter (in the store-bought version often replaced with cheap margarine) as well as nuts and marzipan, none of them recommended if you are watching your waistline or are struggling with autoimmune issues (me).
Now, there is no shortage of recipes for gluten-free Stollen out there and there is even store-bought gluten free Stollen these days. Making it vegan is already a bit more of a challenge as Stollen relies heavily on milk, butter, and eggs. However, you do find recipes for vegan Stollen on the net. Problem is, even the vegan versions use lots of oil or margarine. I am presenting you here a completely fat-free version of this delicious treat that also happens to be vegan and gluten free!
It is so fluffy, juicy and delicious, you won’t miss a thing. It is comforting and perfect with a cup of hot latte or tea on a chilly afternoon. So now matter if you are vegan, want to lose weight or suffer from allergies, fear not – the perfect Stollen is awaiting you!
One loaf
454g gluten free flour (I use a self-made mix of buckwheat flour and a store-bought gf flour mix) 14g dried yeast 130ml almond milk, luke-warm 120g raw sugar 1 cup apple sauce 3tsp mixed spices (cinnamon is mandatory, everything else is up to you – I recommend ginger, cardamom, cloves, nutmeg) almond extract 250g mixed dried fruit (sultanas etc.) and orange peel
Soak dried fruit in some hot water (or orange/apple juice) to soften. Dissolve yeast in the milk, add a tsp of sugar and stir until completely dissolved. Add the flour, spices and remaining sugar to a large bowl, add the yeast-milk mixture and apple sauce, mix well, cover with a dishcloth and let the dough rise in a warm spot for 15 minutes. Add the almond extract and drained soaked fruit and knead well. Let rest for another 2-3 hours. Preheat oven to 180°C. Fill the dough in a loaf tin and bake for 45 minutes. For a more authentic Stollen, you can sprinkle with icing sugar after baking but it is not necessary.
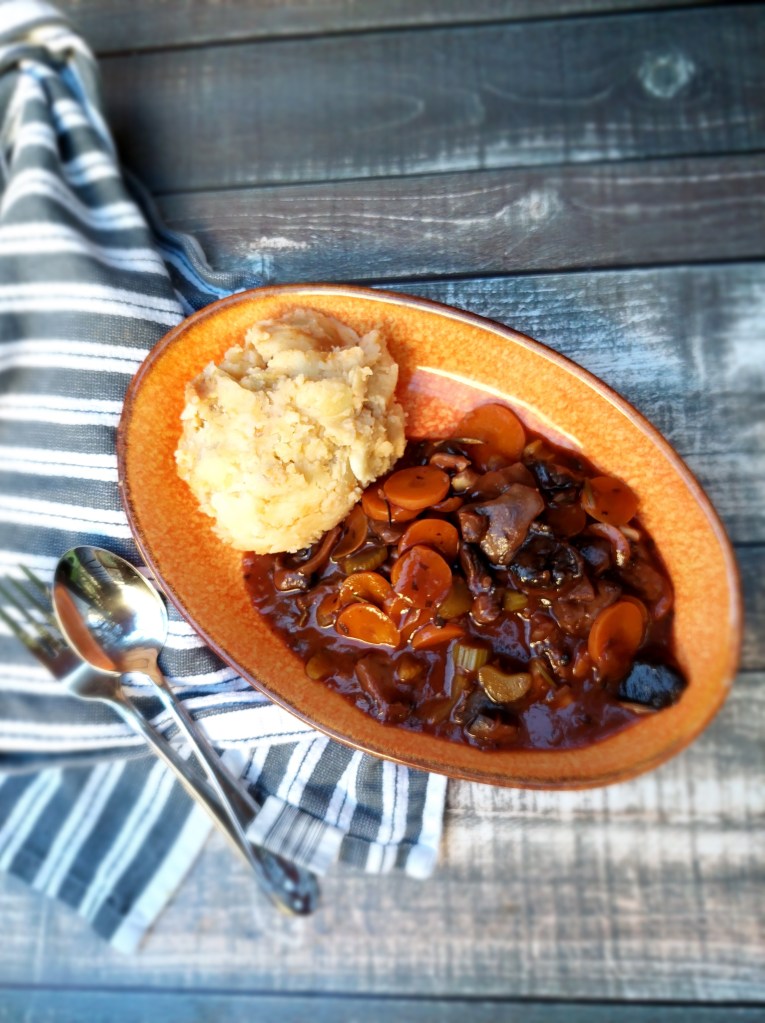
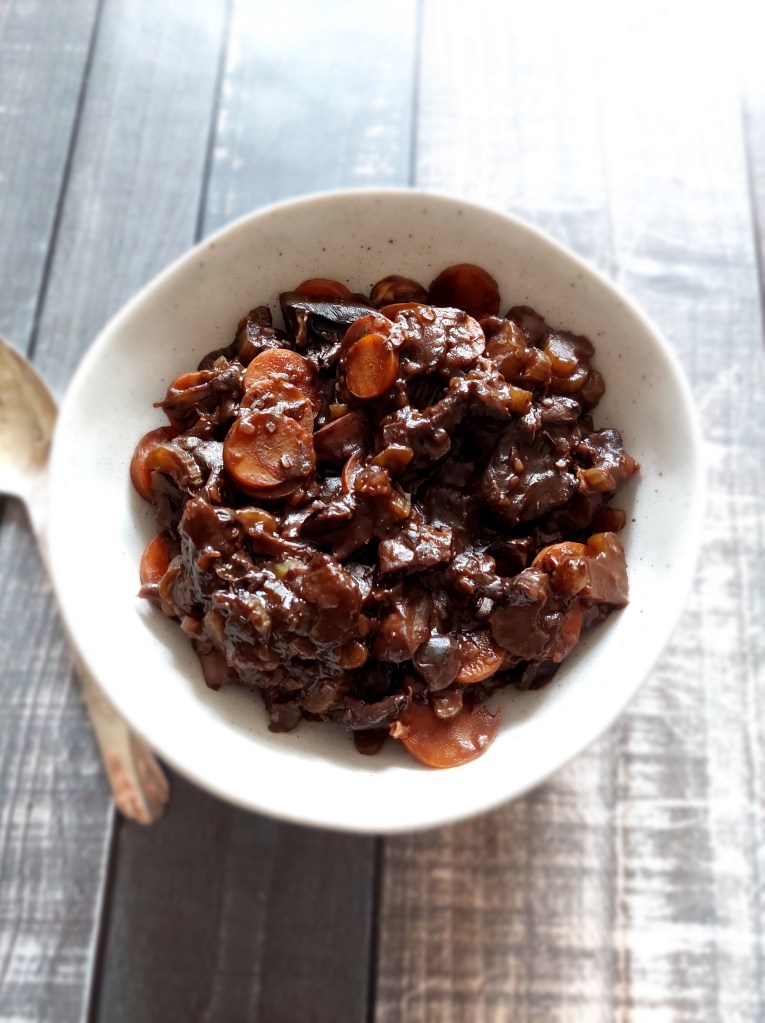
Whether you are veteran vegan, someone who is new to the plantbased lifestyle or just looking for a meat-free staple recipe for lent and beyond, this superb vegan mushroom bourguignon is for you!
It is easy and economical to make yet refined and elegant, looks fancy enough for a dinner party, it is comforting and warming and with its meaty texture will convince even the staunchest meat eater! It is the perfect dish on a gloomy autumn night – and actually for any other night as well!
Mushrooms are a rich, low calorie source of fiber, protein, selenium, and antioxidants. This recipe does without any oil, butter, cream or other fat sources and is therefore low in fat and calories and suitable for pretty much any diet!
It freezes well and is therefore suitable for meal prep.
Mushroom Bourguignon for Meal Prep
4 garlic cloves, minced 2 onions, peeled and finely chopped 3 carrots, finely sliced 3 stalks celery, finely sliced 480g mushrooms, brushed and sliced (any type is fine) 120ml (half a cup) tomato paste dried thyme and rosemary 1-2 tsp cornstarch or tapioca starch 1 cup vegetable broth 1 cup red wine salt (or soy sauce) and pepper to taste
Sear garlic, onions, carrots, and celery in a bit of water or broth in a heavy pot until softened, add mushrooms, thyme, rosemary. Add one cup red wine and broth and let cook until reduced and alcohol smell has evaporated (about 25-30 minutes). Add tomato paste and salt or soy sauce and pepper. Dissolve cornstarch or tapioca in equal amount cold water and add to the bourguignon while vigorously stirring. Let simmer until thickened. Serve with mashed potatoes or alternatively over pasta or rice.
Quick, easy, healthy and yummy pumpkin spice bars – a great breakfast or snack!
Looking for a quick easy and healthy recipe to have at hand when the 3pm slump strikes, the kids come home hungry from school or you need a quick breakfast on the run that doesn’t weigh you down? Then look no further than these pumpkin spice bars!
I have made and perfected this recipe countless times over the years and let me just reassure you that these pumpkin spice bars don’t need to be pumpkin spice bars at all. You can replace the pumpkin puree with apple puree and have apple bars (my favourite!) or replace it with banana and have banana bars etc. This recipe is veeery forgiving – you can play around with different grains, different sweeteners (or omit sweetener altogether) and it will always work!
Ingredients: 3 flax eggs (3 tbs ground flaxseed dissolved in 9 tbs water or plant milk and left to thicken) 3 cups rolled oats 3/4 tsp baking powder 1 cup pumpkin puree (or apple sauce or other fruit/veg puree) cinnamon and other spices to taste pinch of salt 1 cup soy milk or other plant milk 1/4 cup coconut sugar or other sweetener (may be omitted) sultanas or other dried fruit and seeds (half a cup)
Method: Preheat fan-forced oven to 180°C. Line or grease a 20×30 cm baking tin. Stir all ingredients together and let rest for 20 minutes – the longer the better! Pour into prepared tin and bake for 20 minutes or until golden on top. Let cool completely before you slice into squares.
Substitutions and adjustments:
As for oats, you can use quick or rolled oats, the rolled oats give a better texture though.
Sweetener: I have made these many times, including with raw sugar, coconut sugar, stevia, honey, and maple syrup and they all work well. As the oats, apple sauce and dried fruit are naturally sweet you can even omit sweetener altogether.
Milk: You can use any plant milk you like. I used soy milk to keep it nut free, but feel free to use nut milks if you don’t need the bars to be nut free.
Add-ins: These bars are very low in fat as they are free of oil, butter and eggs. The fat only derives from the natural fat in the oats and the seeds. If you follow a very low fat diet, omit the seeds and just add dried fruit.
Flax eggs: If you eat eggs, you can use 2 whole eggs instead of the aquafaba.
Pumpkin puree/apple sauce: mashed banana works well if you don’t have apple sauce, or any type of “baby food” purees. I’ve made these with pumpkin purée with great results.
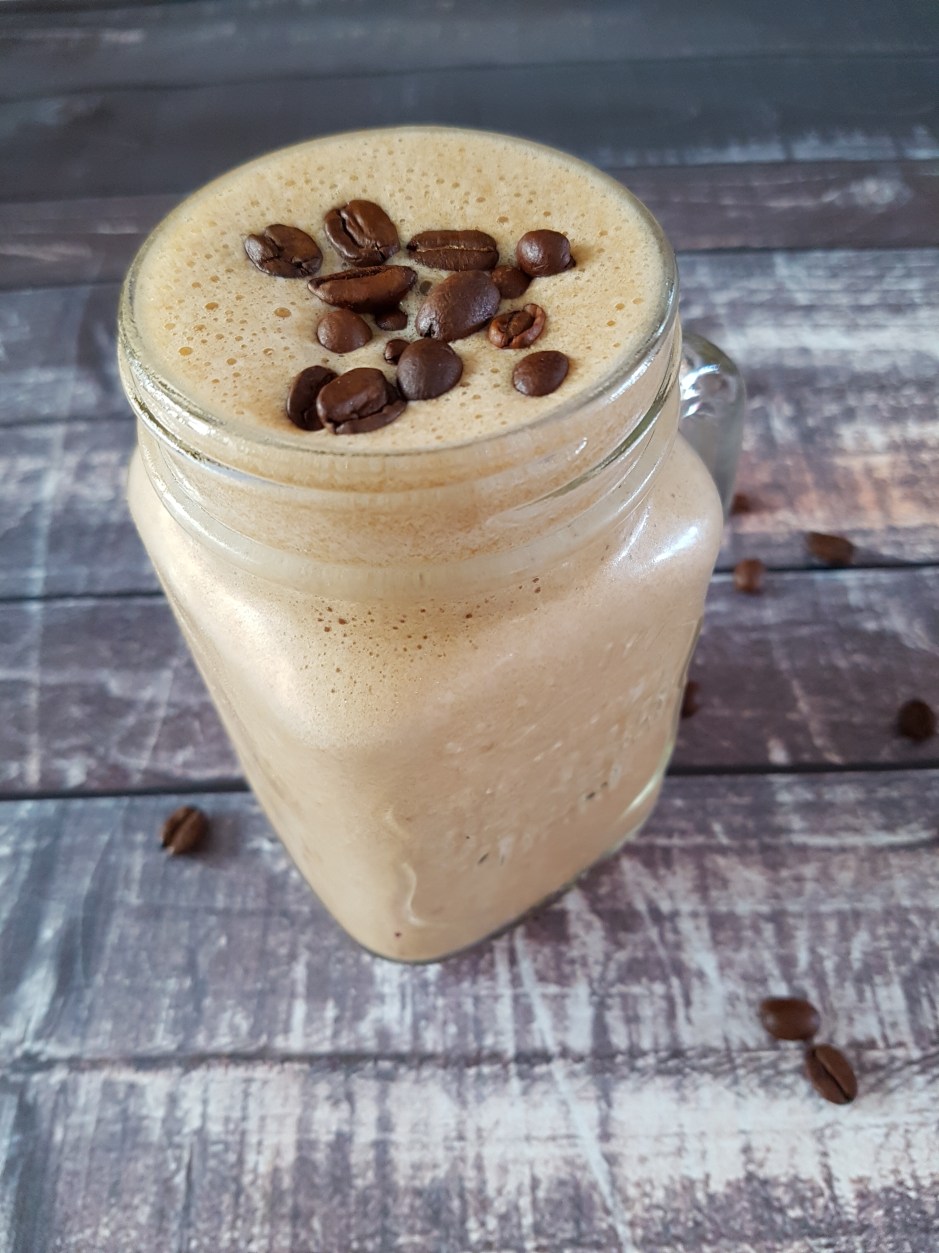
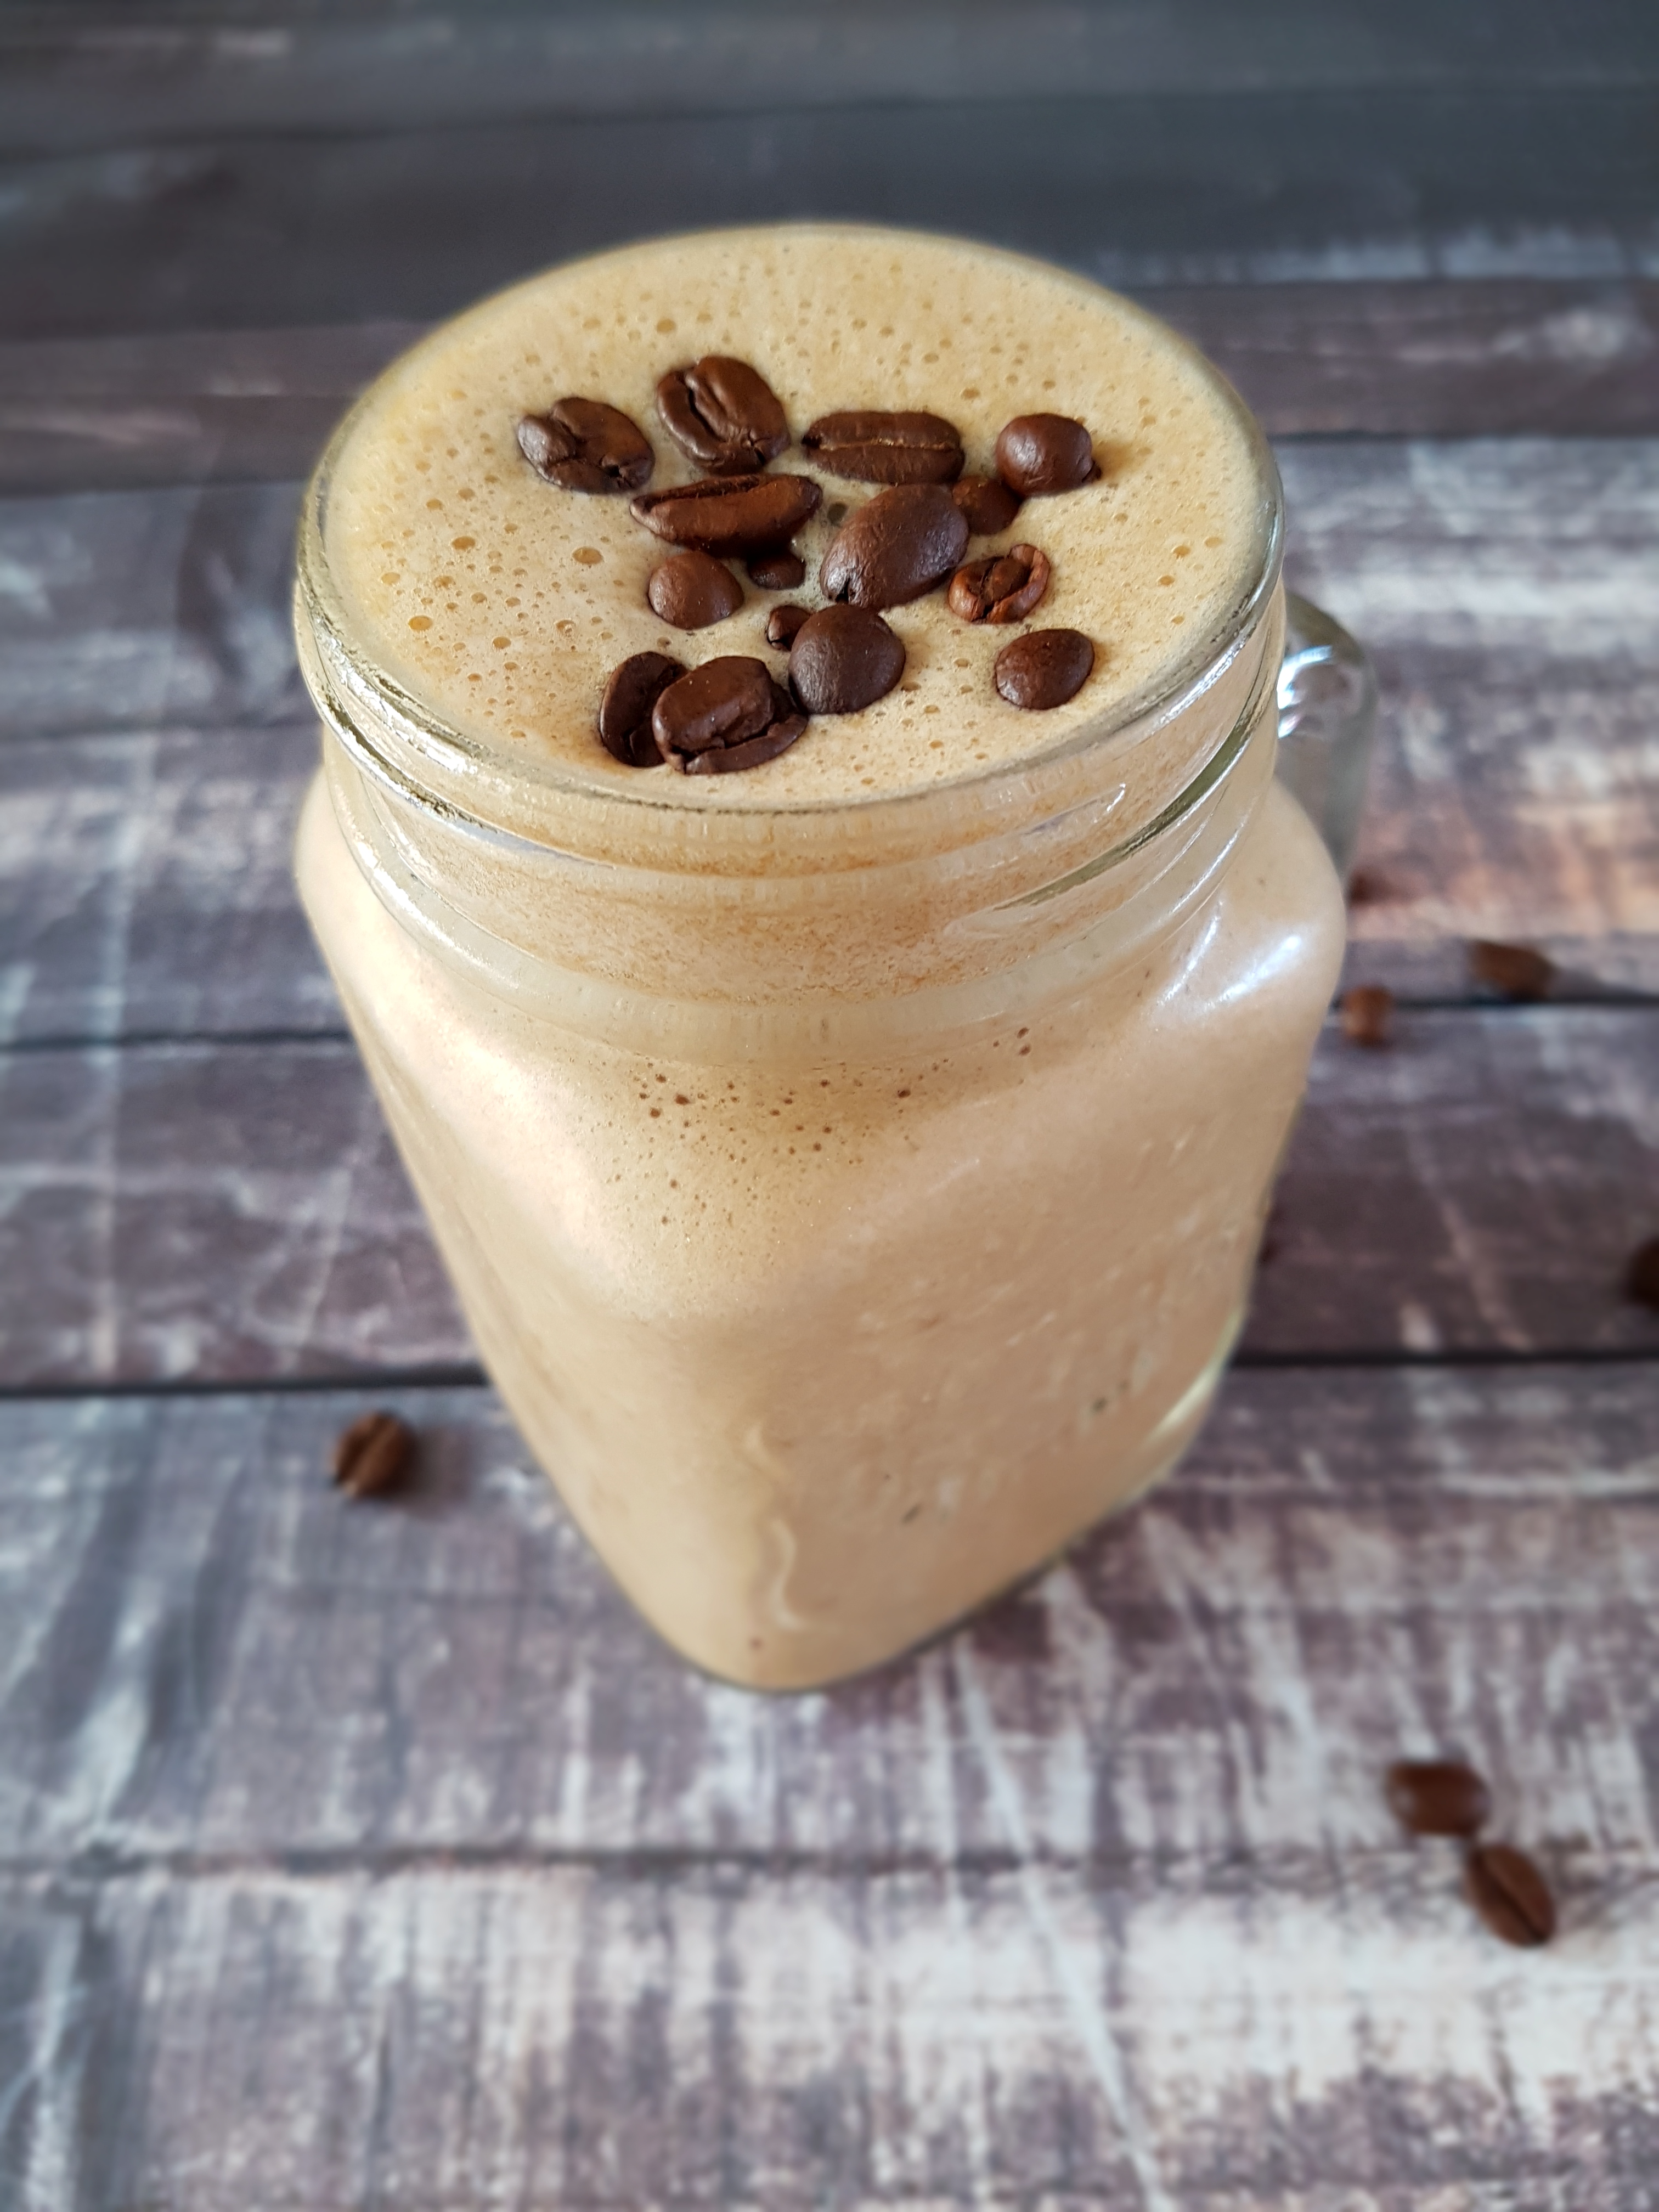
As you can gather from the title, things are getting serious at NWC headquarters, friends. I mean, coffee is obviously always serious business. But a vegan paleo iced coffee? And one that is high protein, high in fiber, low carb, low fat, dairy free (it’s vegan – duh!), soy free, gluten free, sugar free (it’s paleo – duh!) no less? Add fairtrade to the equation (if you use fairtrade coffee) and you can’t get more hipster than this.
Caffeine is always a good idea (before 4pm that is) but with the weather in Melbourne warming up (kinda), the cravings for an iced latte are getting stronger. Are you with me? Does that mean you should succumb to the overpriced frappuccino at your local coffee shop? I hope not. The good thing is, you can prepare my vegan paleo iced coffee in less than a minute in the comfort of your own home and get a serious buzz while still following your vegan, paleo, low carb, low fat etc. diet. Whatever rocks your boat.
It is worth mentioning as an aside that this vegan paleo iced coffee is thick, creamy and delicious. Just like an iced coffee should be.
Ready to kick the afternoon slump in its a**?
Vegan Paleo Iced Coffee
Vegan Paleo Iced Coffee
Serves 1
15 oz. or 450ml filtered water (or plant milk to make it even more creamy) 2 tsp instant coffee granules 5-7 large icecubes 1 large scoop vanilla pea protein powder flavdrops or sweetener to taste 1 tsp organic guar gum
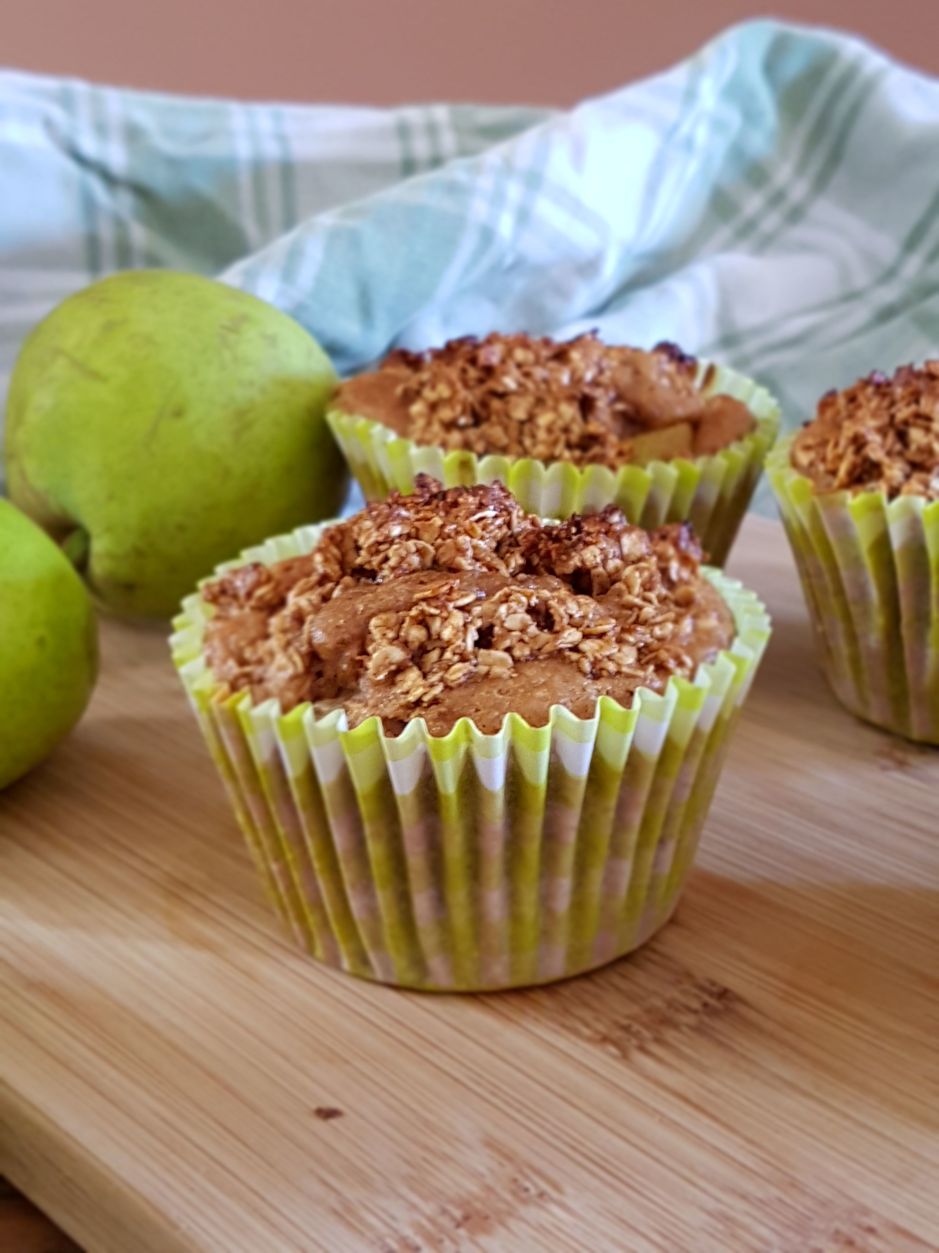
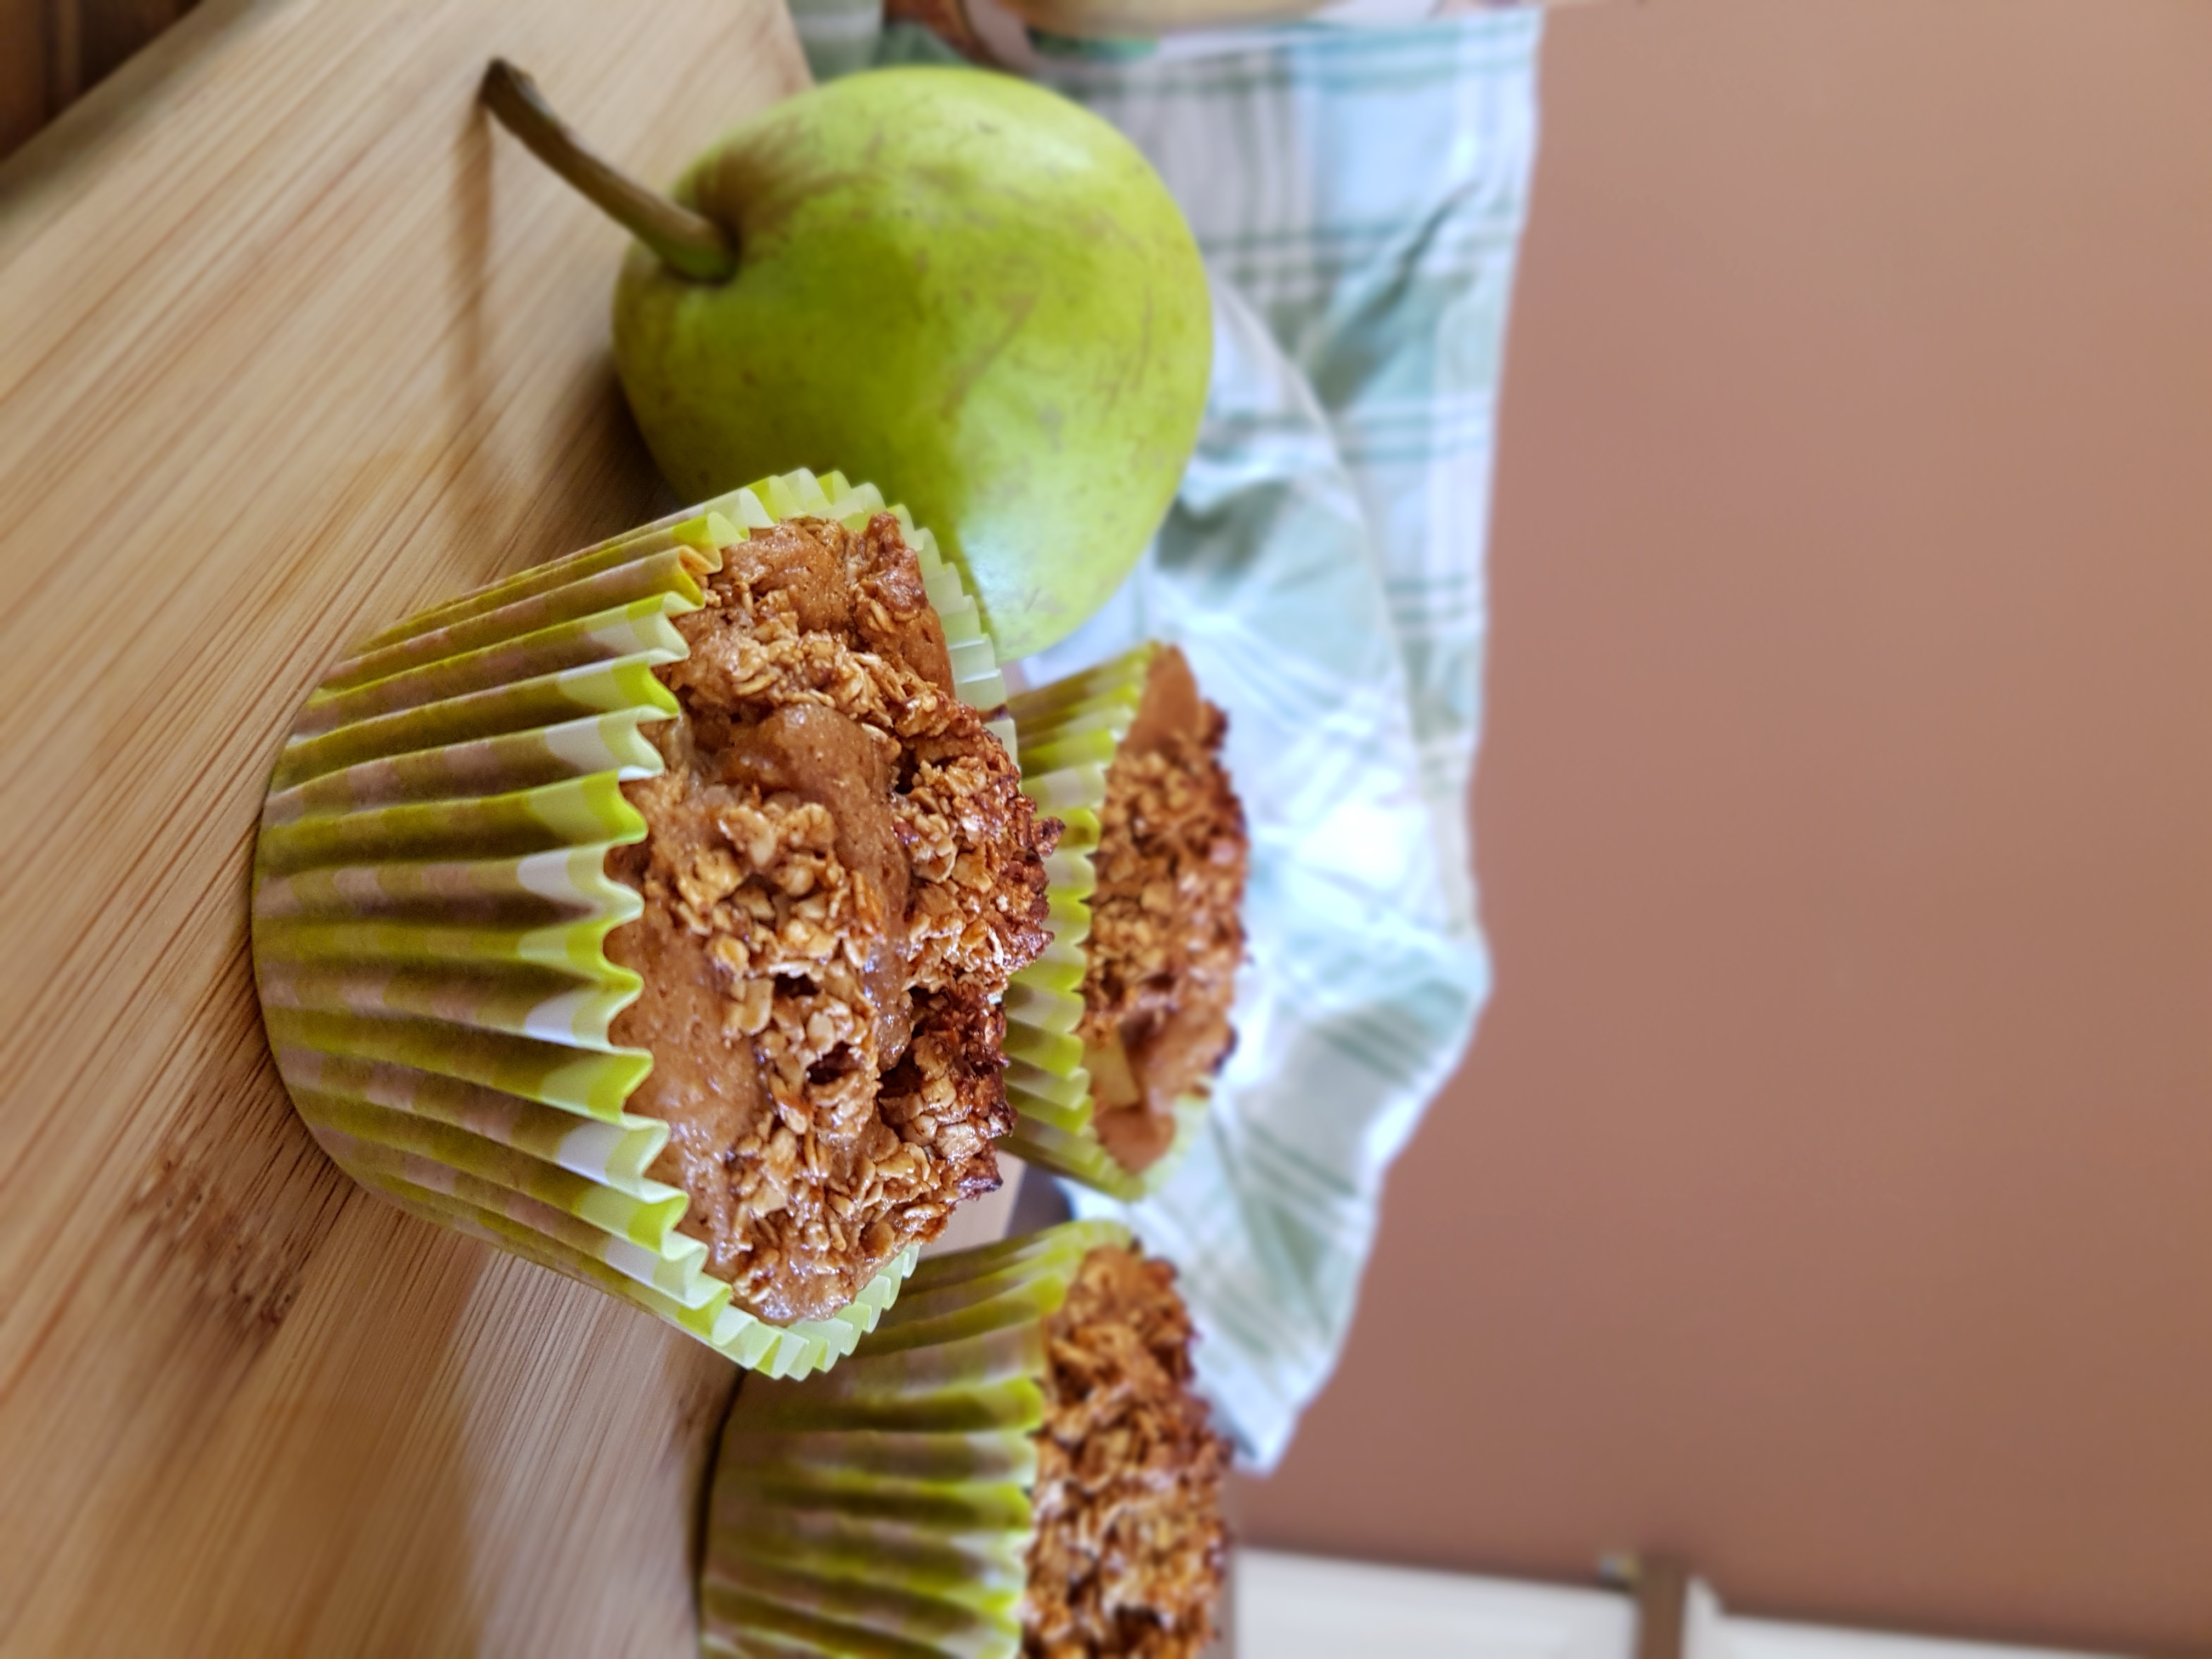
It’s my birthday and I brought you muffins! Not any old muffins, but the most delicious, moist, fruity, fudgy, crowd-pleasing vegan glutenfree lowfat pear streusel muffins! Yes, that’s right. While anything involving the word “streusel” would usually conjure the idea of either vegan, gluten free or lowfat, these babies are exactly that. No white flour, butter or refined sugar involved, and with fat only coming from the fat naturally occurring in oats. Who is in?
Vegan Glutenfree Lowfat Pear Streusel Muffins
These little delights were born out of the necessity to do something with a huge bag full of pears that our supermarket gave away for next to nothing as they were approaching their use-by date. Ever since my teenage years, I have enjoyed making muffins. It is such an easy way to use up whatever fruit you have on hand, it is quick, virtually fool-proof and the results never disappoint. Using fruit in muffins is also a great way to lower their fat content as the fruit keeps the nice and luscious.
Back to my bag full of pears and my obsession with muffins. So vegan glutenfree lowfat pear streusel muffins it was. I had never attempted streusel before so I am quite pleased how these babes turned out after the first attempt. As I said, they are ready in a jiffy and not complicated at all. Perfect if you just want to whip up something quickly for surprise guests or the 3pm munchies.
As my daughter and hubby (who are not into health food at all) devoured them, I can’t really say how long these will keep…:-)
Vegan Glutenfree Lowfat Pear Streusel Muffins
Makes 12 muffins
For the streusel: 1/4 cup oat flour 1/3 cup coconut sugar 2/3 cup oats 1/2 cup applesauce cinnamon
For the muffins: one cup soy milk or other plant milk 2 tbsp apple cider vinegar 1 tbsp vanilla extract 1/2 cup applesauce 2 cups oat flour 1/2 cup coconut sugar 4 tsp baking powder 1/2 tsp salt cinnamon 4 pears, diced
Preheat oven to 180 °C and grease a muffin tin or line it with liners. In a large mixing bowl, mix the milk with the vinegar, vanilla and applesauce and set aside for 15 minutes.
Meanwhile, prepare the streusel by mixing all the streusel ingredients in a small bowl. Set aside.
After 15 minutes are up, add the oat flour, coconut sugar, baking powder, salt and cinnamon and gently stir with a wooden spoon until incorporated and you have a smooth batter. Fold in the diced pear. Scoop batter into prepared muffin tin, then divide the streusel on top of the muffins. Bake for 20-25 minutes and let cool in pan for another 10 minutes before taking them out. Best to store in the fridge in an airtight container.