Vegan Glutenfree Lowfat Pear Streusel Muffins

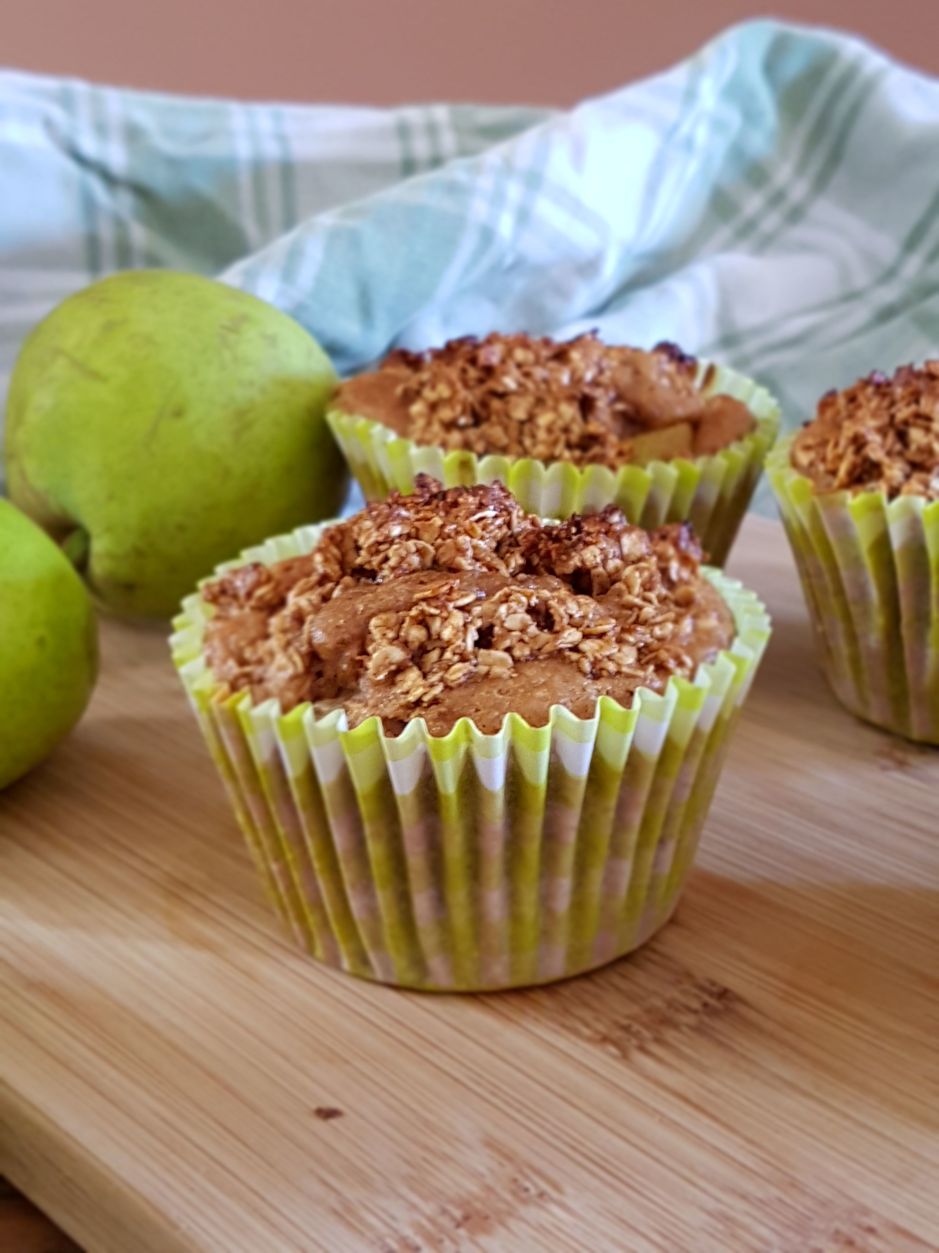
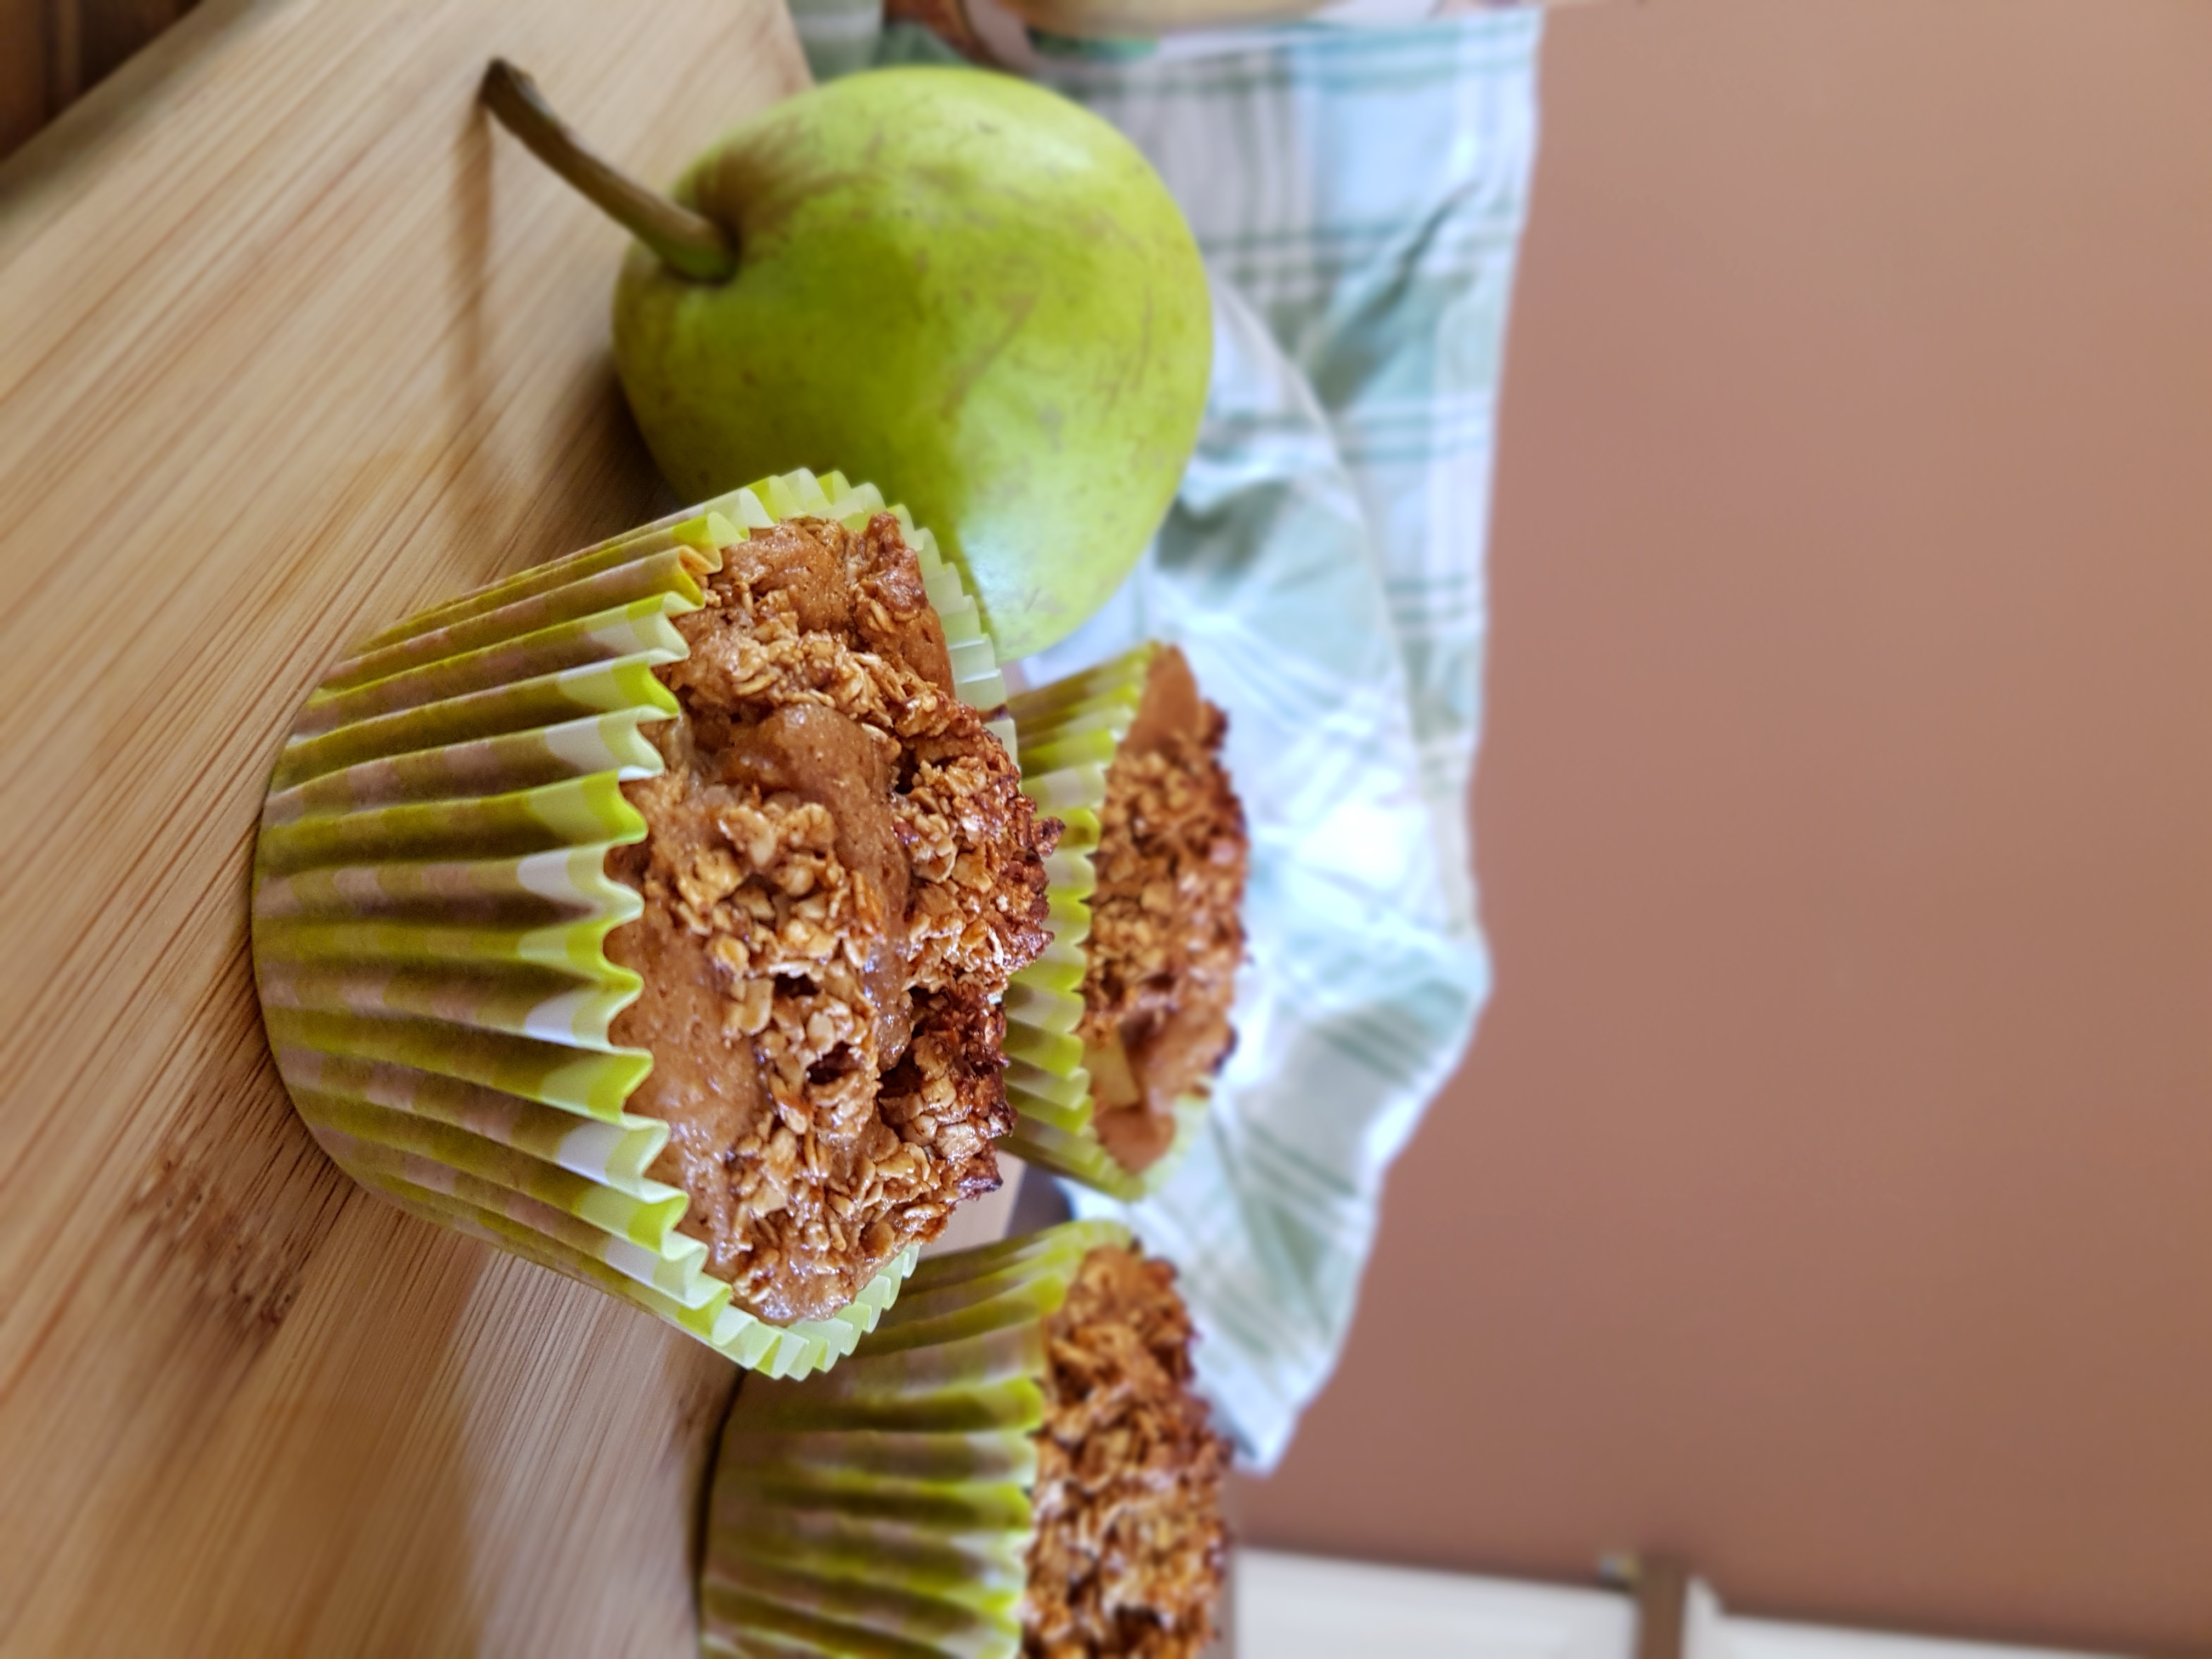
It’s my birthday and I brought you muffins! Not any old muffins, but the most delicious, moist, fruity, fudgy, crowd-pleasing vegan glutenfree lowfat pear streusel muffins! Yes, that’s right. While anything involving the word “streusel” would usually conjure the idea of either vegan, gluten free or lowfat, these babies are exactly that. No white flour, butter or refined sugar involved, and with fat only coming from the fat naturally occurring in oats. Who is in?

Vegan Glutenfree Lowfat Pear Streusel Muffins

These little delights were born out of the necessity to do something with a huge bag full of pears that our supermarket gave away for next to nothing as they were approaching their use-by date. Ever since my teenage years, I have enjoyed making muffins. It is such an easy way to use up whatever fruit you have on hand, it is quick, virtually fool-proof and the results never disappoint. Using fruit in muffins is also a great way to lower their fat content as the fruit keeps the nice and luscious.

Back to my bag full of pears and my obsession with muffins. So vegan glutenfree lowfat pear streusel muffins it was. I had never attempted streusel before so I am quite pleased how these babes turned out after the first attempt. As I said, they are ready in a jiffy and not complicated at all. Perfect if you just want to whip up something quickly for surprise guests or the 3pm munchies.

As my daughter and hubby (who are not into health food at all) devoured them, I can’t really say how long these will keep…:-)

Vegan Glutenfree Lowfat Pear Streusel Muffins

Makes 12 muffins

For the streusel:
1/4 cup oat flour
1/3 cup coconut sugar
2/3 cup oats
1/2 cup applesauce
cinnamon

For the muffins:
one cup soy milk or other plant milk
2 tbsp apple cider vinegar 
1 tbsp vanilla extract
1/2 cup applesauce
2 cups oat flour
1/2 cup coconut sugar
4 tsp baking powder
1/2 tsp salt
cinnamon
4 pears, diced

Preheat oven to 180 °C and grease a muffin tin or line it with liners. In a large mixing bowl, mix the milk with the vinegar, vanilla and applesauce and set aside for 15 minutes.

Meanwhile, prepare the streusel by mixing all the streusel ingredients in a small bowl. Set aside.

After 15 minutes are up, add the oat flour, coconut sugar, baking powder, salt and cinnamon and gently stir with a wooden spoon until incorporated and you have a smooth batter. Fold in the diced pear. Scoop batter into prepared muffin tin, then divide the streusel on top of the muffins. Bake for 20-25 minutes and let cool in pan for another 10 minutes before taking them out. Best to store in the fridge in an airtight container.

Enjoy!

Healthy Anzac Biscuits {vg, gf, lf}

Today is Anzac Day. And without going into all the historical intricacies, for the purposes of this blog, this means Anzac biscuits! Traditional Anzac biscuits, albeit tasty, are far from healthy as they contain butter (or far worse – margarine), refined sugar and white flour. Healthy Anzac biscuits? It seems like an impossible quest, but you can totally do this. Enter my healthy Anzac biscuits!

Healthy Anzac Biscuits

Healthy Anzac biscuits that are gluten free, vegan, refined sugar free and much lower in fat than standard Anzac biscuits. The best bit is that taste-wise, they are so close to the “original” that nobody will believe they are healthy! And as I can attest, they are husband and toddler approved too! I am not a biscuit person myself, but I can hardly stay away from them! With only a handful of standard pantry ingredients and very little prep time, there is no reason to enjoy a healthy Anzac biscuit – not only on Anzac day!

Consisting of oats, desiccated coconut, coconut oil and maple syrup, they are a guilt-free treat with benefits. Oats are one of the most nutritious foods on the planet, a great source of fiber, and have been shown to lower bad cholesterol. Coconut provides an array of essential nutrients, with manganese, copper and selenium only to mention a few. Coconut oil is a medium chain fatty acid, which is not readily stored as fat, but converted to energy and moreover has antifungal and antimicrobial properties. Maple syrup boasts calcium, iron, magnesium, phosphorus, potassium, and zinc as well as vitamins such as thiamin, riboflavin, niacin, and B6. Now that’s what I call healthy Anzac biscuits!

Healthy Anzac biscuits

Vegan, Gluten Free, Dairy Free, Refined Sugar Free, Low Fat

Makes 16 small biscuits

2 cups rolled oats
1/4 cup desiccated coconut
2 tbsp organic maple syrup
4 tsp melted coconut oil
1 tsp vanilla extract
2 tbsp water

Preheat your oven to 160 °C and line a baking sheet with baking paper. Give all ingredients in that order into a high-powered blender and blitz for 20 to 30 seconds, scraping down the sides as necessary, until the dough is combined and comes together. Form into 16 rather flat cookies and arrange evenly on your lined baking sheet. Bake for 20 minutes until lightly golden, let cool completely and store in an airtight container.

Enjoy!

Skinny Parsnip and Peanut Soup (4 ingredients!) {vg, gf}

I do love a good soup, regardless of the weather. And I happened to have a lot of parsnips in this week’s vegetable box delivery (hello, autumn!). Parsnips that were slowly wilting away, screaming at me: “Turn me into a soup!”. I listened to them. And because I am a sucker for unconventional combos, the result was a parsnip and peanut soup. A skinny parsnip and peanut soup, to be precise.

To be honest, I am not the hugest fan of parsnips. I don’t particularly like their texture and the taste does nothing much for me, not even roasted. Throw the good ol’ spud and peanut butter into the equation, however, and magic happens. You don’t even necessarily need the peanuts, I just think it really adds some depth of flavour and it actually works really well with the parsnips and potatoes even though it seems like an unusual pairing. The starchiness of the root vegetables and the creaminess of the nuts just takes this soup to a whole new level of goodness. I used defatted peanut butter powder (pb2) to lower the fat content. However, you could use ground peanuts (or other nuts) or peanut butter instead and this soup would still be very low in calories albeit satisfying.

As a full-time working mum far away from my family (sniff), I take my commitment to create easy, quick and hassle-free recipes very seriously. This soup requires just four ingredients (yes, four!) and a minimal amount of time to prepare. It is also ridiculously fool-proof so you will have absolutely no excuses not to try it! Given that the required ingredients are fairly cheap, this is also a very budget-friendly soup. It is ideally suited to prepare as a big batch and store leftovers in the fridge or freezer. Presented in a beautiful bowl and with some fancy toppings, this soup is also impressive enough to serve at your next dinner party.

Note that if you don’t have or don’t want to use vegetable stock, it’s totally fine to use water instead (that’s what I did). You just need to add salt, pepper and other spices (such as garlic powder) to taste. The stock will make it even more flavoursome but I have tried it both ways and it works beautifully with just the water as well. For what it’s worth, I don’t peel my veggies as it all gets blended up anyway and I use organic but I know tut shat most peaople like to peel their veggies. 😉

Skinny Parsnip and Peanut Soup

Serves 2-4

1 lb (ca. 500 g) potatoes, washed, peeled (optional), and cut into small pieces
4 parsnips, washed and cut into small pieces
3 cups vegetable stock (or water plus salt, pepper, garlic powder and other spices to taste)
2 tbsp powdered peanut butter OR peanut butter OR ground peanuts (or other nut butter or nut meal)

Steam or microwave the vegetables until tender. Bring stock or water and spices to the boil, add the steamed veg and peanut butter/powder, stir and then blend with a stick blender until smooth and creamy. The soup will seem to be liquid and frothy at first, but hold on and it will turn creamy!

Enjoy!

Healthy Pumpkin and Chickpea Curry {vg, gf}

There is just nothing quite like curry. It is comforting, nourishing, versatile, flavoursome, filling, easy and inexpensive. It is a great way to use up leftovers and is the perfect candidate for making in batch and then freezing. The only downside is that traditional Indian, Thai and Malaysian curry recipes with their oodles of oil and coconut cream are far from being a “diet food”. While this is not a problem if you indulge once in a while or are not concerned about your physique, there are certainly options to “healthify” a good curry without compromising on taste, and my healthy pumpkin and chickpea curry is one such example.

Curries are especially suitable for creating lower fat and lower calorie versions of. Due to their ample amounts of fragrant herbs and spices, you don’t need to add much oil at all to carry the flavours. Chili, curry powder, pepper and co. satisfy your taste buds without the need for a tin of coconut cream per portion, and also provide a healthy kick for your metabolism. Healthy curries are a reality!

This healthy pumpkin and chickpea curry is not only yummy, it is also easy as. A handfull of ingredients you likely have sitting in your pantry right now and a maximum of 20-25 minutes of your time, of which the actual hands-on time is very little. Sounds good? Go see for yourself!

Healthy Pumpkin and Chickpea Curry

Serves 4

3 garlic cloves, minced
4 large carrots, washed, peeled and chopped
1 large potato, peeled and chopped (may be parboiled to speed up cooking time)
250 g pumpkin, peeled and chopped (may be parboiled to speed up cooking time)
125 g cauliflower, washed and torn into florets
125 g green peas, fresh or frozen
1 400 ml tin of diced tomatoes
350 ml vegetable stock
2 tins of chickpeas, rinsed and drained (reserve the brine for chocolate mousse!)
1 cup almond milk or very light coconut milk
half a tbsp mild curry powder
salt and pepper to taste
dash of tomato sauce

Heat the garlic in a large saucepan until aromatic. Add the carrots, potato, pumpkin, cauliflower and peas and cook for a few minutes while stirring. Add the tomatoes, stock and spices and cook until vegetables are tender. Then stir in the chickpeas, milk and tomato sauce and heat until thoroughly warm.

Enjoy!

Almost Fat Free Vegan Gluten Free Chocolate Cake

I apologise for that very lengthy title, but I just couldn’t NOT share all the attributes of this marvellous creation of mine. In fact, I should have added moist, fudgy, scrumptious, dreamy, chocolatey, rich, moreish, delightful, satisfying, luxurious, decadent, silky…

I wanted to make a cake for my daughter’s birthday, and in my research about healthy baking I repeatedly stumbled across the tip to use black beans instead of oil/butter and flour. Wut? Yes, that’s right. If you have been following me for some time, you know that I am crazy about legumes. I use them to replace meat (try my lentil bolognese and vegan pâté), cheese and dairy (hello vegan garlic sauce! Or how about some vegan cream cheese? Recipes coming soon so stay tuned!). They are cheap, satisfying, healthy, can be stored almost indefinitely and are incredibly yummy and versatile. But if you thought that the use of legumes is limited to savoury goodies, it’s time to tap into new bean realms.

Almost Fat Free Vegan Gluten Free Chocolate Cake

So I conquered my pantry, kidnapped two beautiful tins of black beans and this is what I did with it. To be honest, I wasn’t so sure how this experiment would turn out. When it comes to baking, I tend to throw the baby out with the bathwater. Just gluten free like back in the day when I started my new journey of no worries baking simply doesn’t cut it anymore these days. I want vegan, oil-free and possible also refined sugar free. Speaking of which, I wish I could say that this cake was sugar free. Unfortunately it isn’t. I am going to try a version with dates soon as I think they might go well in here, but I wanted to take it two steps at a time, not three steps, so for the moment, this uses plain old cane sugar. I’d love for you to try this with alternative sugars so if you do, let me know if it works! So this is not low-sugar or low-carb, but I hope that the lack of oil, butter, gluten, dairy and eggs makes up for it. Plus, beans = fibre and protein FTW.

Oh, and have I mentioned that this is a really easy one? No separating of eggs (it’s vegan – duh!), only one bowl, no first-mix-the-wet-ingredients-then-mix-the-dry-ingredients-then-sift-the-flour-crap that ain’t nobody got time for. The baking time is a little longer than I prefer (45 minutes), but the actual active hands-on time is less than 15. So no excuses!

So what does a cake made of black beans look, smell and taste like? The answer is: nothing short of divine.

Almost Fat Free Vegan Gluten Free Chocolate Cake

Makes 1 8-inch (20cm) round cake

2 cups almond milk, divided
1 tbsp apple cider vinegar
2 tins black beans, drained and rinsed
1 cup apple sauce
2 tsp vanilla

1 cup+ gluten-free flour
3 tsp gluten-free baking powder
1 cup organic cane sugar
1 cup raw organic cacao

Preheat oven to 180 °C and lightly grease an 8-inch or 20-cm bake tin with coconut oil. Mix 1.5 cups of the almond milk with the vinegar in a large mixing bowl and let sit for a minute to let the two ingredients react with each other. Blitz the drained and rinsed black beans together with the remaining half cup almond milk until a paste forms. A coarse texture is okay, but there should not be any large lumps.

Add the bean paste together with the apple sauce and vanilla to the almond milk-vinegar mix and beat until combined and a bit frothy. Add the flour, baking powder, cane sugar and cocoa and beat on high until very smooth. There will probably still be some bean skins, but that will resolve during baking. The texture of the batter should be that of a very thick custard. If in doubt, add a couple more tablespoons of flour. Taste the raw batter (no risk of salmonella) and add a bit more sugar if you have a sweet tooth (some of the sweetness will go away during baking).

Pour the batter into the prepared tin and bake on the middle rack for 40-45 minutes or until it passes the toothpick test. Let the cake cool completely before serving.

Enjoy!