Now this is a real game-changer. If you are sick of rancid-tasting store-bought microwave popcorn and the idea of an oil-free healthy crunchy snack sounds good to you, look no further than this easy recipe for oil free healthy microwave popcorn.
Oil free healthy microwave popcorn
1/4 cup popcorn kernels
1/4 tsp salt (more or less to taste)
2 tbsp water
In a heat-proof glass pyrex dish, mix all ingredients. Cover with an old dish towel (it might get stained) and microwave for two rounds of 3-4 minutes each, around 7 minutes in total, until popping slows down.
You might need more or less time depending on your microwave. Be careful when opening the microwave door as the bowl will be very hot.
With school thankfully being back again this year (yay!), my frantic mornings are filled with two dilemmas. One is packing a snack in my daughter’s lunchbox that is a) nut-free and b) actually gets eaten. The other is that I often don’t have time for a full-on breakfast but need the energy to tackle the drop-off and dealing with those first work emails. Enter my allergy-friendly hemp and coconut bliss balls – a nutritious and delicious breakfast or snack that is very versatile and can even be frozen for meal prep.
I used to make bliss balls with rolled oats and pea protein powder to replace nuts but at the moment my digestive system hat hit rock bottom sadly so I cannot even have oats or pea protein anymore. Enter hemp protein! I don’t care for it much in smoothies but it is superb in these bliss balls.
Most bliss ball recipes suggest to use Medjool dates and they are definitely superior in texture (much softer) but they are also very expensive. I find I can achieve the same result with just regular dried dates from the baking aisle. I soak them for a bit in hot water and then drain them well.
Ingredients 1 cup packed dried dates (approx. 210g), soak in hot water before using to soften them up 1 cup desiccated coconut (reserve some for rolling) 1 scant cup of hemp protein powder (can use other protein powder) 2 tbsp raw cacao optional: spices like cinnamon, gingerbread spice optional: vanilla or almond extract
Method Blend the dates first into a date paste using a high powered blender. Then add everything and blitz into a sticky dough. I should come away from the sides of the blending cup after some time. Add a few drops of water if it seems to crumbly. Wet your hands a bit to form 20-24 balls and roll in reserved desiccated coconut. Store in the fridge or freeze for up to 3 months.
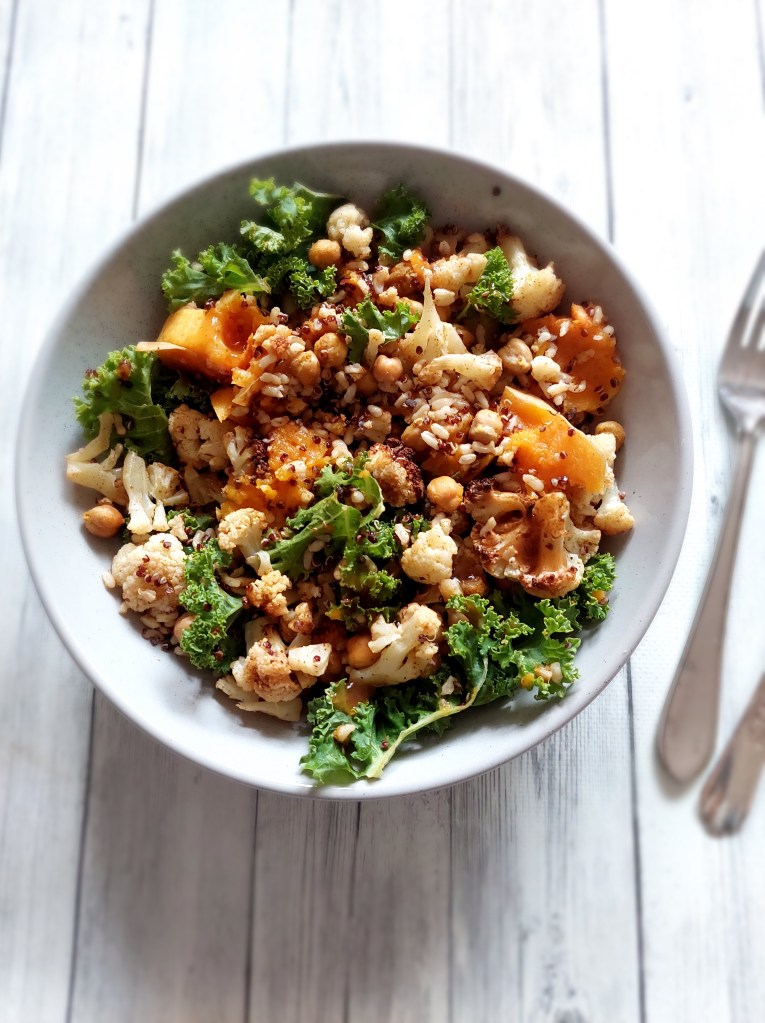
For a super quick and easy yet healthy and delicious salad which is also great for meal-prepping try this recipe for my cauliflower super salad!
It takes next to no effort, is incredibly versatile, delicious hot or cold and delivers healthy plant protein to fuel your afternoon. You can use whatever veggies, legumes and grains you have at hand. My secret is to use a tin of chickpeas and use the chickpea juice (ie. aquafaba) to coat the vegetables in before roasting. They get nice and crispy and any spice sticks to them much better. Aquafaba also eliminates the need to use oil.
Healthy, easy, yummy and of course vegan, gluten free and oil free – my Cauliflower Super Salad
Serves 3
3 medium potatoes, washed and cubed or cut into wedges 1 medium head of cauliflower, cut into small florets optionally any other vegetables such as kale or pumpkin grains of choice (I use a pre-cooked mix of brown rice and quinoa) 1 tin of chickpeas, drained (but reserve liquid!) and rinsed well favourite spices/sauce (e.g. cajun spice, curry mix, bbq sauce)
Method
Preheat oven to 240 °C. Mix the potatoes, cauliflower and chickpeas (or any other legumes and vegetables) in aquafaba and spices.
Bake on a lined sheet until cooked to your liking (about 20-30 minutes). Add precooked grains, mix through and serve with your favourite dressing!
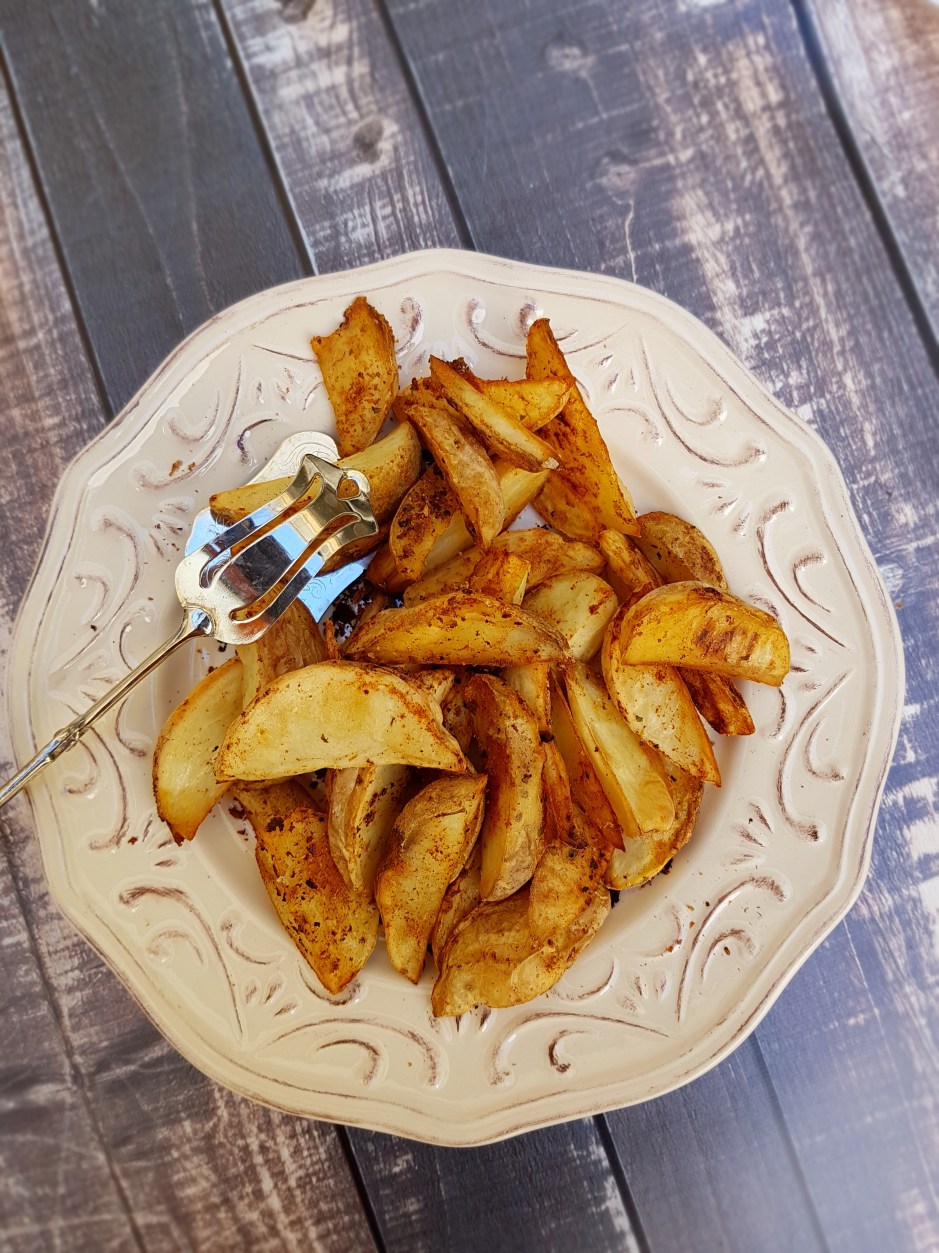
I loooove potatoes. Seriously. They are so much more than a side dish. Not only do they taste delicious, they are so filling and satisfying that they make for a complete meal. I love them in any state – boiled, baked, roasted, mashed, fried…but they are at their best in the form of chips or wedges. Now, if this sounds greasy and unhealthy to you, dripping with trans fats and all sorts of nasties, hear me out. It is possible to achieve the perfect crispy oil-free potato wedges. No oil and no deep-frying required!
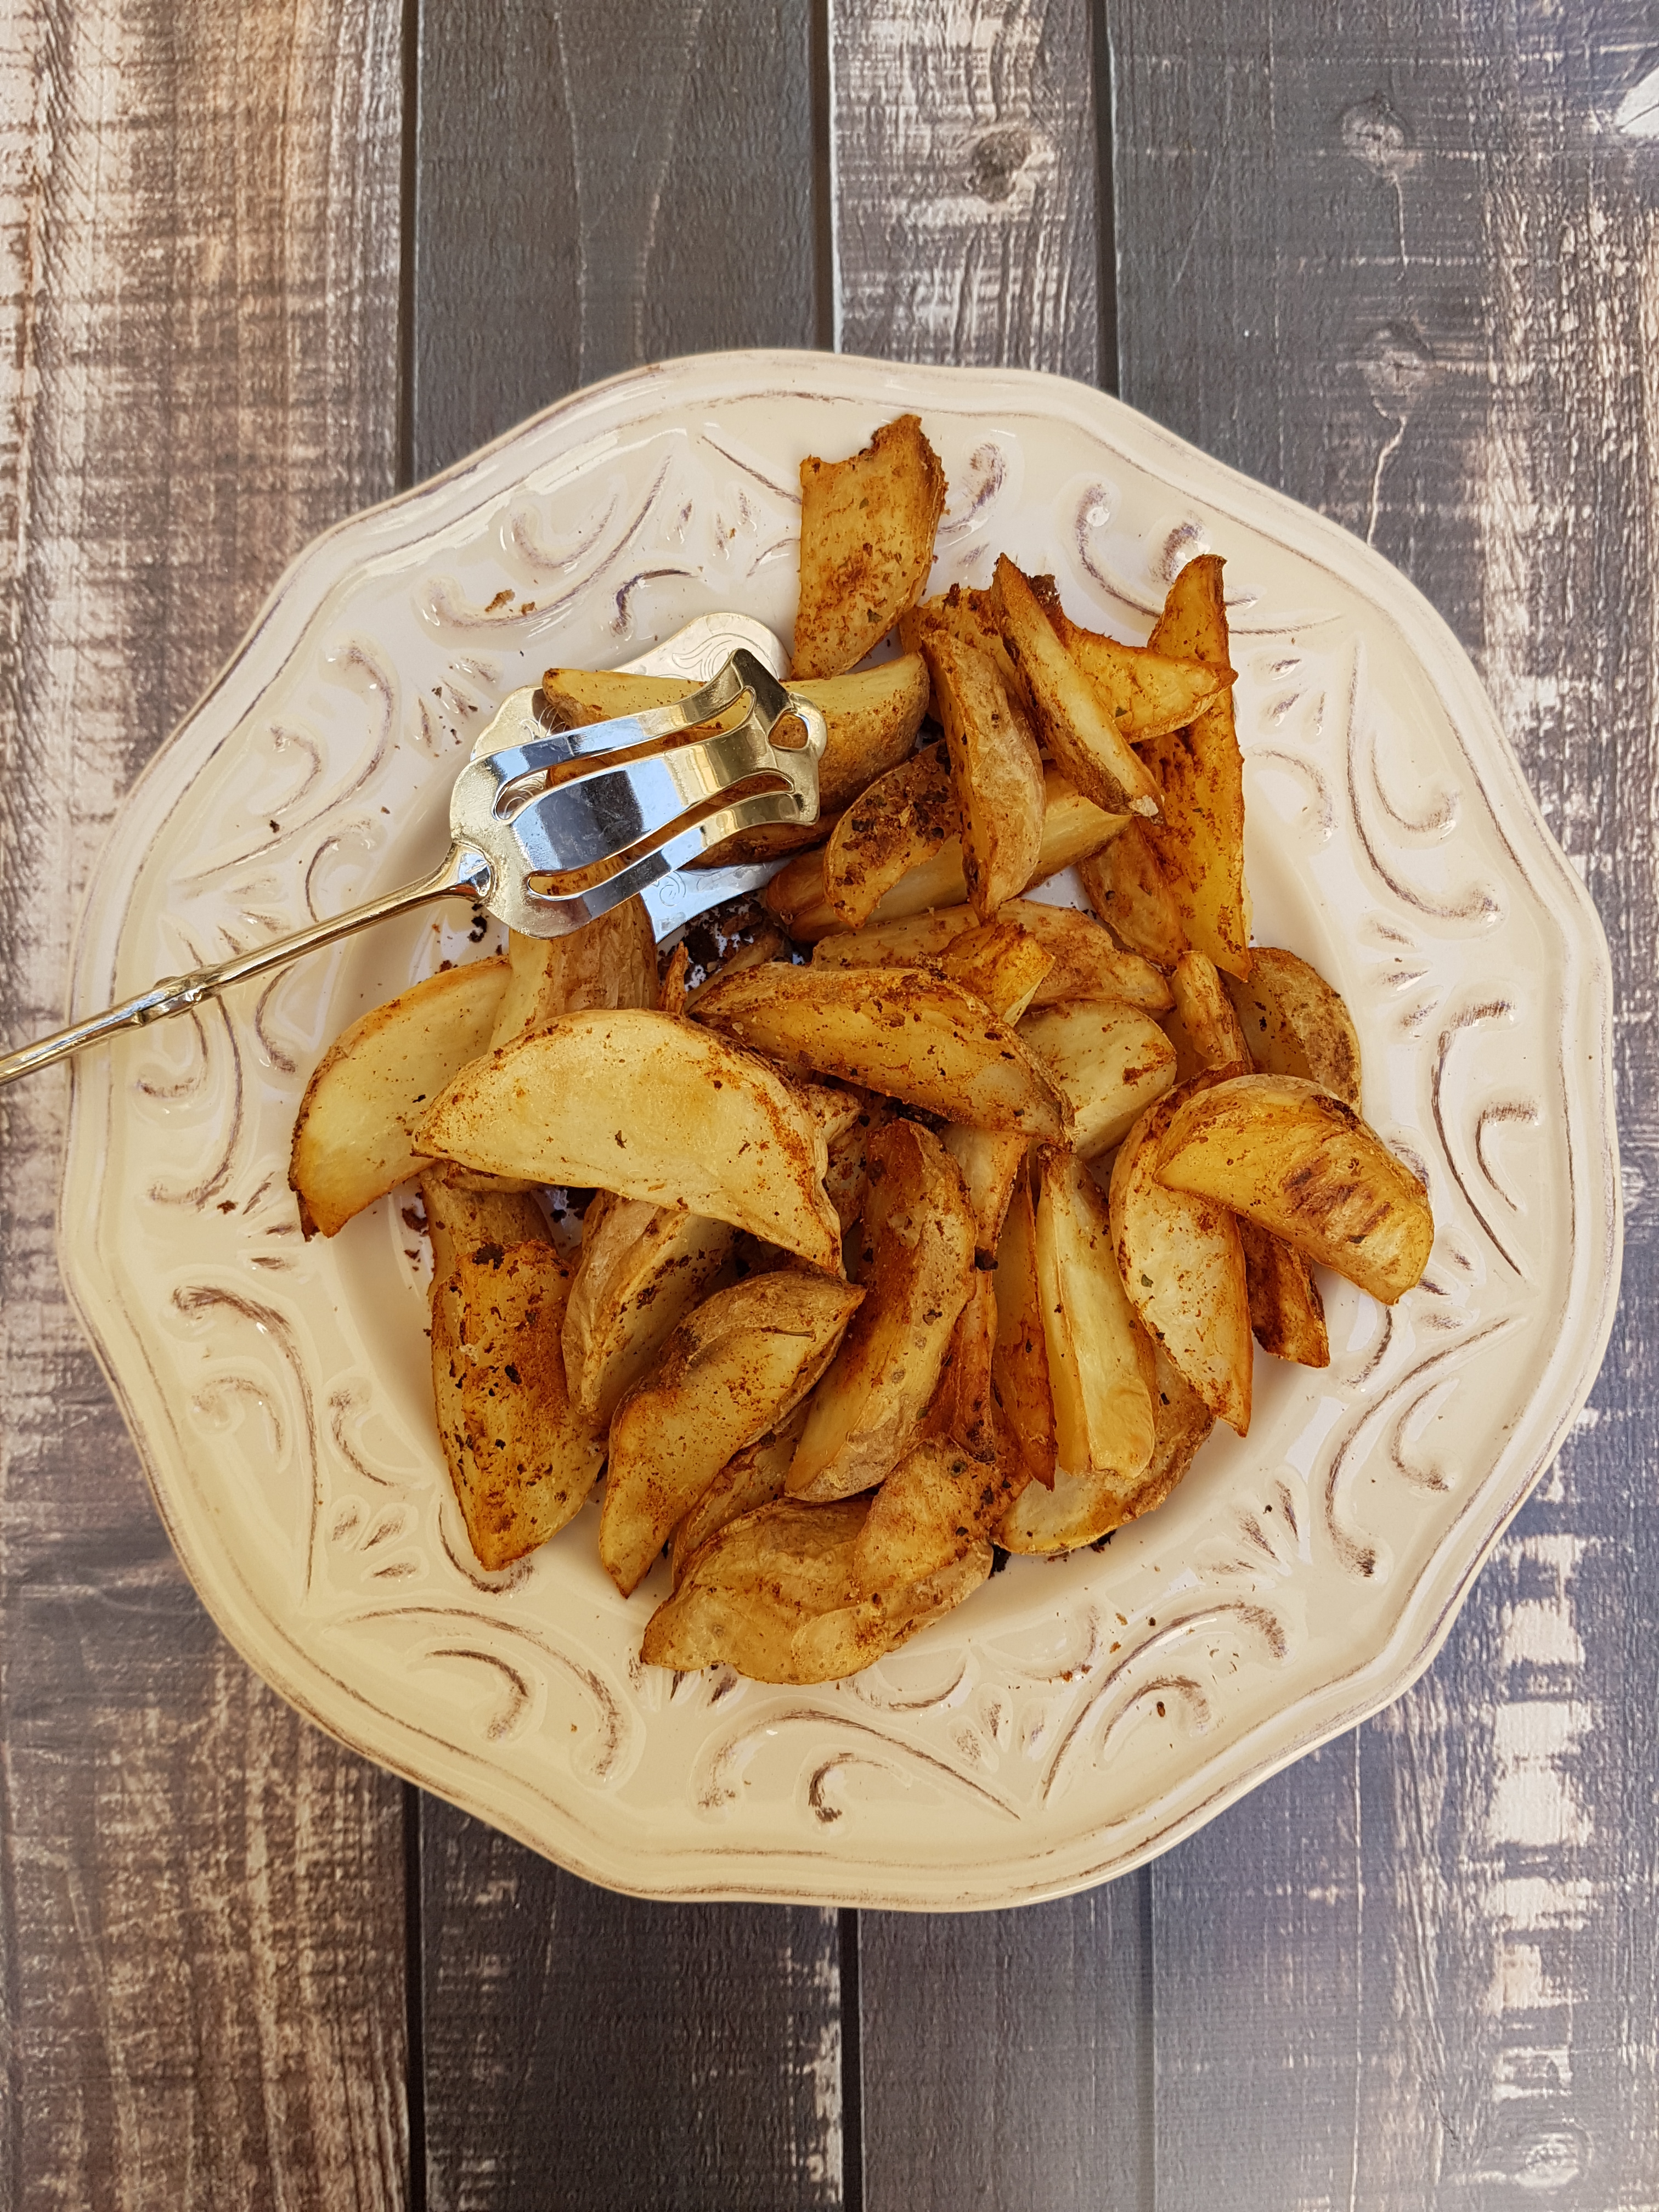
These are not the result of an air-fryer (if you are remotely familiar with instagram you would have come across the latest craze that is air-fryers). No fancy or expensive equipment required, just a good ol’ oven, a baking tray and 40 minutes of your time. That’s all!
While rice, noodles, pasta and (gluten-free) bread all have their merits, nothing will keep you full for as long as a good plate of spuds. Being much lower in carbohydrates and calories than other “side dishes” and with their favourable nutritional profile, potatoes are closer to vegetables than starchy sides. They are fat and cholesterol free and bursting with iron and vitamin C. Vitamin C actually improves the absorption of iron which is why potatoes are extremely valuable for vegans and vegetarians. They contain more potassium than a banana, are a good source of vitamin B6, fiber, magnesium and antioxidants as well as the so-called “resistant starch”. Resistant starch works like soluble fiber which contributes to improved insulin sensitivity, lower blood sugar levels, reduced appetite and improved digestion.
Enough said about the benefits of spuds, I bet you just want to know how to achieve the perfect crispy oil-free potato wedges! Crispy wedges without any oil? What’s the secret ingredient? Yes, there is actually a secret ingredient. And that is…water! I knew that in gluten-free bread baking, putting a tray of water into the oven helps the bread to form a proper crispy crust. I thought that this must also be possible with potatoes! While I have achieved good results dry-roasting potatoes before, adding some water to the tray definitely put these babies onto a new level. Unlike with bread where a separate water tray is put into the oven, the water is added directly to the tray with the potatoes on it.
Crispy Oil-Free Potato Wedges
Crispy oil-free potato wedges
Serves 4
1kg potatoes, washed and cut into wedges 1-2 tbsp coarse sea salt 1 tsp paprika halt a cup plain water
Preheat the oven to 230 °C. Spread the prepared wedges onto a non-stick (or lined) baking tray. Mix the salt and paprika in a small bowl. Sprinkle the spice mix over the potatoes and rub into the wedges. Add the water to the tray. Bake for approx. 40 minutes, turning halfway.
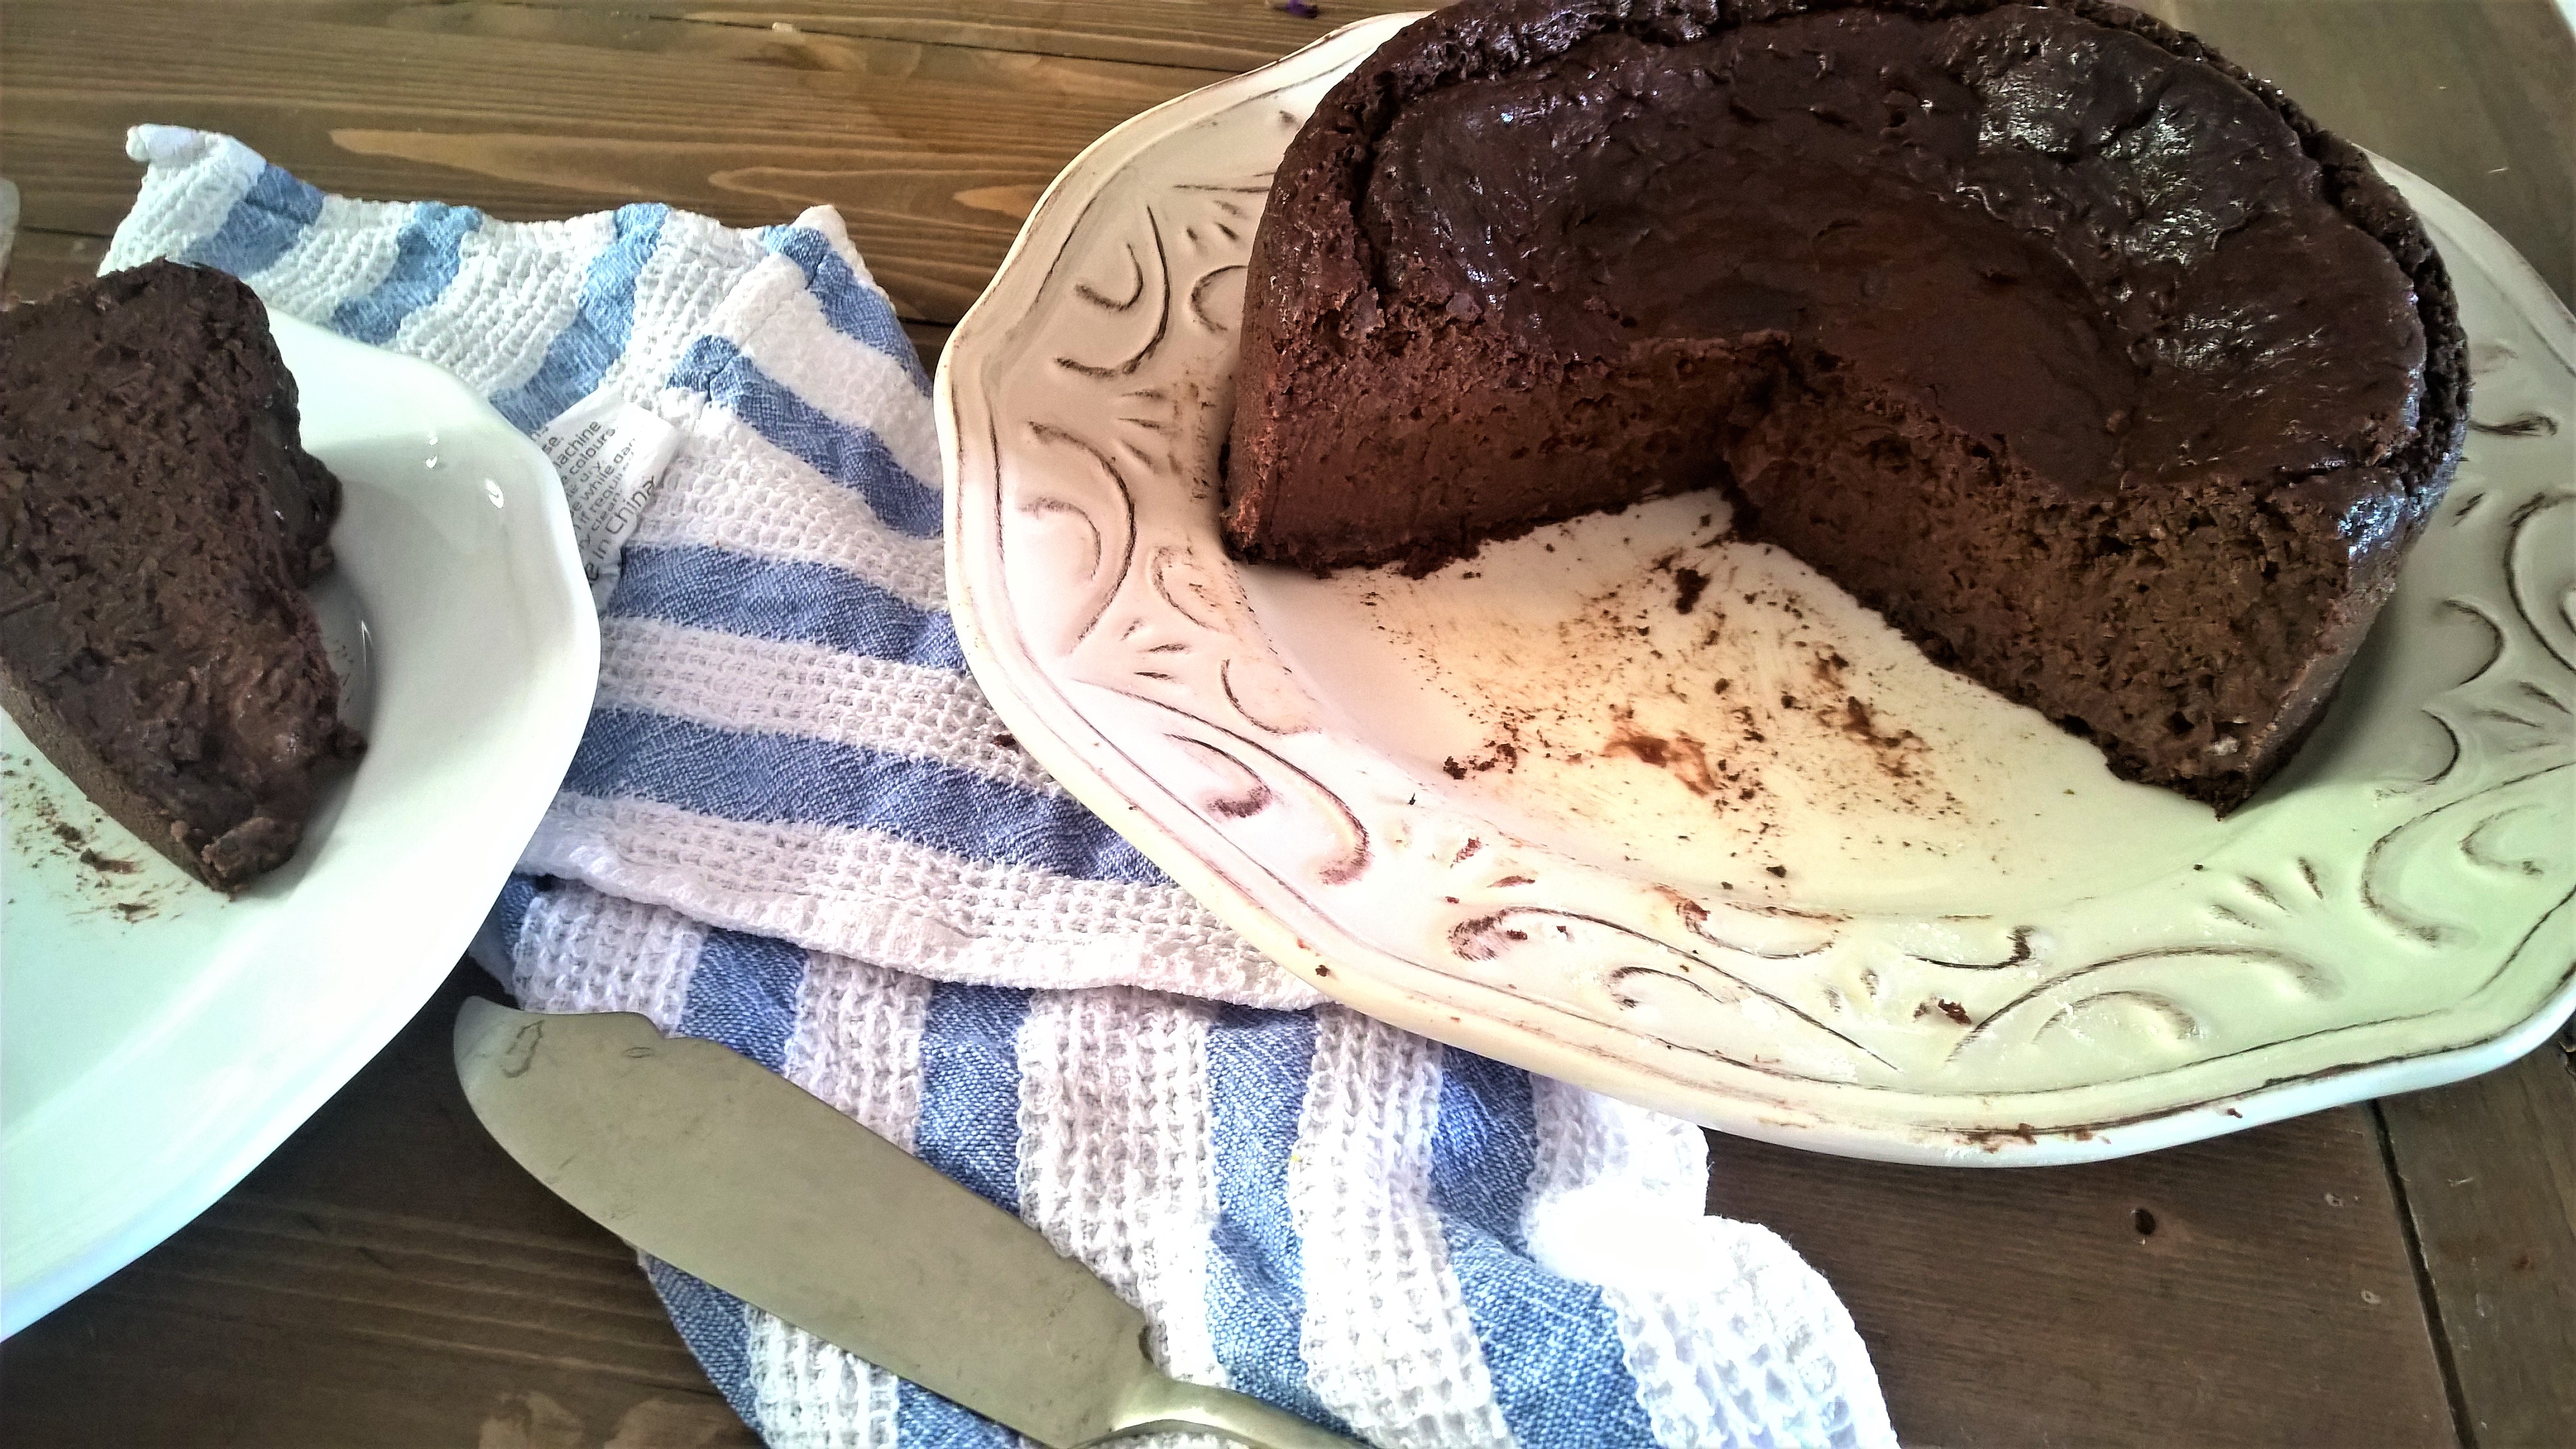
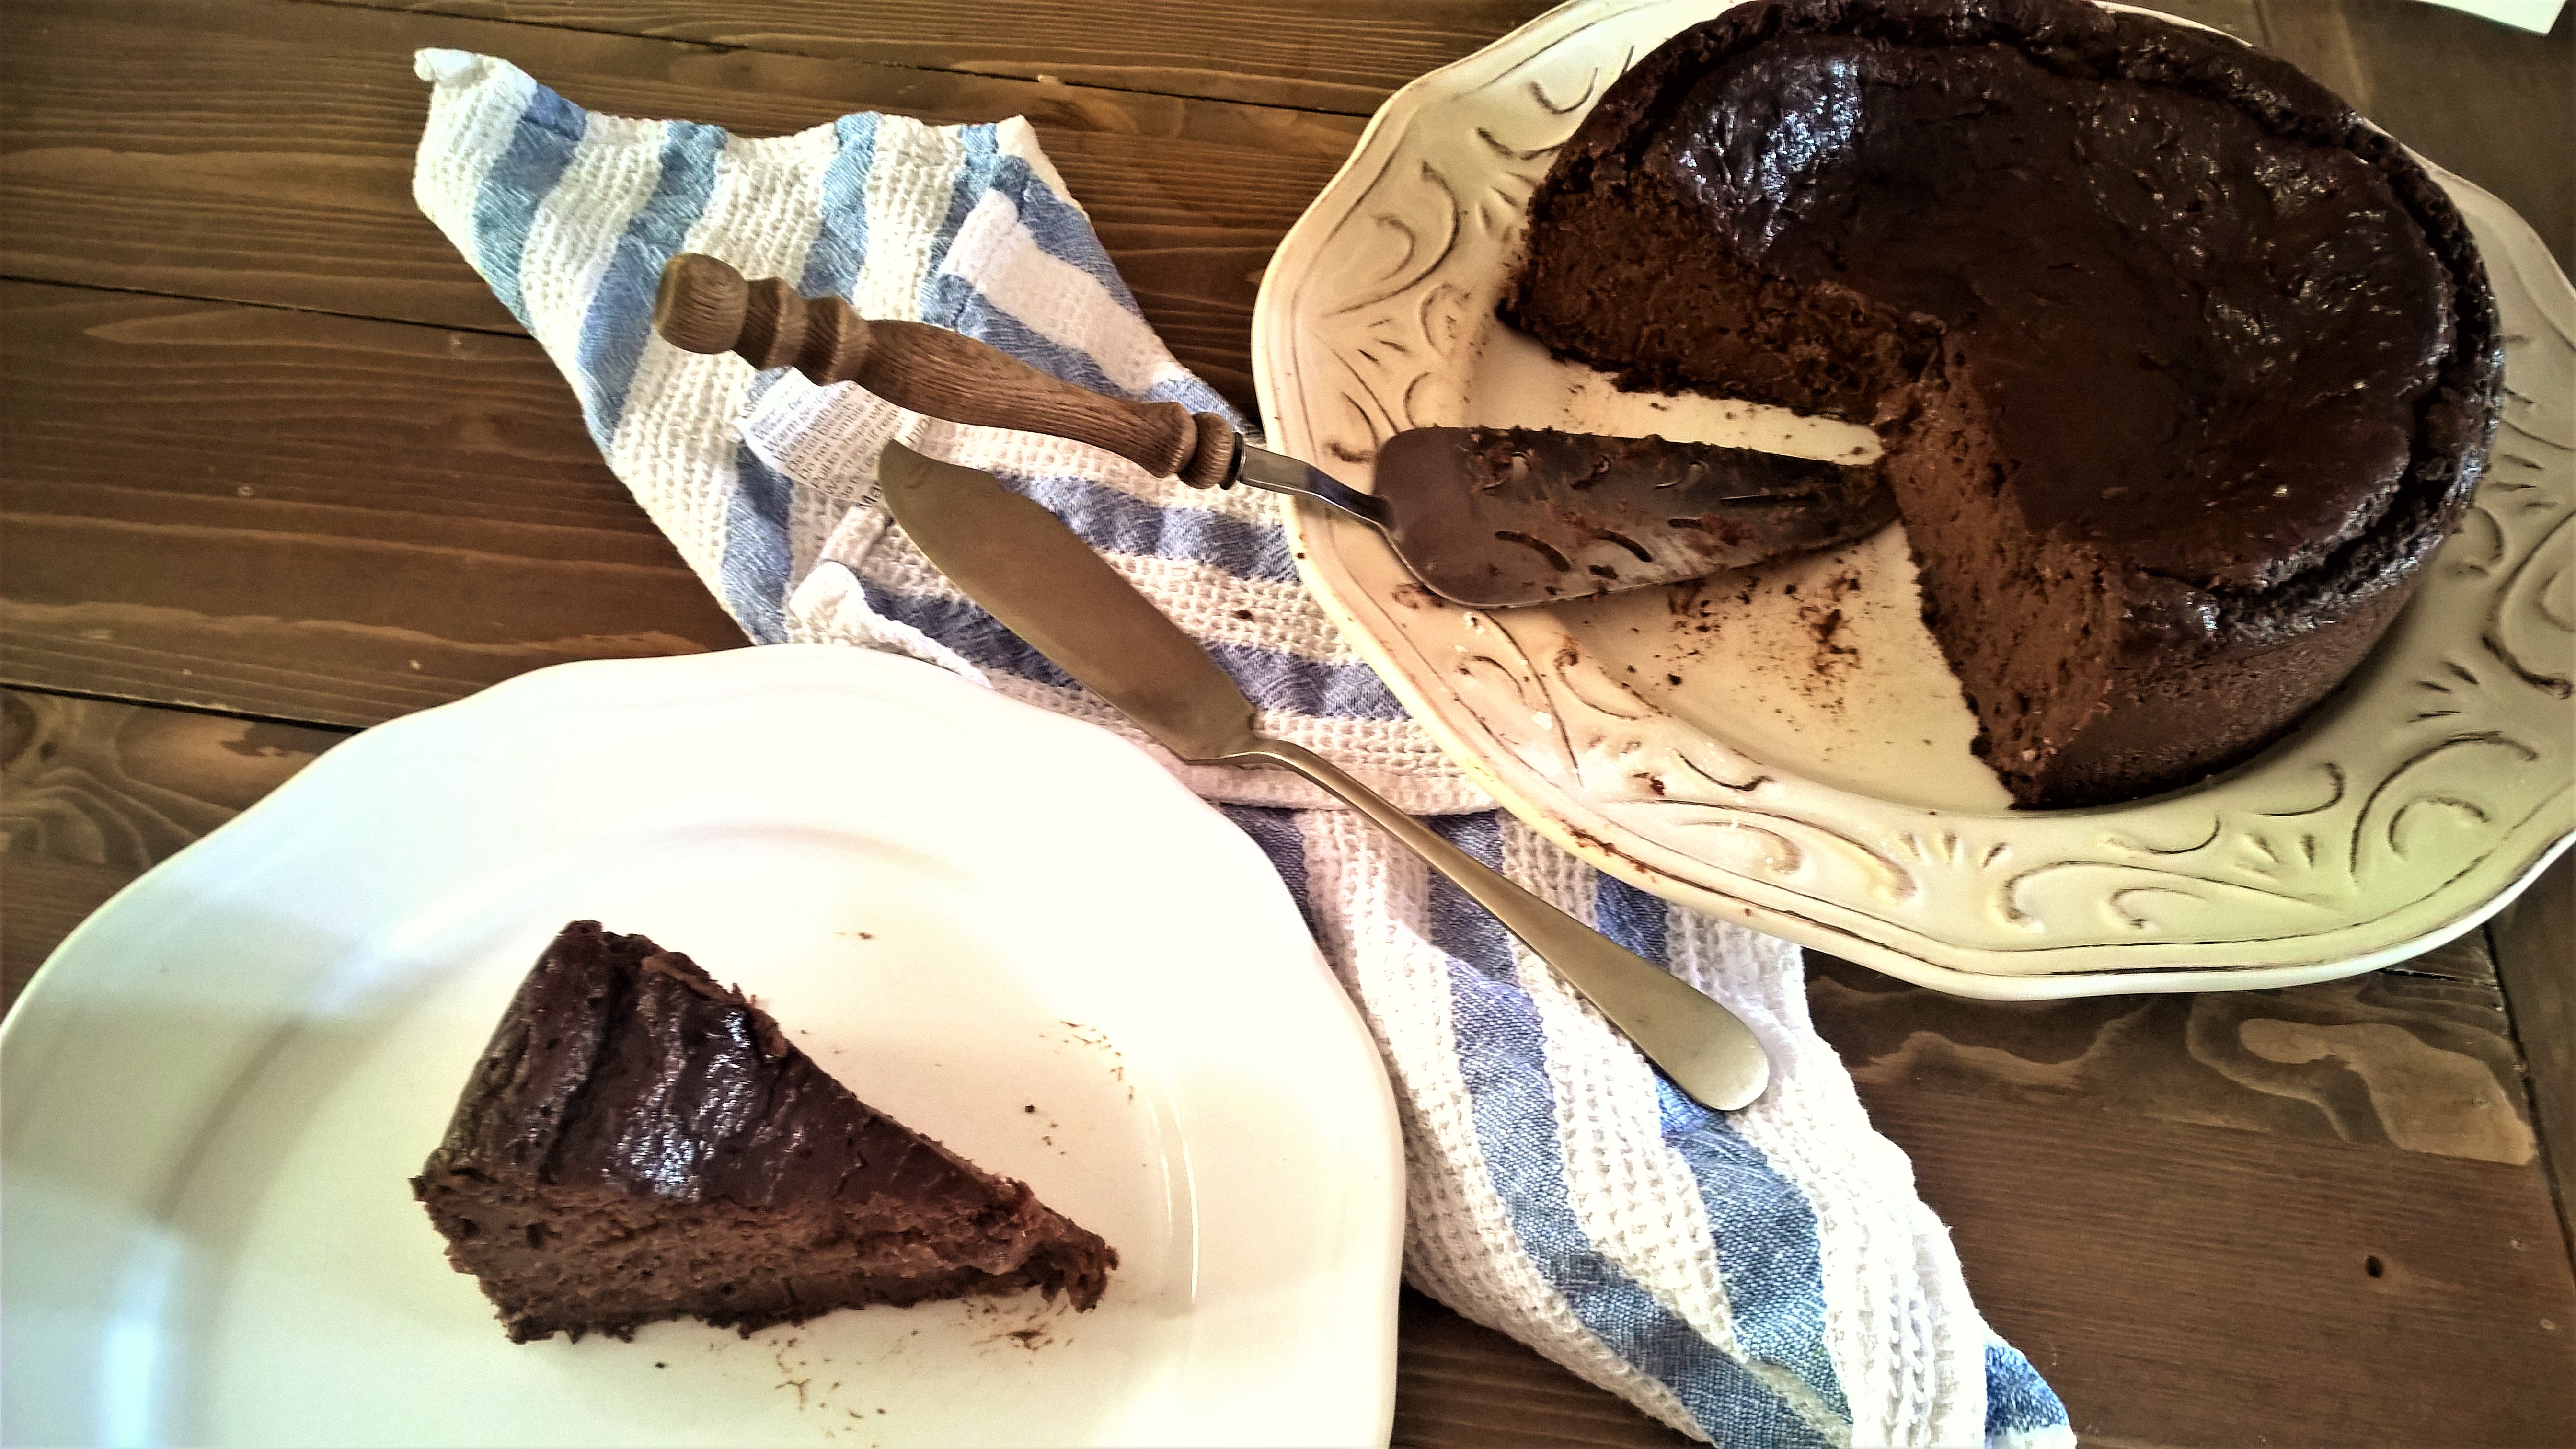
I apologise for that very lengthy title, but I just couldn’t NOT share all the attributes of this marvellous creation of mine. In fact, I should have added moist, fudgy, scrumptious, dreamy, chocolatey, rich, moreish, delightful, satisfying, luxurious, decadent, silky…
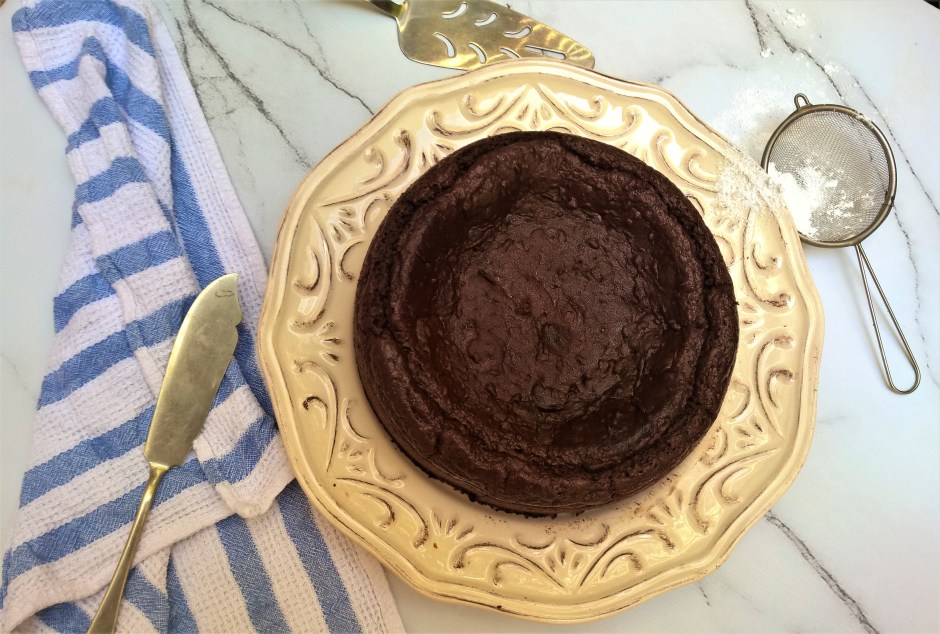
I wanted to make a cake for my daughter’s birthday, and in my research about healthy baking I repeatedly stumbled across the tip to use black beans instead of oil/butter and flour. Wut? Yes, that’s right. If you have been following me for some time, you know that I am crazy about legumes. I use them to replace meat (try my lentil bolognese and vegan pâté), cheese and dairy (hello vegan garlic sauce! Or how about some vegan cream cheese? Recipes coming soon so stay tuned!). They are cheap, satisfying, healthy, can be stored almost indefinitely and are incredibly yummy and versatile. But if you thought that the use of legumes is limited to savoury goodies, it’s time to tap into new bean realms.
Almost Fat Free Vegan Gluten Free Chocolate Cake
So I conquered my pantry, kidnapped two beautiful tins of black beans and this is what I did with it. To be honest, I wasn’t so sure how this experiment would turn out. When it comes to baking, I tend to throw the baby out with the bathwater. Just gluten free like back in the day when I started my new journey of no worries baking simply doesn’t cut it anymore these days. I want vegan, oil-free and possible also refined sugar free. Speaking of which, I wish I could say that this cake was sugar free. Unfortunately it isn’t. I am going to try a version with dates soon as I think they might go well in here, but I wanted to take it two steps at a time, not three steps, so for the moment, this uses plain old cane sugar. I’d love for you to try this with alternative sugars so if you do, let me know if it works! So this is not low-sugar or low-carb, but I hope that the lack of oil, butter, gluten, dairy and eggs makes up for it. Plus, beans = fibre and protein FTW.
Oh, and have I mentioned that this is a really easy one? No separating of eggs (it’s vegan – duh!), only one bowl, no first-mix-the-wet-ingredients-then-mix-the-dry-ingredients-then-sift-the-flour-crap that ain’t nobody got time for. The baking time is a little longer than I prefer (45 minutes), but the actual active hands-on time is less than 15. So no excuses!
So what does a cake made of black beans look, smell and taste like? The answer is: nothing short of divine.
Almost Fat Free Vegan Gluten Free Chocolate Cake
Makes 1 8-inch (20cm) round cake
2 cups almond milk, divided 1 tbsp apple cider vinegar 2 tins black beans, drained and rinsed 1 cup apple sauce
2 tsp vanilla 1 cup+ gluten-free flour 3 tsp gluten-free baking powder 1 cup organic cane sugar 1 cup raw organic cacao
Preheat oven to 180 °C and lightly grease an 8-inch or 20-cm bake tin with coconut oil. Mix 1.5 cups of the almond milk with the vinegar in a large mixing bowl and let sit for a minute to let the two ingredients react with each other. Blitz the drained and rinsed black beans together with the remaining half cup almond milk until a paste forms. A coarse texture is okay, but there should not be any large lumps.
Add the bean paste together with the apple sauce and vanilla to the almond milk-vinegar mix and beat until combined and a bit frothy. Add the flour, baking powder, cane sugar and cocoa and beat on high until very smooth. There will probably still be some bean skins, but that will resolve during baking. The texture of the batter should be that of a very thick custard. If in doubt, add a couple more tablespoons of flour. Taste the raw batter (no risk of salmonella) and add a bit more sugar if you have a sweet tooth (some of the sweetness will go away during baking).
Pour the batter into the prepared tin and bake on the middle rack for 40-45 minutes or until it passes the toothpick test. Let the cake cool completely before serving.
Back in the days when I ate wheat and dairy and generally all things processed and sugary I had a staple recipe for blueberry muffins, which – on the rare occasions that I baked – I always fell back to. I loved it as it was lower in fat than other muffin recipes, replacing most of the fat with buttermilk. It was also dirt-easy to make, requiring just one bowl – perfect for a fast food-addicted 20-something university student without a dishwasher! The muffins were always a success and the recipe was customisable meaning you could use any fruit you wanted in place of the blueberries.
A solid muffin recipe is the first and most basic thing in a baker’s repertoire so once I got into this whole gluten free baking thing, I knew I had to tweak my old go-to. My new gluten-free version of this was just as popular but still relied on refined gluten-free flour and dairy. So after the first step – creating a gluten-free muffin recipe – I needed to come up with a way to make it wholesome and not rely on conventional gluten free flour mixes that with their less than ideal nutritional profile literally make you hungry while you eat! However, not only did I want to create a gluten free and oil free muffin, but also a vegan muffin. Yogurt and buttermilk are great in gluten-free muffins as they really provide that texture that we love and miss about conventional baked goods. The acid in the milk combines with the baking soda to yield moist and tender products. Using yoghurt or buttermilk also means you can nix most of the oil, butter and eggs! So how to replace dairy?
After a bit of research I decided to recreate the sourness from the yogurt/buttermilk with some apple cider vinegar in almond milk. Instead of conventional gluten free flour I used a mix of freshly ground oat flour, almond meal and flax meal (with the flax also replacing the need for eggs). Apple sauce and blueberries keep these muffins nice and moist, so there is no need for eggs or oil. I will probably still tweak the flour part a bit, as the flax gives a somewhat coarse texture but for the time being this is a great recipe if you want a tasty and filling muffin that is gluten free, vegan, refined sugar free, oil free, low in fat and refined grain free and is easy and quick to make with some simple ingredients you likely have in your pantry!
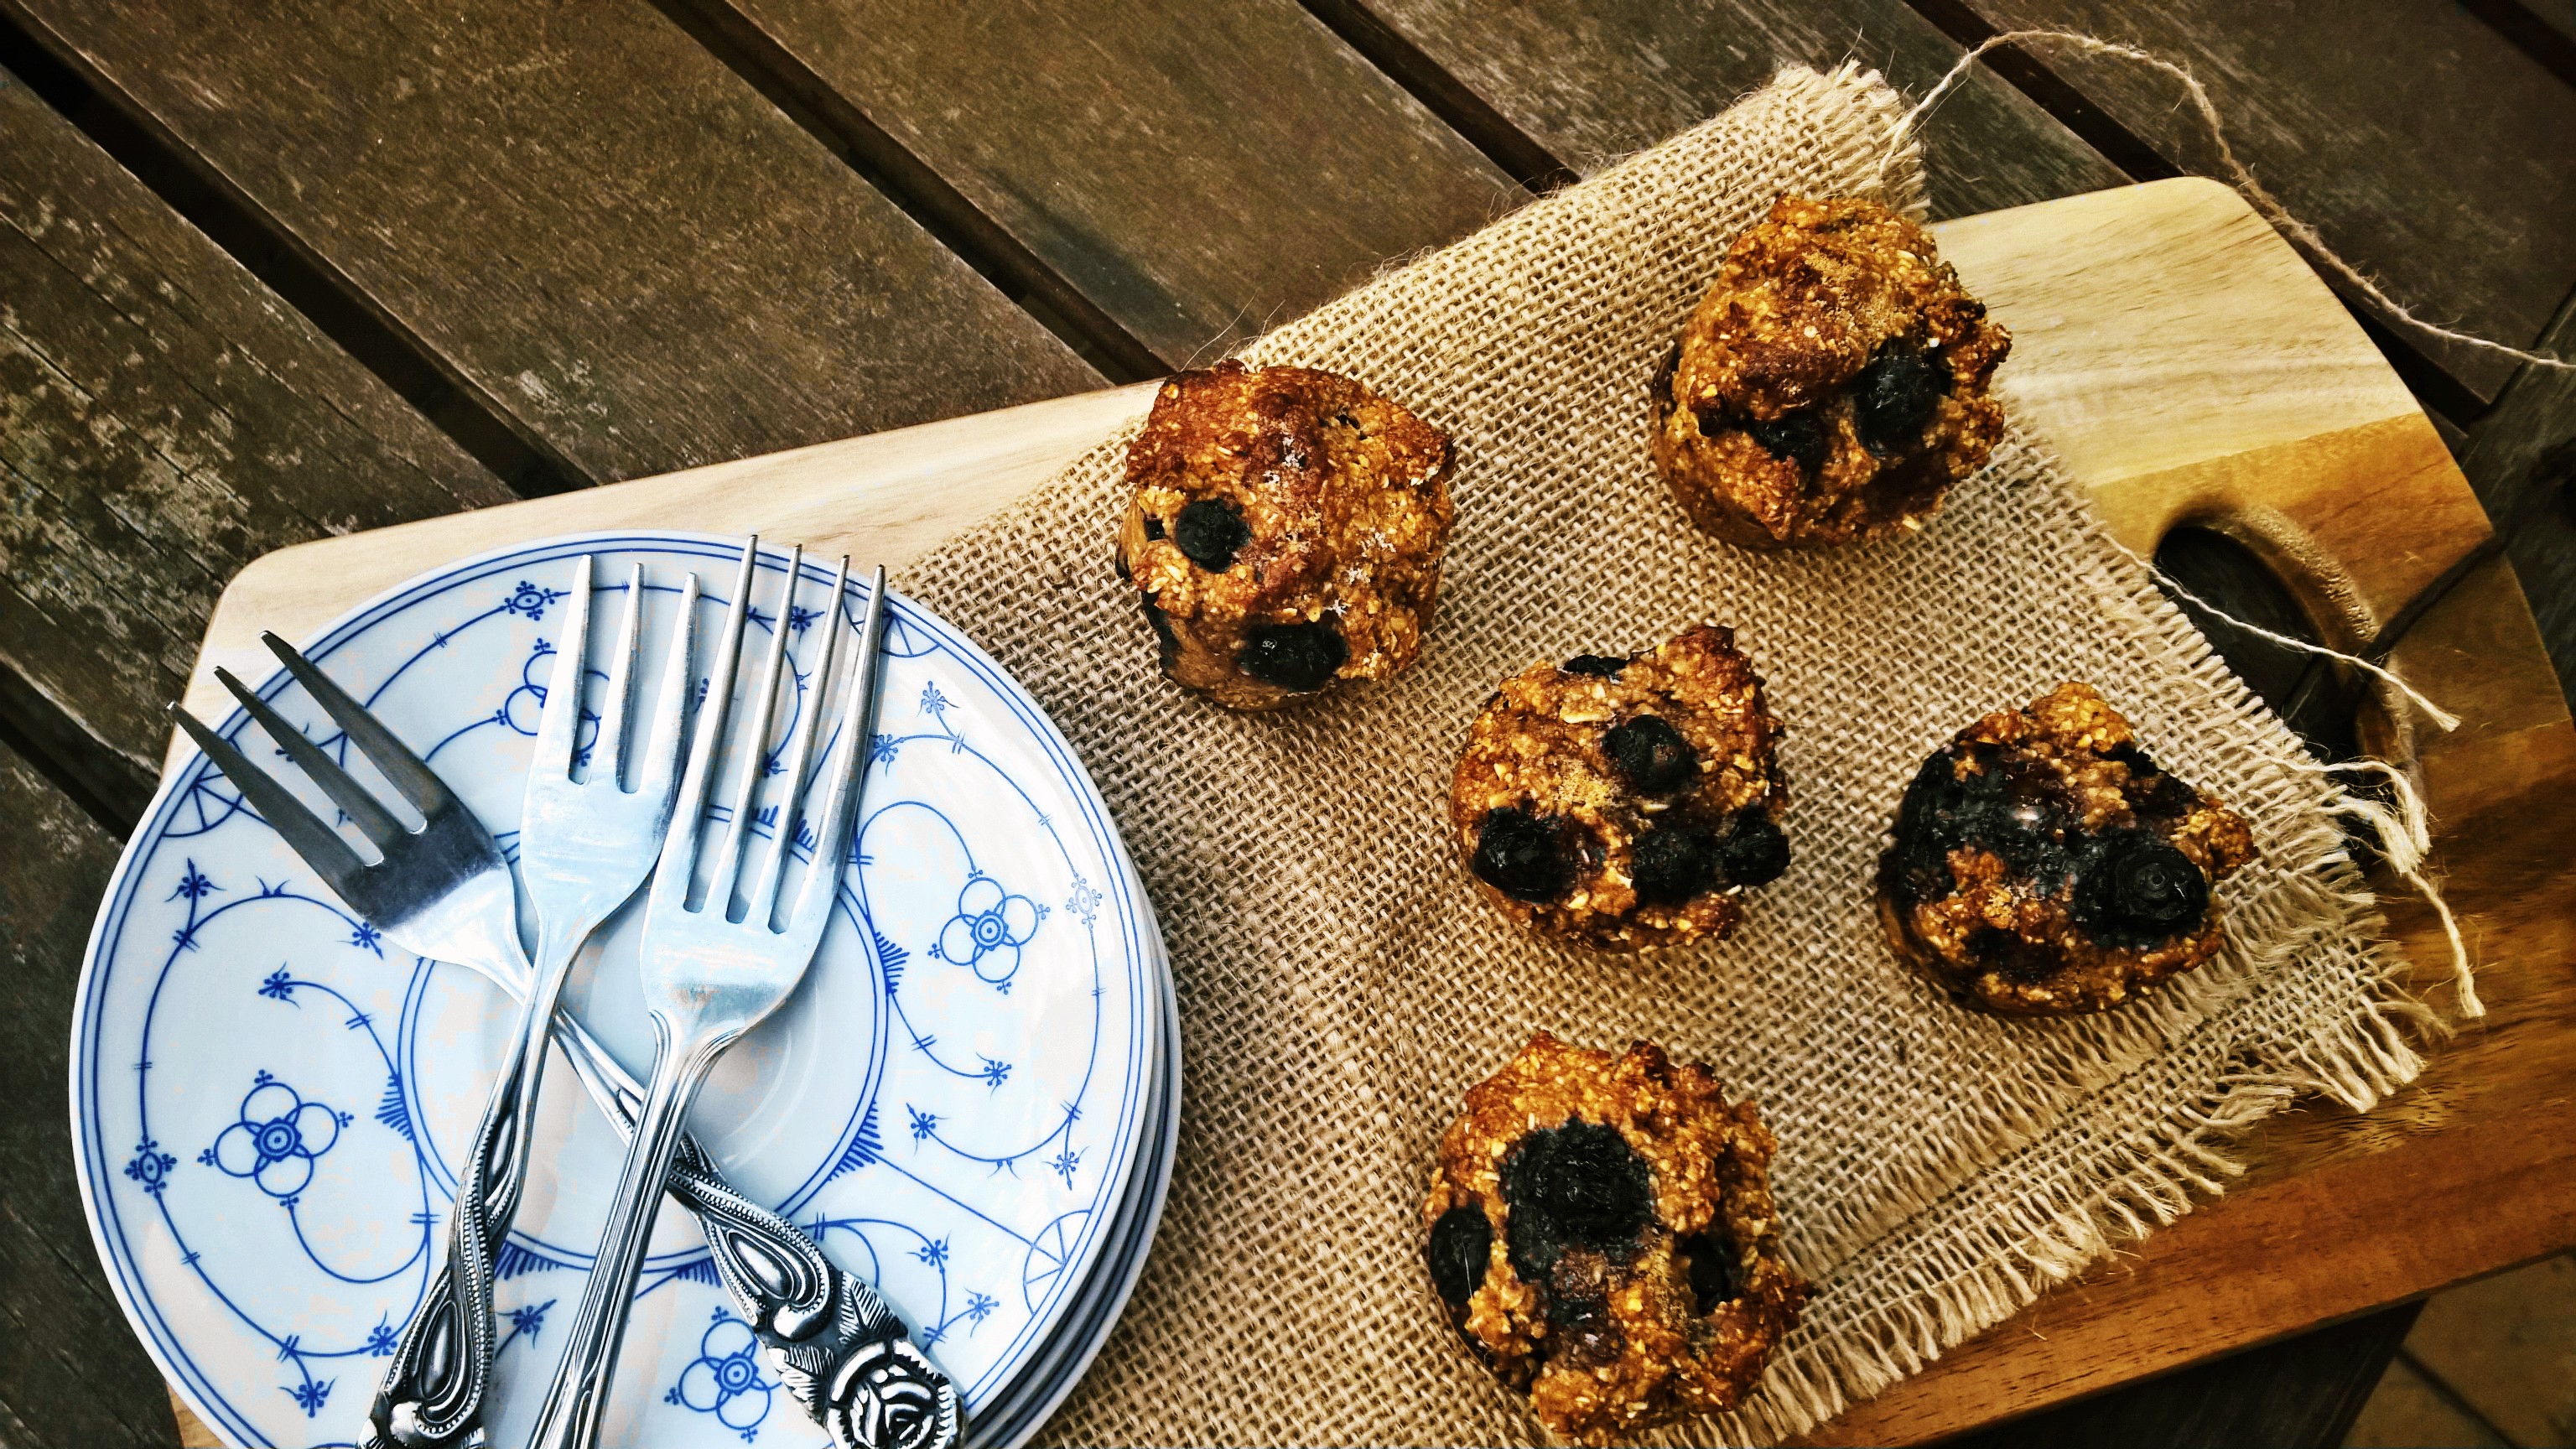
Oil-free Blueberry Muffins {vg, gf}
Oil-free Blueberry Muffins (vg, gf)
Yields 16 mini muffins
½ cup almond milk
1 tb apple cider vinegar
2 cups oat flour 1/3 cup almond meal 1/3 cup flax meal ½ cup coconut sugar ½ cup apple sauce
Pinch of salt pinch of cinnamon 2 tsp of baking powder
dash of vanilla
1 cup of fresh or frozen blueberries
Preheat oven to 180 °C and lightly grease a muffin pan or use paper muffin cups. Mix the almond milk with the apple cider vinegar in a medium bowl and set aside for the two ingredients to react. Then add oat flour, almond meal, flax meal, coconut sugar, apple sauce, salt, cinnamon, vanilla and baking powder and whisk just until combined. Fold in the blueberries and pour the batter into the prepared muffin tray. Bake for 15-20 minutes until a toothpick comes out clean.
Luscious chocolate brownies that are vegan, oil-free and gluten free sounds like an oxymoron, but if you have avocados, you can make the impossible a reality. With their neutral taste and creamy texture, avocados are the perfect replacement for nasty processed oils and antibiotics-laden eggs. Avocados are also a perfect complement to dark chocolate and cacao, so using avocados to make brownies was a no-brainer for me.
Now, every man and his dog seems to make chocolate cake with avocado as a “secret” ingredient these days, so I am probably not going to shock anyone anymore by saying that these yummy gooey brownies have avocado in them. Both my husband and daughter love avocado, and they are in season right now, so needless to say, we are going through quite a few at the moment. As they ripen very quickly, this recipe doesn’t only make sure that you get your dose of healthy monounsaturated fats in one super-fudgy yet good-for-you brownie, it is also a great way to rescue any avocados you might have lying around that are past their prime! I hate wasting food so if you can create something nutritious to fix your chocolate cravings while being good to your wallet and the planet too, then why not?
Honestly folks, if you don’t try this, you are really missing out! These brownies are seriously rich and chocolatey and so fudgey it’s ridiculous. Your junk-loving friends, relatives and kids will never be able to tell that they pack a punch: Besides superfoods avocado and raw cacao, there is oatmeal for healthy carbs, protein and fibre, vegan protein powder to keep you full and satisfied as well as coconut flour, psyllium and flaxmeal for some more protein, fibre and nutrition! Needless to say, they are gluten free, vegan, dairy free, soy free, refined sugar free and oil free! How about that? Like most of my recipes, this is a fuss-free affair – melt chocolate, mix everything together and bake for 20 minutes. Easy as that!
Shall we get baking?
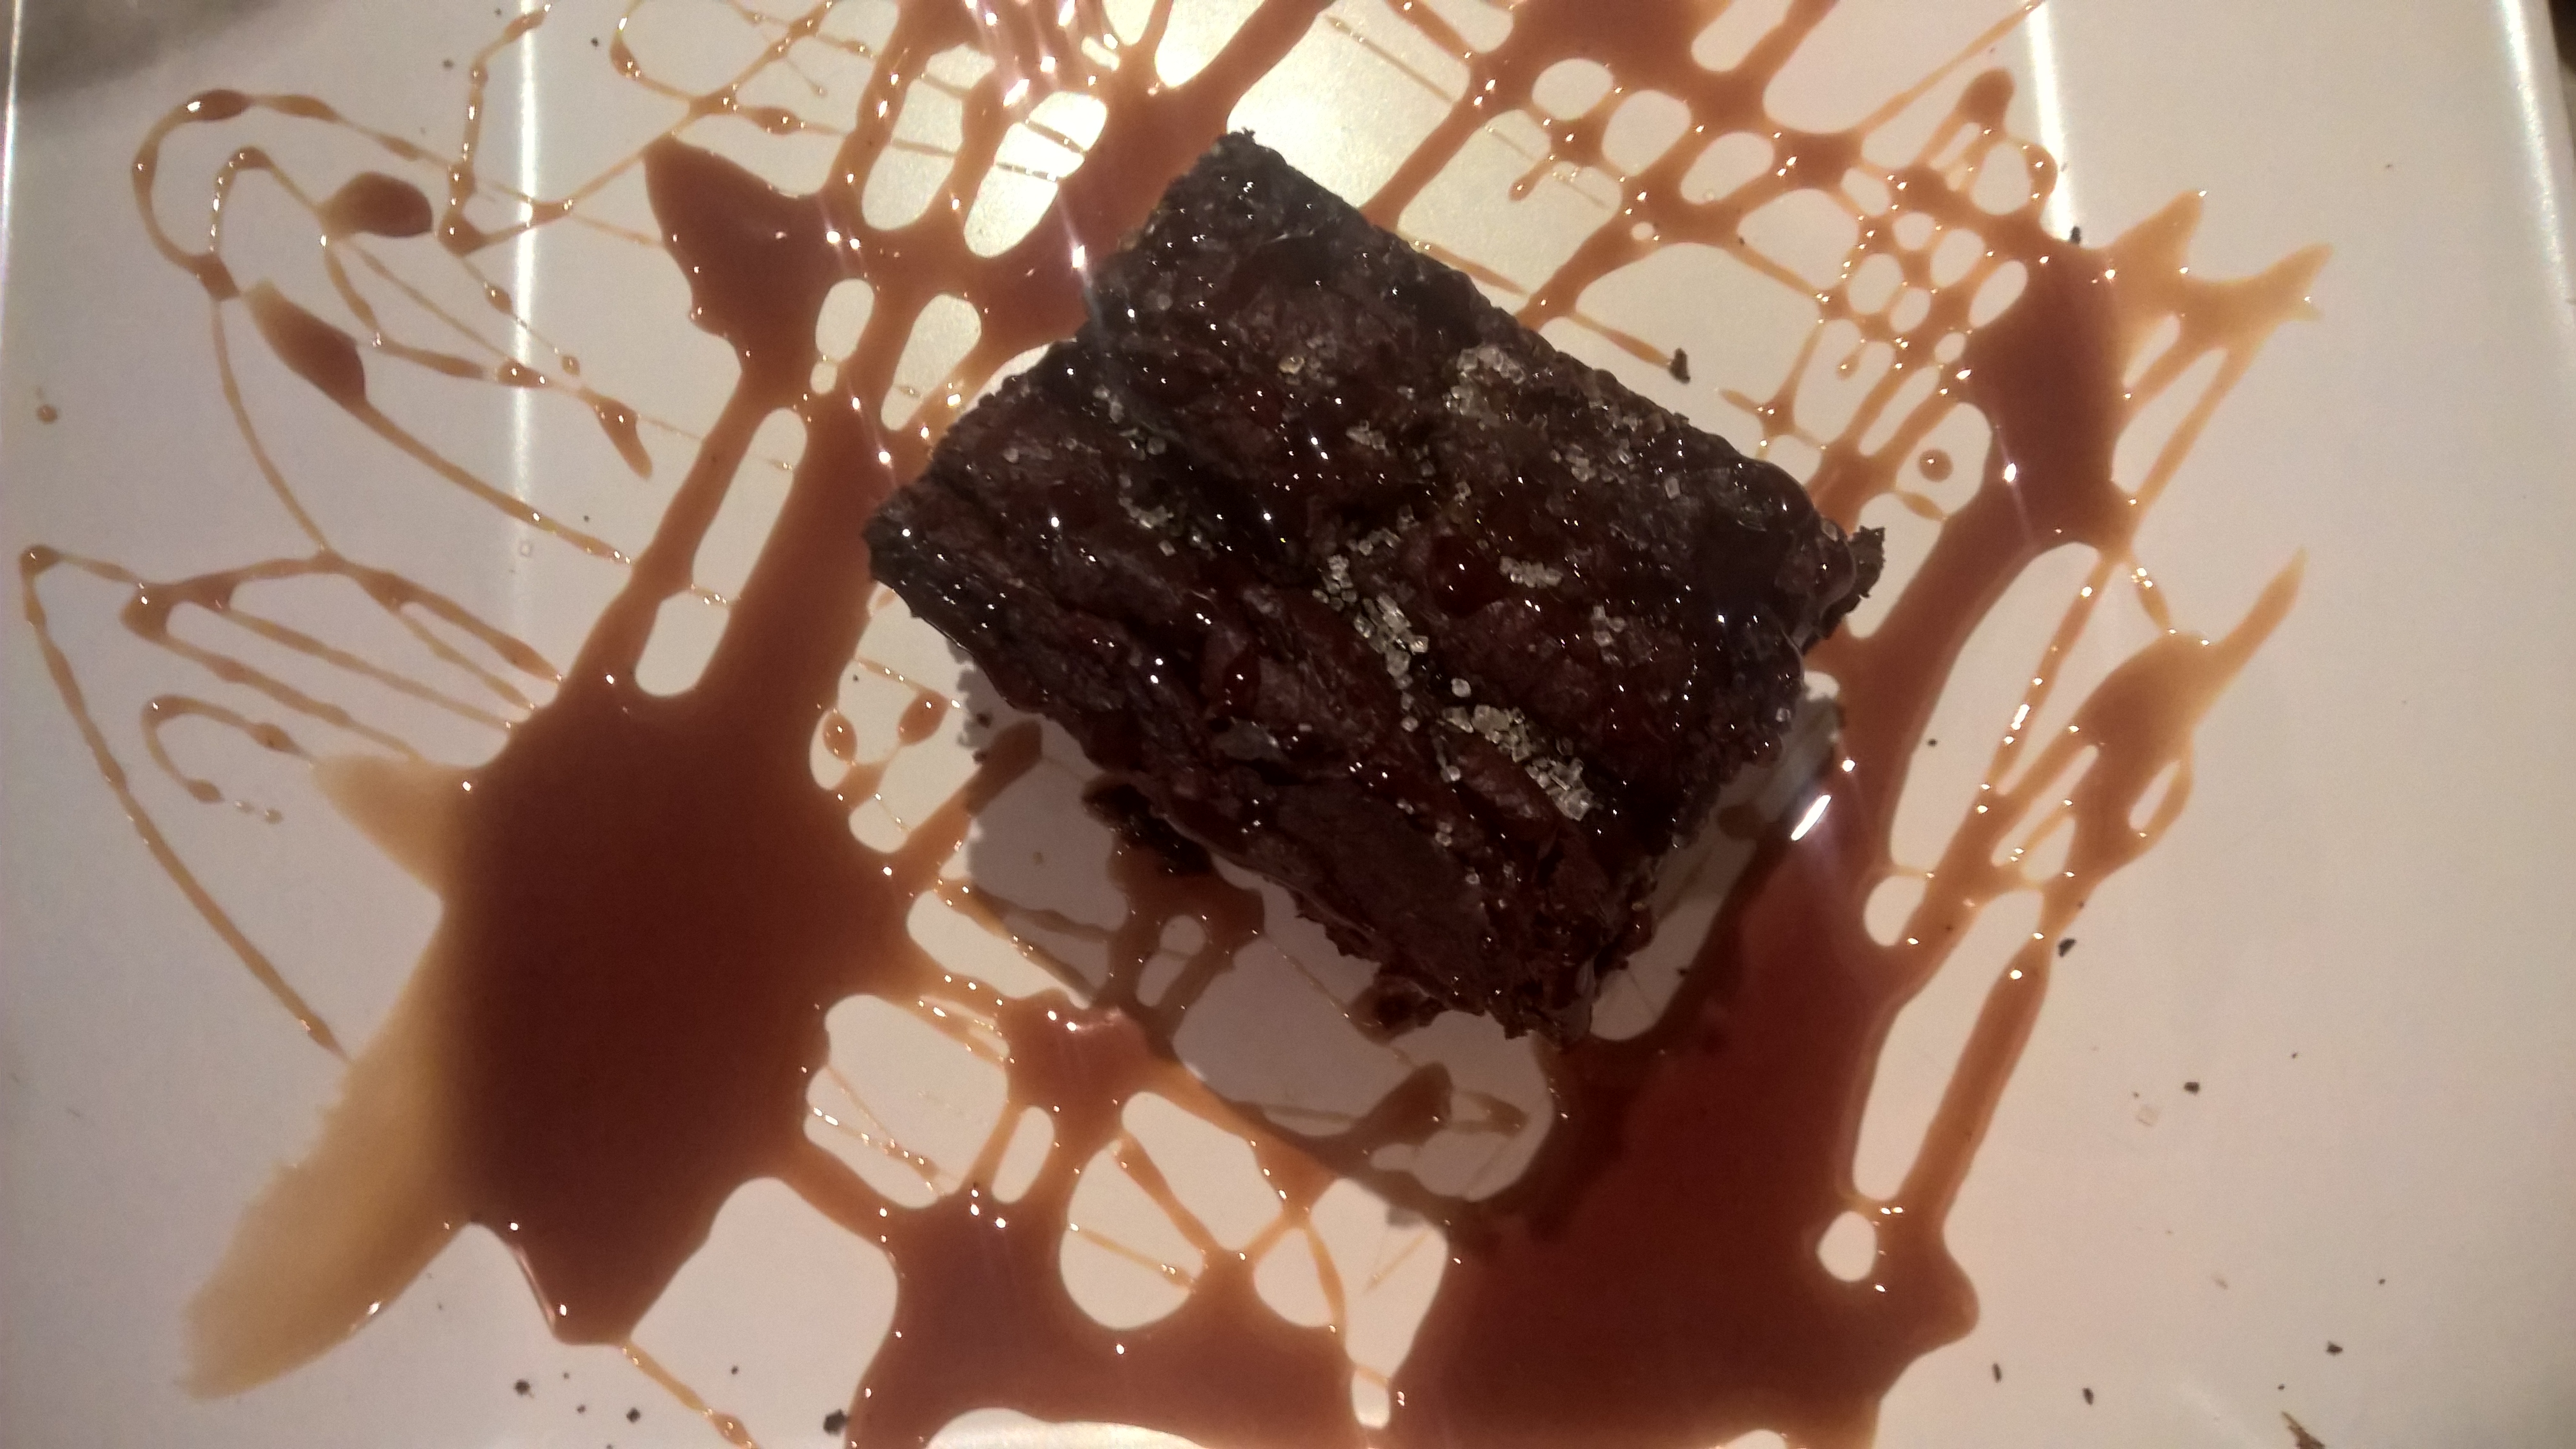
Gluten Free Vegan Avocado Brownies
Gluten Free Vegan Avocado Brownies
60 g vegan dark chocolate 150 g brown rice syrup, divided flesh of 1 large ripe avocado, mashed 1 large ripe banana, mashed 50 g ground rolled oats 2 tbsp rice or pea protein powder 2 tbsp raw cacao 1 tbsp flaxmeal, almond meal or LSA 2 tsp coconut flour 1 tsp psyllium husks, flaxmeal or chia seeds 1 tsp gluten free baking powder
Preheat oven to 180 °C or 350 °F and grease a 20x20cm baking pan. Melt chocolate and 100 g brown rice syrup in a double boiler until melted and smooth. Let cool slightly. In a different bowl, mix avocado, banana and 50 g brown rice syrup until smooth. Stir in melted chocolate mix until smooth, add all remaining ingredients and blend until smooth. Spoon into baking pan and bake for 20 minutes.